
In 2022, Shopify launched an ecommerce stack for headless commerce referred to as Hydrogen. Hydrogen’s progressive expertise has made purchasing experiences exceptionally dynamic whereas sustaining excessive efficiency.
This new framework has a quick-start construct surroundings, good caching, out-of-the-box elements, and built-in cache defaults, so it’s no shock ecommerce builders are enthusiastic about it.
On this publish, we’ll go over the best way to construct a contemporary ecommerce retailer with Shopify Hydrogen and Shopify’s Storefront API.
Leap forward:
As a prerequisite for this tutorial, it is best to have a fundamental understanding of React, Vite, and Tailwind CSS, together with an energetic Shopify retailer.
Getting began with Shopify Hydrogen
Hydrogen is a React framework that makes use of Vite for server-side rendering and a hydration middleware that builds on the Shopify storefront API. Because of this it makes use of information from Shopify to create an interactive frontend software.
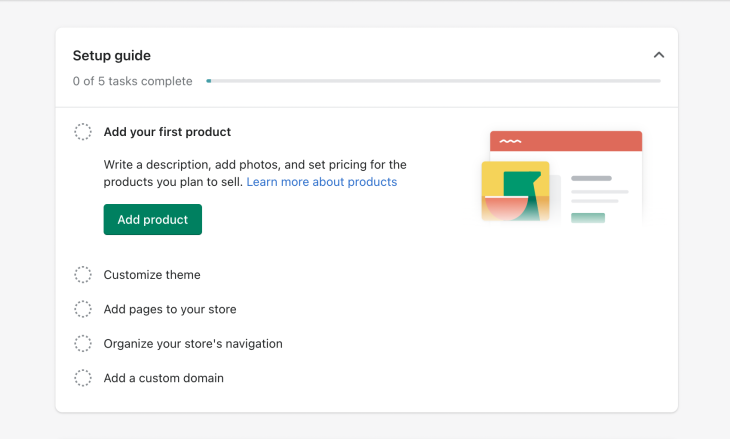
To get began with Shopify Hydrogen, log in to Shopify and create a Shopify retailer for those who don’t have already got one. I’m calling mine Sneakers Kiosk.
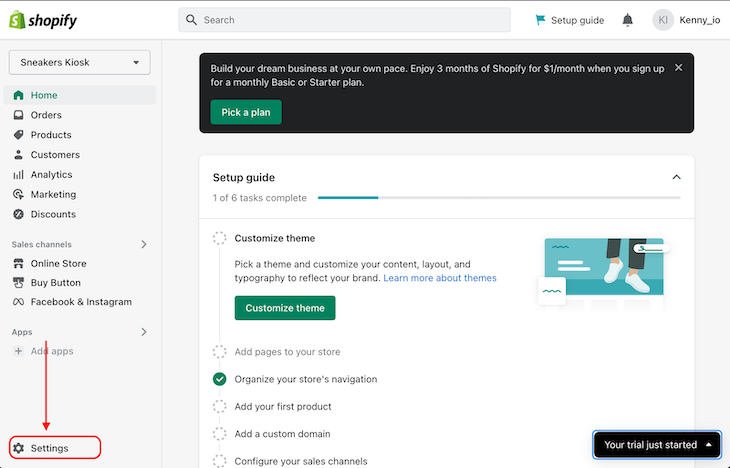
Subsequent, click on on the “Settings” icon on the backside left facet of the web page:
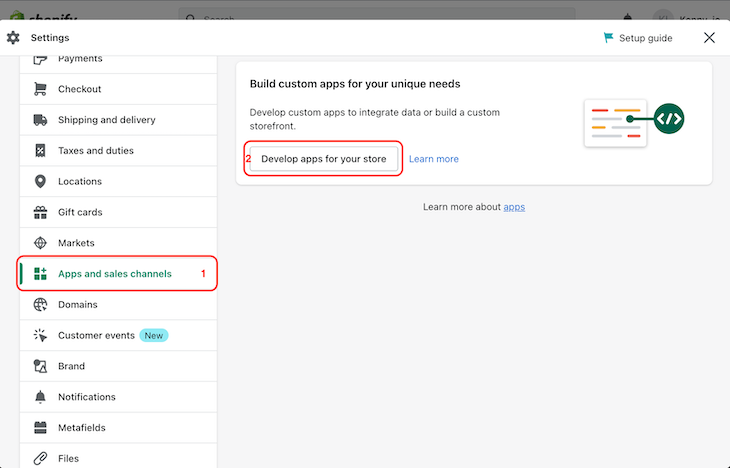
Navigate to the “Apps and gross sales channels” tab and click on on the “Develop apps on your retailer” button to create a customized app:
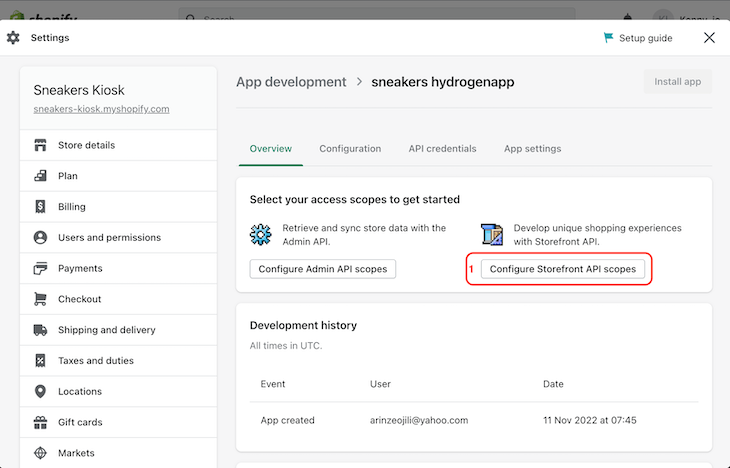
After creating the customized software, click on on the “Configure Storefront API scopes” button to configure the app’s storefront API token:
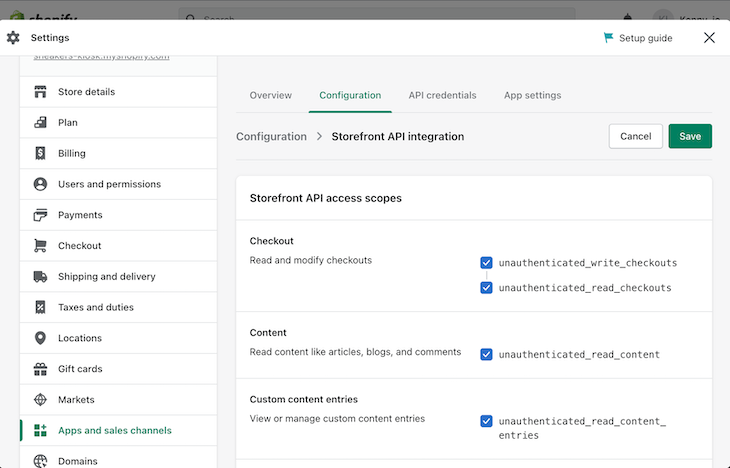
On the shop configuration web page, we’ll save our configurations as proven beneath:
As soon as now we have efficiently saved our configurations, we’ll navigate to the “API credentials” tab. There, we’ll see an possibility to put in the app on our retailer:

On the following display, we’ll see our entry tokens. Copy and save these tokens — we’ll use them later to work together with our Shopify retailer.
Including merchandise to our retailer
With the shop arrange, we are able to now add our merchandise. There are two methods we are able to do that.
First, we might manually add particular person merchandise to our retailer, like so:
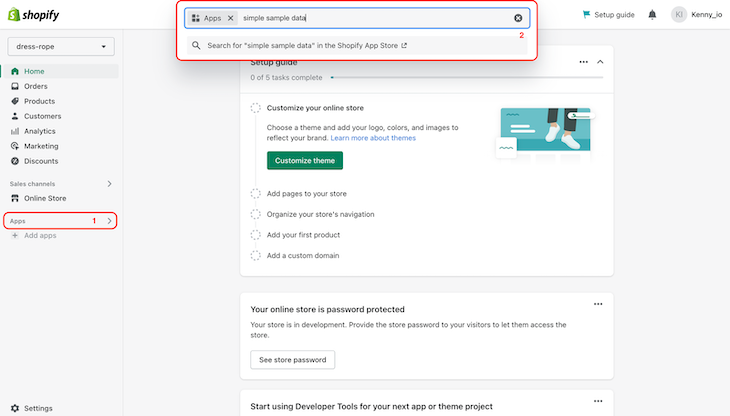
Second, we might set up Easy Pattern Information from the Shopify Retailer to generate dummy information for the storefront. Navigate to the “Apps” tab of the menu bar and seek for “easy pattern information”:
Choose the app and click on the button to put in. Then, choose a product class and the collections we need to generate. Lastly, click on the “Generate” button to populate the shop with the chosen merchandise. With that, our retailer is prepared.
Putting in Hydrogen in our dev surroundings
Run the next command to put in the Hydrogen starter app with some hello-world textual content:
yarn create @shopify/hydrogen --template hello-world
Subsequent, let’s join our Shopify retailer to the Hydrogen app within the hydrogen.config.js file with the next snippets:
// hydrogen.config.js
import { defineConfig } from "@shopify/hydrogen/config";
export default defineConfig({
  shopify: {
    storeDomain: "<your retailer url>", //with out the "https://" half
    storefrontToken: "<your generated entry token>",
    storefrontApiVersion: "2022-07",
  },
});
With the above snippet, we now have entry to our retailer information domestically.
Fetching and displaying merchandise
Now, let’s fetch our dummy merchandise into our Hydrogen software. Create a elements folder and create a FeaturedProducts.server.jsx file inside. Replace the file with the next snippet:
// src/elements/FeaturedProducts.server.jsx
import { Picture, Hyperlink, gql, useShopQuery, CacheLong } from "@shopify/hydrogen";

const QUERY = gql`
  question Residence {
    merchandise(first: 3) {
      nodes {
        id
        title
        deal with
        featuredImage {
          top
          width
          altText
          URL
        }
      }
    }
  }
`;

export default operate FeaturedProducts() {
  const {
    information: { merchandise },
  } = useShopQuery({
    question: QUERY,
    cache: CacheLong(),
  });
  // return() operate right here
}
Within the snippet above, we imported useQuery and gql from @shopify/hydrogen. We additionally constructed a QUERY fixed that may fetch the primary three merchandise and their properties. Lastly, we fetched the merchandise from our retailer by passing the QUERY fixed into the useShopQuery, and destructured the response.
Within the FeaturedProducts.server.jsx file, let’s show the fetched merchandise by updating the return() operate with the next snippets:
// src/elements/FeaturedProducts.server.jsx

export default operate FeaturedProducts() {
  // Outline information and QUERY constants
  return (
    <>
      <h1>Featured Merchandise</h1>
      <div>
        {merchandise &&
          merchandise.nodes.map((prod, index) => (
            <div key={index}>
              <div className="p-2">
                <Hyperlink to={`/product/${prod.deal with}`} className="">
                  <Picture
                    width={prod.featuredImage.width}
                    top={prod.featuredImage.top}
                    src={prod.featuredImage.url}
                    alt={`Picture of ${prod.featuredImage.alttext}`}
                  />
                </Hyperlink>
              </div>
              <div>
                <Hyperlink to={`/product/${prod.deal with}`}>
                  <h3 className="font-medium">{prod.title}</h3>
                </Hyperlink>
              </div>
            </div>
          ))}
      </div>
    </>
  );
}
Right here, we looped via the merchandise and conditionally rendered them.
Subsequent, let’s import and render the FeaturedProducts.server.jsx part within the src/routes/index.server.jsx file:
// src/routes/index.server.jsx

import { Suspense } from "react";
import Hero from "../elements/Hero.server";
import { Structure } from "../elements/Structure.server";
import FeaturedProducts from "../elements/FeaturedProducts.server";

export default operate Residence() {
  return (
    <Structure>
      <Suspense>
        <Hero />
        <FeaturedProducts />
      </Suspense>
    </Structure>
  );
}
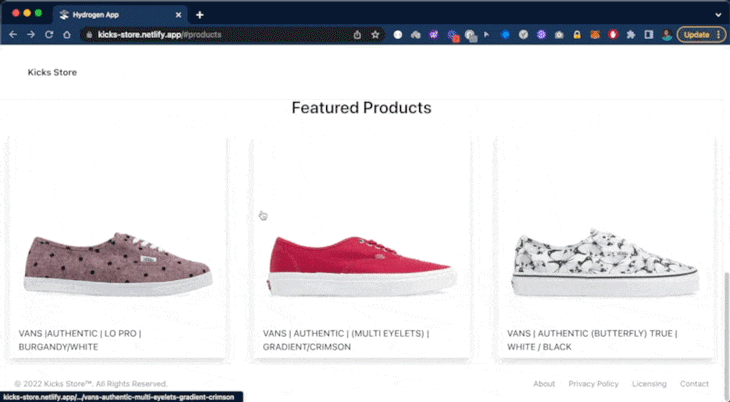
Within the browser, the applying will look one thing just like the beneath:
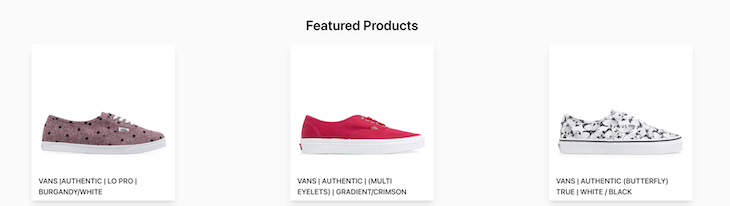
You might even see completely different featured merchandise relying on which product class and collections you chose when organising Easy Pattern Information.
Subsequent, create a single product show web page. Within the elements folder, let’s create a ProductDetails.consumer.jsx file with the next snippet:
// src/elements/ProductDetails.jsx
import { ProductOptionsProvider } from "@shopify/hydrogen";
export default operate ProductDetails({ product }) {
  return (
    <ProductOptionsProvider information={product}>
      <part>
        <div>
          <div>
            <div>{/* product gallery right here */}</div>
          </div>
          <div>
            <div>
              <h1>{product.title}</h1>
              <span>{product.vendor}</span>
            </div>
            {/* Product type right here */}
            <div>
              <div
                dangerouslySetInnerHTML={{ __html: product.descriptionHtml }}
              ></div>
            </div>
          </div>
        </div>
      </part>
    </ProductOptionsProvider>
  );
}
Within the above snippet, we imported ProductOptionsProvider from @shopify/hydrogen, created ProductDetails() operate and handed product as props to it. We additionally wrapped our markup with the ProductOptionsProvider.
Subsequent, let’s replace the ProductDetails.jsx file to show the product photos with the next snippets:
// src/elements/ProductDetails.jsx
import { MediaFile } from "@shopify/hydrogen";

export default operate ProductDetails({ product }) {
  return <div>product gallery</div>;
}

operate ProductGallery({ media }) {
  if (!media.size) {
    return null;
  }
  return (
    <div>
      {media.map((med, i) => {
        let extraProps = {};
        if (med.mediaContentType === "MODEL_3D") {
          extraProps = {
            interactionPromptThreshold: "0",
            ar: true,
            loading: "keen",
            disableZoom: true,
          };
        }
        const information = {
          ...med,
          picture: ,
        };
        return (
          <div>
            <MediaFile
              tabIndex="0"
              information={information}
              choices={{
                crop: "middle",
              }}
              {...extraProps}
            />
          </div>
        );
      })}
    </div>
  );
}
Within the above snippets, we imported MediaFile from @shopify/hydrogen and created the ProductGallery() operate that takes in media information and renders them primarily based on their media varieties utilizing Shopify’s built-in media handler MediaFile.
Subsequent, render the ProductGallery contained in the ProductDetails part to show the completely different product picture variants:
// src/elements/ProductDetails.jsx

export default operate ProductDetails({ product }) {
  return (
    <ProductGallery />
  )
}
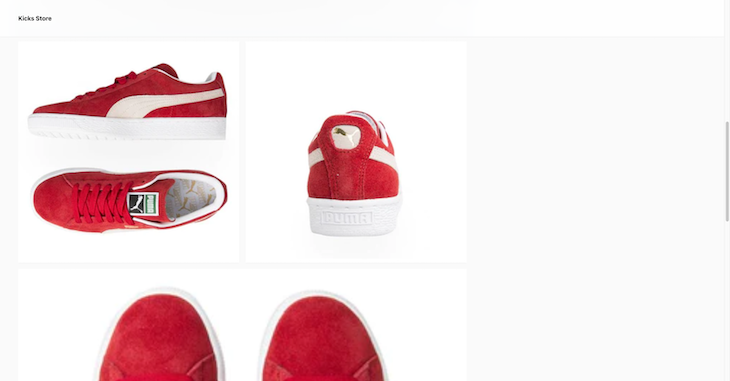
This could appear to be the next within the browser:
Subsequent, create a type to deal with the consumer’s product choice with the next snippet:
// src/elements/ProductDetails.jsx

import { ProductPrice, BuyNowButton } from "@shopify/hydrogen";
operate ProductForm({ product }) {
  const { choices, selectedVariant } = useProductOptions();
  const isOutOfStock = !selectedVariant?.availableForSale || false;
  return (
    <type>
      {
        <div>
          {choices.map(({ title, values }) => {
            if (values.size === 1) {
              return null;
            }
            return (
              <div key={title}>
                <legend>{title}</legend>
                <div>{/* OptionRadio goes beneath this line */}</div>
              </div>
            );
          })}
        </div>
      }
      <div>
        <ProductPrice
          priceType="compareAt"
          variantId={selectedVariant.id}
          information={product}
        />
        <ProductPrice variantId={selectedVariant.id} information={product} />
      </div>
      <div>
        {isOutOfStock ? (
          <span>Accessible in 2-3 weeks</span>
        ) : (
          <BuyNowButton variantId={selectedVariant.id}>
            <span>Purchase it now</span>
          </BuyNowButton>
        )}
      </div>
    </type>
  );
}
The above snippet shows a type beside the product gallery with the product value and a “Purchase it now” button. The shape will appear to be the beneath:
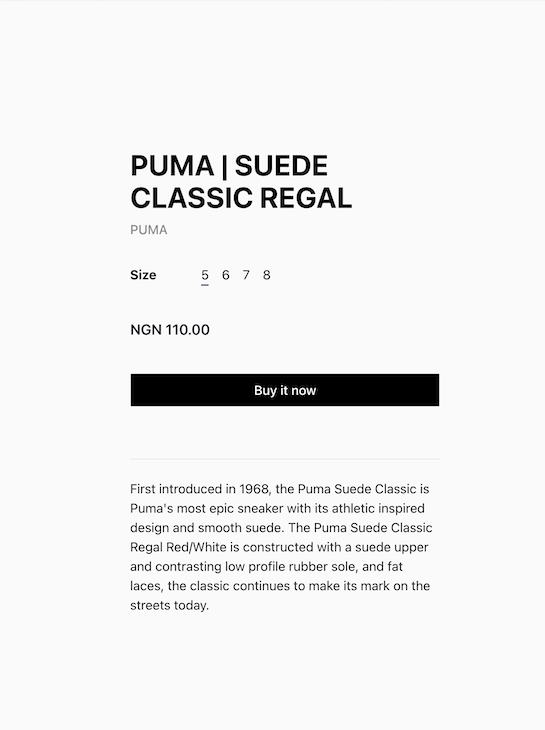
As you possibly can see within the type, the product can have a number of variant sizes. Therefore, we have to add a part to deal with the product variants. To do that, outline a brand new OptionRadio() operate within the elements/ProductDetails.jsx file like this:
// src/elements/ProductDetails.jsx

import { useProductOptions } from "@shopify/hydrogen";
operate OptionRadio({ values, title }) {
  const { selectedOptions, setSelectedOption } = useProductOptions();
  return (
    <>
      {values.map((worth) => {
        const checked = selectedOptions[name] === worth;
        const id = `option-${title}-${worth}`;
        return (
          <label key={id} htmlFor={id}>
            <enter
              sort="radio"
              id={id}
              title={`possibility[${name}]`}
              worth={worth}
              checked={checked}
              onChange={() => setSelectedOption(title, worth)}
            />
            <div>{worth}</div>
          </label>
        );
      })}
    </>
  );
}
Within the above snippet, we import the useProductOptions hook from @shopify/hydrogen. We then create a operate named OptionRadio that takes two properties title and values.
Moreover, we destructured selectedOptions and setSelectedOption from the useProductOptions hook. Lastly, we returned a markup that shows every worth within the values array and imported OptionsRadio into our ProductForm part.
Dealing with dynamic routing for particular person merchandise
Lastly, let’s create a product folder in our /src/routes listing. Then, we’ll create a file referred to as /[handle].server.jsx to deal with dynamic routes for particular person merchandise. Add the next snippet to the file:
// src/routes/[handle].server.jsx
import { Structure } from "../../elements/Structure.server";
import { gql } from "@shopify/hydrogen";

export default operate Product({ params }) {
  return <Structure>/* Product Show part goes right here */</Structure>;
}

const PRODUCT_QUERY = gql`
  fragment MediaFields on Media {
    mediaContentType
    alt
    previewImage {
      url
    }
    ... on MediaImage {
      id
      picture {
        url
        width
        top
      }
    }
    ... on Video {
      id
      sources {
        mimeType
        url
      }
    }
    ... on Model3d {
      id
      sources {
        mimeType
        url
      }
    }
    ... on ExternalVideo {
      id
      embedUrl
      host
    }
  }
  /* Merchandise fetch by deal with question goes right here */
`;
The above snippet incorporates a GraphQL question that retrieves media from MediaFields primarily based on their varieties. Subsequent, let’s add a brand new question to fetch merchandise dynamically by their deal with as proven beneath:
// src/routes/product/[handle].server.jsx

question Product($deal with: String!) {
    product(deal with: $deal with) {
      id
      title
      vendor
      descriptionHtml
      media(first: 7) {
        nodes {
          ...MediaFields
        }
      }
      variants(first: 100) {
        nodes {
          id
          availableForSale
          compareAtPriceV2 {
            quantity
            currencyCode
          }
          selectedOptions {
            title
            worth
          }
          picture {
            id
            url
            altText
            width
            top
          }
          priceV2 {
            quantity
            currencyCode
          }
          sku
          title
          unitPrice {
            quantity
            currencyCode
          }
        }
      }
    }
  }
The above snippet fetches user-selected merchandise with costs and variants dynamically utilizing the deal with handed as a parameter.
Lastly, we are able to now fetch this question utilizing Shopify’s useShopQuery hook and render the web page by including the next snippet:
// src/routes/[handle].server.jsx

import { useShopQuery, useRouteParams } from "@shopify/hydrogen";
import { Structure } from "../../elements/Structure.server";
import ProductDetails from "../../elements/ProductDetails.consumer";
export default operate Product({ params }) {
  const { deal with } = useRouteParams();
  const {
    information: { product },
  } = useShopQuery({
    question: PRODUCT_QUERY,
    variables: {
      deal with,
    },
  });
  return (
    <Structure>
      <ProductDetails product={product} />
    </Structure>
  );
}
Within the above snippet, we imported useShopQuery and useRouteParams from @shopify/hydrogen, together with ProductDetails from the /elements listing. We additionally destructured our deal with variable from the useRouteParams hook.
Moreover, we handed our GraphQL product question into the useShopQuery hook and destructured the merchandise from the info object. Lastly, we handed merchandise as a prop to our ProductDetails part.
Now we are able to efficiently navigate to the person pages for our merchandise dynamically, as you possibly can see beneath:
Deploying our storefront utilizing Netlify
Lastly, let’s deploy the Hydrogen storefront to Netlify. To realize this, we’ll first set up the next package deal as a devDependency:
yarn add @netlify/hydrogen-platform -D
Subsequent, we’ll replace our Vite configuration. Add the next snippet to our vite.config.js file:
// vite.config,js
import netlifyPlugin from '@netlify/hydrogen-platform/plugin'
export default defineConfig({
  plugins: [hydrogen(), netlifyPlugin()],
});
Subsequent, we’ll commit our codebase and push it to GitHub. From there, we are able to leverage Netlify’s CI/CD workflow to deploy the location. You’ll be able to entry the deployed web site on Netlify and try the supply code on GitHub.
Conclusion
This tutorial explored the best way to use Hydrogen — Shopify’s not too long ago launched framework for headless commerce — to construct fashionable storefronts. To study extra about how Hydrogen works, try the Shopify dev docs.
Hydrogen’s progressive expertise has made purchasing experiences exceptionally dynamic whereas sustaining excessive efficiency. If you’re one of many many builders constructing storefronts with Shopify, I hope you discovered this tutorial helpful.
LogRocket: See the technical and UX causes for why customers don’t full a step in your ecommerce move.

LogRocket is sort of a DVR for net and cell apps and web sites, recording actually all the pieces that occurs in your ecommerce app. As an alternative of guessing why customers don’t convert, LogRocket proactively surfaces the basis reason behind points which might be stopping conversion in your funnel, corresponding to JavaScript errors or lifeless clicks. LogRocket additionally displays your app’s efficiency, reporting metrics like consumer CPU load, consumer reminiscence utilization, and extra.
Begin proactively monitoring your ecommerce apps — attempt totally free.
