
Content material administration methods (CMS) like WordPress and Drupal make the method of sharing digital content material on the net much less technical. They largely get rid of the necessity to be taught server-side or database programming.
A static CMS particularly means that you can create and handle digital content material for a static website.
On this quick information, we’ll discover Outstatic, a comparatively new static CMS package deal. We’ll go over the way it works, learn how to set up and configure Outstatic for Subsequent.js functions, in addition to learn how to get began with creating and fetching content material.
Bounce forward:
To comply with together with this tutorial, you need to be conversant in Subsequent.js static website technology and have some fundamental data of Git and GitHub.
What’s Outstatic?
Outstatic is a static CMS package deal created for Subsequent.js functions. It was made out there to builders in late 2022.
This instrument lets you create, edit, and save content material to then be dedicated routinely to your repository and deployed to your stay web site. Outstatic is quick, doesn’t require any database configuration, and features a dashboard to create and handle your content material on the fly.
Among the many many use instances for this framework are blogs, portfolio web sites for managing and showcasing initiatives, information web sites, and documentation websites.
How Outstatic works
Outstatic shops knowledge utilizing a collection-document schema. You possibly can consider a group as a desk in a standard database, whereas a doc is a single file in that desk.
Every Outstatic undertaking is linked to your GitHub account and a GitHub repository. All content material you create is then mapped to the distant GitHub repository and transformed to a markdown file.
You may then handle your content material instantly in your Outstatic dashboard or fetch them as wanted in your Subsequent.js utility.
Getting began with Outstatic and Subsequent.js
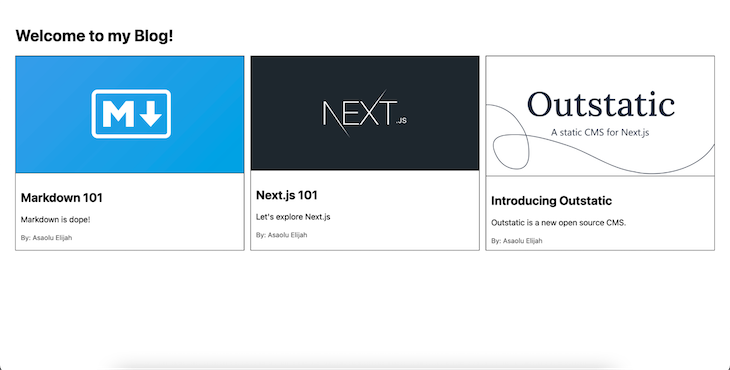
To discover the capabilities of Outstatic, we’ll create a easy weblog website to show our most up-to-date writings. When all the pieces is completed, right here’s a sneak peek at how our utility will look:
Let’s get began by creating a brand new Subsequent.js utility:
npx create-next-app outstatic-blog
As beforehand acknowledged, Outstatic requires a connection to GitHub so as to operate. Subsequently, we should first push our undertaking to GitHub earlier than we are able to start creating collections and paperwork.
Head over to GitHub, create a brand new repository, and push the brand new Subsequent.js utility we simply created to this repo. In case you are unfamiliar with this process, you possibly can confer with this helpful information from GitHub.
Making a GitHub OAuth app
Your Outstatic dashboard is the place you possibly can handle your entire content material. To authorize entry to this dashboard and write entry to your GitHub repository, you’ll have to create a brand new GitHub OAuth app. This may enable Outstatic to remotely create collections and paperwork.
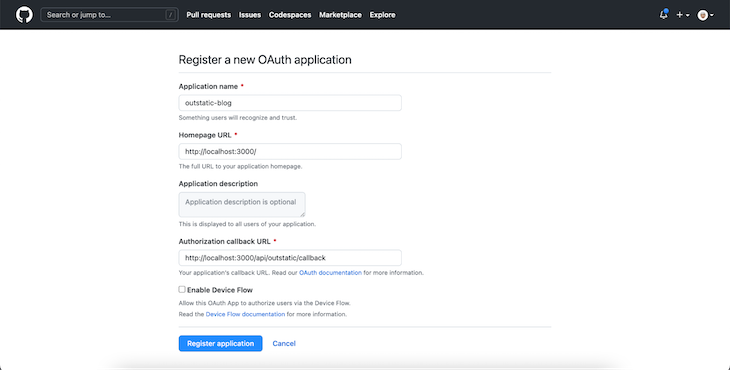
Begin by registering your new OAuth app with GitHub. If you happen to’re following together with this tutorial instantly, then in the course of the registration course of, make sure that the knowledge you entered matches what’s proven under:
In your new GitHub OAuth utility web page, you need to see the appliance shopper ID displayed. You also needs to see a “Generate a brand new shopper secret” button. Click on this button to generate a brand new secret.
As soon as completed, copy the newly generated worth together with the shopper ID and put it aside someplace secure for now.
Including Outstatic to Subsequent.js
The subsequent step is to put in the Outstatic framework in our Subsequent.js utility. We are able to do that with the next command:
npm set up outstatic
# OR
yarn add outstatic
Contained in the default /pages listing in Subsequent.js, create a brand new outstatic/[[...ost]].tsx file and paste the next content material into it:
import 'outstatic/outstatic.css'
import { Outstatic, OstSSP } from 'outstatic'

export default Outstatic

export const getServerSideProps = OstSSP
This code above exports Outstatic and an OstSSP operate. The OstSSP operate is accountable for creating the Outstatic content material administration dashboard in addition to each different server-related operation that’ll occur on it.
Moreover, create a brand new outstatic/[[...ost]].tsx file contained in the default /pages/api and paste the code under into this file:
import { OutstaticApi } from 'outstatic'

export default OutstaticApi
The code above is the place Outstatic integrates with the Subsequent.js API function, permitting it to asynchronously fetch created content material.
Lastly, in your undertaking root folder, create a brand new .env file and paste the next code into it:
OST_GITHUB_ID=YOUR_GITHUB_OAUTH_APP_ID
OST_GITHUB_SECRET=YOUR_GITHUB_OAUTH_APP_SECRET
OST_TOKEN_SECRET=A_RANDOM_TOKEN
OST_REPO_SLUG=YOUR_GITHUB_REPOSITORY_SLUG
Let’s take a more in-depth take a look at the env variables arrange within the code above:
OST_GITHUB_ID— the Consumer ID from the GitHub OAuth app we created earlierOST_GITHUB_SECRET— the shopper secret we generated earlierOST_TOKEN_SECRET— a random string with at the very least 32 charactersOST_REPO_SLUG— your GitHub repository title
We’re all performed now! Run your Subsequent.js app with the npm run dev command and navigate to http://localhost:3000/outstatic. You’ll see an output like this:
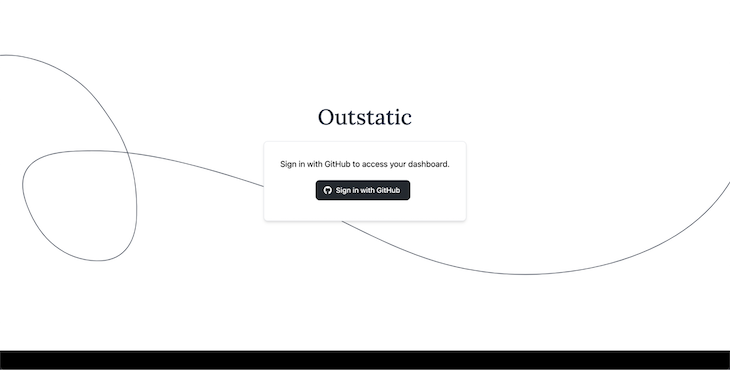
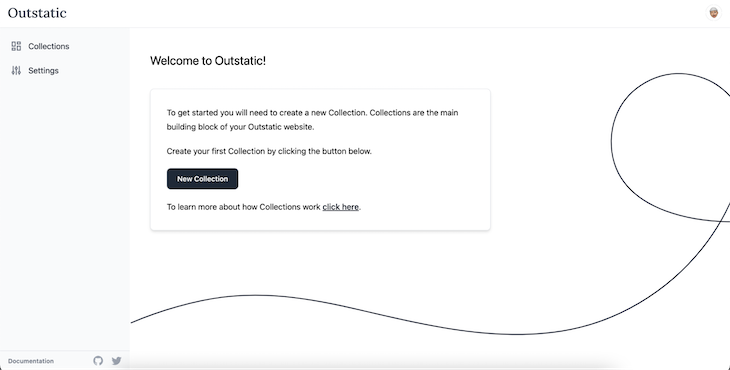
Sign up together with your GitHub account to substantiate the authorization, and you need to be redirected to your Outstatic content material dashboard as proven under:
Outstatic content material administration
We are able to instantly create new collections and handle all the content material inside these collections utilizing the Outstatic content material editor. Let’s discover learn how to create and handle Outstatic collections and paperwork now.
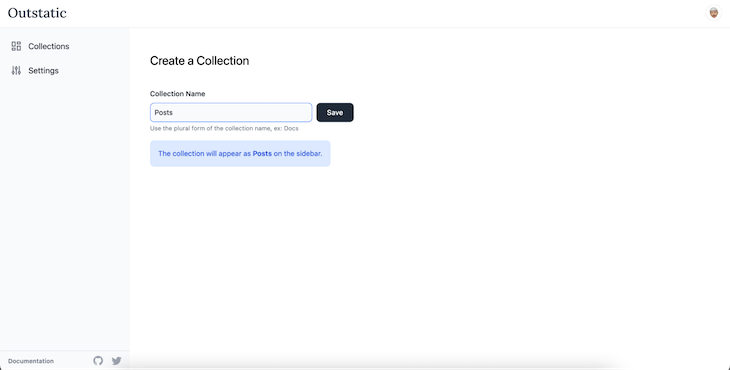
Creating collections
Let’s create a brand new assortment for our weblog posts. Click on the “New Assortment” button proven in your Outstatic dashboard. Then, sort “Posts” within the assortment title subject as proven under and click on the “Save” button:
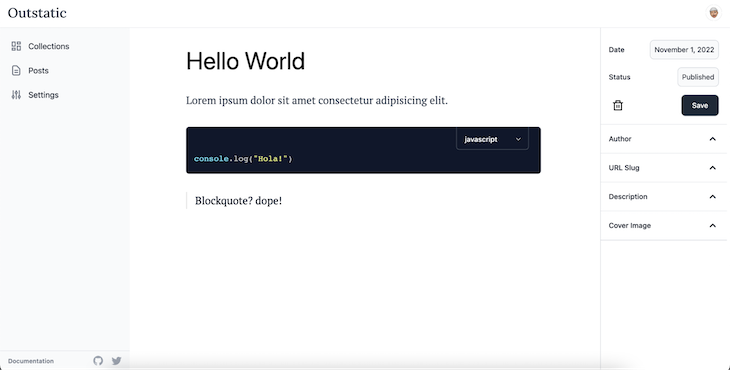
Creating paperwork: Markdown editor
Outstatic options an interactive editor for creating paperwork. Inside this editor, you possibly can write Markdown code, and the corresponding output is immediately generated. Moreover, you possibly can simply format chosen parts, import photos, and far more:
Now that we’ve gotten this far, you possibly can discover the editor your self. Attempt to create some new paperwork for our Posts assortment, add cowl photographs and descriptions, and likewise make sure that to set their standing to “Printed.”
Fetching knowledge
If you happen to pull distant adjustments with the git pull command, you’ll see that Outstatic has created a brand new outstatic/content material folder. Inside this folder, all the collections and paperwork we’ve created are current, transformed to Markdown recordsdata.
The Outstatic package deal helps the next strategies:
getDocuments()technique for fetching all paperworkgetDocumentBySlug()technique to fetch a single doc by its slug
We are able to then leverage these strategies with the native Subsequent.js getStaticProps or getServerSideProps strategies to fetch created content material for our utility.
Extra nice articles from LogRocket:
To proceed, substitute the content material of the pages/index.js file with the next:
import { getDocuments } from "outstatic/server";
import Hyperlink from "subsequent/hyperlink";

const Index = ({ posts }) => {
  return (
    <>
      <div className="container">
        <h1>Welcome to my Weblog!</h1>
        <div className="row">
          {posts.map((submit) => (
            <Hyperlink href={"/weblog/" + submit.slug} key={submit.publishedAt}>
              <div className="card">
                <img
                  className="card-img"
                  src={submit.coverImage}
                  alt={submit.title}
                />
                <div className="card-body">
                  <h2>{submit.title}</h2>
                  <p>{submit.description}</p>
                  <small className="creator">By: {submit.creator.title}</small>
                </div>
              </div>
            </Hyperlink>
          ))}
        </div>
      </div>
    </>
  );
};

export default Index;

export const getStaticProps = async () => {
  const posts = getDocuments("posts", [
    "title",
    "publishedAt",
    "slug",
    "coverImage",
    "description",
    "author",
  ]);

  return {
    props: { posts },
  };
};
Right here, we used the getDocuments() technique to fetch all our posts’ paperwork. We then handed the returned knowledge as a prop to our web page parts.
Afterward, we mapped via the returned knowledge and displayed a weblog card for every iteration. Every weblog card reveals the submit’s cowl picture, title, description, and creator’s title. We additionally linked every weblog card to a dynamic web page that shows the weblog content material.
To add slightly aesthetic to your Subsequent.js app, substitute the content material in your types/international.css file with the next code:
html,
physique {
  padding: 0;
  margin: 0;
  font-family: -apple-system, BlinkMacSystemFont, Segoe UI, Roboto, Oxygen,
    Ubuntu, Cantarell, Fira Sans, Droid Sans, Helvetica Neue, sans-serif;
}

.container {
  padding: 30px;
}

.row {
  show: flex;
  justify-content: space-between;

}

.card {
  border: 1px stable;
  max-width: 450px;
}

.card-body {
  padding: 10px;
}

.card-img {
  width: 100%;
  border-bottom: 1px stable #282828;
}

.creator {
  shade: #4c4c4c;
  font-weight: 400;
}
Run the appliance with the next command:
npm run dev
It’s best to then see an output much like the one under in your browser:
For our weblog info web page, create a brand new weblog/[slug].js file inside the present /pages folder and paste the code under into it:
import { getDocuments, getDocumentBySlug } from "outstatic/server";

const BlogSingle = ({ submit }) => {
  return (
    <div>
      <div className="container">
        <img
          className="card-img"
          src={submit.coverImage}
          alt={submit.title}
          fashion={{ maxHeight: "450px" }}
        />
        <div className="card-body">
          <h2 fashion={{ margin: "10px 0" }}>{submit.title}</h2>
          <small className="creator">By: {submit.creator.title}</small>
          <p fashion={{ marginTop: "5vh" }}>{submit.content material}</p>
        </div>
      </div>
    </div>
  );
};

export default BlogSingle;

export async operate getStaticPaths() {
  const posts = getDocuments("posts", ["slug"]);

  const paths = posts.map((submit) => ({
    params: { slug: submit.slug },
  }));

  return {
    paths,
    fallback: false,
  };
}

export const getStaticProps = async ({ params }) => {
  const slug = params.slug;
  const submit = getDocumentBySlug("posts", slug, [
    "title",
    "slug",
    "coverImage",
    "author",
    "content",
  ]);
  return {
    props: { submit },
  };
};
Right here’s a rundown of what’s occurring on this file. To start, we used the Subsequent.js getStaticPaths() technique and the Outstatic getDocuments() technique to retrieve all paperwork and generate dynamic paths for them.
Moreover, we used the Subsequent.js getStaticProps() technique together with the Outstatic getDocumentBySlug() technique to retrieve the content material of the doc with the handed slug. After this, we handed the returned knowledge as a prop and displayed it on our web page.
If we run our utility now, we should always see all the pieces working completely, as proven within the GIF under:
Conclusion
Outstatic is an up-and-coming static CMS for Subsequent.js. This tutorial has demonstrated the way it works through the use of it to construct a easy weblog website. Outstatic is a reasonably latest library with ongoing enhancements that seems to have a promising future.
Try the official Outstatic web site to be taught extra. You can too learn up on implementing SSR in Subsequent.js in case your app has dynamic web page content material that adjustments regularly or is fetched from exterior companies or databases.
LogRocket: Full visibility into manufacturing Subsequent.js apps
Debugging Subsequent functions might be tough, particularly when customers expertise points which are tough to breed. If you happen to’re excited about monitoring and monitoring state, routinely surfacing JavaScript errors, and monitoring gradual community requests and part load time, strive LogRocket. 

LogRocket is sort of a DVR for internet and cellular apps, recording actually all the pieces that occurs in your Subsequent.js app. As a substitute of guessing why issues occur, you possibly can combination and report on what state your utility was in when a difficulty occurred. LogRocket additionally screens your app’s efficiency, reporting with metrics like shopper CPU load, shopper reminiscence utilization, and extra.
The LogRocket Redux middleware package deal provides an additional layer of visibility into your consumer periods. LogRocket logs all actions and state out of your Redux shops.
Modernize the way you debug your Subsequent.js apps — begin monitoring without spending a dime.
