
Often, in cross-platform growth, we have to execute sure code on a platform-specific foundation. For Flutter apps, we will draw from a wealthy plugin library to make use of the native performance of many platforms with out having to write down our personal implementations, so this will not be too daunting.
Nonetheless, as our wants turn into an increasing number of area of interest, we might discover {that a} plugin doesn’t exist to leverage a sure operate. That’s when we have to take into account writing our personal platform-specific code.
The platforms that you’re focusing on have already got a language that you should utilize to implement the performance. For instance, on Android, you should utilize Kotlin or Java, whereas on Home windows, you should utilize C++.
So, the primary query we have to reply is: Why would we even take into account Rust for our platform-specific language?
Soar forward:
The case for utilizing Rust with Flutter
Let’s think about that we wanted to get the present battery degree of the gadget that the consumer was at the moment on. If there was no plugin that offered this performance, we would wish to contemplate a minimum of two issues:
- The way to transmit knowledge between our native code and Flutter
- The platform-specific language (like C++/Kotlin/Swift/and so forth)
Let’s discover every of those challenges now.
Transmitting knowledge between native code and Flutter
If now we have lots of knowledge to transmit between our Flutter app and native code, we’ll must create the bindings to transmit knowledge backwards and forwards. There’s fairly a little bit of boilerplate concerned on this course of, and it may be irritating and time-consuming to need to replace these bindings when our implementation adjustments.
Luckily, there’s a package deal referred to as Pigeon that’s speculated to automate fairly a little bit of this for builders. Can that assist us in our state of affairs?
A fast take a look at Pigeon’s documentation for supported platforms tells us that Pigeon helps producing the next:
- Goal-C code for iOS (accessible to Swift)
- Experimental Swift code for iOS
- Java code for Android (accessible to Kotlin)
- Experimental Kotlin code for Android
- Experimental C++ code for Home windows
Regardless of the uptake of Kotlin and Swift on the focused cell platforms, Pigeon assist for these platforms remains to be in an experimental section.
That’s not such a giant deal for cell apps, as you possibly can name Java code from Kotlin and Goal-C code from Swift. This lets you leverage the generated Pigeon code inside your app. Nonetheless, desktop and internet apps are one other matter.
Pigeon assist for Home windows is experimental, and assist for Linux doesn’t exist. If you happen to’re hoping to take your app to manufacturing, utilizing an experimental generator doesn’t really feel like a good suggestion. And for Linux or the net, you’re again to writing your platform bindings by hand anyway.
This may turn into a chore when you’re writing an app that targets lots of platforms, particularly in case your app targets a platform the place Pigeon assist is experimental or nonexistent. It’s not an unmanageable quantity of labor, however it’s nonetheless an quantity of labor.
Drawbacks of working with platform-specific languages
Flutter, by its very nature, is a cross-platform language. That implies that there’s an opportunity that some individuals writing Flutter apps is not going to have encountered a bona fide platform-specific language, like Kotlin or Swift.
In these instances, it’s not so arduous to go looking StackOverflow for an implementation and attempt to guess your manner by means of. Kotlin and Swift will handle your reminiscence for you, disposing of objects when they’re now not accessed, so it’s more durable — although not not possible — to introduce reminiscence leaks.
On Home windows and Linux, this can be a fully totally different proposition.
To implement native performance, you must use C++. As Pigeon assist is experimental for Home windows and doesn’t exist for Linux, you must not solely write your platform-specific code in a language you probably don’t perceive, but in addition your binding code.
Making this proposition tougher is the truth that you must handle your individual reminiscence and monitor your individual references. To high it off, any exceptions that happen on the native layer which are uncaught will trigger your app to crash on desktop.
In brief, even when you will get your binding code created, you’re solely going to bind to your — when you’re a newbie — probably very unsafe code. It’s not very interesting.
How utilizing Rust and Flutter Rust Bridge resolves these issues
To make use of Rust inside our Flutter venture, now we have to utilize the community-produced flutter_rust_bridge package deal.
This package deal has broad platform assist encompassing Android, iOS, Home windows, Linux, macOS, and Net. Because of this, it doesn’t matter what platform you’re focusing on, you’ll have the ability to use Rust and Flutter Rust Bridge.
Shortly reviewing the advantages of Rust and Flutter Rust Bridge, it turns into fairly a compelling case.
First, Flutter Rust Bridge generates all your binding code for you and helps asynchronous operations like emitting to a Stream.
Extra nice articles from LogRocket:
Subsequent, Rust is a better language to make use of, and in addition safer than C++ on Home windows.
Moreover, you possibly can use Rust crates inside your Rust venture to leverage native performance as an alternative of writing your individual implementation.
Lastly, uncaught exceptions inside Rust code are transferred to Flutter through a panic, which you’ll be able to view and troubleshoot accordingly. In comparison with native uncaught exceptions on Home windows inflicting crashes on desktop, this can be a significantly better expertise.
To display this, let’s create a easy Flutter app that will get the present battery degree of the gadget that it’s working on.
Creating our Flutter Rust Bridge venture
First up, let’s set up some dependencies for flutter_rust_bridge. These are the Rust programming language, and LLVM.
Begin by downloading and putting in Rust from the web site. In a command window, run the next:
winget set up -e --id LLVM.LLVM
It will obtain and arrange LLVM.
In case you are creating a brand new venture with Flutter and Rust, you possibly can clone this template repository from Github. This template comes ready-made with all of the bits and items it’s essential to get Rust working inside your Flutter venture. Then, you possibly can skip all the way down to the “Writing the Rust Code” a part of this tutorial.
Nonetheless, when you have an present venture with Flutter to which you wish to add Rust, proceed studying. This can even be useful when you’re inquisitive about how Rust integrates with Flutter tasks.
In my case, we’ll be integrating Rust with a brand-new Flutter venture that I created by working flutter create windows_battery_check.
As a result of we’re about to make low-level adjustments to your venture, now could be a great time to test your code into your supply management system. This fashion, if we unintentionally break your venture, it’s simple to undo.
Configuring the Rust venture
Let’s undergo the documentation on flutter_rust_bridge to grasp how we will combine Rust into our venture.
It’s not a sophisticated setup per se. Nonetheless, if we get any steps fallacious, our venture received’t construct and it is going to be tough to troubleshoot why. I’ll additionally provide some rationalization of what we’re doing that can assist you perceive what’s occurring if that is your first publicity to Rust as nicely.
First, navigate to your Flutter venture. Throughout the venture, execute cargo new native --lib from the command line.
Word that native is simply the venture title for the Rust venture. You’ll be able to change it if you’d like, however take into account you’ll need to replace it each time we reference it on this article’s code samples.
Subsequent, inside the native listing, open cargo.toml. Below the [dependencies] header, add the next:
flutter_rust_bridge = "1"
Add the next entry beneath [package]:
[lib]
crate-type = ["lib", "cdylib", "staticlib"]
Our cargo.toml file ought to now appear to be this:
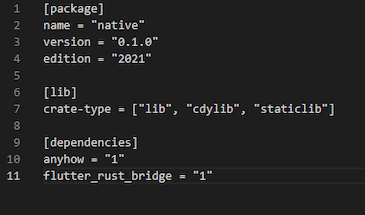
For context, cargo.toml is the file that incorporates data on our rust venture. This file additionally homes what different packages — or as they’re referred to as when working with Rust, crates — our venture will depend on.
Let’s proceed. Throughout the native listing, execute the next instructions from a command immediate or terminal:
cargo set up flutter_rust_bridge_codegen
flutter pub add --dev ffigen && flutter pub add ffi
This provides the code era device for Rust to the Rust venture, together with the FFI era bits to the Flutter venture.
Configuring our Flutter venture
Inside our native listing, run the next instructions:
flutter pub add flutter_rust_bridge
flutter pub add -d build_runner
flutter pub add -d freezed
flutter pub add freezed_annotation
These elements obtain the next factors:
flutter_rust_bridge— The “Flutter-side” a part of the Flutter Rust Bridge librarybuild_runner— Used to generate the Dart code utilized in platform bindingfreezed— Used to switch objects from Rust to Flutter
Checking our configuration
We’ve touched on fairly just a few issues, so let’s take a second to test that our setup is nice to date. If we’ve skipped a package deal unintentionally or made a mistake, nothing will work and it is going to be arduous to troubleshoot why.
Our native/config.toml file ought to appear to be this:
[package]
title = "native"
model = "0.1.0"
version = "2021"

# See extra keys and their definitions at https://doc.rust-lang.org/cargo/reference/manifest.html

[dependencies]
anyhow = "1"
flutter_rust_bridge = "1"
In the meantime, our pubspec.yaml ought to have these dependencies:
dependencies:
  flutter:
    sdk: flutter
  cupertino_icons: ^1.0.2
  ffi: ^2.0.1
  flutter_rust_bridge: ^1.49.1
  freezed_annotation: ^2.2.0

dev_dependencies:
  flutter_test:
    sdk: flutter
  flutter_lints: ^2.0.0
  ffigen: ^7.2.0
  build_runner: ^2.3.2
  freezed: ^2.2.1
Establishing our Home windows venture integration
It’s lastly time to combine our native Rust venture with Flutter. To try this, obtain the cmake file that Rust makes use of and place it inside your venture’s home windows listing. Then, round line 57, after embrace(flutter/generated_plugins.cmake), add the next line:
embrace(./rust.cmake)
Returning to our Rust venture configuration
Now, inside your editor of alternative, open the Rust venture from the native listing. Create a brand new file referred to as api.rs inside the src listing. Then, open the lib.rs file and add the next to the highest of the file:
mod api;
Now let’s write some very fundamental Rust code that we will name from our Flutter app. Inside our api.rs file, let’s add a extremely easy operate to check our integration:
pub fn helloWorld() -> String {
    String::from("Whats up from Rust! ")
}
")
}
Producing the platform binding code
Now it’s lastly time to generate the code that Flutter will use to invoke Rust performance. Throughout the root of your venture, run the next command:
flutter_rust_bridge_codegen --rust-input native/src/api.rs --dart-output lib/bridge_generated.dart --dart-decl-output lib/bridge_definitions.dart
On your sanity, you need to save this command right into a file like generate_bindings.bat. You will have to re-run it after you replace your Rust code and expose any new capabilities.
Open your Flutter venture. Throughout the lib listing, add the next native.dart file:
// This file initializes the dynamic library and connects it with the stub
// generated by flutter_rust_bridge_codegen.

import 'dart:ffi';

import 'dart:io' as io;

import 'package deal:windows_battery_check/bridge_generated.dart';

const _base="native";

// On MacOS, the dynamic library isn't bundled with the binary,
// however somewhat immediately **linked** towards the binary.
last _dylib = io.Platform.isWindows ? '$_base.dll' : 'lib$_base.so';

last api = NativeImpl(io.Platform.isIOS || io.Platform.isMacOS
    ? DynamicLibrary.executable()
    : DynamicLibrary.open(_dylib));
And with that, we’re accomplished! Our Flutter venture can now name Rust code.
Calling Rust from Flutter
Inside our foremost.dart, we’ll name our quite simple Rust code. Our widget that does this seems to be like so:
import 'package deal:windows_battery_check/native.dart';
...

class HomePage extends StatelessWidget {
  const HomePage({Key? key}) : tremendous(key: key);

  @override
  Widget construct(BuildContext context) {
    return Scaffold(
      appBar: AppBar(
        title: Textual content("Flutter Battery Home windows"),
      ),
      physique: Middle(
        baby: FutureBuilder( // All Rust capabilities are referred to as as Future's
          future: api.helloWorld(), // The Rust operate we're calling.
          builder: (context, knowledge) {
            if (knowledge.hasData) {
              return Textual content(knowledge.knowledge!); // The string to show
            }
            return Middle(
              baby: CircularProgressIndicator(),
            );
          },
        ),
      ),
    );
  }
}
Working the venture leads to the next window developing:
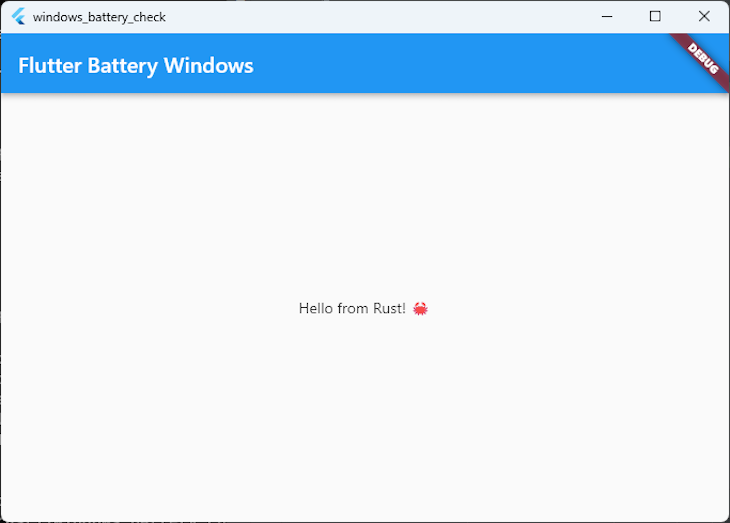
Our app works! Now let’s truly get our battery statistics.
First, let’s replace our cargo.toml with the dependencies we have to retrieve the battery standing on Home windows. We have to add the Home windows crate to leverage performance from the Home windows API, and we additionally must particularly load sure options from this crate.
Our dependencies inside the cargo.toml will appear to be this:
[dependencies]
anyhow = "1.0.66"
flutter_rust_bridge = "1"

[target.'cfg(target_os = "windows")'.dependencies]
home windows = {model = "0.43.0", options =["Devices_Power", "Win32_Foundation", "Win32_System_Power", "Win32_System_Com", "Foundation", "System_Power"]}
Now, it’s time to implement the precise performance that our app implements. Our app fulfills two capabilities:
- Checks if a battery is current within the system
- Emits battery standing updates over time
Let’s implement these capabilities now.
Checking if a battery is current
Our operate to retrieve the present battery presence standing from the system seems to be like this:
pub fn getBatteryStatus() -> End result<bool> {
    // https://study.microsoft.com/en-us/home windows/win32/api/winbase/ns-winbase-system_power_status
    let mut powerStatus: SYSTEM_POWER_STATUS = SYSTEM_POWER_STATUS::default();
    unsafe {
        GetSystemPowerStatus(&mut powerStatus);
        Okay(powerStatus.BatteryFlag != 128)
    }
}
Primarily, we create a container for the SYSTEM_POWER_STATUS, initialize it with default values, after which move it to the GetSystemPowerStatus operate. Then, we will use the API documentation to grasp the consequence.
On this case, 128 implies that there isn’t any battery current. So long as this return worth isn’t equal to 128, there must be a battery current.
Receiving battery updates over time
To have the ability to obtain battery updates over time, our app should ship outcomes over a Stream. Luckily, StreamSink comes with flutter_rust_bridge, so it’s easy to ship occasions over a stream.
Inside our api.rs, close to the highest of the file, add a RwLock that defines our Stream:
static BATTERY_REPORT_STREAM: RwLock<Possibility<StreamSink<BatteryUpdate>>> = RwLock::new(None);
Then, let’s create a brand new operate referred to as battery_event_stream that assigns the worth of this RwLock to the Stream that’s being handed to Rust:
pub fn battery_event_stream(s: StreamSink<BatteryUpdate>) -> End result<()> {
    let mut stream = BATTERY_REPORT_STREAM.write().unwrap();
    *stream = Some(s);
    Okay(())
}
As a result of we’re interacting immediately with the Home windows API, we have to learn the documentation on how battery reporting works on Home windows. From studying these API paperwork, we will perceive what the BatteryStruct ought to appear to be and what the values returned from ChargingState imply.
The info mannequin seems to be like this:
#[derive(Debug)]
pub struct BatteryUpdate {
    pub charge_rates_in_milliwatts: Possibility<i32>,
    pub design_capacity_in_milliwatt_hours: Possibility<i32>,
    pub full_charge_capacity_in_milliwatt_hours: Possibility<i32>,
    pub remaining_capacity_in_milliwatt_hours: Possibility<i32>,
    pub standing: ChargingState,
}

#[derive(Debug)]
pub enum ChargingState {
    Charging = 3,
    Discharging = 1,
    Idle = 2,
    NotPresent = 0,
    Unknown = 255,
}
With our stream being initialized, and our knowledge mannequin set, it’s lastly time to wire up the occasion era.
To do that, let’s create an init operate that units up the subscription, and emits occasions into the stream because the battery standing adjustments. We have to be cautious after we do that, as when the gadget is unplugged, sure properties (like ChargeRateInMilliwatts) will return null.
Luckily, it’s fairly simple to soundly deal with these null values by utilizing sample matching inside Rust, as we will see right here:
pub fn init() {
    Battery::AggregateBattery().unwrap().ReportUpdated(&TypedEventHandler::<Battery, IInspectable>::new(|battery, inspectable| {
        let agg_battery = Battery::AggregateBattery();
        let report = agg_battery.unwrap().GetReport().unwrap();

        let battery_outcome = BatteryUpdate {
            charge_rates_in_milliwatts: match report.ChargeRateInMilliwatts() {
                Okay(charge_rate) => {
                    Some(charge_rate.GetInt32().unwrap())
                }
                Err(_) => {
                    None
                }
            },
            design_capacity_in_milliwatt_hours: match report.DesignCapacityInMilliwattHours() {
                Okay(design_capacity) => {
                    Some(design_capacity.GetInt32().unwrap())
                }
                Err(_) => {
                    None
                }
            },
            full_charge_capacity_in_milliwatt_hours: match report.FullChargeCapacityInMilliwattHours() {
                Okay(full_charge) => {
                    Some(full_charge.GetInt32().unwrap())
                }
                Err(_) => {
                    None
                }
            },
            remaining_capacity_in_milliwatt_hours: match report.RemainingCapacityInMilliwattHours() {
                Okay(remaining_capacity) => {
                    Some(remaining_capacity.GetInt32().unwrap())
                }
                Err(_) => {
                    None
                }
            },
            standing: match report.Standing().unwrap().0 {
                3 => Charging,
                1 => Discharging,
                2 => Idle,
                0 => NotPresent,
                _ => Unknown
            },
        };

        println!("Handler Replace{:?}", battery_outcome);
        match BATTERY_REPORT_STREAM.try_read() {
            Okay(s) => {
                s.as_ref().unwrap().add(battery_outcome);
            }
            Err(_) => {
                println!("Error when writing battery standing.");
            }
        }
        Okay(())
    })).count on("Couldn't subscribe to battery updates");
}
After now we have this code in our api.rs, it’s time to re-run the command we saved earlier from the command line:
flutter_rust_bridge_codegen --rust-input native/src/api.rs --dart-output lib/bridge_generated.dart --dart-decl-output lib/bridge_definitions.dart
Displaying battery leads to the Flutter app
As a result of now we have already built-in the Rust venture with our Flutter venture, all now we have to do is replace our code to realize the next:
- Name the
initoperate to start listening to occasions from the Rust library - Use a
FutureBuilderto point out whether or not the system has a battery or not - Use a
StreamBuilderto point out updates to the battery standing as they arrive
Our HomePage widget now seems to be just like the under, as it might probably name immediately into the Rust library  :
:
class HomePage extends StatefulWidget {
  const HomePage({Key? key}) : tremendous(key: key);

  @override
  State<HomePage> createState() => _HomePageState();
}

class _HomePageState extends State<HomePage> {

  @override
  void initState() {
    api.init();
    tremendous.initState();
  }

  @override
  Widget construct(BuildContext context) {
    return Scaffold(
      appBar: AppBar(
        title: Textual content("Flutter Battery Home windows"),
      ),
      physique: Middle(
        baby: Column(
          crossAxisAlignment: CrossAxisAlignment.middle,
          mainAxisAlignment: MainAxisAlignment.middle,
          kids: [
            FutureBuilder( // For when results emit once
              future: api.getBatteryStatus(),
              builder: (context, data) {
                return Text(
                  'System has battery present: ${data.data}',
                  style: TextStyle(
                      color: (data.data ?? false) ? Colors.green : Colors.red),
                );
              },
            ),
            StreamBuilder( // For when there are results over time
              stream: api.batteryEventStream(),
              builder: (context, data) {
                if (data.hasData) {
                  return Column(
                    children: [
                      Text(
                          "Charge rate in milliwatts: ${data.data!.chargeRatesInMilliwatts.toString()}"),
                      Text(
                          "Design capacity in milliwatts: ${data.data!.designCapacityInMilliwattHours.toString()}"),
                      Text(
                          "Full charge in milliwatt hours: ${data.data!.fullChargeCapacityInMilliwattHours.toString()}"),
                      Text(
                          "Remaining capacity in milliwatts: ${data.data!.remainingCapacityInMilliwattHours}"),
                      Text("Battery status is ${data.data!.status}")
                    ],
                  );
                }
                return Column(
                  kids: [
                    Text("Waiting for a battery event."),
                    Text(
                        "If you have a desktop computer with no battery, this event will never come..."),
                    CircularProgressIndicator(),
                  ],
                );
              },
            ),
          ],
        ),
      ),
    );
  }
}
With our code up to date, we will go forward and run our Flutter app on Home windows. After just a few seconds (or, when you unplug your laptop computer), the next ought to show:
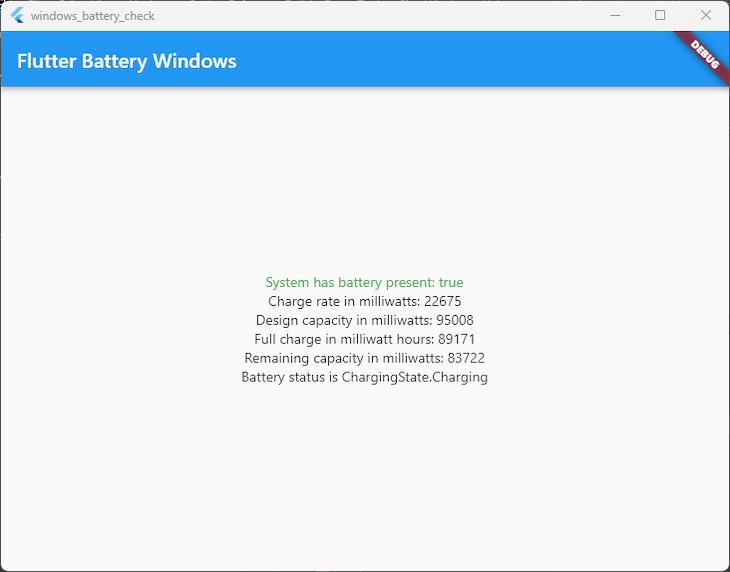
Over time, when there’s an replace to the battery cost, these values will emit over the stream, and the UI will routinely replace.
Conclusion
Utilizing Rust for native platform performance, particularly on Home windows, could make writing native code simpler and safer. With the ability to obtain occasions over a stream is a superb match for asynchronous occasions as nicely.
As all the time, the code samples used inside this information are out there on Github. There are two folders inside this repository.
The batterytest folder is a standalone Rust console app that acted as a sandbox for me to check out the Home windows API calls by themselves. With the ability to test that my calls have been purposeful earlier than including on the Flutter resolution was priceless in itself.
The windows_battery_check folder incorporates the complete Flutter venture, together with the Rust library and code.
Completely happy growing!
LogRocket: Full visibility into manufacturing Rust apps
Debugging Rust functions will be tough, particularly when customers expertise points which are tough to breed. If you happen to’re all for monitoring and monitoring efficiency of your Rust apps, routinely surfacing errors, and monitoring gradual community requests and cargo time, attempt LogRocket. 
LogRocket is sort of a DVR for internet and cell apps, recording actually every thing that occurs in your Rust app. As a substitute of guessing why issues occur, you possibly can combination and report on what state your software was in when a difficulty occurred. LogRocket additionally screens your app’s efficiency, reporting metrics like shopper CPU load, shopper reminiscence utilization, and extra.
Modernize the way you debug your Rust apps — begin monitoring totally free.
