
On the subject of constructing internet purposes, authentication is usually a main headache. Builders have to resolve what safety sample they need to implement, and accomplish that the best means.
Magic, previously Fortmatic, which was identified for its fast, seamless, one-way integration for internet authentication, is now a significant participant within the blockchain ecosystem because of its Magic Auth product.
On this tutorial, we’ll reveal tips on how to use Magic with Ethereum, talk about organising a wise contract, and discover ways to authenticate customers utilizing Magic on the Ethereum blockchain.
You’ll find a hyperlink to the general public repo that incorporates the undertaking we created on this article. We’ll cowl the next:
Let’s get began!
What’s the blockchain?
The blockchain is a buzz phrase that has stirred up the web within the final 5 years, however merely put, it’s a distributed database that’s shared among the many nodes of a pc community, storing info electronically in digital format. The blockchain has been extensively adopted as a result of it ensures the truthfulness and safety of a file of knowledge.
Blockchains are finest identified for his or her essential function in cryptocurrency programs, the place they keep a safe and decentralized file of transactions.
Ethereum is a well-liked, decentralized open supply blockchain with sensible contract performance. On this article, we’ll use Ethereum because the blockchain we work together with.
What’s Magic and Magic Auth?
Magic, initially Fortmatic, is extensively identified for offering a seamless technique to combine authentication into your internet purposes. Magic is an SDK that allows passwordless authentication and could be built-in into your app with just some traces of codes.
Magic Auth, which we‘ll use on this article, is an SDK that, when built-in into your software, allows passwordless Web2 and Web3 onboarding and authentication utilizing magic hyperlinks. On the time of writing, Magic Auth helps over 20 blockchains and could be applied with just some traces of code.
What’s web3.js?
web3.js is a group of libraries that permit you to work together with a neighborhood or distant Ethereum node utilizing HTTP, IPC, or WebSocket. In abstract, Web3.js is a library that allows us to work together with the Ethereum blockchain utilizing JavaScript.
Establishing Magic and Web3.js
To get began utilizing Magic within the Ethereum blockchain, we have to add some configurations and setup.
First, create a brand new listing to deal with our undertaking:
mkdir magic-blockchain && cd magic-blockchain
Subsequent, initialize a Node.js undertaking:
npm init -y
Now, we’ll set up the web3.js library and the Magic SDK:
npm set up --save web3 [email protected]
Writing our sensible contract
We have to create a wise contract that we will later deploy to the Ethereum blockchain. Good contracts are applications saved on a blockchain that run when predetermined circumstances are met.
We are going to create a primary “Good day, World!” sensible contract. Create a brand new file known as helloworld.sol with the next code:
Extra nice articles from LogRocket:
// SPDX-License-Identifier: MIT

pragma solidity ^0.8.9;

contract helloworld {

  string public message = "Good day World";

  operate replace(string reminiscence newMessage) public {
    message = newMessage;
  }

}
Compile the sensible contract
As said earlier, we’ll have to deploy our sensible contract to the Ethereum blockchain. To take action, we’ll have to compile it to a kind that we will execute inside the blockchain.
We’ll use the code under to assist us compile our sensible contract by getting the Abi and bytecode we’d like:
npm i [email protected]
Create a file named compile.js and add the code under to it:
const path  = require('path');
const fs = require('fs');
const  solc = require('solc')
const helloWorldPath = path.resolve(__dirname, '' , 'helloworld.sol');
const file = fs.readFileSync(helloWorldPath).toString();
// Enter construction for solidity compiler
var enter = {
    language: "Solidity",
    sources: {
      "helloworld.sol": {
        content material: file,
      },
    },

    settings: {
      outputSelection: {
        "*": {
          "*": ["*"],
        },
      },
    },
  };
  const output = JSON.parse(solc.compile(JSON.stringify(enter)));
  if(output.errors) {
      output.errors.forEach(err => {
          console.log(err.formattedMessage);
      });
  } else {
      const bytecode = output.contracts['helloworld.sol'].helloworld.evm.bytecode.object;
      const abi = output.contracts['helloworld.sol'].helloworld.abi;
      console.log(`bytecode: ${bytecode}`);
      console.log(`abi: ${JSON.stringify(abi, null, 2)}`);
  }
Subsequent, we compile the contract to get the abi and bytecode we’d like. Run node compile.js and replica the output bytecode and abi to retailer them someplace secure.
For the contract deployment, I’ll use the handle of the contract I already deployed.
Authenticating customers with Magic Auth
As said earlier, Magic Auth creates an Ethereum public handle for all authenticated customers, which we will then use to authenticate customers.
Let’s create an index.html file that may act as a GUI for the applying we‘ll develop.
To authenticate customers into our app, we’ll combine with Magic. As soon as the consumer is authenticated, we’ll be capable of see the accounts and public addresses created mechanically by Magic for that consumer on the Ethereum blockchain.
Earlier than we will obtain this, we first have to create a Magic Auth software to get the keys we’ll want within the software.
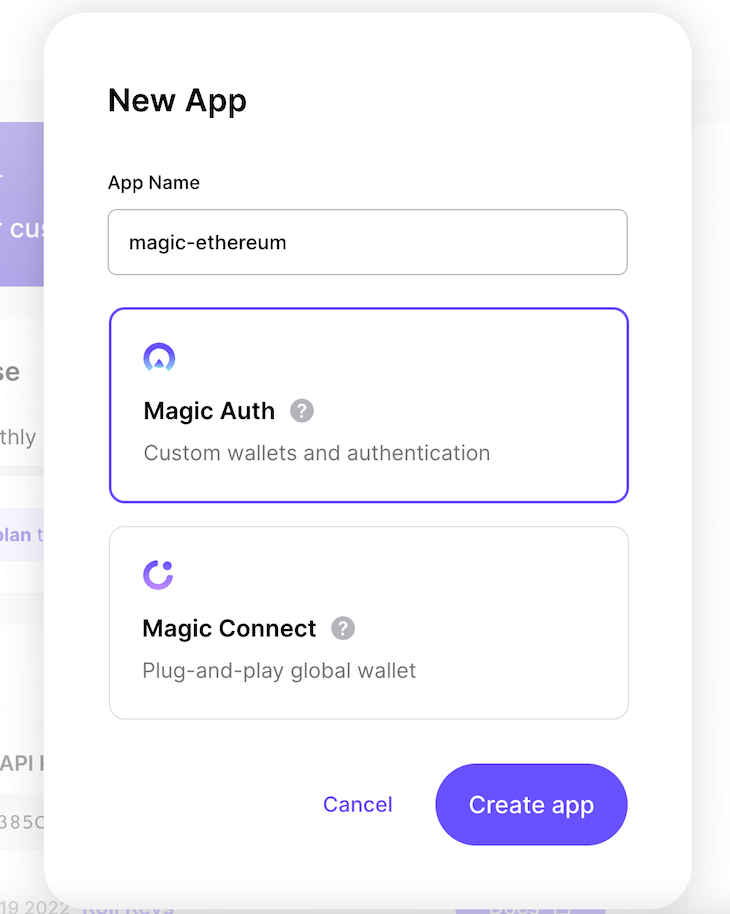
Head over to your Magic dashboard, click on on the New App button, and enter the title of the app. Then, copy the content material of the PUBLISHABLE API KEY:
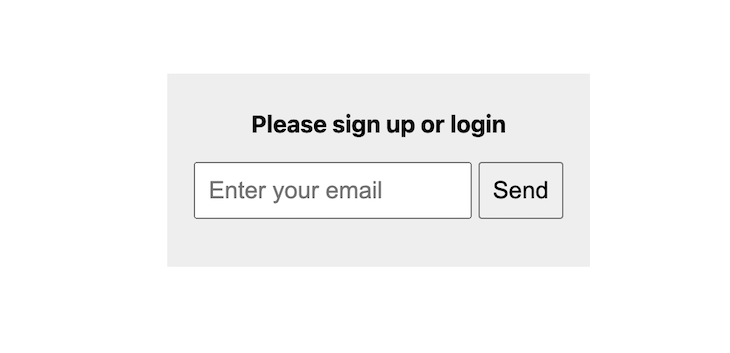
The content material of the index.html file allows sign-in and logout skill, in addition to the preliminary interplay with the Ethereum blockchain:
<!DOCTYPE html>
<html>
  <head>
    <title>Magic and Ethereum</title>
    <meta charset="UTF-8" />
    <meta title="viewport" content material="width=device-width, initial-scale=1" />
    <hyperlink rel="stylesheet" kind="textual content/css" href="https://weblog.logrocket.com/magic-ethereum-blockchain/types.css" />
    <script src="https://auth.magic.hyperlink/sdk"></script>
    <script src="https://cdn.jsdelivr.internet/npm/[email protected]/dist/web3.min.js"></script>
    <script>
      /* Configure Ethereum supplier */
      const magic = new Magic("pk_live_your_own_here", {
        community: "rinkeby"
      });
      const web3 = new Web3(magic.rpcProvider);
      const render = async () => {
        const isLoggedIn = await magic.consumer.isLoggedIn();

        let authHtml = `
          <div class="container">
            <h1>Please join or login</h1>
            <kind onsubmit="login(occasion)">
              <enter kind="e-mail" title="e-mail" required="required" placeholder="Enter your e-mail" />
              <button kind="submit">Ship</button>
            </kind>
          </div>
        `;
        let userHtml = "";
        const goal = doc.querySelector("#app");
        if (isLoggedIn) {
          const userMetadata = await magic.consumer.getMetadata();
          const userAddress = (await web3.eth.getAccounts())[0];
          const userBalance = web3.utils.fromWei(
            await web3.eth.getBalance(userAddress)
          );
          authHtml = `
             <div class="container">
              <h1>Present consumer: ${userMetadata.e-mail}</h1>
              <h1>Consumer Tackle: ${userAddress}</h1>
              <h1>Present Steadiness: ${userBalance} ETH</h1>
              <button onclick="logout()">Logout</button>
            </div>
         `;

          userHtml = `
            <div class="container">
              <h1>Ethereum handle</h1>
              <div class="data">
                <a href="https://rinkeby.etherscan.io/handle/${userAddres                    s}" goal="_blank">${userAddress}</a>
              </div>
              <h1>Steadiness</h1>
              <div class="data">${userBalance} ETH</div>
            </div>
          `;
        }
        goal.innerHTML = authHtml + userHtml
      };
      const login = async e => {
        e.preventDefault();
        const e-mail = new FormData(e.goal).get("e-mail");
        if (e-mail) {
          await magic.auth.loginWithMagicLink({ e-mail });
          render();
        }
      };

      const logout = async () => {
        await magic.consumer.logout();
        render();
      };
</script>
  </head>
  <physique onload="render()">
    <div id="app">
      <div class="container">Loading...</div>
    </div>
  </physique>
</html>
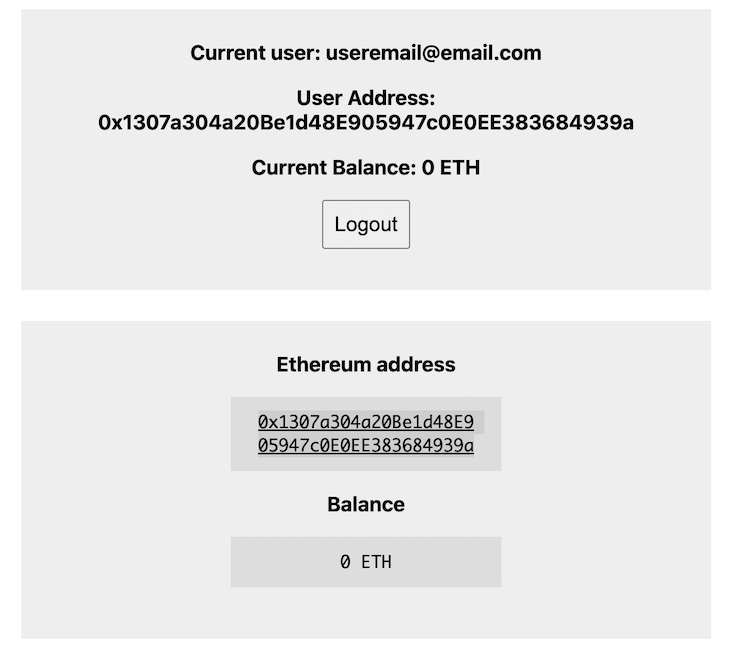
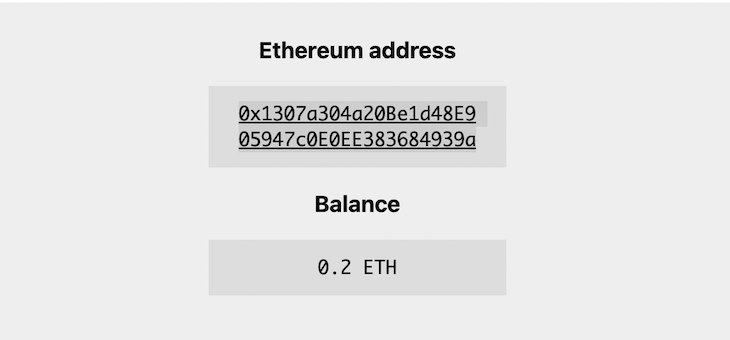
After the consumer authenticates, we present them a number of particulars to make sure that all the pieces works nicely:
Writing to the blockchain
After the consumer is logged in, they will work together with the blockchain by way of Magic. To check this, we‘ll replace the message property within the contract by writing to the blockchain.
We’ll merely name the replace technique within the contract and go within the new message. Let’s replace the index.html file:
const contractABI = 'theabi';
let contractAddress = "0x83d2F577E2c4D056864543a62B8638bFA0ebaAD6";

let userHtml = "";
let contractHtml = "";
if (isLoggedIn) {
let contract = new web3.eth.Contract(
            JSON.parse(contractABI),
            contractAddress
          );
          const currentMessage = await contract.strategies.message().name();
          contractHtml = `
            <div class="container">
              <h1>Good Contract</h1>
              <div class="data">
                <a href="https://rinkeby.etherscan.io/handle/${contractAddress}" goal="_blank">${contractAddress}</a>
              </div>
              <h1>Message</h1>
              <div class="data">${currentMessage}</div>
              <kind onsubmit="replace(occasion)">
                <enter kind="textual content" title="new-message" class="full-width" required="required" placeholder="New Message" />
                <button id="btn-update-msg" kind="submit">Replace Message</button>
              </kind>
            </div>
          `;
        }

goal.innerHTML = authHtml + userHtml + contractHtml
Subsequent, we add the replace technique, which merely makes use of the primary public Ethereum account supplied by Magic to ship the decision to the replace technique of the contract:
const replace = async e => {
        e.preventDefault();
        const newMessage = new FormData(e.goal).get("new-message");
        if (newMessage) {
          const btnUpdateMsg = doc.getElementById("btn-update-msg");
          btnUpdateMsg.disabled = true;
          btnUpdateMsg.innerText = "Updating...";
          const fromAddress = (await web3.eth.getAccounts())[0];
          const contract = new web3.eth.Contract(
            JSON.parse(contractABI),
            contractAddress
          );
          const receipt = await contract.strategies
            .replace(newMessage)
            .ship({ from: fromAddress });
          console.log("Accomplished:", receipt);
          render();
        }
      };
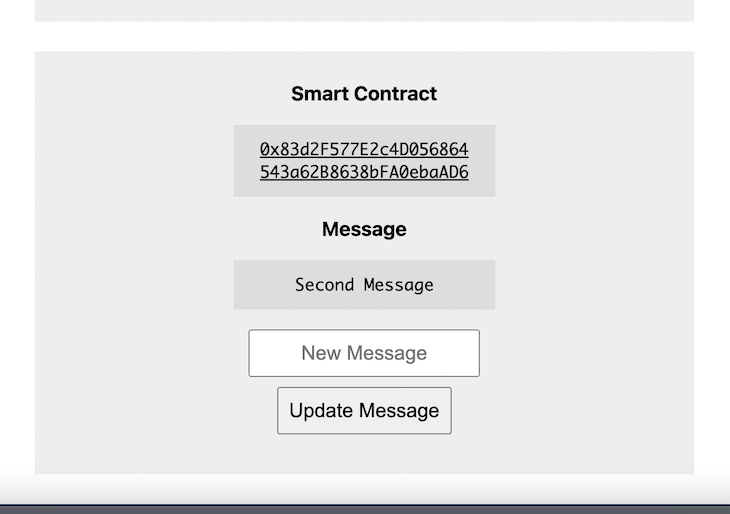
We now have a brand new interface, as seen within the picture under:
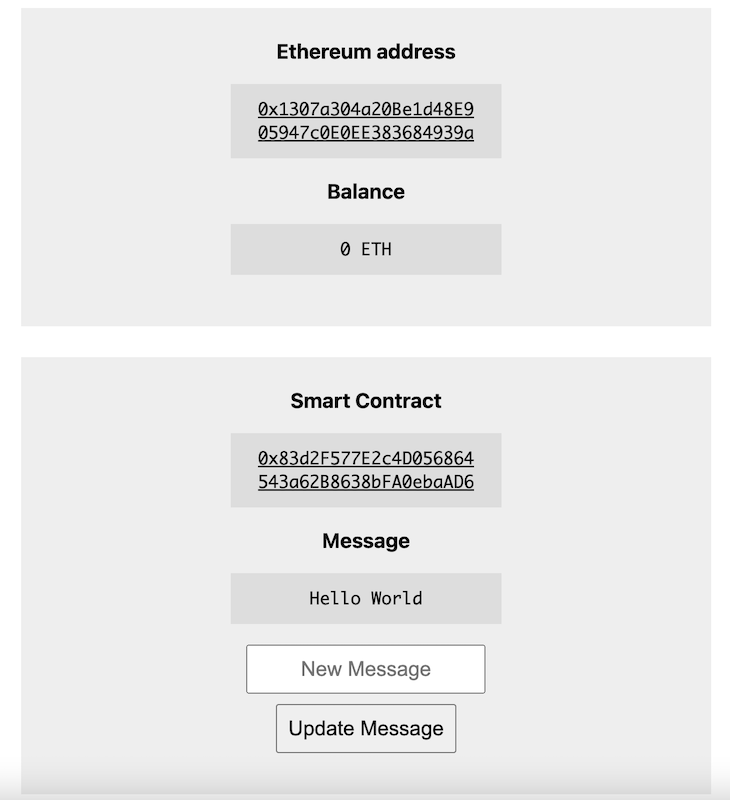
As soon as the consumer enters a brand new message, a brand new transaction might be initiated to replace the message property.
Remember that we have to add take a look at ethers to the account used to work together with the blockchain. To take action, head over to the Rinkeby Ether Faucet. After getting some ether in your account, refresh the web page so the modifications might be mirrored:
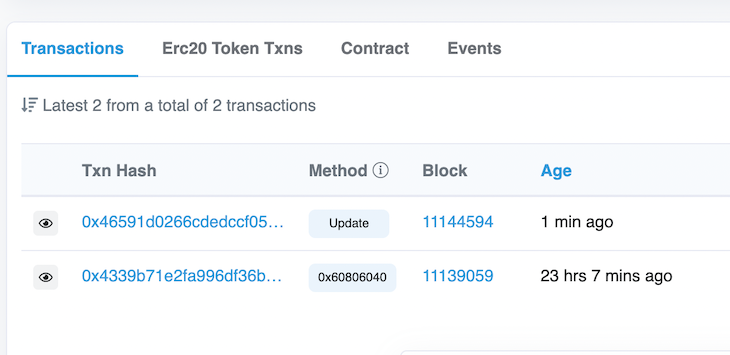
Subsequent, the consumer updates the message by inserting a brand new one. This can take a while as a result of it must work together with the Ethereum blockchain operating on the Rinkeby community. As soon as it’s performed, it ought to re-render the web page, and the brand new contract message might be displayed.
Head over to Rinkeby by clicking on the hyperlink to the deployed sensible contract to confirm that we will see the transaction that deployed the contract and that up to date the message:
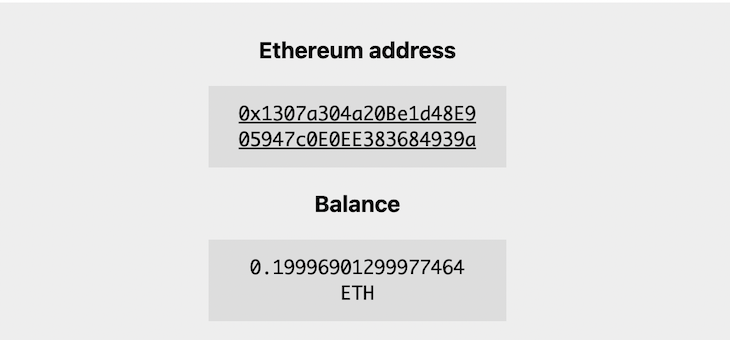
This replace takes some fuel charges from the account we used to make the replace. If we test our present stability, we’ll see that the required ether was deducted:
Conclusion
On this article, we realized about Magic and the way it integrates with the Ethereum blockchain utilizing the web3.js JavaScript library.
Hopefully you loved this text and are excited in regards to the alternatives Magic provides blockchain builders to create safe, decentralized purposes. Thanks for studying!
LogRocket proactively surfaces and diagnoses an important points in your Web3 apps.

1000’s of engineering and product groups use LogRocket to cut back the time it takes to grasp the basis explanation for technical and value points of their Web3 apps. With LogRocket, you may spend much less time on back-and-forth conversations with prospects and take away the infinite troubleshooting course of. LogRocket permits you to spend extra time constructing new issues and fewer time fixing bugs.
Proactively repair your Web3 apps — strive LogRocket at this time.
