
Because of the good Cocos Star Developer “What a Coincidence C” for letting us share his tutorial.
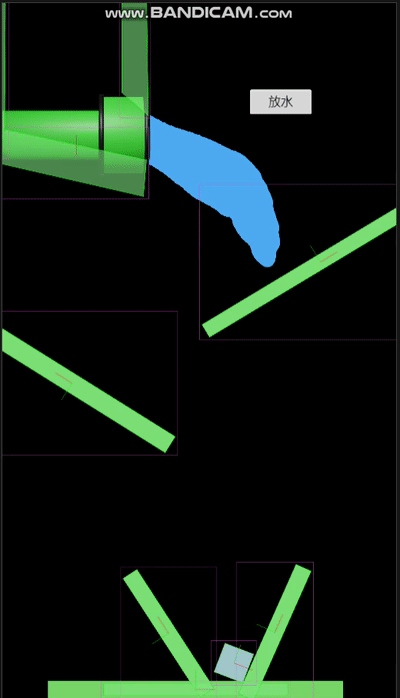
[Screenshot of the game “Where’s the water?”]
Implementing interactive liquids in video games is a extra engaging answer. For instance, the favored sport “The place’s the water?” has achieved good outcomes.
In Cocos Creator, if you wish to notice 2D liquid and contemplate the working effectivity, you need to use the bodily particle impact of Box2D to simulate.
Constructing a dynamic 2D liquid answer in Cocos Creator might be analyzed on this tutorial.
The construction of this tutorial is as follows:
-
How one can use
-
Pre-knowledge
-
Precept evaluation
The challenge file is out there on the backside of this text, it may be used when the scenario arises.
1. How one can construct it
1.1 Scene Development
Create a brand new empty scene in Cocos Creator and create a UICanvas:

Create a digital camera for liquid rendering Digicam-001:
For this digital camera, make it ClearFlag = SOLID_COLOR
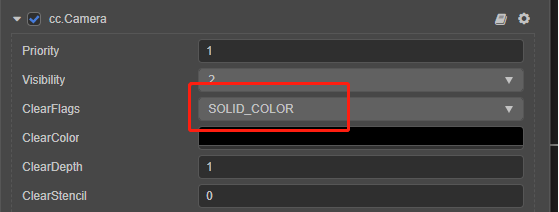
The perform of this digital camera is to attract the liquid to an RT after which challenge the dynamic texture to a particular place within the sprite UI.
After that, the collider is organized within the scene. Since it’s Box2D, keep in mind to decide on 2D for the collider. In any other case, the collider will use Bullet and don’t have anything to do with Box2d:
Two physics engines, Bullet and Box2D, are packaged inside Cocos Creator, and each are in separate worlds
In Box2d, if you need the collision between the colliders to be efficient, no less than one celebration wants to carry the Rigidbody2D element: Due to this fact, it is advisable add a RigidBody2D to the collider, whose sort is chosen as static. On this means, the physics engine is not going to simulate his pace and power.
1.2 Including liquid
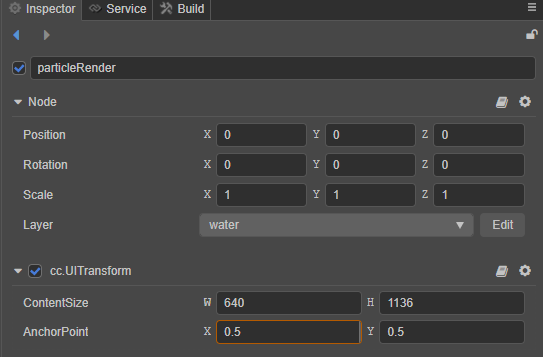
Create an empty UINode that may be a Node with solely UITransform elements:
Add WaterRender to this element:
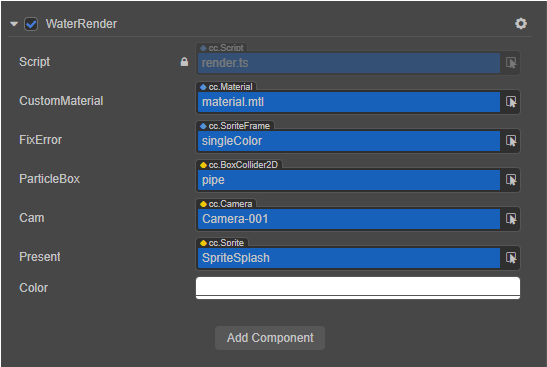
Then specify a few of his values:
- Customized Materials:
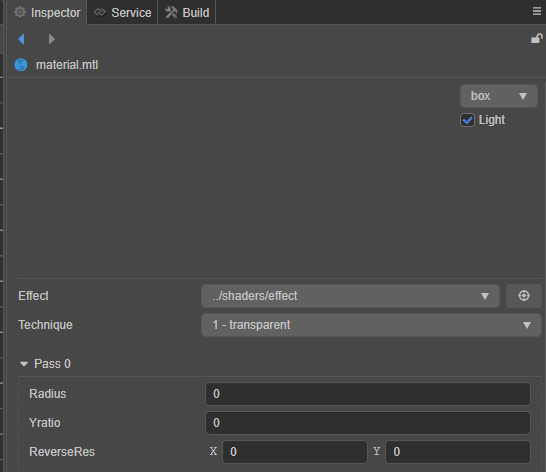
-
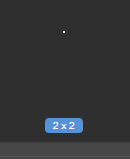
FixErrorfactors to a 2×2 strong coloration small texture:
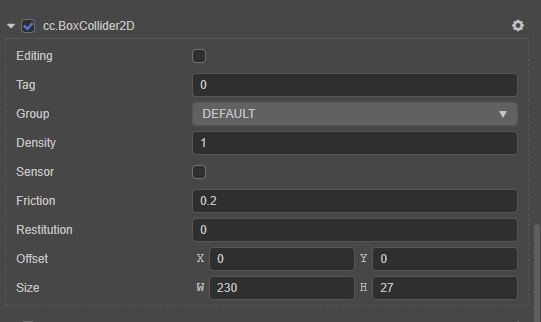
- Water pipes: Water pipes include a number of colliders that constrain the liquid to stream the place we would like it

1.3 Run the sport to play the demo
The physics debugging is turned on right here, and the operating state of the particles may be noticed extra clearly.
2. Pre-existing information
2.1 Physics engine

Box2D is a light-weight 2D sport physics engine.
Many of the 2D physics of widespread sport engines are executed utilizing Box2D.
Within the physics engine simulation, by means of the power of the middle of mass, calculate its pace and acceleration, and many others. and at last get the place of the thing.
The rendering engine will then learn the calculation outcomes of the physics engine and apply them to the rendering
2.2 LiquidFun

LiquidFun is an extension library primarily based on Box2D.
The position of this library is so as to add a particle system that simulates liquid to Box2D.
Google senior programmer Kentaro Suto developed the library, and the supply code is written in C++ and translated to JavaScript
2.3 Assembler
In a sport engine, when drawing a sprite or a mannequin, it must generate particular vertices and name the motive force methodology (OpenGL, DirectX … and many others.) to attract it to the display.
Inside Cocos Creator, if we need to draw a sequence of vertices to the display, we have to use the Assembler
The assembler, because the identify suggests, assembles vertices to be used by rendering elements
By means of this Assembler, the place, coloration, texture coordinates, index of vertices may be personalized.
//There are numerous Assemblers in Cocos Creator:
/**
 * easy assembler
 * The assembler is out there by means of `UI.easy`.
 */
export const easy: IAssembler
/**
 Tiled assembler
*/
export const tiled: IAssembler =
...
On this demo, the related data of all vertices within the vertex buffer is calculated by studying the place of the particles within the physics engine.
3. Precept Evaluation
In render.ts, There are two lessons: WaterRender and WaterAssembler
First, parse the WaterRender class
3.1 Evaluation of WaterRender
WaterRender is the core class of the complete DEMO, answerable for creating and rendering particles.
3.1.1 Renderable2D
WaterRender is inherited from Renderable2D.
In Cocos Creator, any node object that must be rendered will maintain a RenderableComponent, which Renderable2D is the bottom class for rendering 2D elements in Cocos Creator.
Customise your individual rendering scheme by overriding the _render methodology.
Right here, utilizing a customized _assembler to assemble the geometry that must be drawn.
/**
*commitComp will submit the present rendering information to the rendering pipeline
*/

protected _render(render: any) {
    render.commitComp(this, this.fixError, this._assembler!, null);
}
3.1.2 Create a particle system
It may be understood that liquids are composed of many tiny water droplets.
This offers the physics engine the choice to make use of particle programs to simulate the conduct of a lot of water droplets in an environment friendly method.
Create the particle system:
var psd_def = {
        strictContactCheck: false,
        density: 1.0,
        gravityScale: 1.0,
        radius: 0.35,  // Right here the radius of the particle is specified

        ...
}

this._particles = this._world.physicsWorld.impl.CreateParticleSystem(psd);
Create a particle group:
var particleGroupDef = {
   ...
    form: null,
    place: {
        x: this.particleBox.node.getWorldPosition().x / PHYSICS_2D_PTM_RATIO,
        y: this.particleBox.node.getWorldPosition().y / PHYSICS_2D_PTM_RATIO
    },
    // @ts-ignore
    form: this.particleBox._shape._createShapes(1.0, 1.0)[0]
};

this._particleGroup = this._particles.CreateParticleGroup(particleGroupDef);
this.SetParticles(this._particles);
A particle group defines a set of particles for a particle emitter with a customized form:
// Create the geometry of BoxCollider2D
form: this.particleBox._shape._createShapes(1.0, 1.0)[0]
By observing liquids, it may be discovered that liquids have some widespread properties:
-
Move, droplets transfer alongside the floor of the collider, and gravityScale: 1.0 defines the coefficient by which the particles are affected by gravity.
-
Adhesion, which may be noticed when two water droplets are shut collectively, might be attracted to one another by the power of the liquid by defining
viscousStrengthto outline the adhesion of the particles. -
Compression, the liquid particles might be compressed. The next values outline the compression allowed by the particles:
pressureStrength
staticPressureStrength
staticPressureRelaxation
staticPressureIterations -
Floor stress, everyone knows the experiment of placing a coin on the water. The coin is not going to sink to the underside. That is the floor stress of the liquid. The next two properties can modify the floor stress of a liquid:
surfaceTensionPressureStrength: 0.2,
surfaceTensionNormalStrength: 0.2,
3.2 Evaluation of WaterAssembler
WaterAssembler and RenderableComponent offers customization of vertex buffers.
Inside this class, 4 separate vertices are generated by accessing the place of every particle of the particle system
let posBuff = particles.GetPositionBuffer();
let r = particles.GetRadius() * PHYSICS_2D_PTM_RATIO * 3;

for (let i = 0; i < particleCount; ++i) {
    let x = posBuff[i].x * PHYSICS_2D_PTM_RATIO;
    let y = posBuff[i].y * PHYSICS_2D_PTM_RATIO;

    // left-bottom
    vbuf[vertexOffset++] = x - r; //x
    vbuf[vertexOffset++] = y - r; //y
    vbuf[vertexOffset++] = 0; // z
    vbuf[vertexOffset++] = x; // u
    vbuf[vertexOffset++] = y; // v
   ...
}
The vertex cache describes the information of the vertices
Lastly calculate the index cache:
// fill indices
const ibuf = buffer.iData!;

for (let i = 0; i < particleCount; ++i) {
    ibuf[indicesOffset++] = vertexId;
    ibuf[indicesOffset++] = vertexId + 1;
    ibuf[indicesOffset++] = vertexId + 2;
    ibuf[indicesOffset++] = vertexId + 1;
    ibuf[indicesOffset++] = vertexId + 3;
    ibuf[indicesOffset++] = vertexId + 2;

    vertexId += 4;
}
The index cache specifies the order by which the vertices are drawn
This generates a rectangle primarily based on the middle level of the particle, however what you see ultimately is a circle, proper?
The magic right here is solved with supplies and the Impact system.
3.3 Materials and Shader Evaluation
When simulating, it is advisable use impact.impact particular results to simulate
Notice that the clear approach is chosen right here:

Inside impact.impact, the vert perform has two variables of frag: v_corner and v_center. These two variables symbolize the place of the middle level and the nook of the particle place.
  out vec2 v_corner;
  out vec2 v_center;

  vec4 vert () {
    vec4 pos = vec4(a_position.xy, 0, 1);
    // no a_corner in internet model

    // use a_position as an alternative of a_corner
    v_corner = a_position.xy * reverseRes;

    // Because the particle is a strong coloration, the texCoord information the place of the middle level of the particle
    v_center = a_texCoord.xy * reverseRes;
    v_corner.y *= yratio;
    v_center.y *= yratio;

    return cc_matViewProj * pos;
  }
These two frag variables in smoothstep are calculated by interpolation.
smoothstep(edge0, edge1, x)

//This perform will calculate the Hermite interpolation primarily based on x.
t = clamp((x - edge0) / (edge1 - edge0), 0.0, 1.0);
return t * t * (3.0 - 2.0 * t);
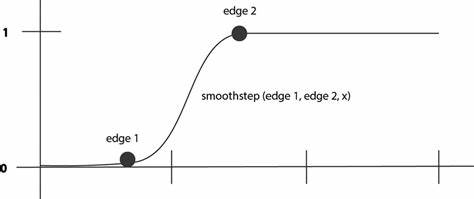
Interpolate inside the frag perform by calculating the space between the pixel place and the particle middle utilizing smoothstep.
The radius of the particle might be managed between 1 and three occasions the radius
On the identical time, as a result of the calculation is predicated on the middle and radius, the particles may also change from a rectangle to a circle:
  in vec2 v_corner;
  in vec2 v_center;

  vec4 frag () {
    float masks = smoothstep(radius * 3., radius, distance(v_corner, v_center));
    return vec4(1.0, 1.0, 1.0, masks);
  }
The colour of the particles drawn right now is white:

Lastly, render it blue by show.impact matching the render texture:
show.impact makes use of the colour handed within the property viewer coloration:
  in vec4 coloration;

  #if USE_TEXTURE
    in vec2 uv0;
    #pragma builtin(native)
    structure(set = 2, binding = 10) uniform sampler2D cc_spriteTexture;
  #endif

  vec4 frag () {
    vec4 o = vec4(1, 1, 1, 1);

    #if USE_TEXTURE
      o *= CCSampleWithAlphaSeparated(cc_spriteTexture, uv0);
      #if IS_GRAY
        float grey  = 0.2126 * o.r + 0.7152 * o.g + 0.0722 * o.b;
        o.r = o.g = o.b = grey;
      #endif
    #endif

    o.a = smoothstep(0.95, 1.0, o.a);

    o *= coloration;

    ALPHA_TEST(o);

    return o;
  }
Right now, there might be some burrs because of the alpha downside:
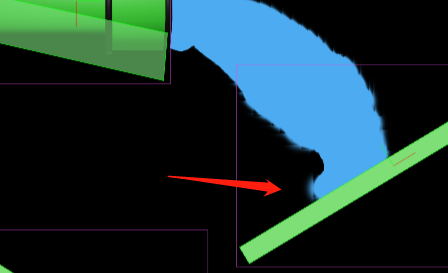
So by smoothstep(0.95, 1.0, o.a), the alpha values of the pixels are all managed between 0.95 and 1.
This rendering reveals that it’s pointless to simulate actual results to make video games. We will make good outcomes so long as we idiot the eyes!
Epilogue
Along with being appropriate for simulating liquids, bodily particle programs may also be used to simulate any deformable object.
That is the top of this tutorial. In case you are within the physics engine, please go away a message within the remark space.
