
Typically while you begin growing a recreation in Unity, you need a trimmed-down model of an setting the place you possibly can transfer your characters round. ProBuilder permits you to rapidly create and prototype 3D ranges, in addition to create primary 3D fashions with out leaving Unity.
On this article, you’ll learn to design a easy stage in Unity utilizing ProBuilder.
This can be a sneak preview of our ultimate consequence.

Unity undertaking setup
In the event you haven’t executed so already, create a brand new Unity 3D undertaking and title it “Hey ProBuilder.”
You are able to do so by launching Unity Hub in your laptop and clicking New Challenge.
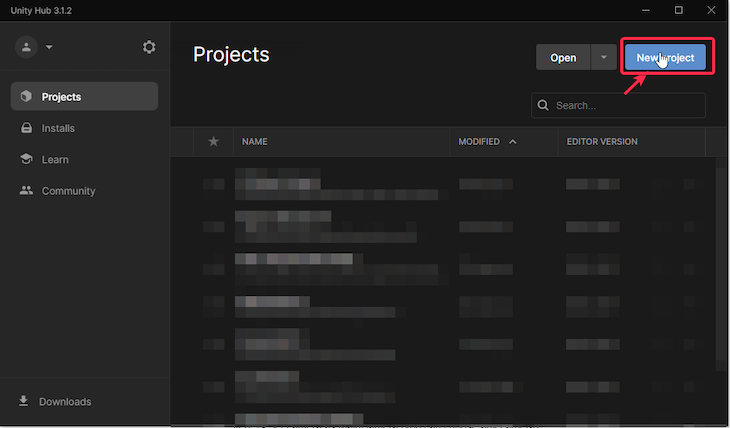
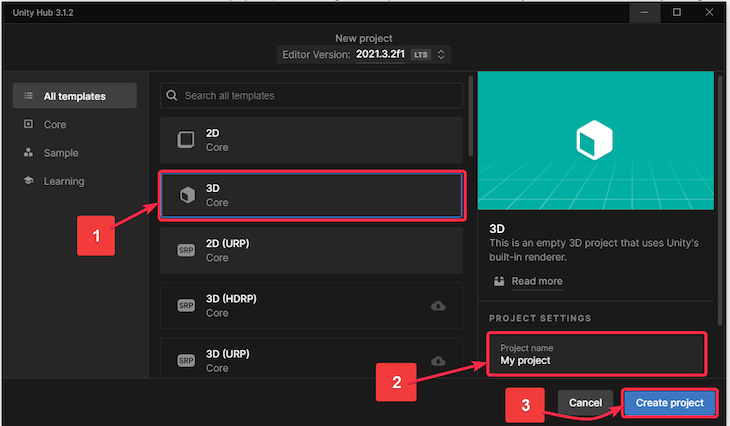
After clicking on New Challenge, the window under pops up. To make sure that we’re making a 3D undertaking, full the next steps:
- Choose 3D from the templates
- Replace the Challenge Title from “My Challenge” to “Hey ProBuilder”
- Click on the Create Challenge button
The undertaking will take a couple of minutes to open up in Unity.
Preserve the undertaking open, and let’s work on integrating ProBuilder.
Organising ProBuilder with Unity
On this step, you’ll add the ProBuilder package deal to the Hey ProBuilder undertaking in Unity.
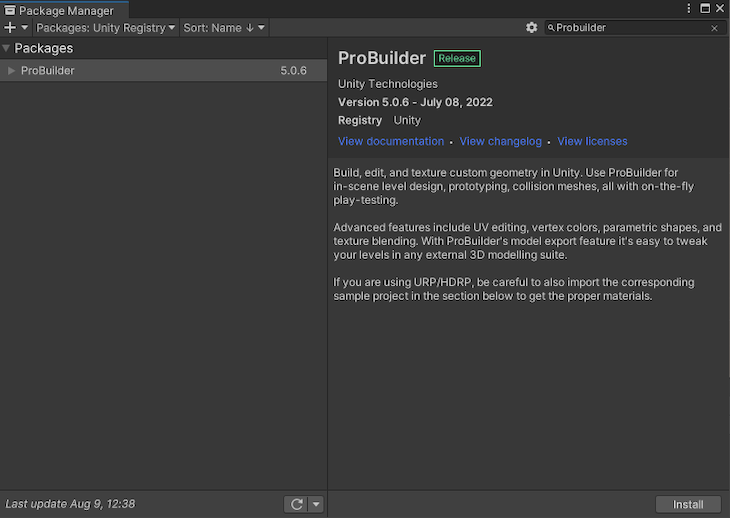
To begin, obtain the ProBuilder package deal. To take action, go to Window > Package deal Supervisor. Swap Packages to Unity Registry. Seek for ProBuilder and click on Set up.
To confirm if ProBuilder is put in efficiently, go to the Challenge panel on the underside left-hand aspect of the Unity editor. Develop Packages. In the event you see ProBuilder on the checklist, you understand that ProBuilder was efficiently put in.
Within the high toolbar, click on Instruments > ProBuilder > ProBuilder Window. Dock the ProBuilder window wherever you need. I prefer to dock it simply subsequent to the Hierarchy panel.
Extra nice articles from LogRocket:
Nice. You’re all set to discover the completely different options of ProBuilder.
Utilizing shapes in ProBuilder
Let’s start with New Form.
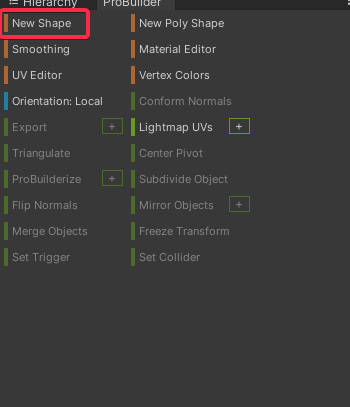
The New Form function permits you to create 12 completely different primitive shapes:
- Arch
- Cone
- Dice
- Cylinder
- Door
- Pipe
- Airplane
- Prism
- Sphere
- Sprite
- Stairs
- Torus
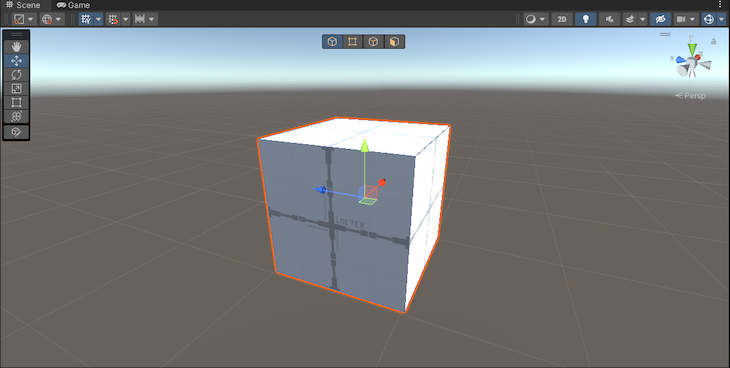
Let’s start with bringing a dice into our scene. To take action, click on New Form. You will notice a Create Form panel open within the right-hand nook of your Scene panel. Choose the dice icon. Maintain left click on and drag the form out like this:

Set the dice measurement to 1 unit throughout X, Y, and Z.
Be aware: In the event you return to the Hierarchy panel, you will note that the brand new form (i.e., the dice) is a GameObject.
Choice modes in Unity
The 4 buttons on the high of the Scene panel are used to change between the next 4 choice modes:

- Object choice
- Vertex choice
- Edge choice
- Face choice
This stage of manipulation just isn’t attainable with the usual 3D objects in Unity. In different phrases, you possibly can create a dice GameObject (proper click on > 3D Object > Dice), however you can not management its vertices, edges, or faces inside Unity. Because of this making a dice (or some other form) with ProBuilder is a greater different.
There are specific operations which you can carry out in your 3D object that will help you create the form that you simply need to obtain. The three operations that you’ll carry out on this article are:
- Flipping normals
- Extrusion
- Bevel
Create a room in Unity utilizing ProBuilder
Let’s start by creating the boundaries of a room. It’s simpler than you assume.
- Create a dice (utilizing ProBuilder and never Unity’s commonplace 3D object)
- Preserve the scale 5 x 2 x 5. That is what you get
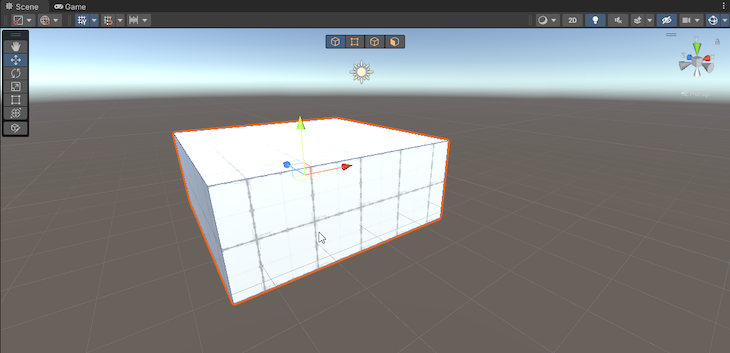
- Be sure you are within the Object choice mode. Choose the dice. Click on Flip Normals from the ProBuilder panel, and also you get a room. Easy, proper?
Now let’s add stairs inside this room.
First, scale the room up 10x by going to the Hierarchy panel > Choose Dice. From the Inspector panel on the right-hand aspect, make sure you allow constrained proportions for the Scale Property. Then put 10 as the dimensions for X, Y, and Z.
Subsequent, change to the ProBuilder panel, click on New Form, then click on the Stairs icon from the Create Form panel. Left click on on the scene and maintain. Drag to stretch alongside the X and Z axis. Launch the left click on. Transfer the cursor alongside the +ve Y axis to set the peak of the stair. Do a left click on and that’s it. You might have created a stairway.
Professional tip: Just be sure you don’t choose some other object immediately after creating a brand new form. In any other case, you gained’t have the ability to change the steps from their configuration window (or Create Form window). You’ll have to delete the present stair and create one other one. This is perhaps troublesome through the first few makes an attempt, however you’re going to get the hold of it with some apply. My recommendation right here can be to go sluggish at first. Step by step, you’ll turn out to be quicker.
Mess around with the completely different Stairs Settings for the steps right here and observe the adjustments.
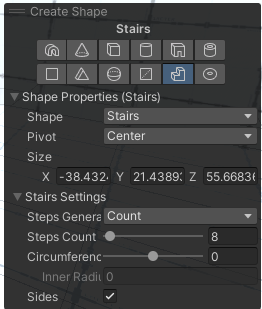
I’ve saved these settings for the steps:
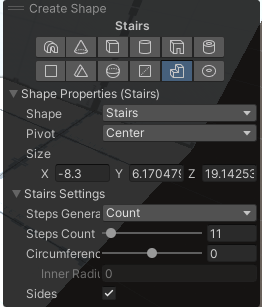
Ignore the values below Form Properties. You may need completely different values relying on the look you’re going for.
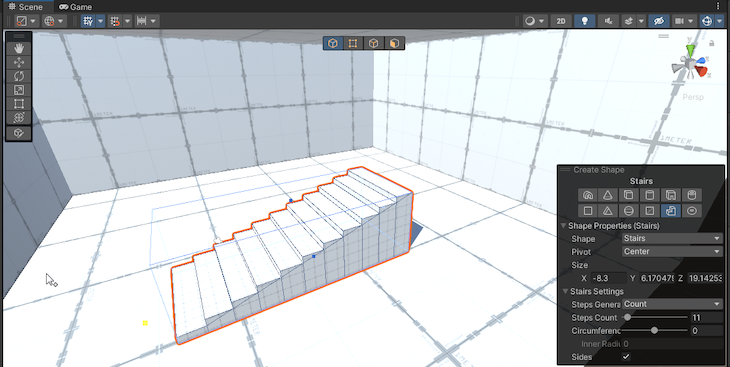
That is what my room seems to be like:
Now, let’s say that if there was a personality going up the steps, there must be some form of platform on the finish of the steps to stroll round; in any other case, the character would fall down. Let’s construct that little platform by utilizing extrusion.
- Swap to Face Choice mode and choose the top face of the steps:
- Maintain Shift and drag the chosen face ahead. This step is known as extrusion. You simply extruded one face of the steps.
- Now, improve the size of the platform horizontally, like this:
You may improve the thickness of the platform as a lot as you need. Be happy to experiment. Consider this as “inventive freedom.”
Let’s see easy methods to bevel now. Beveling could be carried out on edges and faces. Technically, in the event you bevel a face, then all the perimeters that make up that face are going to turn out to be beveled, so it’s nonetheless solely being utilized to edges. That is what beveling seems to be like — the sharp edges of the chosen face turn out to be rounded (beveled).
To carry out beveling, choose a face or an edge and click on the Bevel button from the ProBuilder panel.
In the event you click on on the + icon on the best aspect of the Bevel button, you can too modify the quantity of beveling.
Attempt the opposite operations, together with:
- Subdivide
- Merge
- Delete
See what setting you possibly can give you.
Convey a personality into your Unity setting
Obtain this free Starter Property pack from Unity. In the event you haven’t downloaded it earlier than, it’s going to say “Add to my Property.” Click on that after which click on Open in Unity.
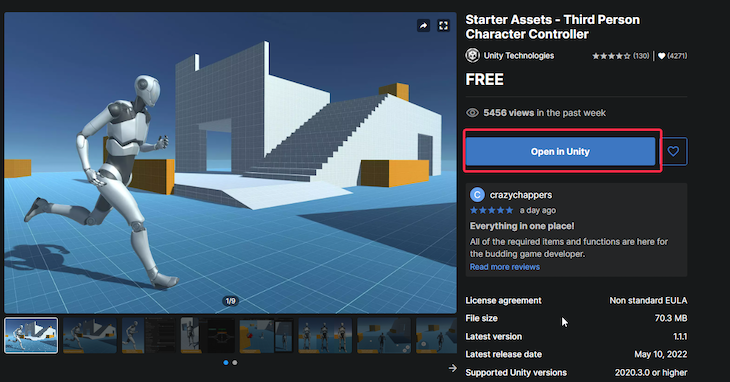
The Package deal Supervisor will open robotically in your Unity undertaking. Then, click on the Obtain button within the backside right-hand nook.
Subsequent, click on Import.
Delete the Major Digicam from the scene.
Then go to the Property panel > Starter Property > ThirdPersonController > Prefabs.
Drag the NestedParentArmature_Unpack prefab into the scene and place it contained in the room wherever you want.
Improve the scale of the prefab by altering the dimensions by 5 (or no matter seems to be good to you).
From the Hierarchy panel > NestedParentArmature_Unpack > choose PlayerArmature. Within the Inspector panel, find the “Third Individual Controller” script and alter the next values:
- Transfer Velocity = 15 (as per your liking)
- Dash Velocity = 25 (as per your liking)
Click on Play to let your character stroll round within the setting. Use the W, A, S, and D keys to maneuver round. Hit House to leap and use the mouse to go searching.
Conclusion
Superior! You simply created a stage in Unity with ProBuilder.
In the event you face any points or want some assist, please ping me on Twitter or LinkedIn, and take a look at my Gumroad web page or YouTube channel in the event you’re in search of extra Unity tutorials and assets.
