Prior to now, there was nothing cooler than a personalized gadget (cellphone), the colours, icons, and background all wanting nice with a dynamic theme. Imagine it or not, these themes gave cellular units nearly all of their attraction. Try the 2 pictures beneath:
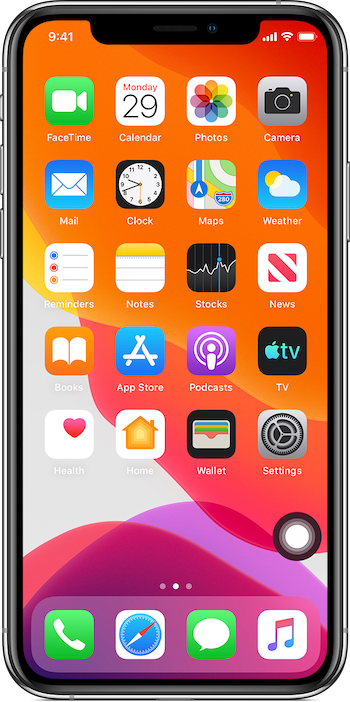
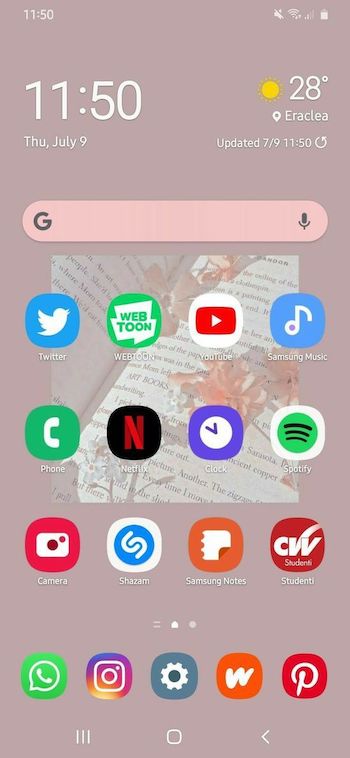
It’s not troublesome to distinguish between the 2 — that’s the advantage of a theme.
This text will information you on learn how to create a dynamic theme switcher that may change between three colours, producing a dynamic theme. It would additionally use the palette_generator Flutter bundle to determine the dominant shade scheme from a picture.
To leap forward:
Let’s get to it!
Conditions
For this tutorial, we count on the reader to have the newest model of the Flutter SDK with null security. Additionally, the reader should set up the next dependencies:
flutter_colorpicker: v1.0.3material_color_generator: v1.1.0palette_generator: v0.3.3+2supplier: v6.0.3shared_preferences: v2.0.15
Creating our Flutter app
We’ll begin by creating a brand new Flutter venture, and to do this, we are going to paste the command beneath within the terminal:
Flutter create <foldername>
Observe: Substitute
<foldername>with the supposed venture title.
The command above creates the usual counter venture of any new Flutter venture. We gained’t want that. As a substitute, we are going to substitute the codes within the predominant.dart file with the code beneath:
import 'bundle:flutter/materials.dart';
void predominant() {
  runApp(const MyApp(
    title: 'Shade picker',
  ));
}
class MyApp extends StatefulWidget {
  const MyApp({Key? key, required this.title}) : tremendous(key: key);
  remaining String title;
  @override
  State<MyApp> createState() => _MyAppState();
}
class _MyAppState extends State<MyApp> {
  @override
  Widget construct(BuildContext context) => MaterialApp(
      title: 'Flutter Demo',
      debugShowCheckedModeBanner: false,
      dwelling: Scaffold(
          appBar: AppBar(
        title: Textual content(widget.title),
      )));
}
The distinction between the code above and the default predominant.dart Flutter code is moderately than utilizing a stateless widget, we’re utilizing a stateful widget. It is because the venture goals to have an effect on the theme widget’s state, and we can not accomplish that with stateless widgets. Right here is the picture of the venture at this stage:
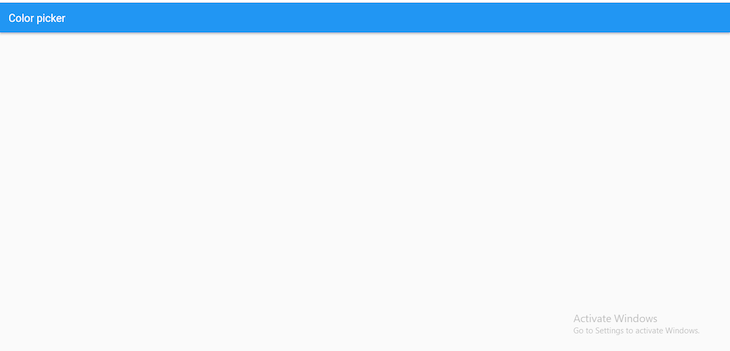
We’ll construct on this element later, however earlier than that, we are going to create a ChangeNotifier class that may deal with the switching and persistence of our base widget.
Restoring the earlier state utilizing ChangeNotifier
What will we imply by persistence? On this context, persistence means when the app reloads or closes, the present state is saved, and thus, when loaded again up, the app restores the earlier state it saved. To do this, we are going to use the shared_preference bundle talked about within the conditions.
To start, we are going to create a brand new file referred to as themes.dart, and we are going to paste the code beneath in it:
import 'bundle:flutter/materials.dart';
import 'bundle:shared_preferences/shared_preferences.dart';

class AppTheme extends ChangeNotifier {
  remaining String key = "theme";
  SharedPreferences? _prefs;
  late bool _darktheme;

  bool get darkTheme => _darktheme;

  AppTheme() {
    _darktheme = true;
    _loadprefs();
  }

  switchthemelight() {
    _darktheme = false;
    _saveprefs();
    notifyListeners();
  }

  switchthemedark() {
    _darktheme = true;
    _saveprefs();
    notifyListeners();
  }

  _initiateprefs() async {
    _prefs ??= await SharedPreferences.getInstance();
  }

  _loadprefs() async {
    await _initiateprefs();
    _darktheme = _prefs?.getBool(key) ?? true;
    notifyListeners();
  }

  _saveprefs() async {
    await _initiateprefs();
    _prefs?.setBool(key, _darktheme);
  }
}
Ranging from the highest, we created a category referred to as AppTheme, which is an extension of the ChangeNotifier class. Inside the class, there’s a key for the shared preferences, a SharedPreferences occasion, a Boolean occasion, and a getter for the Boolean occasion.
Subsequent, we referred to as an initializer and fed it the Boolean occasion, which we set to the worth true.
Then, we created two features: switchthemelight() and switchthemedark(), which change the worth of the Boolean to false and true, respectively. Lastly, the final three features _initiateprefs(), _loadprefs(), and _saveprefs() deal with the initializing, load, and save properties of the SharedPreferences occasion.
Observe:
SharedPreferencescan solely deal with small quantities of information.
Now we are able to deal with the UI portion of this venture.
Flutter venture person interface
The person interface facet of this Flutter venture might be in two elements: deciding on private shade decisions for various theme properties and colours from pictures.
Deciding on shade decisions from theme properties
We’ll begin by creating two fields, an inventory containing the pictures, and 6 variables with sort Shade (three every for 2 themes):
remaining urlImages = [
  'images/light.jpg',
  'images/dark.jpg',
];
Shade lightindigo = Colours.indigo;
Shade lightpink = Colours.pink;
Shade lightred = Colours.purple;
Shade darkindigo = Colours.indigo;
Shade darkpink = Colours.pink;
Shade darkred = Colours.purple;
Subsequent, we are going to wrap the construct methodology in a ChangeNotifierProvider. Doing this can require us to make use of the supplier bundle talked about within the conditions.
Then, we are going to set the kid widget to a Shopper class (additionally made obtainable by the supplier bundle) and return the MaterialApp class:
Widget construct(BuildContext context) => ChangeNotifierProvider(
    create: (context) => AppTheme(),
    youngster: Shopper<AppTheme>(builder: (context, state, youngster) {
      return MaterialApp(
      );
    })
);
By wrapping the MaterialApp class in a client, we are able to use the getters and features created within the AppTheme class.
Beginning with crucial factor on the listing, we wish to create a theme. So, within the MaterialApp class, we are going to create a theme widget, name an if-else assertion, and set the situation to the getter darktheme created within the AppTheme class. The conditional assertion checks the worth of the darktheme getter initialized within the AppTheme class (on this case, true). The theme widget ought to use the primary theme, and if false, it ought to use the second theme:
title: 'Flutter Demo',
debugShowCheckedModeBanner: false,
theme: state.darkTheme
    ? darkish = ThemeData(
        appBarTheme: AppBarTheme(shade: darkred),
        colorScheme: const ColorScheme.darkish().copyWith(
          secondary: darkpink,
          brightness: Brightness.darkish,
        ),
        scaffoldBackgroundColor: colours.isNotEmpty
            ? colours[_currentindex = 1].shade
            : darkred,
      )
    : mild = ThemeData(
        colorScheme: ColorScheme.fromSwatch(
          primarySwatch: generateMaterialColor(shade: lightred),
        ).copyWith(
          secondary: lightpink,
          brightness: Brightness.mild,
        ),
        scaffoldBackgroundColor: colours.isNotEmpty
            ? colours[_currentindex].shade
            : lightindigo),
Observe: We used tenary operators for the conditional assertion, and we used the
material_color_generatorbundle to assign the colour variable we created to theprimarySwatch.
To make use of a picture inside Flutter, we are going to head to the pubspec.yaml file and uncomment the asset part like the instance beneath:
belongings:
  - pictures/
Lastly, we are going to create a Gridview utilizing the pictures we imported earlier. The photographs might be wrapped in a GestureDetector widget and linked to a dialog widget utilizing a perform.
We’ll create three widgets throughout the dialog widget that may use the colorpicker bundle. Doing that may enable the person to pick customized shade designs to switch the default Flutter theme.
Right here is the ultimate code:
import 'bundle:flutter/materials.dart';
import 'bundle:flutter_colorpicker/flutter_colorpicker.dart';
import 'bundle:palette_generator/palette_generator.dart';
import 'bundle:supplier/supplier.dart';
import 'bundle:theme_switcher/themes.dart';
import 'bundle:material_color_generator/material_color_generator.dart';
void predominant() {
  runApp(const MyApp(
    title: 'Shade picker (Mild Theme)',
  ));
}
class MyApp extends StatefulWidget {
  const MyApp({Key? key, required this.title}) : tremendous(key: key);
  remaining String title;
  @override
  State<MyApp> createState() => _MyAppState();
}
class _MyAppState extends State<MyApp> {
  late ThemeData mild;
  late ThemeData darkish;

  remaining urlImages = [
    'images/light.jpg',
    'images/dark.jpg',
  ];
  Shade lightindigo = Colours.indigo;
  Shade lightpink = Colours.pink;
  Shade lightred = Colours.purple;
  Shade darkindigo = Colours.indigo;
  Shade darkpink = Colours.pink;
  Shade darkred = Colours.purple;

  @override
  Widget construct(BuildContext context) => ChangeNotifierProvider(
      create: (context) => AppTheme(),
      youngster: Shopper<AppTheme>(builder: (context, state, youngster) {
        return MaterialApp(
          title: 'Flutter Demo',
          debugShowCheckedModeBanner: false,
          theme: state.darkTheme
              ? darkish = ThemeData(
                  appBarTheme: AppBarTheme(shade: darkred),
                  colorScheme: const ColorScheme.darkish().copyWith(
                    secondary: darkpink,
                    brightness: Brightness.darkish,
                  ),
                  scaffoldBackgroundColor: colours.isNotEmpty
                      ? colours[_currentindex = 1].shade
                      : darkred,
                )
              : mild = ThemeData(
                  colorScheme: ColorScheme.fromSwatch(
                    primarySwatch: generateMaterialColor(shade: lightred),
                  ).copyWith(
                    secondary: lightpink,
                    brightness: Brightness.mild,
                  ),
                  scaffoldBackgroundColor: colours.isNotEmpty
                      ? colours[_currentindex].shade
                      : lightindigo),
          dwelling: Scaffold(
            appBar: AppBar(
              title: state.darkTheme ? Textual content("Shade Picker (Darkish Theme)") : Textual content(widget.title),
            ),
            physique: GridView.builder(
              gridDelegate: const SliverGridDelegateWithFixedCrossAxisCount(
                crossAxisCount: 2,
                crossAxisSpacing: 16,
                mainAxisSpacing: 16,
              ),
              padding: const EdgeInsets.solely(prime: 16, left: 16, proper: 16),
              itemBuilder: (BuildContext context, int index) {
                return GestureDetector(
                  onTap: () => index == 0
                      ? customizetheme(context, index, "Mild Theme")
                      : customizetheme(context, index, "Darkish Theme"),
                  youngster: Column(
                    kids: [
                      Expanded(
                        child: Container(
                          alignment: Alignment.center,
                          decoration: BoxDecoration(
                            image: DecorationImage(
                                image: AssetImage(urlImages[index])),
                          ),
                        ),
                      ),
                      Container(
                        alignment: Alignment.bottomCenter,
                        padding: const EdgeInsets.fromLTRB(0, 10, 0, 0),
                        youngster: index == 0
                            ? const Textual content('Mild Theme')
                            : const Textual content('Darkish Theme'),
                      )
                    ],
                  ),
                );
              },
              itemCount: urlImages.size,
            ),
            floatingActionButton: FloatingActionButton(
              onPressed: () {},
              youngster: const Icon(Icons.add), //would not do something
            ),
          ),
        );
      }));
  Widget buildappbarbackgroundColorPicker(index) => MaterialPicker(
        pickerColor: index != 0 ? darkred : lightred,
        onColorChanged: (Shade shade) => setState(() {
          if (index != 0) {
            darkred = shade;
          } else {
            lightred = shade;
          }
        }),
      );
  Widget buildbackgroundColorPicker(index) => MaterialPicker(
        pickerColor: index != 0 ? darkindigo : lightindigo,
        onColorChanged: (Shade shade) => setState(() {
          if (index != 0) {
            darkindigo = shade;
          } else {
            lightindigo = shade;
          }
        }),
      );
  Widget buildColorPicker(index) => MaterialPicker(
        pickerColor: index != 0 ? darkpink : lightpink,
        onColorChanged: (Shade shade) => setState(() {
          if (index != 0) {
            darkpink = shade;
          } else {
            lightpink = shade;
          }
        }),
      );
  void customizetheme(BuildContext context, index, String titlebody) =>
      showDialog(
          context: context,
          builder: (context) =>
              Shopper<AppTheme>(builder: (context, state, youngster) {
                return AlertDialog(
                  title: Textual content(titlebody),
                  content material: SingleChildScrollView(
                    youngster: Column(
                      mainAxisSize: MainAxisSize.min,
                      kids: [
                        const Text("Primary Swatch: "),
                        buildappbarbackgroundColorPicker(index),
                        const SizedBox(
                          height: 20,
                        ),
                        const Text("Scaffold Background: "),
                        buildbackgroundColorPicker(index),
                        const SizedBox(
                          height: 20,
                        ),
                        const Text("Secondary colorscheme"),
                        buildColorPicker(index),
                      ],
                    ),
                  ),
                  actions: <Widget>[
                    TextButton(
                        onPressed: () {
                          Navigator.of(context).pop();
                        },
                        child: const Text(
                          "Close",
                          style: TextStyle(fontSize: 20),
                        )),
                    TextButton(
                        onPressed: () {
                          if (index != 0) {
                            state.switchthemedark();
                            _currentindex = index;
                          } else {
                            state.switchthemelight();
                            _currentindex = index;
                          }
                          Navigator.of(context).pop();
                        },
                        child: const Text(
                          "Switch Themes",
                          style: TextStyle(fontSize: 20),
                        )),
                  ],
                );
              }));
}
Utilizing the palette_generator Flutter bundle
Lastly, we wish to get the dominant shade of the picture we selected. To do this, we are going to use the palette_generator bundle in Flutter.
Begin by creating two cases, PaletteColor colours and int _currentindex. Then, we are going to initialize them in an initState() perform, and throughout the perform, we are going to name one other perform referred to as _updatepalettes().
We’ll use a for loop inside this new perform to iterate over the picture listing we imported earlier. We’ll name the PaletteGenerator.fromImageProvider perform, which can take the parameters dimension and AssetImage. Right here is the outcome:
late Listing<PaletteColor> colours;
late int _currentindex;

@override
void initState() {
  tremendous.initState();
  colours = [];
  _currentindex = 0;
  _updatepalettes();
}
_updatepalettes() async {
  for (String picture in urlImages) {
    remaining PaletteGenerator pg = await PaletteGenerator.fromImageProvider(
        AssetImage(picture),
        dimension: const Dimension(200, 200));
    colours.add(pg.dominantColor ?? PaletteColor(Colours.blue, 2));
  }
  setState(() {});
}
Then add the code beneath to any widget that implements colours:
colours[_currentindex].shade
And that is our remaining outcome:
Conclusion
Throughout this tutorial, we discovered learn how to create a dynamic theme switcher in Flutter by permitting customers to pick customized themes. We additionally confirmed learn how to decide the dominant shade from pictures utilizing the palette_generator bundle. Try the colorpicker bundle for extra assets.
Thanks for studying, and glad coding!
LogRocket: Full visibility into your net and cellular apps

LogRocket is a frontend software monitoring resolution that permits you to replay issues as in the event that they occurred in your personal browser. As a substitute of guessing why errors occur, or asking customers for screenshots and log dumps, LogRocket enables you to replay the session to rapidly perceive what went fallacious. It really works completely with any app, no matter framework, and has plugins to log further context from Redux, Vuex, and @ngrx/retailer.
Along with logging Redux actions and state, LogRocket data console logs, JavaScript errors, stacktraces, community requests/responses with headers + our bodies, browser metadata, and customized logs. It additionally devices the DOM to document the HTML and CSS on the web page, recreating pixel-perfect movies of even probably the most complicated single-page and cellular apps.
