Do you need to create a consumer portal in WordPress?
A consumer portal is a devoted space the place shoppers can login and entry unique paperwork, information, assist, and extra.
On this article, we’ll present you the right way to simply create a consumer portal in WordPress.
Why Create a Shopper Portal in WordPress?
A consumer portal makes it simpler to handle consumer sources on-line. This could scale back the variety of assist requests you obtain, enable shoppers to assist themselves, and supply them with a greater consumer expertise.
For instance, should you run a pictures web site you then may create a dashboard the place shoppers can add and obtain pictures.
Equally, should you run a graphic design or internet design enterprise, you then may create a buyer portal the place shoppers can obtain all of the sources you’ve designed for them.
And not using a consumer portal, the client would want to contact you straight and watch for a response. That is time-consuming and irritating for each you and the consumer.
With that being stated, let’s see the right way to scale back your workload and preserve your prospects blissful by making a consumer portal in WordPress.
The right way to Create a Shopper Portal in WordPress
Every enterprise will want one thing totally different from their consumer portal, so that you want an answer that’s versatile, customizable, and works nicely with different plugins.
For this information, we will likely be utilizing MemberPress.
It’s the finest WordPress membership plugin available on the market and lets you simply create a members-only part to your shoppers. MemberPress additionally has highly effective show guidelines so that you create unique posts, pages, and different content material to your shoppers.
First, it’s essential set up and activate the MemberPress plugin. For extra particulars, see our step-by-step information on the right way to set up a WordPress plugin.
Upon activation, go head and go to MemberPress » Settings and enter your license key.
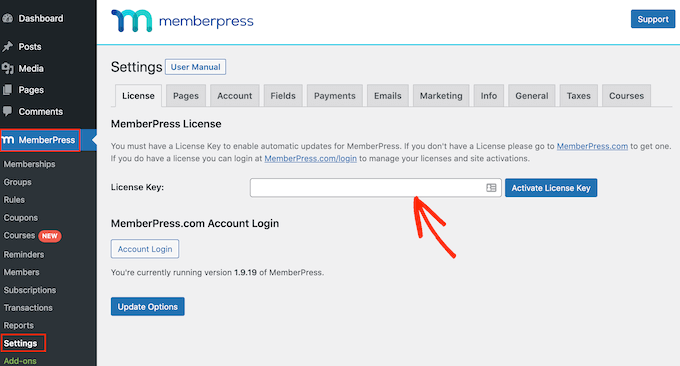
You’ll discover this data below your account on the MemberPress web site. It’s additionally within the e mail you bought if you bought MemberPress.
After getting into the important thing, click on on ‘Activate License Key.’
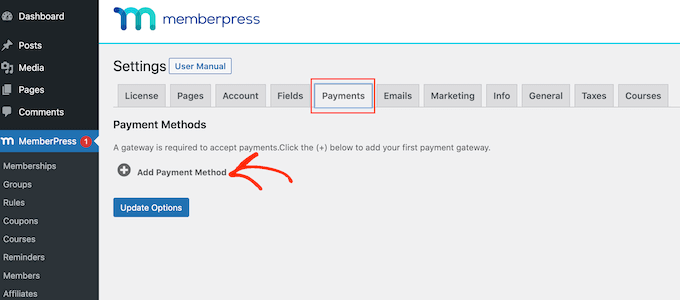
Subsequent, it’s essential add at the least one fee gateway so you may simply settle for bank card funds in your consumer portal.
MemberPress helps PayPal and Stripe. If you are going to buy a MemberPress Professional plan, then it’s also possible to settle for funds utilizing Authorize.internet.
Be aware: For those who plan so as to add current shoppers to your portal with out charging a price, then you may skip this step.
So as to add a fee technique, change to the ‘Funds’ tab and click on on ‘Add Fee Technique.’
Now you can selected a fee technique from the ‘Gateway’ dropdown.
MemberPress will then present all of the settings it’s essential configure earlier than utilizing this fee gateway. For instance, within the following picture we’re including PayPal fee to WordPress.
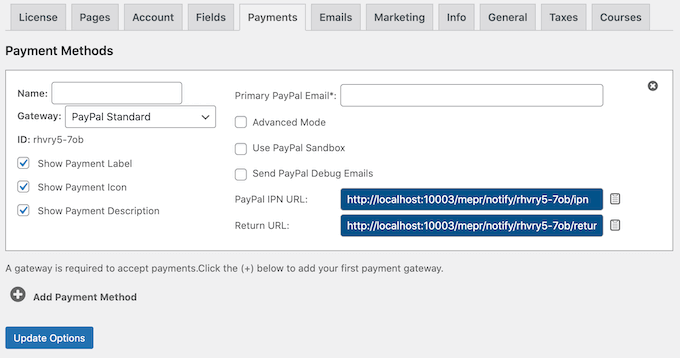
After selecting a gateway, you’ll have to enter some data to configure your account. When you’ve performed that, click on on the ‘Replace Choices’ button to save lots of your modifications.
You’ll be able to add a number of fee gateways to your company portal just by following the identical course of described above.
After including a number of fee strategies, you’re able to create a membership plan.
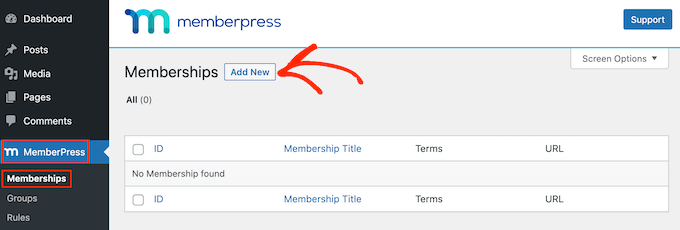
To get began, merely go to the MemberPress » Memberships web page and click on on the Add New button.
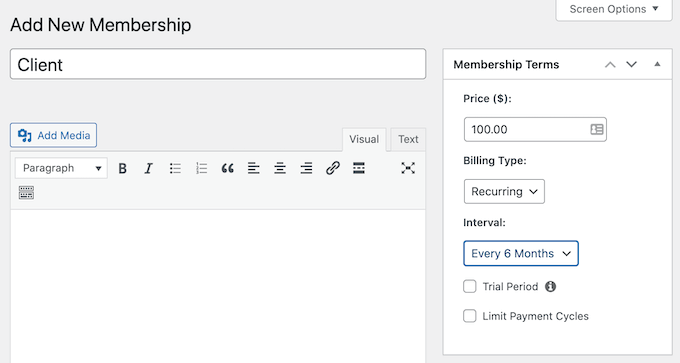
On the following display, you may kind a title for the membership degree and set the worth. For those who’re planning so as to add shoppers manually, then you may depart the ‘Value’ discipline at ‘0.’
Nonetheless, if you wish to earn a living by promoting subscriptions to your consumer portal, then you may kind in a value.

Subsequent, use the ‘Billing Sort’ dropdown to create a billing cycle, for instance you may cost shoppers a one-time price for lifetime entry or arrange a recurring month-to-month subscription.
Within the following picture, we’re charging shoppers $100 each 6 months.
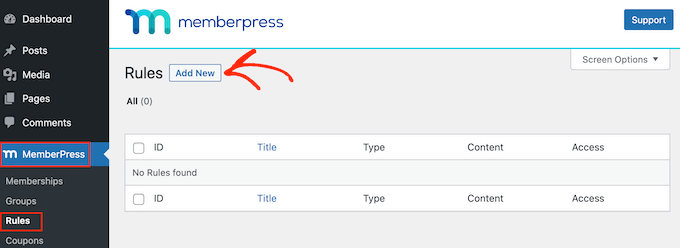
Subsequent, it’s essential create entry guidelines. This lets you create an unique, client-only space of your WordPress web site.
Merely go to the MemberPress » Guidelines web page after which click on on the ‘Add New’ button.
On the following display, you first want to decide on what content material you need to limit.
The ‘Protected Content material’ part presents totally different choices. To begin, you may limit entry to particular pages and posts, though this can be time-consuming when you have plenty of content material.
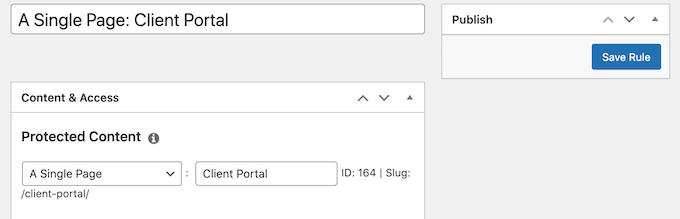
Another choice is to limit entry to all baby pages of a selected guardian web page. For instance, you may create a ‘Shopper Portal’ guardian web page after which limit entry to all its baby pages. This could prevent plenty of effort and time.
Equally, you may limit entry to all of the posts which have a selected class or tag.

Beneath that, you may specify who can entry this content material by opening the ‘Entry Situations’ dropdown and selecting ‘Membership.’
Within the second dropdown menu, choose the membership degree you created earlier.
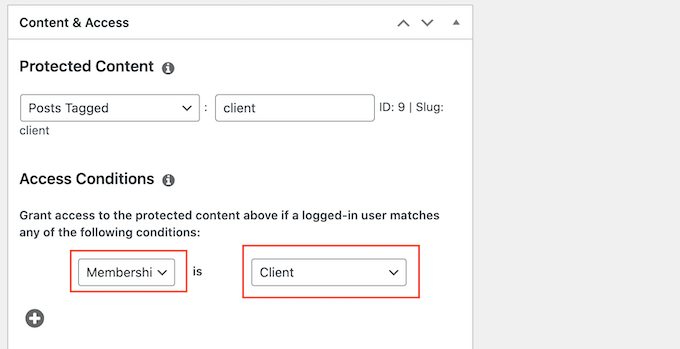
While you’re pleased with how the entry rule is about up, click on on the Save Rule button to retailer your settings.
You’ll be able to create extra content material restriction guidelines by following the identical course of described above.
Making a Shopper Account Web page in MemberPress
Subsequent, you’ll need to create an Account web page, which is the web page that shoppers will see then they log into your portal.
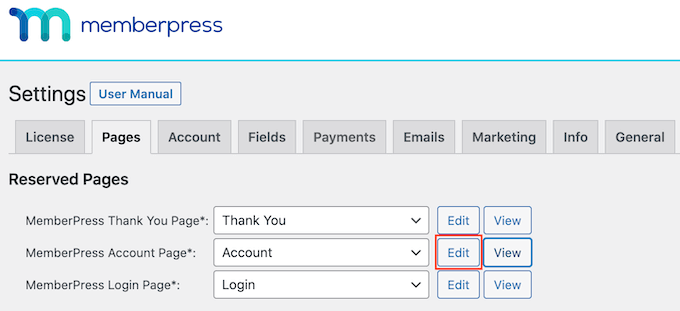
First, go to MemberPress » Settings and click on on the ‘Pages’ tab.
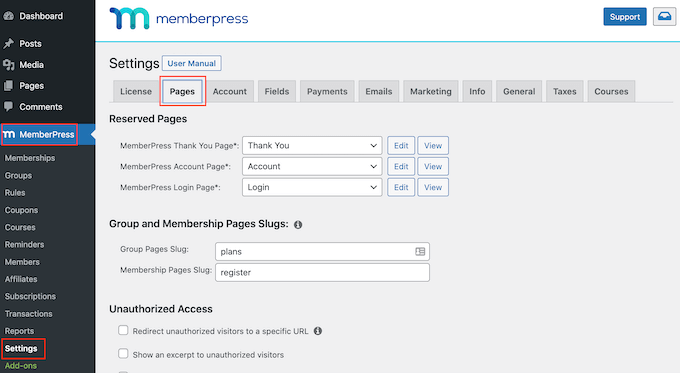
MemberPress will create an Account web page mechanically.
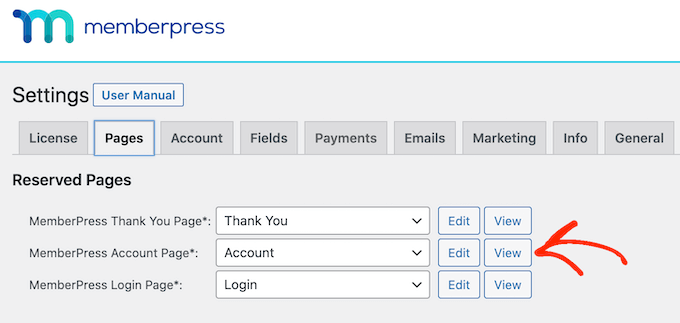
To preview the web page, click on on the ‘View’ button subsequent to ‘MemberPress Account Web page.’
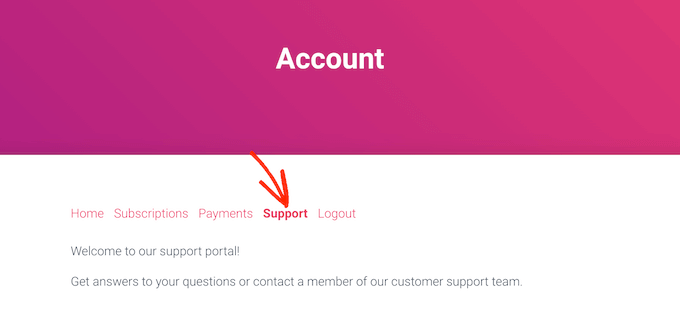
The default Account web page has a number of totally different tabs the place shoppers can edit their profile, verify their subscriptions, and sign off of their account.
The Account web page can be designed to completely combine along with your WordPress theme, as you may see within the following picture.
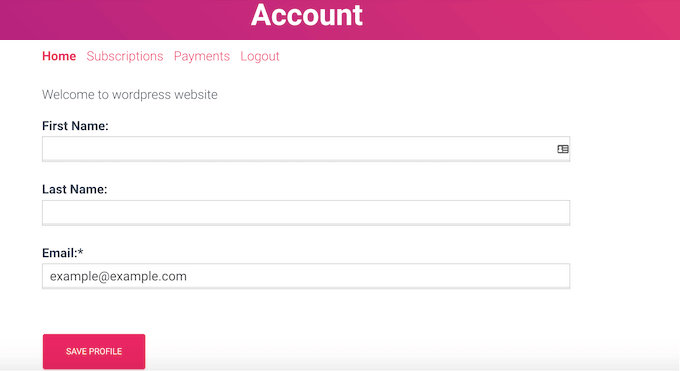
The default Account web page ought to be an excellent match for many consumer portals. Nonetheless you may edit the web page similar to you’ll another WordPress web page.
To make some modifications, click on on the ‘Edit’ button.
This launches the usual WordPress web page editor, so you are able to do forward and make your modifications. Simply remember that any content material you add right here will likely be seen to everybody and never simply the consumer.
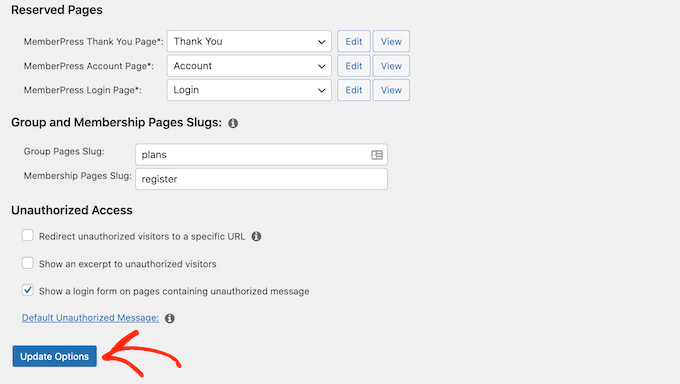
While you’re pleased with how the account web page appears, simply scroll to the underside of the display and click on on ‘Replace Choices.’
MemberPress will now go forward and create the Account web page.
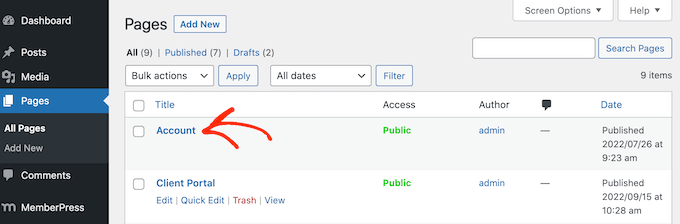
You’ll be able to see this web page dwell in your web site by including /account/ to the top of your area, for instance www.instance.com/account/.
You too can discover this web page in your WordPress dashboard by going to Pages » All Pages.
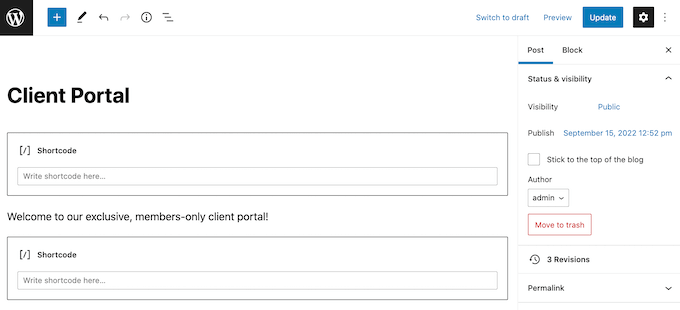
Though MemberPress creates this web page mechanically, it’s also possible to add the Account content material to any web page or put up utilizing the [mepr-account-form] shortcode.
For extra particulars on the right way to place the shortcode, please see our information on the right way to add a shortcode in WordPress.
Customizing Shopper Account Web page in MemberPress
Content material safety guidelines are one approach to create unique content material to your shoppers. Nonetheless, generally chances are you’ll need to conceal particular content material inside a web page or put up, such because the index to your members-only bbPress discussion board or some bonus documentation you created utilizing a WordPress data base plugin.
On this case, you may wrap the content material in shortcode. MemberPress will then conceal or present the content material contained in the shortcode, based mostly on whether or not the particular person is logged into your consumer portal.
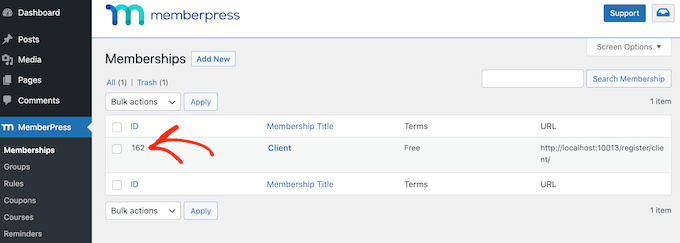
To begin, you’ll have to know the ID for the consumer membership degree. To get this, merely go to MemberPress » Memberships and have a look at the worth within the ‘ID’ column.
Upon getting the ID, go the web page or put up the place you need to conceal some content material.
You’ll be able to then create a shortcode block above the content material and a block under the content material.
Within the prime block, add the next: [mepr-active membership='162']. Ensure you substitute the quantity with the consumer membership ID.
Subsequent, add the next within the backside block: [/mepr-active].
Then, merely replace or publish the web page and go to your web site in incognito mode, or when logged out of your WordPress account.
MemberPress ought to conceal the content material inside your shortcode blocks. To see the content material, merely log into any consumer membership account.
Including Tabs to The Accounts Web page in MemberPress
By default, the Account web page has Residence, Subscriptions, Funds, and Logout tabs.
Chances are you’ll need to add extra tabs to assist members discover content material in your consumer portal. For instance, you possibly can create tabs for customer support software program similar to HelpDesk.com or HelpScout, to assist shoppers contact your assist group.
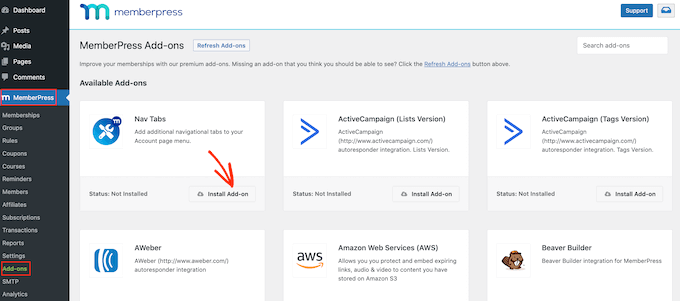
The best approach so as to add extra tabs to the Account web page is by utilizing the MemberPress Nav Tabs add-on.
Merely go to MemberPress » Add-ons after which click on on the ‘Set up Add-on’ button subsequent to ‘Nav Tabs.’
After that, go to MemberPress » Settings.
Right here, click on on the ‘Account’ tab.
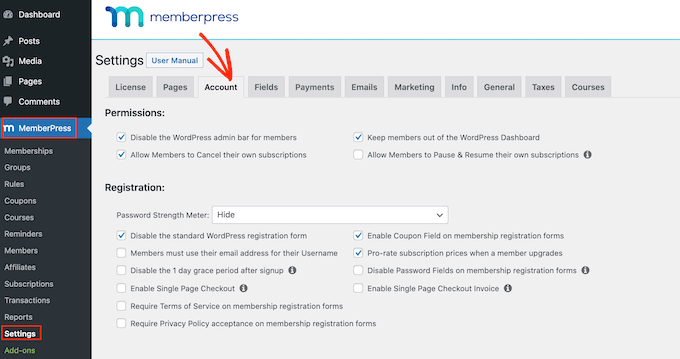
Subsequent, simply scroll to ‘Account Nav Tabs Settings’ and verify the ‘Allow Account Nav Tabs’ field.
When you’ve performed that, you’ll see a brand new editor the place you may choose both ‘Content material’ or ‘URL.’
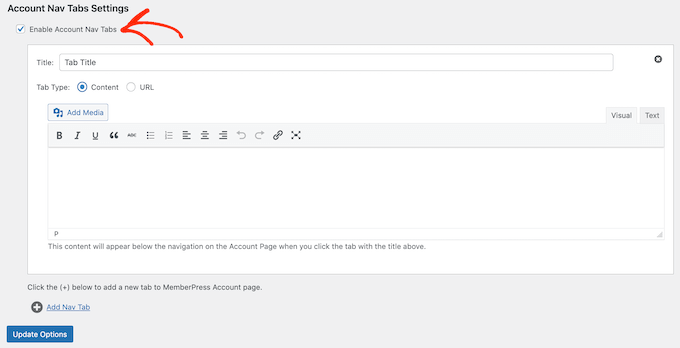
For those who select ‘Content material,’ then you may add pictures, textual content, audio, shortcodes, and different content material.
This content material will seem inside the brand new tab, as you may see within the following picture.
The opposite possibility is ‘URL,’ which can take the consumer to a special web page, just like clicking an merchandise within the navigation menu.
For those who do choose ‘URL,’ then you may kind in a title and the URL that the tab will hyperlink to. By default, the hyperlink will open in the identical tab however you may open it in a brand new tab by checking the ‘Open URL…’ field.
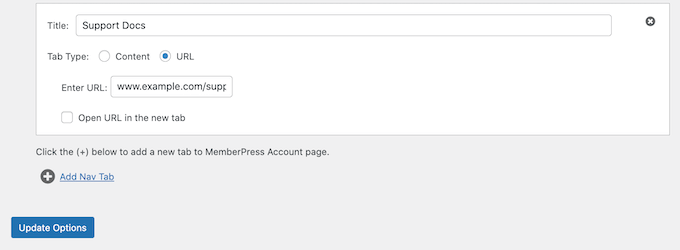
So as to add extra tabs to the Account web page, merely click on on ‘Add New Tab’ and repeat the method described above.
After including all of your customized tabs, click on on the ‘Replace Choices’ button to save lots of your modifications.
Including Customized Content material for an Particular person Shopper
MemberPress additionally lets you present a special message to every consumer of their Account web page. This message is included within the ‘Residence’ tab.

By creating a private greeting, you may make your shoppers really feel extra appreciated and valued. You may additionally embody hyperlinks to sources that the consumer could discover useful, such because the documentation for a brand new product they’ve simply purchased.
So as to add a customized message, go to MemberPress » Members. You’ll be able to then hover over any consumer and click on on the ‘Edit’ hyperlink when it seems.
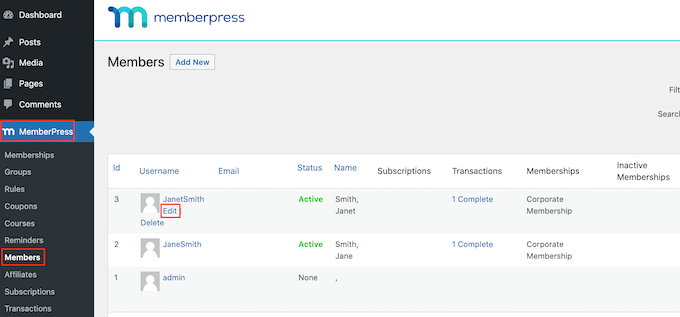
After that, scroll to the ‘Customized MemberPress Account Message’ part and add the content material that you simply need to present to this explicit consumer.
This space works just like the common WordPress put up editor so you may add pictures, shortcodes, picture galleries, video, audio information, and another sources that the consumer could discipline helpful.
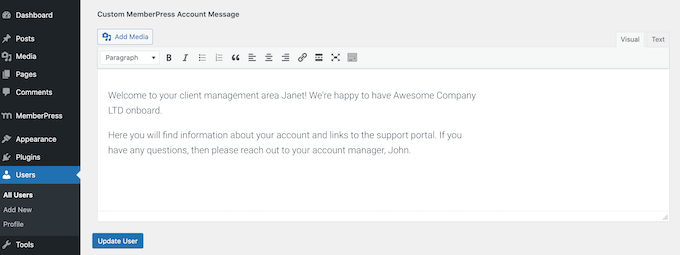
Don’t overlook to click on on the ‘Replace Person’ button to save lots of your modifications.
Including a Hyperlink to Shopper Space utilizing MemberPress
Subsequent, it’s essential make it straightforward for shoppers to entry the portal by including it to your menu.
Merely go to Look » Menus and click on to broaden the ‘Pages’ part, if it isn’t expanded already.
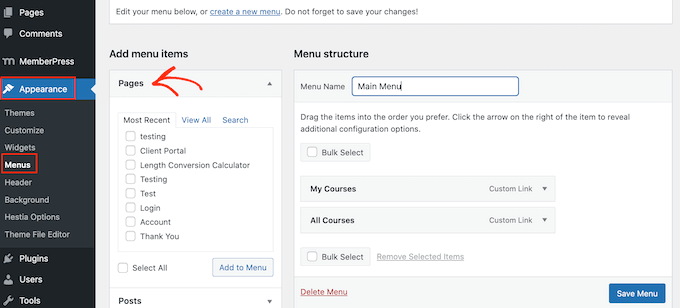
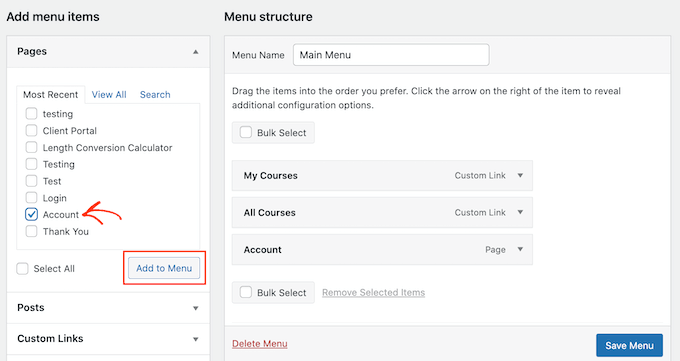
You’ll be able to then verify the field subsequent to the ‘Account’ web page and click on on ‘Add to Menu.’
When you’ve performed that, you may change the place the Account web page seems within the menu utilizing drag and drop.
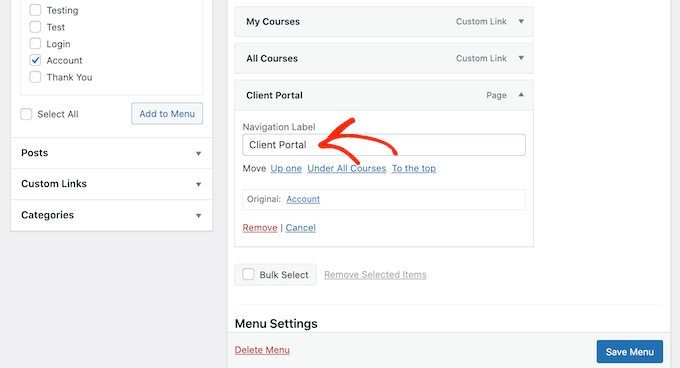
You too can change the label that’s used for the ‘Account’ web page within the menu. The default is ‘Account’ however chances are you’ll need to use ‘Shopper Portal’ or related.
To do that, click on to broaden the ‘Account’ part after which kind a brand new title into the ‘Navigation Label’ discipline.
Don’t overlook to click on on ‘Save Menu’ to retailer your settings.
Now should you go to your web site, you’ll see a hyperlink to the Account web page in your menu.

Extending Shopper Portal with MemberPress
By this level, you’ve created a consumer portal with unique, members-only content material and even a customized welcome message.
That’s a fantastic begin, however let’s have a look at another options that you may add to the consumer portal utilizing MemberPress.
1. File Downloads
Need to enable shoppers to obtain information out of your web site? This is likely to be something from copies of your invoices, to reviews and research, or the inventory pictures you’ve created for the consumer.
MemberPress comes with a File Downloads add-on that lets you provide downloadable content material to your shoppers. After creating the obtain, you may add it to any web page or put up utilizing a shortcode.
MemberPress will then present a hyperlink that guests can use to obtain the file.
You need to use content material safety to make the file unique to your shoppers, and even create totally different downloadable information for every consumer.
For step-by-step particulars, please see our information on the right way to handle file downloads in WordPress.
2. Coaching Programs
Chances are you’ll need to provide programs, workshops, and different coaching supplies to your shoppers.
The excellent news is that MemberPress can be the finest WordPress LMS plugin available on the market.
The MemberPress course builder is constructed on prime of the WordPress block editor. This implies you may add classes, matters, classes, embed movies, pictures, and extra utilizing the WordPress instruments that you simply’re already accustomed to.
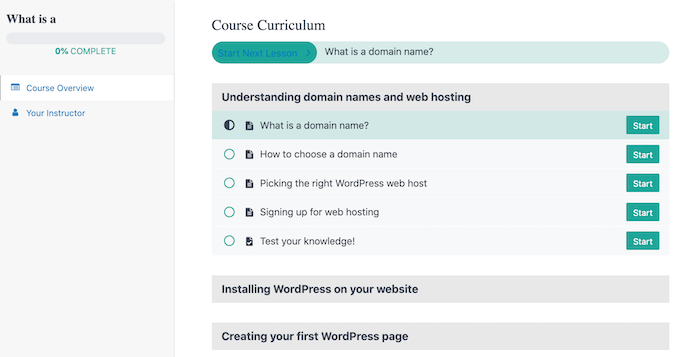
By publishing programs to the consumer portal, you may add extra worth to your prospects and encourage them to resume their membership.
For extra particulars, see our tutorial on the right way to simply create on-line programs in WordPress.
3. Add Types to Shoppers Space
Irrespective of whether or not it’s a contact kind, suggestions kind, buyer testimonial kind, or a buyer survey, kinds are an necessary approach to talk along with your shoppers.
They can assist you get suggestions and enhance the member expertise, whereas additionally giving shoppers a approach to ask questions and get assist.
MemberPress integrates completely with WPForms, which is the finest WordPress kind builder plugin available on the market.
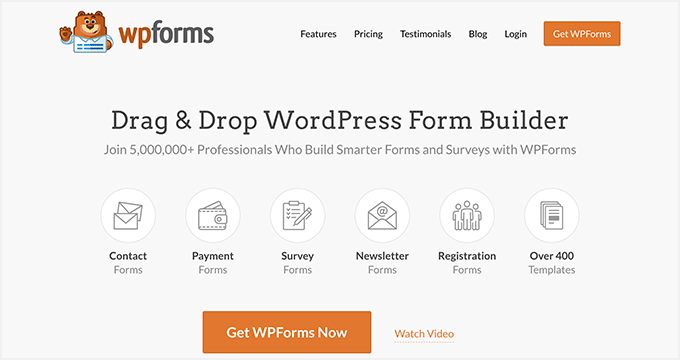
Typically, shoppers could have to add information to your portal, similar to a contract that it’s essential signal or pictures that you simply plan to publish to your consumer portfolio.
You’ll be able to simply create file add kinds utilizing WPForms. You’ll be able to then embed the shape on the Account web page, or any members-only web page in your web site.
4. Promoting Extra Merchandise and Companies
As a enterprise proprietor, chances are you’ll need to promote different services and products to your shoppers.
MemberPress works with lots of the e mail advertising providers that you could be already be utilizing to maintain your viewers engaged and promote your different services and products. This consists of SendinBlue, Fixed Contact, Drip, and 1000+ others.
You too can add an internet retailer to your portal utilizing WooCommerce and promote different merchandise to your prospects.
We hope this text helped you discover ways to create a consumer portal in WordPress. You might also need to see our comparability of the finest enterprise cellphone providers, and our information on the right way to create an e mail publication.
For those who favored this text, then please subscribe to our YouTube Channel for WordPress video tutorials. You too can discover us on Twitter and Fb.
The put up The right way to Create a Shopper Portal in WordPress first appeared on WPBeginner.
