It’s regular in your web site to bear extra work as soon as it’s been constructed. Maybe you’re planning to revamp it, add extra performance, or change to a brand new theme. Nonetheless, this could imply that your guests are greeted with a glitchy website.
Happily, you’ll be able to put your web site into upkeep mode. This fashion, you’ll be able to work on it in non-public whereas preserving your Person Expertise (UX).
On this publish, we’ll take a better have a look at upkeep mode and focus on while you would possibly use it. Then, we’ll present you allow it in WordPress. Let’s get began!
When to Allow Upkeep Mode in WordPress
Upkeep mode lets you current a message that informs guests that your web site is at present unavailable. Consequently, customers received’t be capable to view or interact along with your content material. You may as well allow them to know while you’ll have your web site up and operating once more.
With out placing your website into upkeep mode, guests can encounter damaged hyperlinks, redirects, and 404 errors. This will make you look unprofessional.
By placing your website into upkeep mode, you’ll be able to create a optimistic popularity and protect your UX. Listed here are a couple of eventualities when it might make sense to make use of it:
- Once you’re switching to a brand new theme or redesigning your website
- Once you’re fixing WordPress errors and bugs
- Once you’re testing out new plugins
You may as well modify your upkeep mode web page to generate leads. For example, you’ll be able to redirect visitors to your social media accounts or embrace your contact particulars.
The right way to Allow Upkeep Mode in WordPress (3 Steps)
The simplest approach to allow upkeep mode in WordPress is to make use of a plugin. On this tutorial, we’re going to make use of WP Upkeep Mode & Coming Quickly. With over 900,000 installs, this can be a trusted and dependable instrument. Plus, it’s extremely customizable, enabling you so as to add countdown timers and get in touch with kinds to your upkeep web page.
Step 1: Set up and Configure the Plugin
You may set up the plugin immediately out of your WordPress dashboard. As soon as activated in your website, you’ll be able to configure the plugin by navigating to Settings > WP Upkeep Mode.
Then, allow upkeep mode by checking the Activated field:
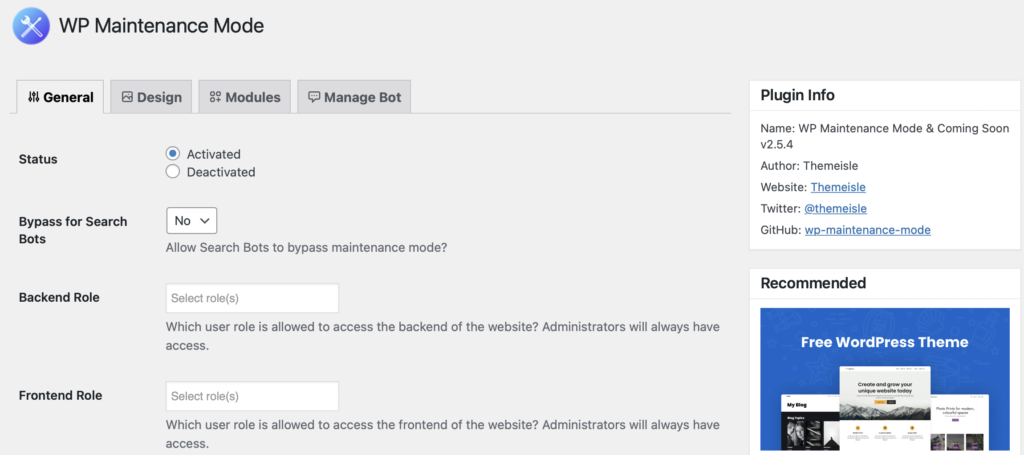
You may as well select whether or not you’d like search engines like google to show your web site whereas it’s in upkeep mode. Merely use the Bypass for Search Bots dropdown menu to pick your choice.
Subsequent, you’ll be able to select which consumer roles have entry to your back and front finish whereas your website’s in upkeep mode. By default, that is set to Administrator.
When you’re proud of the settings, click on on Save adjustments.
Step 2: Create Your Upkeep Mode Web page
At this level, you could have enabled upkeep mode in your website. Nonetheless, you’ll be able to customise it to encourage customers to take motion.
To get began, head to the Design tab of the plugin’s settings. Then, use the dropdown field to pick the web page you wish to use for upkeep mode and click on on Edit:
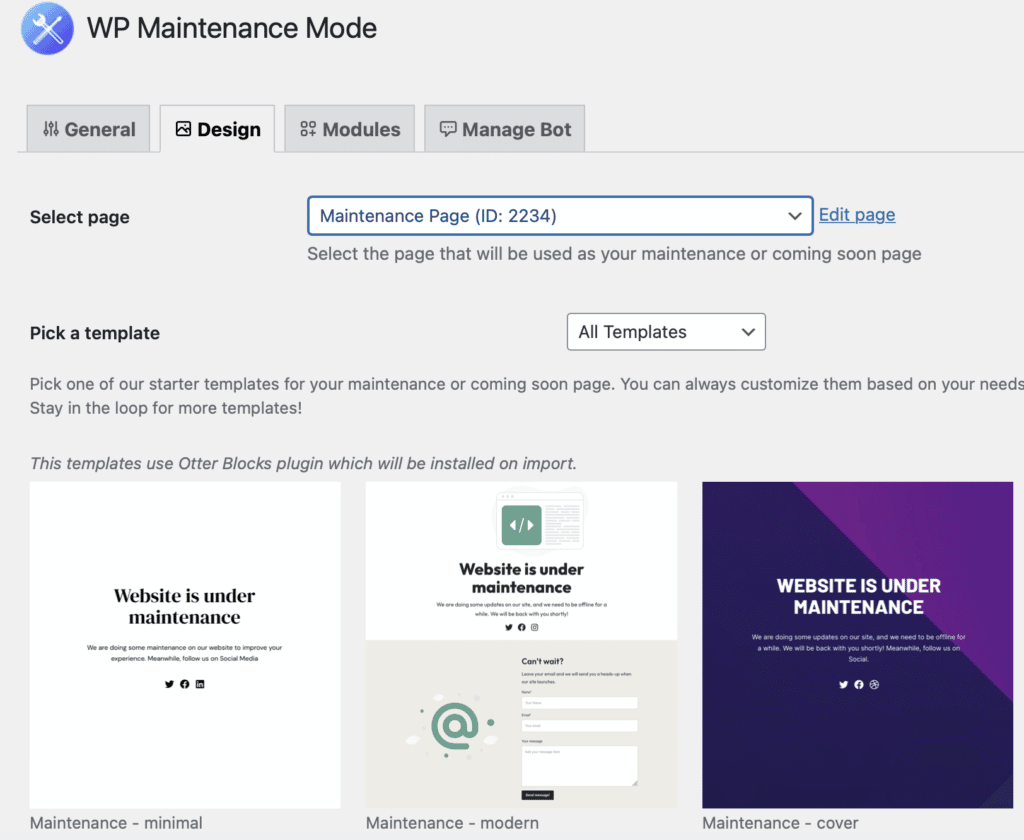
You may as well use a pre-designed template by Otter Blocks. For those who select considered one of these templates, the Otter Blocks plugin will mechanically be put in. The template will then be imported to a brand new draft web page the place you’ll be able to customise the structure and allow it from the plugin’s settings.
When you entry your upkeep mode web page, you can provide it a charming title and add the content material that you simply wish to show utilizing blocks:

Moreover, you can also make your web page look extra interesting by making use of customized colours to fonts and backgrounds. When you’re comfortable along with your web page design, save your adjustments.
Step 3: Make Your Upkeep Mode Discover Extra Partaking
You may go one step additional and add parts to your web page to spice up your UX. For example, a countdown timer can maintain guests within the know.
Discover the Countdown module, then choose the date when your web site will probably be able to launch and hit Reset:

You may alter how your timer shows and apply customized colours within the Block settings. You can give guests the choice to be notified when your web site is out there. To do that, you’ll must embed an opt-in type, or create your personal headings and textual content fields:

In fact, you’ll must sync this type along with your e mail advertising and marketing platform to ship your messages. For those who’re gathering consumer information in your web page, it’s vital to verify it’s GDPR-compliant. It’s additionally a good suggestion so as to add a hyperlink to your privateness coverage web page.
Moreover, you’ll be able to add hyperlinks to direct customers to your social profiles. All you have to do is add your distinctive URLs to the suitable icon:
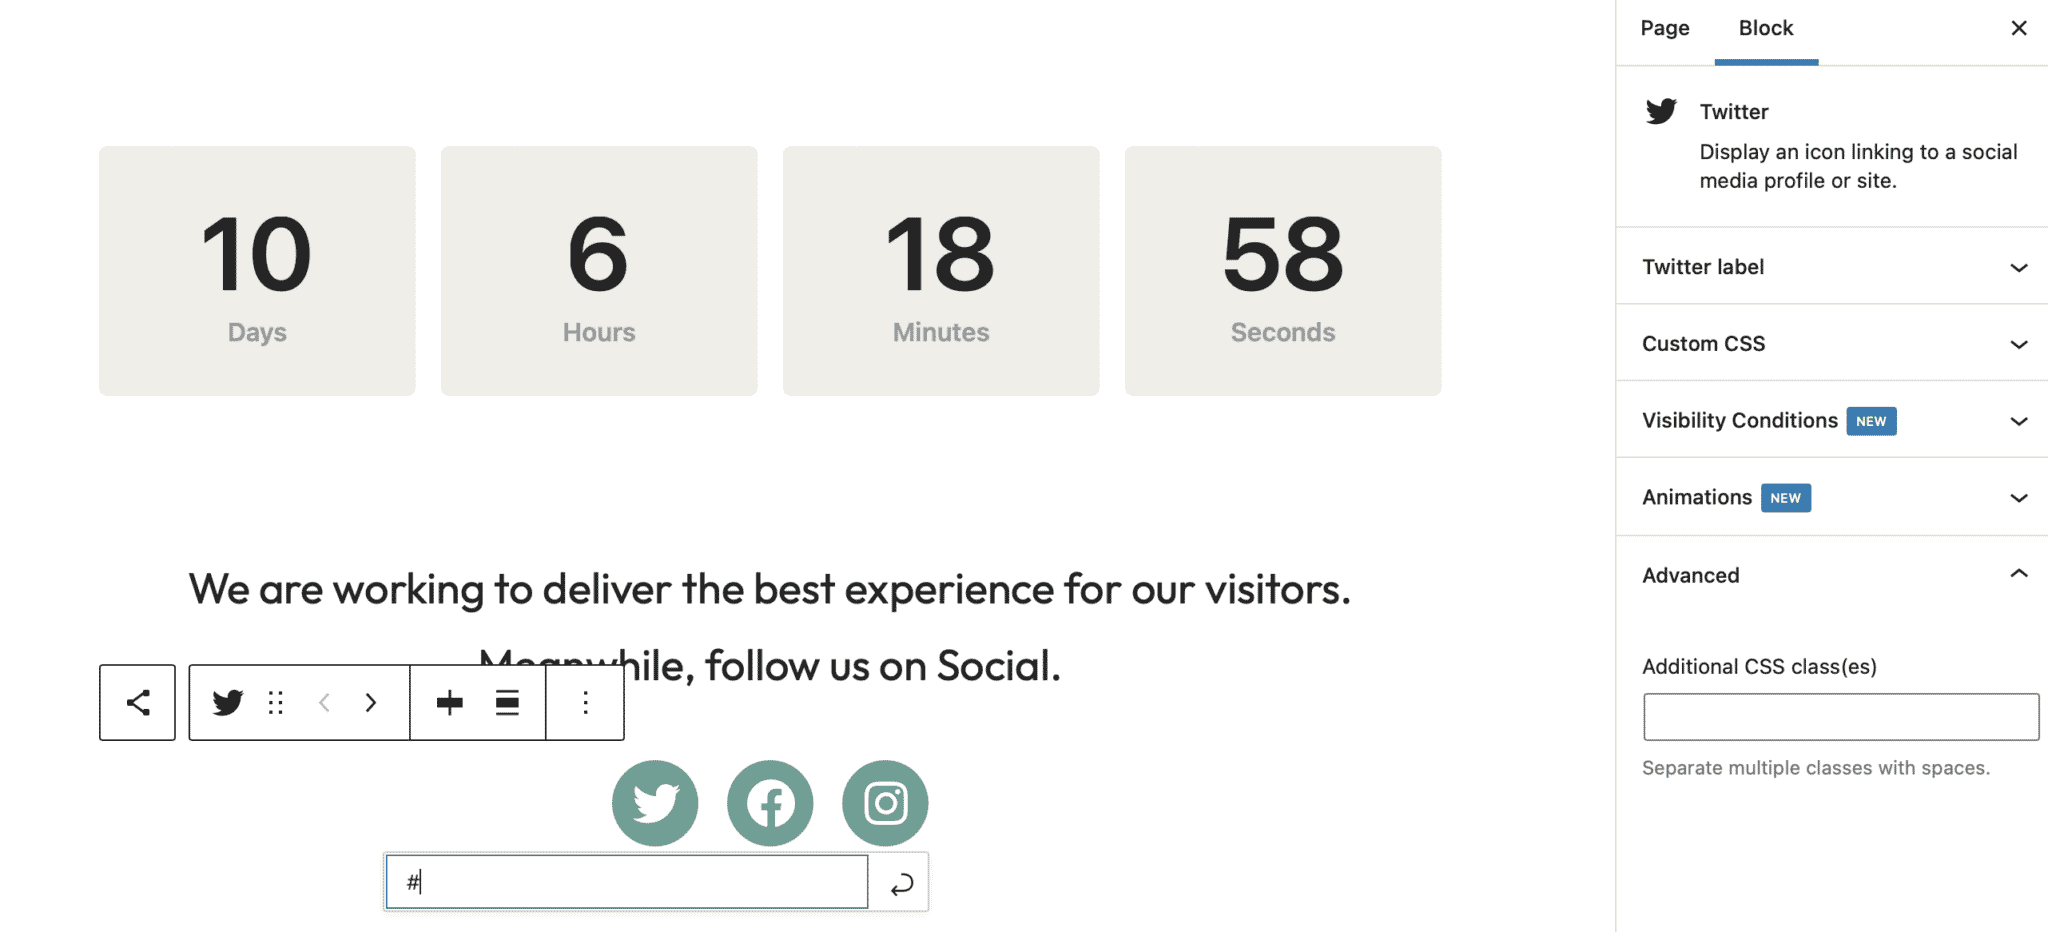
Then, you’ll be able to add hyperlink labels within the Block settings to make your website extra accessible.
Step 4: Set Up Your Chatbot
Lastly, you’ll be able to arrange a pre-programmed stay chatbot to work together along with your guests. This will help you drive conversions and develop your mailing record earlier than your website is even lively.
To allow this function, go to Handle Bot. Then, set the standing to Activated:

Right here, you’ll be able to select a bot title and add an avatar so as to add a contact of character to your bot. For those who scroll additional down, you’ll be able to customise the messages that your guests will see.
For instance, you’ll be able to ask them whether or not they wish to be notified when your website is prepared. If they are saying sure, you’ll be able to ask them to offer their e mail deal with:
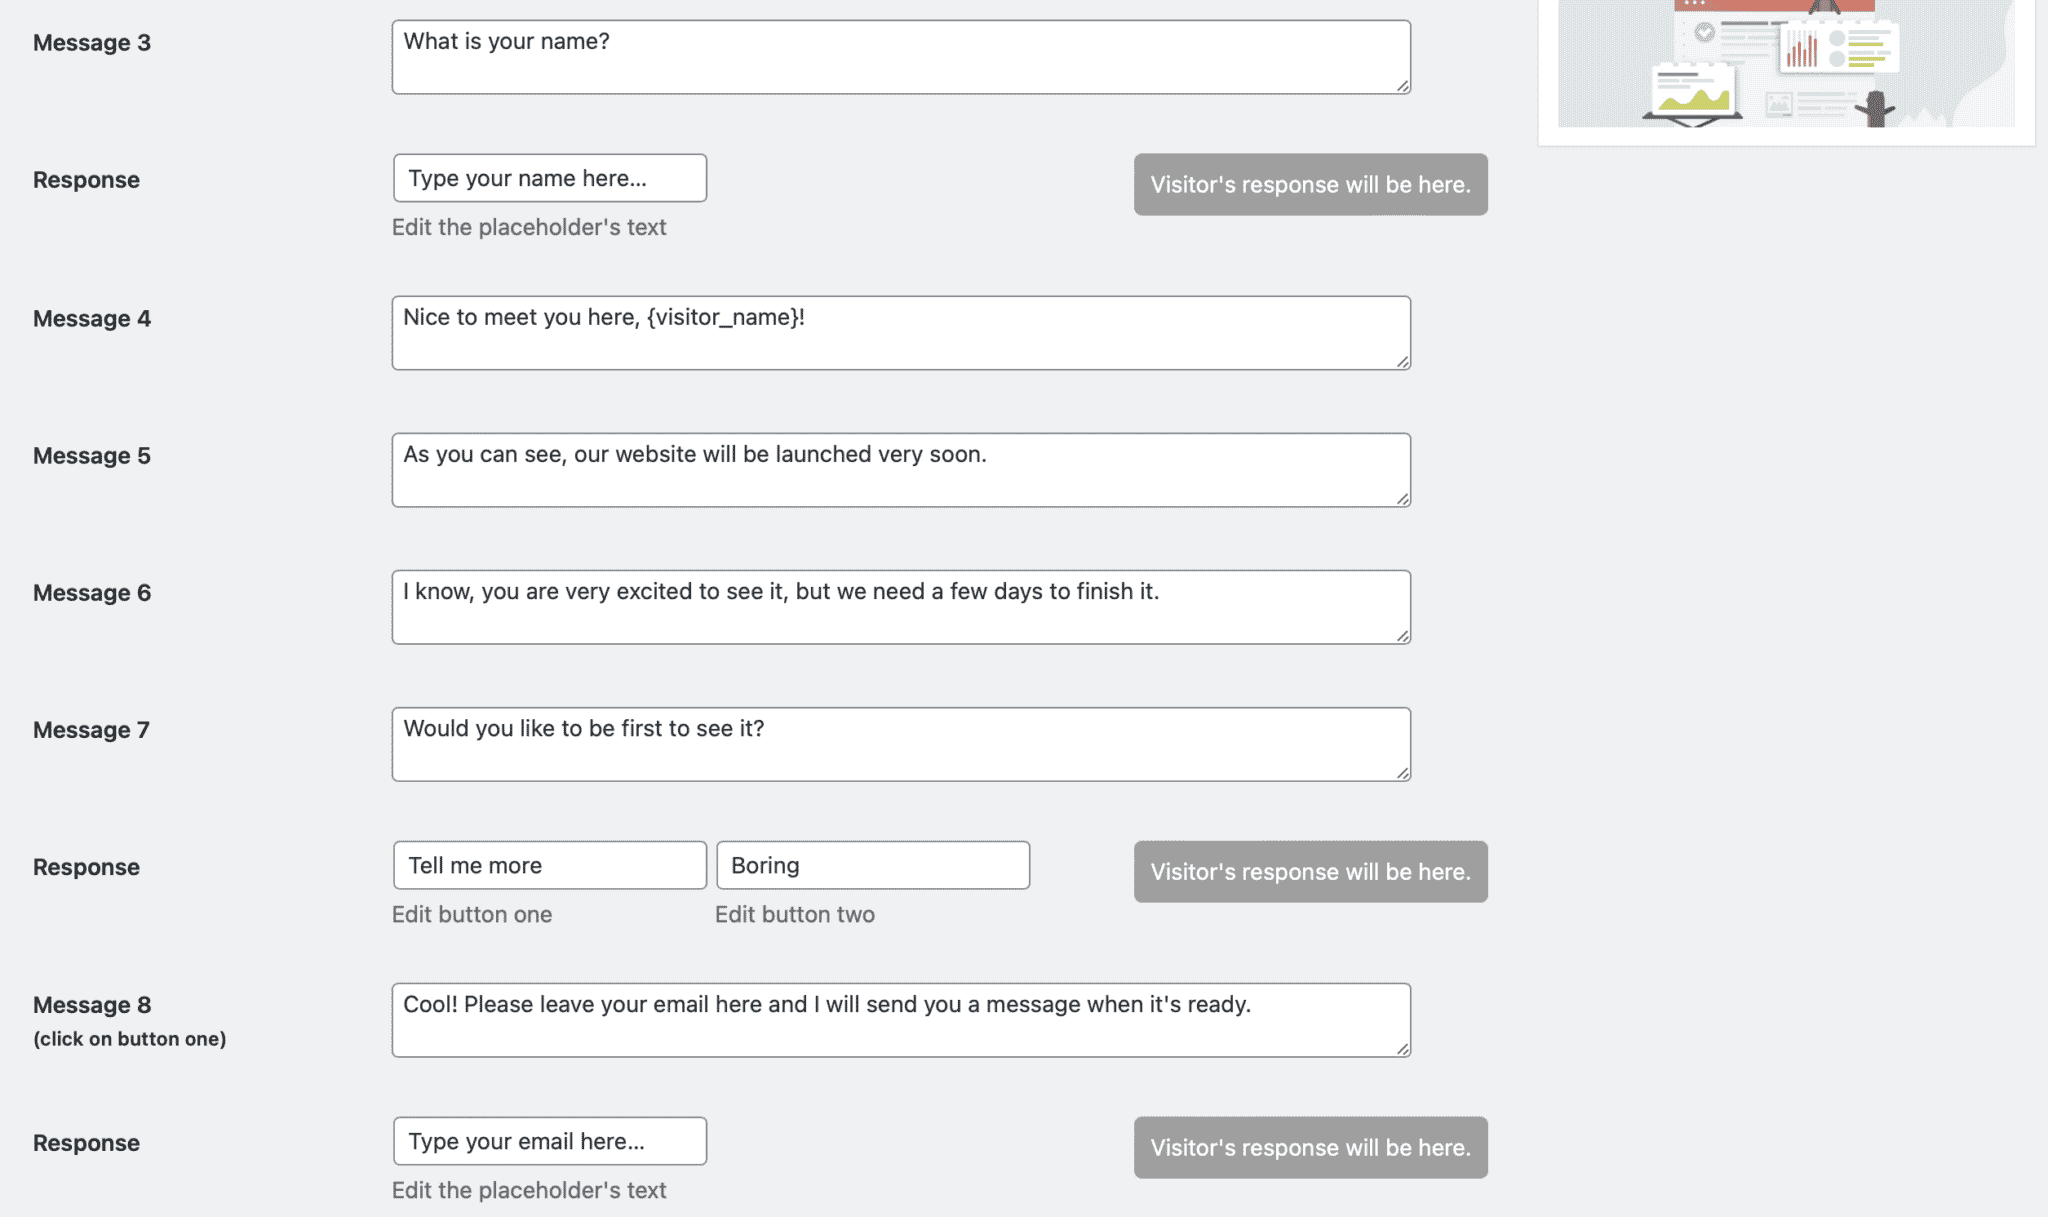
You may create quick, easy message sequences, or construct extra elaborate ones to maintain guests in your web page for longer.
Conclusion
Whereas there are occasions while you’ll wish to tweak your web site, sure duties can break your website or make your pages show oddly. Nonetheless, you’ll be able to allow upkeep mode to point out a user-friendly discover and protect your UX.
To recap, right here’s allow upkeep mode in WordPress:
- Set up and configure WP Upkeep Mode & Coming Quickly plugin.
- Create your upkeep mode web page.
- Make your upkeep mode discover extra partaking by including a countdown timer and different options.
- Arrange your chatbot.
Do you could have any questions on allow upkeep mode in WordPress? Tell us within the feedback part beneath!
