Now that we’ve obtained the fundamentals of the block constructed, it’s time to introduce a number of the options afforded to us by the WordPress API that enable us to make modifications to the visuals of our block. Specifically, we need to utilizing block attributes for customized colours.
Positive, up up to now, we’ve bee constructing the blocks utilizing the WordPress APIs for block creation, serialization, and displaying, however we’ve additionally hard-coded loads of our our styling. And relating to constructing customized blocks, typically that’s precisely what we need to do.
However different occasions, we wish the customers to have the ability to change, say, the colour of their textual content or the background of their blocks, or possibly each. And the APIs for the Block Editor make this doable. As with the remainder of the content material of this sequence, although, it’s not with out understanding what’s accessible to us.
Since this sequence builds upon itself, I like to recommend studying and following the earlier articles so far particularly if you happen to’re simply now stumbling throughout this content material.
To this point, these are the issues we’ve mentioned:
- Required Instruments, Plugin Construction, Dependencies, Block Metadata
- The Backend, The Frontend, Performance, Types, a Working Demo
- Block Attributes, Editable Content material, Elements, Editor Types
- Saving Information, Styling the Frontend
If you happen to’re able to proceed, we’ll get began. Keep in mind, now that we’re this far within the sequence, I’m working to maintain the articles a bit shorter. It is because:
- We’ve laid sufficient floor work so it’s simpler to concentrate on one factor at a time,
- I discover it simpler to digest one idea at a time particularly relating to studying one thing new, like constructing blocks as a backend engineer
 .
.
So on this submit, we’re going to concentrate on one new factor: Introducing colour choices for our block.
Block Attributes for Customized Colours
On the finish of the final submit, I wrote the next:
There are a selection of locations we will go from right here particularly because it pertains to styling our block and introducing options for customers to customise what they see.
And as I discussed earlier, that’s what we’re going to be doing by profiting from what WordPress gives for us. Assuming you’ve nonetheless obtained your code arrange from the place we left off within the final article, that’s the place we’re going to choose up as we speak.
 Block Attributes
A couple of articles in the past, I talked about block attributes. You may learn extra about them in mentioned article or within the Block Editor Handbook however the gist of it this: There are specific options that may be enabled by way of defining sure values within the configuration file.
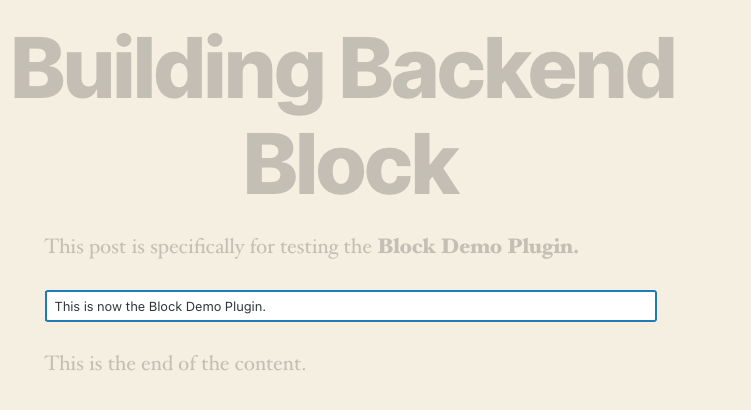
And on this case, we’re trying to introduce each textual content and background colours. Earlier than doing that, although, let’s check out what the UI of our customized block appears like within the context of WordPress proper now:
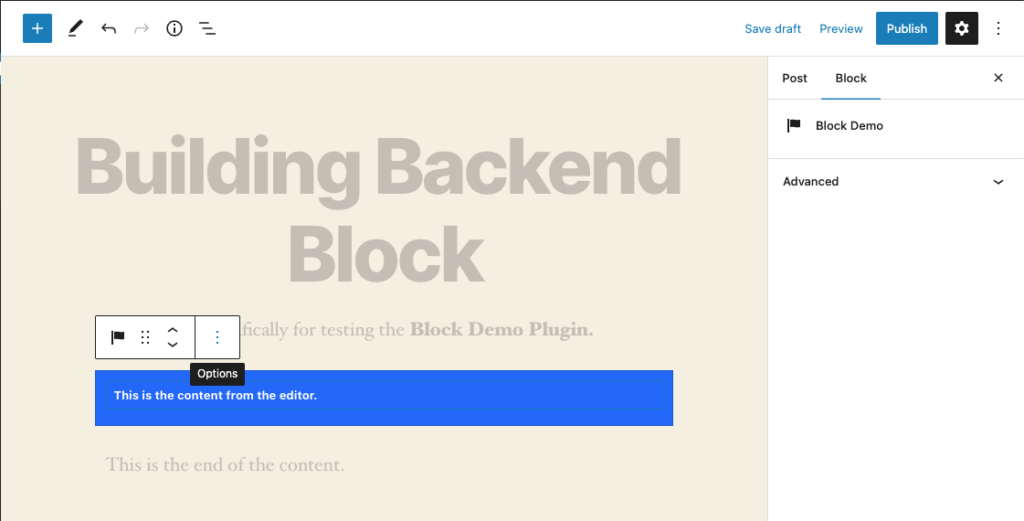
Discover that whenever you add the block to your submit, you’ve gotten the power to edit its content material and that’s all. The remainder of font colour and the background colour are supplied for you (technically, they’re supplied by us since we’re writing the kinds for the block however you get the thought).
However what if you wish to give the person the power to vary that? That is the place further block attributes come into play.
 Replace the Block Attributes
First, we’re going to replace the attributes so as to add help for colour of textual content and background. Find the realm of index.js that appears like the next:
attributes: {
    content material: {
        sort: 'string',
        supply: 'textual content',
        selector: 'enter'
    },
},
After which replace it in order that it contains the help ingredient:
helps: {
    colour: {
        textual content: true,
        background: true
    }
},
attributes: {
    content material: {
        sort: 'string',
        supply: 'textual content',
        selector: 'enter'
    },
},
Then run $ npm run construct to rebuild the property. And at this level, you possibly can refresh your submit. You could must take away the block after which re-add it because it has new code related to.
 Evaluation Block Modifications
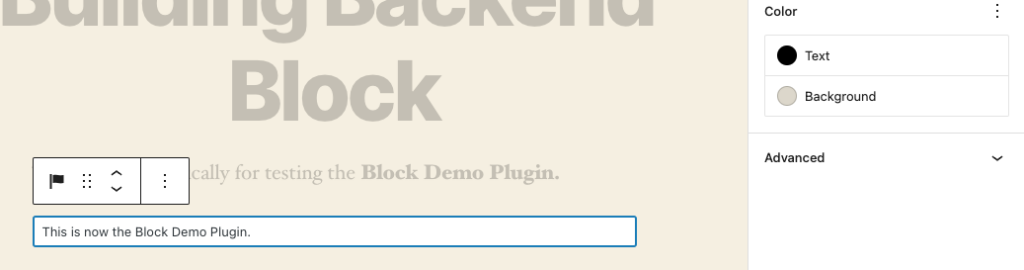
Now, whenever you add the block, it’s best to see new choices within the sidebar or the Settings as WordPress truly calls it, and it appears like this:
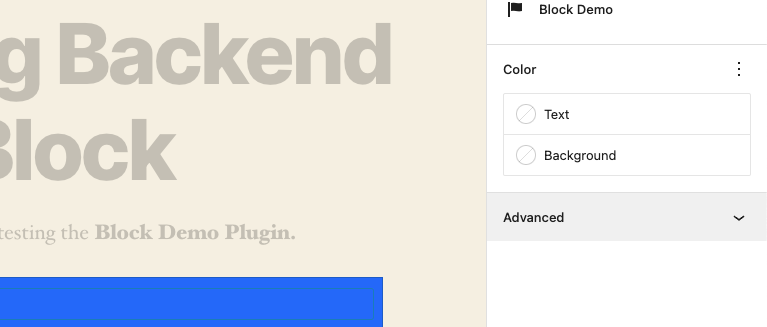
Discover that there at the moment are choices for Textual content and for the Background. Moreover, if you happen to edit the textual content after which choose it and edit the background and alter it, the modifications will likely be mirrored within the editor.
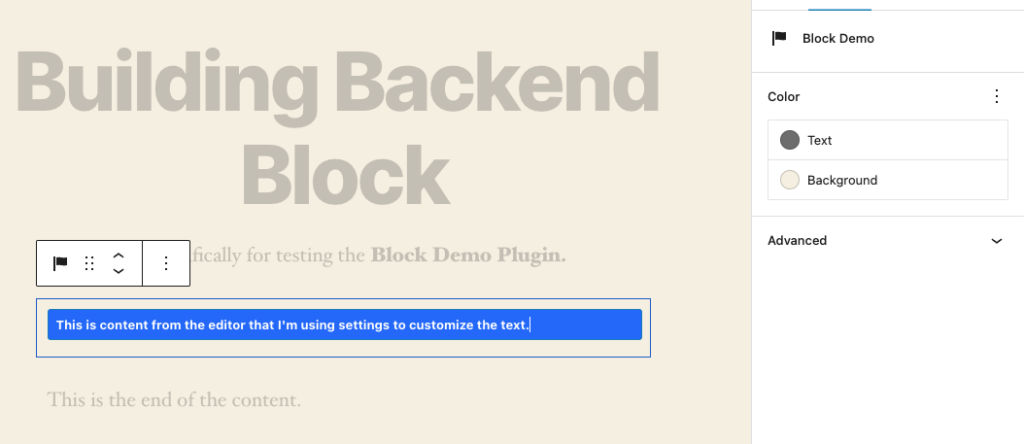
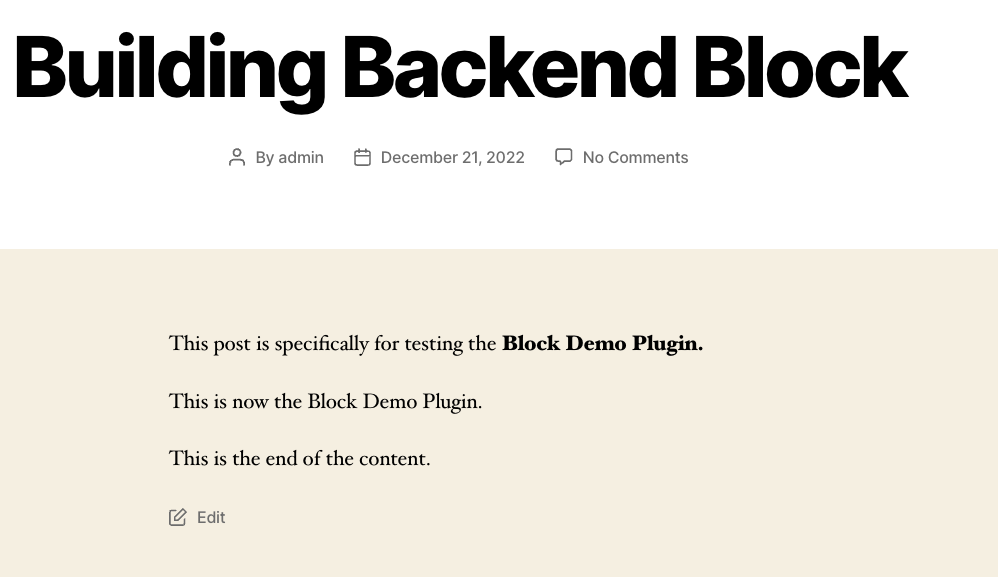
Then, if you happen to preview or publish and consider the web page, you’ll see the block as you’ve styled it. For instance, right here’s an instance of the block that I’ve working within the editor with some pattern content material together with customizations from the sidebar:
And once I preview this on the frontend, we see the next:
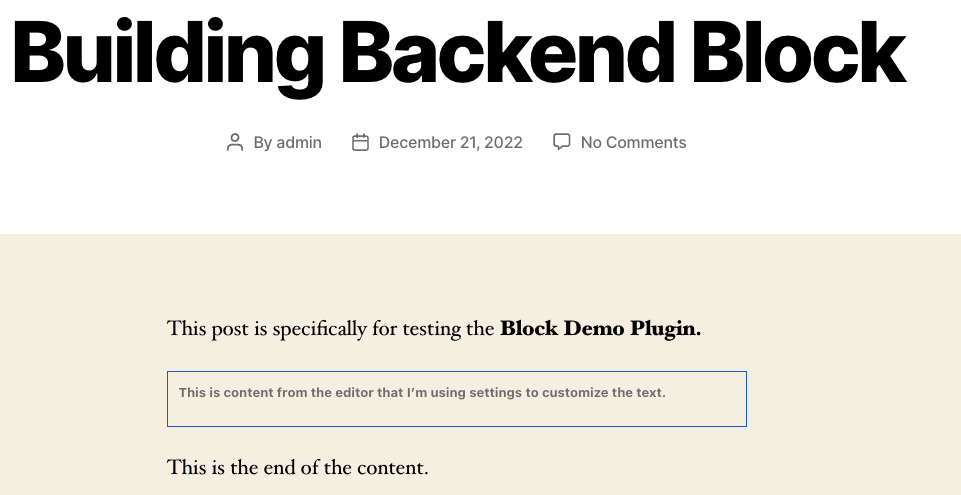
Clearly, the brand new options are working form of.
The frontend appears good however the editor remains to be not fairly matching the content material of what we’ve put in place. Why is that?
Recall that we’ve had to make use of a TextControl for the block within the editor and that we’ve additionally written some customized kinds to strive to attract parity between the editor and the frontend.
Now that we’ve obtained choices for customizing the block, we have to refactor the kinds of the block in order that they work based mostly on what the person writing and what the person is setting.
 Refactoring Types (One Step Ahead, Two Steps Again)
Earlier than shifting ahead with taking benefits of those new settings, we have to perceive one thing in regards to the TextControl. Particularly, from the handbook:
TextControls are greatest used without cost textual content entry.
It additionally goes on to say the next:
TextControls ought to:
- Stand out and point out that customers can enter data.
- Have clearly differentiated states (chosen/unselected, lively/inactive).
- Make it straightforward to grasp the requested data and to deal with any errors.
- Have seen labels; placeholder textual content shouldn’t be an appropriate alternative for a label because it vanishes when customers begin typing.
So the underside line is that these controls ought to give customers the power to know after they can enter textual content and after they can’t. Which means making an attempt to create parity between what the person enters on the backend wants to supply an affordance they will achieve this.
This implies there are some choices that need to be made:
- Will we need to attempt to drive the editor to look precisely just like the frontend?
- Ought to we outline clear kinds for the backend to point what the person can and can’t edit?
- How will we deal with what the person has supplied within the backend to render on the entrance finish?
So far as the factors above are involved, I’ve a number of ideas.
The Enter Component
So far as the TextControl is worried:
- The person must know what they will and what they can not manipulate. Enter areas have a really constant model throughout all sorts of interfaces (be it the net, apps, cellular apps, and so forth) so counting on out-of-the-box kinds is normally a good suggestion.
- The handbook itself states: “Stand out and point out that customers can enter data.”
- Thus, the management must differentiate itself from the remainder of the content material within the block.
That signifies that relating to refactoring the block, the very first thing we need to do is restore the enter ingredient to precisely the way it appears. And since we’re going to be refactoring the remainder of the block round this, let’s
- Empty the stylesheet quickly,
- Take away the placeholder from the
TextControlas per the rules within the Handbook.
This implies the index.scss file must be empty and whenever you run $ npm run construct, the block will look one thing like this:
And once we save the submit and consider it, that is what we see on the frontend:
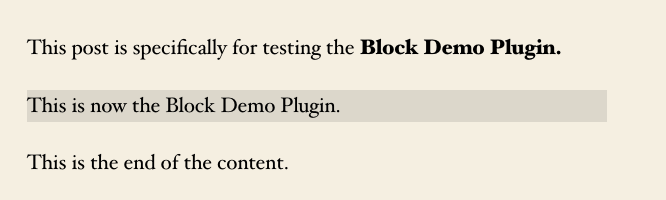
Discover the worth merely inherits what the person has supplied. And that’s okay. Keep in mind, typically within the editor, content material the person gives goes to be static on the frontend not in contrast to how we draft posts.
So this raises a query: How do the brand new colour settings have an effect on a extra fundamental block? Let’s have a look.
First, choose a textual content colour utilizing the settings. Provided that I’m utilizing the a default theme, I’m going to pick the Main colour which is #000000. Then I’m going to pick Refined Background which is #DCD7CA for the colour of the background of my block.
Within the editor, that is what I see:
As you possibly can inform, there’s no visible indicator that this has modified something with regard to the block. However what does it appear to be on the frontend? Save the submit and consider it. If you happen to’ve adopted together with my work, you then’ll see one thing like this:
And that is what we’d anticipate given what we’ve modified so far. To be honest, it isn’t a lot:
- We added some extent as to what the block helps when it comes to colours and background,
- We’ve eliminated the kinds we’ve had in favor of following the principles of the handbook.
Although it could not look like a lot, these are the sorts of issues which are key to understanding when working not solely with blocks however with model guides basically:
That nonetheless you assume it ought to work doesn’t essentially imply it’s the advisable manner for it to work. And to that finish, I maintain the opinion that it’s greatest to comply with the rules of any model information, handbook, or requirements that you’ve got in order that the work you produce appears as if it’s a part of the pure design language for the software program system during which you’re working.
So we’ve come all this approach to study a bit extra and scale back a few of what now we have. What’s subsequent?
 TODO
TODO
At this level, we’re primarily left with what we had within the final submit: A block that permits customers to enter enter and see it on the frontend. The factor we have added provides customers the power to model their work with out having to jot down any code and that’s helpful.
So the place will we go from right here? Let’s say we need to create a block that gives the person with a set of data after which asks them to enter information within the editor to render it on the frontend.
This might give approach to one thing much more complicated in a future iteration reminiscent of permitting the person to enter one thing on the frontend to undergo a type, one other endpoint, or one thing like that.
In order I proceed with the sequence, we’re first going to take a look at what’s required to implement a customized block that features:
- a heading,
- a paragraph,
- and an enter area to assist information the final word output.
We’ll proceed to make use of the customization choices we’ve outlined on this submit and present how we will apply them to what the person gives and the best way to ignore them for what we, because the developer, present.
After that, we’ll have a look at including an enter to the frontend of the positioning in addition to incorporating a SlotFill.
But it surely’s going to take us a number of extra articles to cowl all of that data.
 References