
Though internet parts had been launched in 2011, they aren’t the typical developer’s first or second alternative for composing UI layouts, regardless of what the know-how presents.
That is partly as a result of a rise in JavaScript frameworks, component-driven improvement fanatics, and different esoteric components through the years.
Now, in comes Shoelace, a UI library constructed on internet element know-how that provides the identical expertise as any JavaScript framework however with higher perks.
On this article, we’ll introduce Shoelace, take a look at its inside fucntions, and reveal the best way to use its parts with React to construct a easy interface.
Soar forward:
Conditions
To comply with together with this tutorial, you’ll want the next:
- Working data of React
- The most recent model of Node.js is put in in your machine
What’s Shoelace?
Shoelace is an open supply, framework-agnostic element for constructing accessible internet functions.
In contrast to typical UI libraries that export consumer interface parts and components particular to a selected framework, Shoelace supplies a set of extremely customizable UI parts constructed on a framework-agnostic know-how often called internet parts.
What are internet parts?
An internet element is a composition of ordinary internet applied sciences that permits you to create reusable customized components or parts that encapsulate functionalities and types away from the remainder of your code.
The online element specification is made up of three applied sciences:
- Customized components: These are HTML components with customized tag names and conduct which can be specified by a set of JavaScript APIs, which can be utilized wherever in your software
- Shadow Dom: This can be a set of JavaScript APIs that attaches a scoped DOM tree to a component. It isolates the functionalities and types of a customized factor to keep away from collision with different components of the doc
- HTML templates: These are HTML components (
<template>and<slot>) that allow you to create markup templates that aren’t rendered till known as upon
These applied sciences are used collectively to create internet parts with encapsulated performance.
Try the docs to be taught extra in regards to the internet element specification.
Advantages of utilizing Shoelace
Frontend frameworks resembling Angular, React, and Vue.js are constructed on the idea of utilizing component-driven improvement to create an organized UI of parts that encapsulates content material, performance, and styling right into a single JavaScript file.
Though this does alleviate the complicated constraints current in internet improvement, it does have a number of shortcomings:
- Parts are framework-specific, which means they will solely be used within the framework for which they’re designed
- Builders should discover ways to use the framework the parts are designed for
- The lifespans of parts are restricted by that of the framework
- Builders should rebuild foundational parts when switching to a different framework
Net parts are supposed to resolve these issues.
Shoelace is constructed on internet element know-how. It exports HTML and DOM normal parts which can be supported by each trendy browser and work throughout totally different frameworks.
There are various advantages to utilizing Shoelace; listed below are a number of:
- Absolutely customizable parts to match an present design
- Capability to construct a number of functions with totally different frameworks that share the identical UI parts
- Capability to change frameworks with out rebuilding foundational parts
- Continuous browser help
Getting began with Shoelace
Putting in Shoelace is so simple as including a <script></script> tag to your venture’s doc. Nevertheless, not each framework presents inbuilt help for internet parts.
For instance, the React render tree doesn’t correctly propagate occasions emitted by an internet element. To handle this concern, Shoelace created wrappers that allow us use internet parts in React.
There are three official methods to combine Shoelace right into a venture:
- CDN: That is the simplest method to combine Shoelace into your venture; it entails including a CDN script and types hyperlink to your doc
- Putting in regionally: This technique allows you to set up the Shoelace regionally utilizing the Node.js bundle supervisor
- Cherry-picking: Putting in Shoelace by way of CDN or regionally will incur the complete dimension of the library in your venture, thus decreasing your software’s load time. As an alternative, Shoelace allows you to cherry-pick and set up solely these parts you really want
Set up
On this article, we’ll be utilizing React to reveal Shoelace’s utilization. Since Shoelace makes use of a wrapper for React, we are able to solely set up the library regionally utilizing npm.
For the needs of this demo, I’ll assume you have already got a React venture arrange. Now, go forward and set up Shoelace with the next command:
npm set up @shoelace-style/shoelace
With Shoelace put in, you can begin utilizing its parts by importing them into your parts, like so:
import { SlInput } from "@shoelace-style/shoelace/dist/react";
perform App() {
  return (
    <div className="App ">
      <SlInput worth={"David"} label="Title" />
    </div>
  );
}

export default App;
As you’ll be able to see, Shoelace parts are imported as React parts as an alternative of the particular customized components. That is peculiar to React alone; the <SlButton> element within the above code can be imported as a <sl-button> customized factor in different frameworks like Vue, Svelte, or Angular.
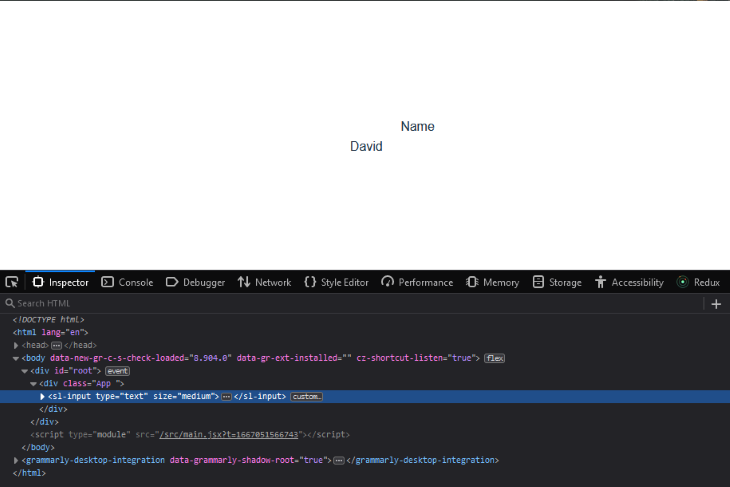
The above code will render a barebones enter factor to the browser, however and not using a default fashion:
Theme choice
Shoelace parts are designed to be extremely suitable with the totally different theming techniques your venture may need. You may select between a light-weight or darkish theme or create a customized theme out of the field.
The theme you add to your venture will decide the default fashion of your parts. For instance, say you add the mild theme to your venture by linking the stylesheet to your venture’s App.js file:
import "./App.css";
import { SlInput } from "@shoelace-style/shoelace/dist/react";

//mild theme stylesheet
import "@shoelace-style/shoelace/dist/themes/mild.css";

perform App() {
  return (
    <div className="App">
      <SlInput worth={"David"} label="Title" />
    </div>
  );
}

export default App;
The enter element will render with a default fashion (on this case, decided by the mild theme), like so:
In the event you add the darkish theme as an alternative, the element will render with a default fashion that corresponds to that theme:

In contrast to the mild theme, to make use of the darkish theme, you could activate it after importing the stylesheet into your venture. You are able to do this by including sl-theme-dark to the className on the mum or dad div contained in the App.js file, like so:
//darkish theme stylesheet
import "@shoelace-style/shoelace/dist/themes/darkish.css";

perform App() {

  return (
    <div className="App sl-theme-dark">
      <SlInput worth={"good day"} />
    </div>
  );
}

export default App;
By now, you need to have a fundamental understanding of how Shoelace works and the best way to combine it right into a React venture.
Subsequent, let’s create a composition to get a greater take a look at the inner functionalities of Shoelace parts.
Extra nice articles from LogRocket:
Utilizing internet parts in React
Shoelace presents distinctive parts that you just gained’t discover in lots of different framework libraries. Parts resembling picture composer and break up panel actually push the thought of what’s attainable with the library.
For our pattern venture, we’ll construct a card element with a button and equipment icon that fires an occasion when clicked.
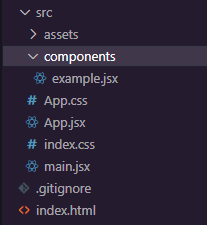
In the event you’d wish to comply with together with the instance venture, create a parts folder within the src folder and add a card.jsx file:
Subsequent, import the card element into the App.js file and add it to the return part:
//App.jsx
import { useState } from "react";
import "./App.css";
import Instance from "./parts/instance";

perform App() {
  return (
    <div className="App">
      <Instance />
    </div>
  );
}

export default App;
Now, you’ll have to import all of the parts that you just’ll be utilizing for the whole lot of the tutorial contained in the card.jsx file:
//instance.js
import {
  SlButton,
  SlCard,
  SlDrawer,
  SlIconButton,
  SlDialog,
  SlSwitch,
} from "@shoelace-style/shoelace/dist/react";
With that carried out, it’s time to start out composing playing cards!
Within the element’s physique, declare the <Slcard> element and nest the next code inside:
<SlCard fashion={{ maxWidth: "300px" }} >
<img
  src="https://photographs.unsplash.com/photo-1667120651808-34305af680d3?ixlib=rb-4.0.3&ixid=MnwxMjA3fDB8MHxwaG90by1wYWdlfHx8fGVufDB8fHx8&auto=format&match=crop&w=1736&q=80"
  alt="A squirrel sits on a wooden."
  slot="picture"
/>
<sturdy>Squirrel</sturdy>
<br />
<p>Squirrels are family members Sciuridae, a household that features…</p>
<br />
<small>6 weeks previous</small>
<div slot="footer"
 fashion={{
    show: "flex",
    alignItems: "heart",
    justifyContent: "space-between",
 }}
>
  <SlButton variant="main" tablet>
    Extra Data
  </SlButton>
  <SlIconButton
    title="gear"
  ></SlIconButton>
</div>
</SlCard>
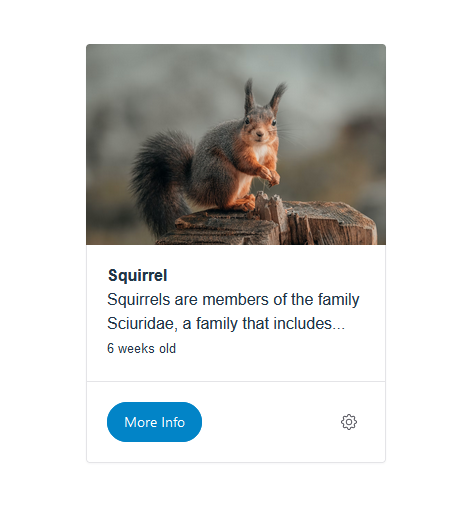
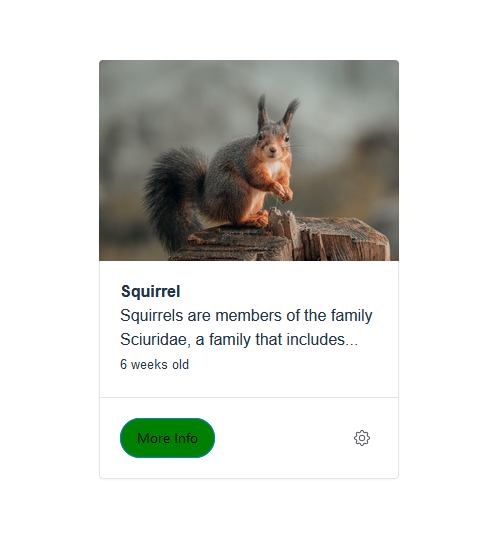
Right here, we added a picture, heading, and outline to the cardboard utilizing the img, sturdy, and small components. We additionally added a footer with a div and nested the Shoelace button and icon parts:
Make sure to set the basepath for Shoelace property within the App.jsx file earlier than importing and utilizing property like icons:
//App.jsx
import { setBasePath } from "@shoelace-style/shoelace/dist/utilities/base-path";
setBasePath(
  "https://cdn.jsdelivr.internet/npm/@shoelace-style/[email protected]/dist/"
);
The slot attribute on the img and div tags is a Shoelace property that some internet parts use to simply accept contents inside it. In our venture, we’re utilizing it to outline our card composition’s picture and footer part.
The slot attribute tells the element the place to put the factor it’s known as on. Take the div with the footer slot, for instance, when you put the code on the high of the cardboard element, simply earlier than the img tag:
<SlCard fashion={{ maxWidth: "300px" }}>
<div slot="footer"
   fashion={{
      show: "flex",
      alignItems: "heart",
      justifyContent: "space-between",
   }}
  >
    <SlButton variant="main" tablet>
      Extra Data
    </SlButton>
    <SlIconButton
      title="gear"
    ></SlIconButton>
  </div>
  <img
    src="https://photographs.unsplash.com/photo-1667120651808-34305af680d3?ixlib=rb-4.0.3&ixid=MnwxMjA3fDB8MHxwaG90by1wYWdlfHx8fGVufDB8fHx8&auto=format&match=crop&w=1736&q=80"
    alt="A squirrel sits on a wooden."
    slot="picture"
  />
  <sturdy>Squirrel</sturdy>
  <br />
  <p>Squirrels are family members Sciuridae, a household that features…</p>
  <br />
  <small>6 weeks previous</small>
</SlCard>;
The footer div will nonetheless be rendered on the backside of the cardboard within the browser. The identical goes for the img tag.
Go to the card parts documentation web page to see different element slots and the way you should utilize them.
Subsequent, let’s take a look at how we are able to customise our card composition with CSS.
Styling Shoelace internet parts
As you may need observed, Shoelace parts aren’t exceptionally effectively styled out of the field, however they’ve sufficient styling to get you going.
To align the design of Shoelace’s parts with that of your functions, you could first perceive how Shoelace makes use of the shadow DOM.
As talked about earlier, the shadow DOM encapsulates the types and conduct of a customized factor. Consequently, types from outdoors the shadow DOM can not have an effect on what’s inside, so you’ll be able to’t merely goal the internals of a customized factor with CSS selectors.
Take a peek on the Extra Data button within the card’s footer utilizing your browser’s devtool. It ought to look just like this:
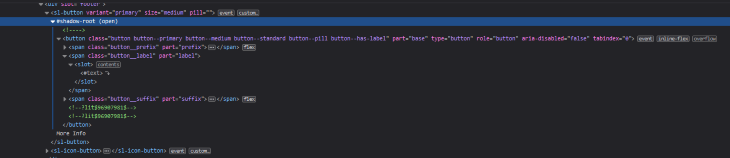
Earlier than we get to styling our element, we have to perceive what’s occurring right here. The <SlButton> element creates a button factor with three nested span components representing every a part of the net element: prefix, label, and suffix.
The second span factor wraps a <slot> factor accountable for rendering no matter content material is handed between the net element tags.
Discover the shadow-root; that is our button’s shadow DOM. it encapsulates the content material throughout the button customized factor.
The underlying button factor is what we have to fashion. Nonetheless, because it’s unimaginable to take action from the surface with simply common CSS selectors, we’ll use one of many strategies Shoelaces supplies for styling customized components.
There are 3 ways to customise a Shoelace customized factor; you should utilize element components, design tokens, or customized properties.
The official documentation supplies detailed explanations of the best way to use these strategies for customizations. We’ll reveal the best way to customise our parts utilizing the primary method (element components) for comfort.
Shoelace parts expose a half attribute that lets you goal customized components from outdoors the shadow root utilizing the CSS ::half() pseudo selector.
In the event you look carefully on the <SlButton> customized factor in your devtool, you’ll discover a half attribute on the underlying button factor:
<button
half="base"
class="button button--primary button--medium button--standard button--pill button--has-label"
kind="button"
position="button"
aria-disabled="false"
tabindex="0"
>
...
</button>;
You may goal the half(base) attribute on the factor by merely giving the <SlButton> element a className and including the ::half() selector to it in your CSS file:
.button::half(base){
  coloration: black;
  background-color: inexperienced;
}
Alternatively, you should utilize the element because the selector, however it needs to be with the precise customized factor, not the React element exported by the wrapper. So, let’s use the sl-button as an alternative of SlButton:
sl-button::half(base){
  coloration: black;
  background-color: inexperienced;
}
This CSS code will change the button’s textual content and background coloration from white to black and blue to inexperienced, respectively:
There’s one thing vital to notice right here. Since each button element has a base half, each button on the web page will decide up this fashion. To repair this quirk, we are able to once more use the element components method. We’ll give the button a className and use it as an alternative of the element’s title.
We don’t have a lot else to fashion on our card. The default styling is sweet sufficient on this case, so we’ll go away it as is.
Subsequent, let’s take a look at including occasion listeners to the Extra Data button and equipment icon.
Occasion dealing with
Shoelace parts emit occasions and strategies whose utilization might differ barely from what you’re used to in React. For instance, the dialog element has a present technique, which manually triggers the pop-up state of the dialog element when known as. Nevertheless, you’ll must entry the underlying customized factor utilizing React’s useRef Hook to make use of this technique:
import React from "react";
import { SlDialog } from "@shoelace-style/shoelace/dist/react";

export default perform Instance() {
  const ref = React.useRef();
  return (
    <div>
      <SlDialog label="dialog" ref={ref}></SlDialog>
    </div>
  );
}
The element additionally emits an sl-show occasion that fires when the dialog exhibits. In React, you’ll be able to take heed to the identical occasion utilizing onSlShow:
import React from "react";
import { SlDialog } from "@shoelace-style/shoelace/dist/react";

export default perform Instance() {
  const aFunc = () =>{
    console.log("This perform will run when the dialog element exhibits");
  }
  return (
    <div>
      <SlDialog label="dialog" onSlShow={aFunc}></SlDialog>
    </div>
  );
}
Alternatively, you should utilize React’s occasion handlers, resembling onClick, on parts like SlButton and <SlIconButton>:
import React from "react";
import { SlDialog } from "@shoelace-style/shoelace/dist/react";

export default perform Instance() {
  const [toggle, setToggle] = React.useState(false)
  return (
    <div>
      <SlDialog label="dialog" onClick={() => setToggle(true)}></SlDialog>
    </div>
  );
}
Transferring on, we’ll add onClick occasion handlers that open drawer and dialog parts when clicking the Extra Data button and equipment icon parts on our card.
The drawer element will show extra details about the cardboard’s content material. The dialog element will render a swap element that disables or permits the Extra Data button when its state adjustments.
The very first thing we have to do is create three totally different states for every occasion contained in the instance.jsx file:
 const [open, setOpen] = React.useState(false);
 const [dialog, setDialog] = React.useState(false);
  const [toggle, setToggle] = React.useState(true);
Subsequent, add onClick occasion handlers to the footer button and equipment icon, with a callback perform that toggles the Open and Dialog state variable values:
<SlButton
onClick={() => setOpen(true)}
  variant="main"
  tablet
>
  Extra Data
</SlButton>
<SlIconButton
  title="gear"
  onClick={() => setDialog(true)}
></SlIconButton>
Now, when a button is clicked, its occasion handlers will set the Open and Dialog state’s worth to true.
Subsequent, add drawer and dialog parts under the cardboard composition with the next content material and props:
<SlDrawer
  label="Squirrel"
  placement="begin"
  open={open}
  onSlAfterHide={() => setOpen(false)}
>
  <img
    src="https://photographs.unsplash.com/photo-1667120651808-34305af680d3?ixlib=rb-4.0.3&ixid=MnwxMjA3fDB8MHxwaG90by1wYWdlfHx8fGVufDB8fHx8&auto=format&match=crop&w=1736&q=80"
    alt="A squirrel sits on a wooden."
   fashion={{ width: "100%" }}
  />
  <p>
    Squirrels are family members Sciuridae, a household that features
    small or medium-size rodents. The squirrel household consists of tree
    squirrels, floor squirrels, and flying squirrels. Squirrels are
    indigenous to the Americas, Eurasia, and Africa, and had been launched
    by people to Australia.
  </p>

  <SlButton
    slot="footer"
    variant="main"
    onClick={() => setOpen(false)}
  >
    Shut
  </SlButton>
</SlDrawer>
<SlDialog
  label="Dialog"
  open={dialog}
  onSlAfterHide={() => setDialog(false)}
>
  <div
    fashion={{
      show: "flex",
      alignItems: "heart",
      justifyContent: "space-between",
    }}
  >
    <p>Allow/Disable Drawer button</p>
    <SlSwitch
      onSlChange={() => setToggle(toggle ? false : true)}
    ></SlSwitch>
  </div>
  <SlButton
    slot="footer"
    variant="main"
    onClick={() => setDialog(false)}
  >
    Shut
  </SlButton>
</SlDialog>
The open prop on each parts allows you to cross state variables controlling their open and closed states. We’re utilizing this as an alternative of the present and conceal strategies.
By passing the Open and Dialog states to the open props, we’re telling the parts to indicate when the values of their respective states are truthy:
Contained in the footer of each parts is a button element with an onClick occasion handler that units the states to false, thus closing them.
In contrast to the remainder of the parts, the SlSwitch element nested throughout the dialog element isn’t utilizing an onClick handler for its occasion. As an alternative, we used the onSlChange occasion handler to set the toggle state.
<SlSwitch
onSlChange={() => setToggle(toggle ? false : true)}
 ></SlSwitch>
Right here, we’re checking if the worth of the toggle state is true earlier than setting a brand new worth for it.
Proper now, the toggle state doesn’t set off something. We would like it to disable or allow the Extra Data button primarily based on its present worth. So, what we’ll do is add a disabled prop to the button and cross the toggle state variable to it as an argument:
<SlButton
onClick={() => setOpen(true)}
  variant="main"
  disabled={toggle}
  tablet
  className="button"
>
  Extra Data
</SlButton>
That’s it! We’ve efficiently created an interactive card composition with minimal effort. We are able to simply switch our composition to different frameworks resembling Svelte, Angular, or Vue with little to no tweaking, because of Shoelace and the net element know-how.
Conclusion
On this article, we launched Shoelace and internet parts. We additionally checked out how Shoelace leverages internet element know-how to create a framework-agnostic UI library.
The article additionally showcased Shoelace’s button, card, enter, dialog, drawer, and swap parts and demonstrated how they can be utilized collectively to compose a easy interface.
Reduce via the noise of conventional React error reporting with LogRocket
LogRocket
is a React analytics resolution that shields you from the a whole bunch of false-positive errors alerts to just some really vital objects. LogRocket tells you probably the most impactful bugs and UX points really impacting customers in your React functions.

LogRocket
routinely aggregates shopper facet errors, React error boundaries, Redux state, gradual element load occasions, JS exceptions, frontend efficiency metrics, and consumer interactions. Then LogRocket makes use of machine studying to inform you of probably the most impactful issues affecting probably the most customers and supplies the context that you must repair it.
Give attention to the React bugs that matter —
attempt LogRocket at the moment.
