Set up Residence Assistant and create a motion-activated gentle automation with this tutorial
| Key | Worth |
|---|---|
| Abstract | Set up Residence Assistant and create an automation |
| Classes | Good Residence, Ubuntu Core |
| Issue | 3 |
| Creator | nathan.hart@canonical.com |
Overview
On this tutorial, we’ll discover ways to set up Residence Assistant on Ubuntu Core, then create a motion-activated gentle automation. It is a nice place to begin for a safe, open-source good residence. By the top, we’ll have discovered the talents we have to create Residence Assistant automations of our personal with no matter good residence units we want.
Supplies required:
- Raspberry Pi 4
- Energy cable
- Case (beneficial)
- SD card (no less than 8GB beneficial)
- SD card reader (if not constructed into your pc)
- Aeotec Z-Stick Gen 5+ Z-Wave USB stick
- Aeotec MultiSensor 6
- Aeotec LED Bulb 6 Multi-white
- A monitor with an HDMI interface
- A mini-HDMI cable
- A USB keyboard
- A USB energy adapter

Putting in Ubuntu Core
Period: 20 minutes
We’ll begin by following the directions right here to put in Ubuntu Core on our raspberry pi, making word of its IP deal with throughout the course of.
Pairing the Z-Wave units
Period: 3 minutes
We will pair the bulb and multi-sensor to the Z-Wave stick with out putting in any software program. The Z-Wave stick has a battery in it, so it doesn’t even must be plugged in!
First, we’ll set up the bulb in a light-weight fixture, switched off. After urgent the button on the Z-Wave stick, we should always see blue gentle flashing across the button. Now, we’ll change on the bulb that can flash just a few instances to point it’s looking for a Z-Wave host with which to pair. The 2 ought to routinely detect one another and pair.
Now, we’ll plug within the USB energy cable included with the multi-sensor into the sensor and our USB energy adapter. We’ll press the button on the Z-Wave stick once more and ensure that we see the flashing blue gentle. There’s a “tamper button” on a nook of the rear panel of the multi-sensor. We’ll press the tamper button, and the multi-sensor ought to pair with the Z-Wave stick routinely.
Putting in the Residence Assistant snap
Period: 4 minutes
We will hook up with the raspberry pi by way of ssh by opening a terminal on our pc and operating the command:
ssh @
Now, we’ll run the command:
snap set up home-assistant-snap
This may set up the newest model of the Residence Assistant snap from the secure channel

To help the Z-Wave stick, we might want to set up a Z-Wave server as effectively, thankfully, there’s a snap for it!
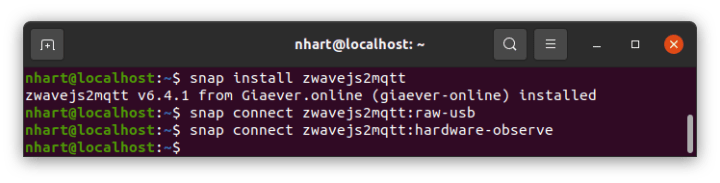
We’ll run the command snap set up zwavejs2mqtt, adopted by
- snap join zwavejs2mqtt:raw-usb
- snap join zwavejs2mqtt:hardware-observe
These instructions will give the Z-Wave server entry to the USB port so it may possibly speak to the Z-Wave stick. For additional info, seek advice from the documentation right here.
Linking Residence Assistant and the Z-Wave server
Period: 3 minutes
We’ll now begin the Z-Wave service/daemon by operating the command sudo zwavejs2mqtt.allow
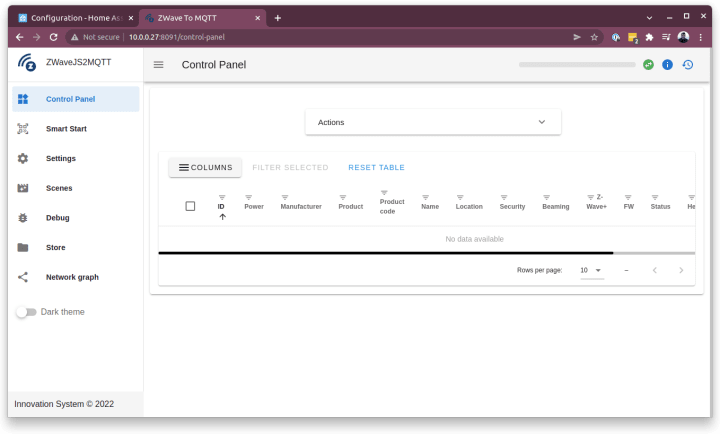
Now, in a browser window, we are able to kind within the IP deal with of the pi, adopted by the Z-Wave server port quantity like this http://:8091
Now, we’ll click on on settings and scroll to the Residence Assistant part the place we’ll allow WS server.
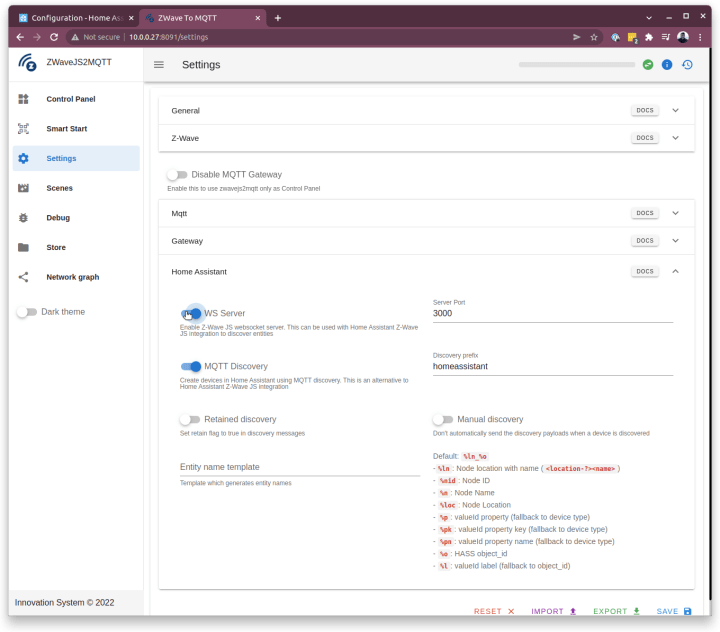
Press SAVE, and we’ll then transfer to the Z-Wave part of the Settings web page. There, we’ll disable the mushy reset setting. That is vital for the actual kind of Z-Wave dongle we’re utilizing. Guarantee as effectively that the serial port is listed as proven within the screenshot beneath.

Now, let’s configure Residence Assistant. To do that, we’ll open a brand new browser tab and kind the IP deal with of the Pi and port 8123 like this http://:8123
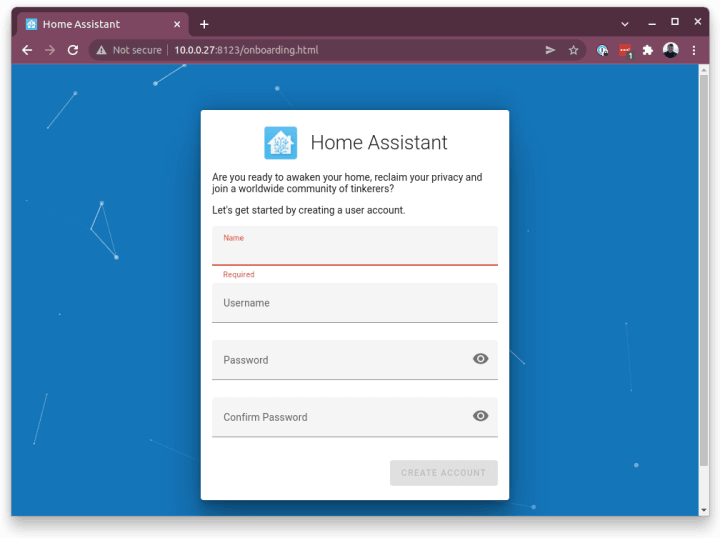
The UI will immediate us to set our residence location, items of alternative, and utilization metrics preferences. It additionally could uncover some companies in your native community to attach.
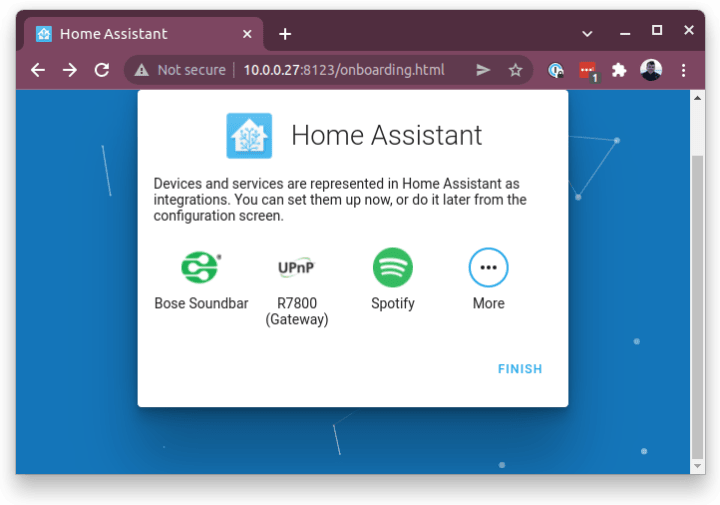
We’ll skip these for now, and click on FINISH.
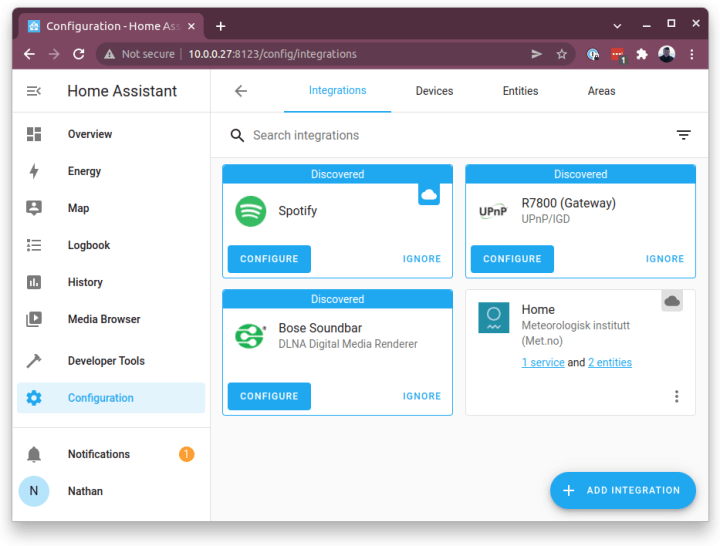
We must always now be capable of see the Residence Assistant residence web page. From right here, we’ll click on Configuration within the left menu, then Units & Companies.

Within the Integrations tab, we’ll now click on on ADD INTEGRATION.
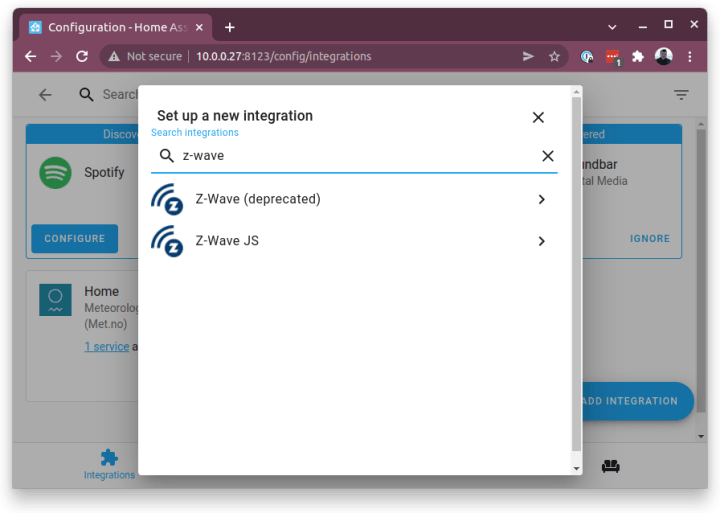
Within the New Integration interface, seek for and click on on Z-Wave JS, taking care to not use the deprecated Z-Wave integration.
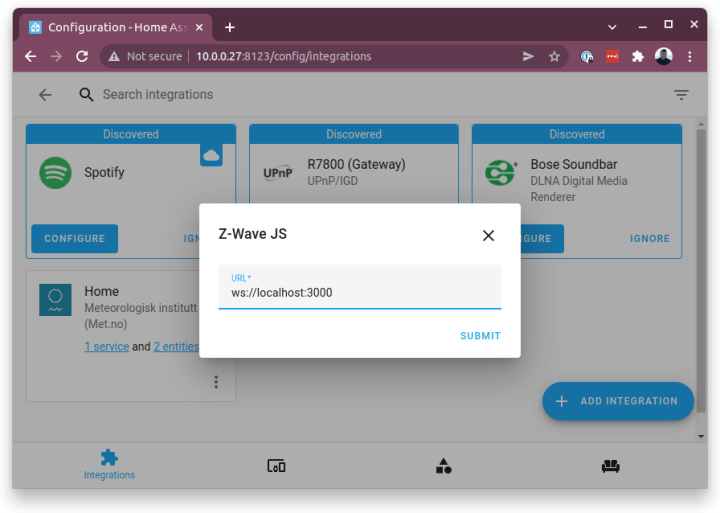
The URL subject needs to be populated routinely, but when not, kind in ws://localhost:3000. This comes from the earlier setup we did within the Z-Wave server.
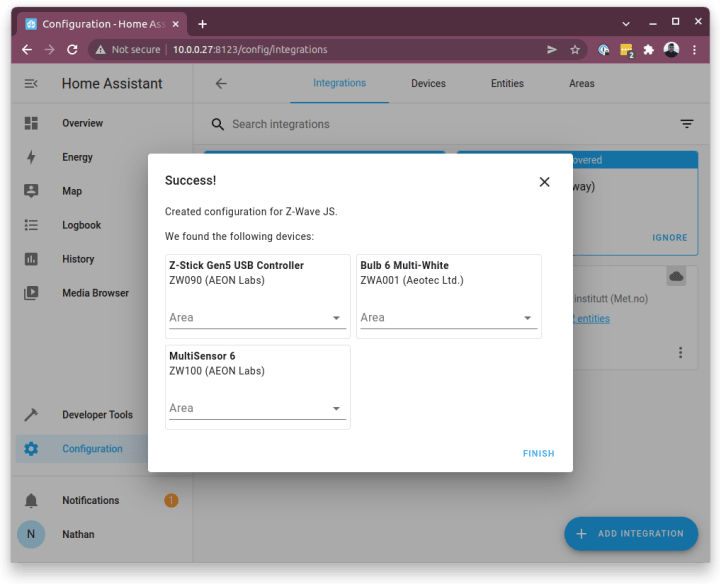
We must always now see the units we beforehand paired to our Z-Wave stick! Set the realm fields appropriately. For me, I put Workplace within the Space subject, as I’m creating my motion-activated gentle in my workplace.
Creating the automation in Residence Assistant
Period: 4 minutes
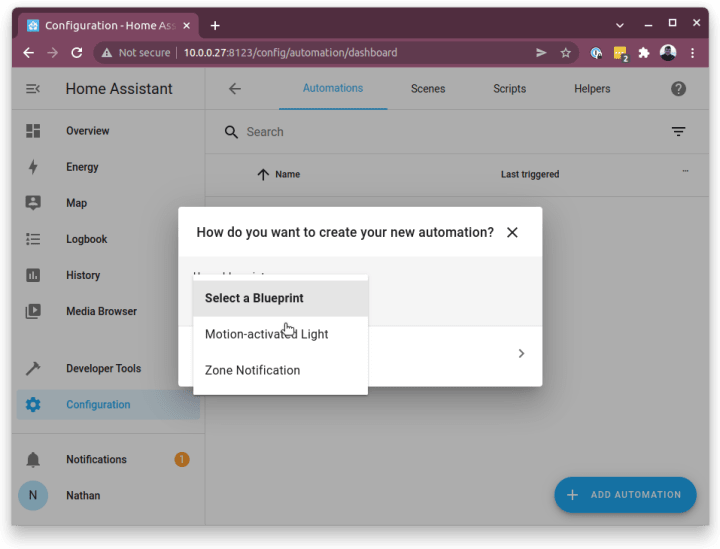
From the Residence Assistant homepage, we’ll now go to Configuration -> Automations & Scenes -> Add Automation. Within the pop-up window, select Choose a Blueprint and choose Movement-activated Gentle from the dropdown.
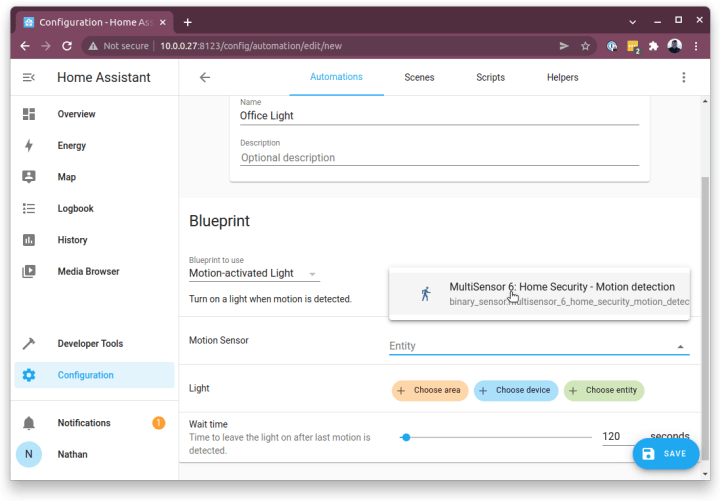
We have to select a reputation for the automation, one thing like Workplace Gentle ought to suffice. Within the Movement Sensor dropdown, we should always choose our multi-sensor, which ought to seem routinely.
Within the Gentle part, we’ll choose Select system and choose our gentle bulb from the dropdown.
We’ll now set the wait time to how lengthy the sunshine ought to stay on with no movement detected, 120 seconds in my case.
Now, we’ll click on SAVE and we’re accomplished!
For concepts on what to strive subsequent, take a look at the group boards at Residence Assistant, and tell us what you have been capable of create on Ubuntu Core in our discourse group.
