
Trendy smartphones usually include contact screens as an alternative of inbuilt bodily keypads, and cell working techniques supply numerous hand gesture options for utilizing functions. For instance, now, cell apps assist display screen faucets, lengthy display screen faucets, drag and drop, and multi-touch-like hand gestures. Customers can use nearly all options in any generic app with easy finger contact occasions by way of buttons and different interactive UI components.
React Native initially provided native platform-specific buttons and a number of other touchable core elements for dealing with primary consumer gestures. Later, the framework launched the Pressable API for dealing with frequent consumer gestures.
On this article, we are going to focus on React Native’s touchable and pressable elements, utilizing examples to establish the benefits and limitations of every element kind. Additionally, we are going to focus on when we have to use every element based mostly on the UI/UX ideas. Be happy to leap round this put up, too, since we’ll be overlaying so much:
React Native touchable elements
In React Native, we are able to use the Button element to deal with primary contact occasions. The Button element renders a platform-specific, native button factor on the display screen, so it’s not customizable in a cross-platform approach with numerous kinds as View elements. As an answer, React Native launched touchable elements to create custom-styled, cross-platform buttons.
Earlier than discussing touchable elements, let’s create a local button and establish its limitations.
Making a native button
First, create a brand new React Native mission with the next command:
npx react-native init TouchableExample
cd TouchableExample
Subsequent, add the next code to your App.js supply file:
import React from 'react';
import {
  SafeAreaView,
  Button,
  StyleSheet,
  View,
} from 'react-native';

const App = () => {
  const onTap = () => {
    console.log('Button touched!');
  };
  return (
    <SafeAreaView model={kinds.container}>
      <Button
        title="Default button"
        onPress={onTap}
      />
      <View model={kinds.separator}/>
      <Button
        title="Default button (disabled)"
        disabled={true}
        onPress={onTap}
      />
      <View model={kinds.separator}/>
      <Button
        title="Purple button"
        coloration="crimson"
        onPress={onTap}
      />
    </SafeAreaView>
  );
};

const kinds = StyleSheet.create({
  container: {
    flex: 1,
    justifyContent: 'middle',
    marginHorizontal: 36,
  },
  separator: {
    peak: 12
  }
});

export default App;
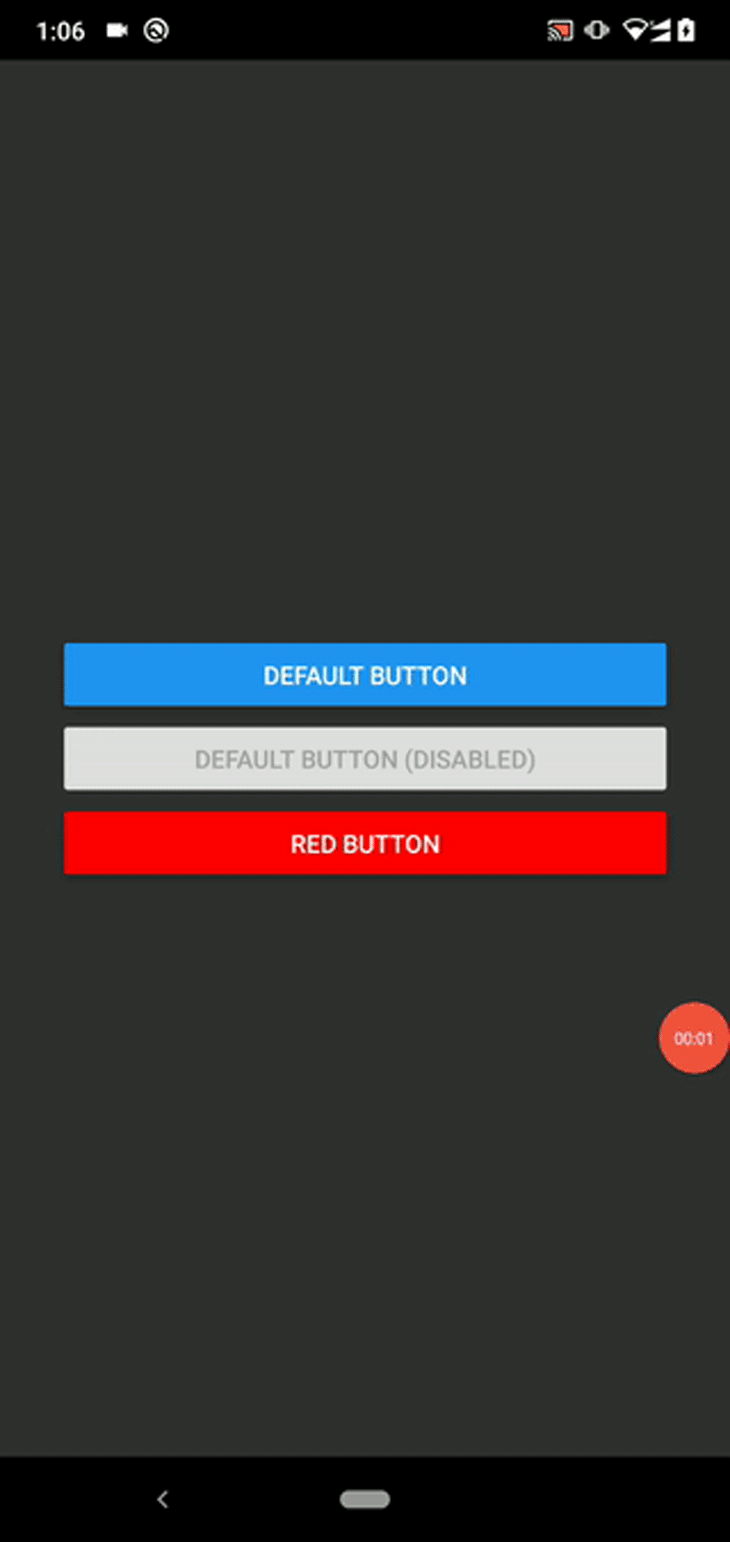
The above code snippet creates three native buttons:
- Button with the default theme coloration
- Default button, disabled
- Purple-colored button
Run the above code with the next instructions:
npm begin
# --- or ---
yarn begin

npx react-native run-android
# --- or ---
npx react-native run-ios
You will note button components with three totally different kinds and a suggestions animation based mostly in your present cell platform once you faucet the energetic buttons. Take a look at the next preview proven on an Android system:
Limitations
The coloration prop modifications the background coloration of a specific button on Android and textual content coloration (a.ok.a., the button foreground coloration) on iOS. The model prop will not be out there for Button, so we have to add a separator factor or wrap it with a View to set the button margin accordingly.
As you’ll be able to see, the Button element’s UI customization is proscribed to the coloration prop solely, and buttons look totally different based mostly on the cell platform.
Subsequently, React Native affords you touchable elements to create customizable and cross-platform components that customers can contact.
The TouchableOpacity element
TouchableOpacity is a core element that reduces the opacity stage because the contact occasion suggestions. It internally makes use of the Animated.View element to implement the opacity transition — then, you need to use the model prop for styling, not like the platform-specific Button element. It additionally helps little one elements , which let you construct touchable photographs, {custom} buttons, and complicated checklist objects.
Add the next code to your App.js file to create some buttons with the TouchableOpacity element:
import React from 'react';
import {
  SafeAreaView,
  TouchableOpacity,
  StyleSheet,
  View,
  Textual content,
} from 'react-native';

const App = () => {
  const onTap = () => {
    console.log('Button touched!');
  };
  return (
    <SafeAreaView model={kinds.container}>
      <TouchableOpacity
        model={[styles.button, { backgroundColor: '#ee2244' }]}
        onPress={onTap}>
        <Textual content>Purple button</Textual content>
      </TouchableOpacity>
      <TouchableOpacity
        model={[styles.button, { backgroundColor: '#2277ee' }]}
        onPress={onTap}
        activeOpacity={0.6}>
        <Textual content>Blue button</Textual content>
      </TouchableOpacity>
      <TouchableOpacity
        model={[styles.button, { backgroundColor: '#22bb22' }]}
        onPress={onTap}
        activeOpacity={0.6}
        disabled={true}>
        <Textual content>Inexperienced button (disabled)</Textual content>
      </TouchableOpacity>
    </SafeAreaView>
  );
};

const kinds = StyleSheet.create({
  container: {
    flex: 1,
    justifyContent: 'middle',
    marginHorizontal: 36,
  },
  button: {
    padding: 12,
    marginBottom: 12
  }
});

export default App;
Right here, we created three {custom} buttons by utilizing the TouchableOpacity element as the bottom factor. We will:
- Regulate the pressed opacity stage with the
activeOpacityprop - Disable the opacity animation and the contact occasion callbacks with the
disabledprop
Not like the platform-specific Button element, TouchableOpacity seems to be the identical on all supported platforms.
Run the above supply code and you will note the {custom} buttons, as proven under:
This element affords hitSlop and pressRetentionOffset to configure the contact motion habits and touch-sensitive area. These props have the next impacts:
hitSlop: Defines how removed from the unique button area the consumer’s contact motion can beginpressRetentionOffset: Defines how far the consumer wants to maneuver their finger from the area to deactivate a pressed button. This offset worth contains thehitSlopworth, too
The above props allow you to create smaller touchable components in a user-friendly approach, i.e., so as to add some interactive UI components that render touchable areas smaller than a fingertip on the display screen.
The next script implements a button you could activate by touching 100px away from the highest and backside edges of the button, and 50px away from the left and proper edges. Now, you don’t have to faucet on prime of the button area to activate it — however you’ll have to transfer your finger a bit additional away to deactivate the pressed state in comparison with its default configuration:
<TouchableOpacity
    model={[styles.button, { backgroundColor: '#ee2244' }]}
    onPress={onTap}
    hitSlop={{prime: 100, left: 50, proper: 50, backside: 100}}
    pressRetentionOffset={200}>
    <Textual content>Purple button</Textual content>
</TouchableOpacity>
You may make any software UI part touchable with this element. For instance, the next code snippet renders a picture button:
import React from 'react';
import {
  SafeAreaView,
  TouchableOpacity,
  StyleSheet,
  Textual content,
  Picture,
} from 'react-native';

const App = () => {
  const onTap = () => {
    console.log('Button touched!');
  };
  return (
    <SafeAreaView model={kinds.container}>
      <TouchableOpacity
        model={[styles.button, { backgroundColor: '#2277ee' }]}
        onPress={onTap}>
        <Picture
          model={kinds.tinyLogo}
          supply={{
            uri: 'https://reactnative.dev/img/tiny_logo.png',
          }}
        />
        <Textual content model={kinds.buttonText}>Picture button</Textual content>
      </TouchableOpacity>
    </SafeAreaView>
  );
};

const kinds = StyleSheet.create({
  container: {
    flex: 1,
    justifyContent: 'middle',
    marginHorizontal: 36,
  },
  button: {
    padding: 12,
    marginBottom: 12,
    flexDirection: 'row',
    borderRadius: 6
  },
  buttonText: {
    marginTop: 10,
    marginLeft: 20,
    fontSize: 20
  },
  tinyLogo: {
    width: 50,
    peak: 50,
  },
});

export default App;
The above supply code renders the next picture button:
Most builders create trendy checklist elements with FlatList and TouchableOpacity. I described the best way to develop a touchable component-based ecommerce app in this text.
You may connect features to numerous occasions in a specific contact occasion circulation with the onPress, onPressIn, onPressOut, and onLongPress callbacks.
The TouchableHighlight element
The TouchableHighlight element permits you to change the kid View element’s background coloration throughout the button’s pressed state. You may’t put a number of little one components inside this element (as a result of it seeks to alter the underlying little one element’s background coloration), however you’ll be able to all the time add nested components by wrapping them with a View. This element additionally accepts the model prop for making use of View kinds, just like TouchableOpacity.
Let’s use the TouchableHighlight element in a code snippet to grow to be extra accustomed to it. The next supply code re-implements the picture button we simply constructed with the TouchableHighlight element:
import React from 'react';
import {
  SafeAreaView,
  TouchableHighlight,
  StyleSheet,
  Textual content,
  View,
  Picture,
} from 'react-native';

const App = () => {
  const onTap = () => {
    console.log('Button touched!');
  };
  return (
    <SafeAreaView model={kinds.container}>
      <TouchableHighlight
        model={[styles.button, { backgroundColor: '#2277ee' }]}
        activeOpacity={0.7}
        underlayColor="#30aaff"
        onPress={onTap}>
        <View model={kinds.buttonContent}>
          <Picture
            model={kinds.tinyLogo}
            supply={{
              uri: 'https://reactnative.dev/img/tiny_logo.png',
            }}
          />
          <Textual content model={kinds.buttonText}>Picture button</Textual content>
        </View>
      </TouchableHighlight>
    </SafeAreaView>
  );
};

const kinds = StyleSheet.create({
  container: {
    flex: 1,
    justifyContent: 'middle',
    marginHorizontal: 36,
  },
  button: {
    padding: 12,
    marginBottom: 12,
    borderRadius: 6
  },
  buttonContent: {
    flexDirection: 'row',
  },
  buttonText: {
    marginTop: 10,
    marginLeft: 20,
    fontSize: 20
  },
  tinyLogo: {
    width: 50,
    peak: 50,
  },
});

export default App;
We alter the default button’s pressed state coloration by way of the underlayColor prop , after which we are able to see the {custom} coloration because the contact occasion suggestions. We will additionally change the underlying elements’ opacity by way of the activeOpacity prop, like we did with the TouchableOpacity element.
Take a look at the next preview of the picture button:
You may subscribe to the background animation occasions by way of onShowUnderlay and onHideUnderlay callbacks.
The TouchableWithoutFeedback element
The TouchableOpacity and TouchableHighlight elements can every inherit a number of shared props from the TouchableWithoutFeedback element definition. For instance, disabled and onPress-like props got here from the TouchableWithoutFeedback definition.
The TouchableWithoutFeedback element itself accepts consumer gestures however doesn’t show any suggestions animation. Usually, consumer gestures present a suggestions animation as a very good UI/UX design follow, so TouchableWithoutFeedback isn’t useful in sensible use instances.
You may solely connect one little one factor with this element, just like the TouchableHighlight element, however you’ll be able to all the time add nested components by wrapping them with a View.
Take a look at the next instance supply code:
import React, { useState } from 'react';
import {
  SafeAreaView,
  TouchableWithoutFeedback,
  StyleSheet,
  Textual content,
  View,
} from 'react-native';

const App = () => {
  let [counter, setCounter] = useState(0);
  const onTap = () => {
    setCounter(counter + 1);
  };
  return (
    <SafeAreaView model={kinds.container}>
      <TouchableWithoutFeedback
        onPress={onTap}>
        <View model={[styles.button, { backgroundColor: '#2277ee' }]}>
          <Textual content model={kinds.buttonText}>Depend ({ counter })</Textual content>
        </View>
      </TouchableWithoutFeedback>
    </SafeAreaView>
  );
};

const kinds = StyleSheet.create({
  container: {
    flex: 1,
    justifyContent: 'middle',
    marginHorizontal: 36,
  },
  button: {
    padding: 12,
    marginBottom: 12,
    borderRadius: 6
  },
  buttonText: {
    fontSize: 20,
    textAlign: 'middle'
  },
});

export default App;
The above code snippet implements a easy counter app that will increase its show worth with each button faucet occasion. Right here, the counter worth will get up to date, however we are able to’t see a suggestions animation.
Take a look at the next preview on Android:
The TouchableNativeFeedback element
As beforehand mentioned, touchable elements are cross-platform UI elements, so you’ll be able to implement a platform-independent UI part to seize consumer gestures. The TouchableNativeFeedback element is an Android-only element that helps us show the platform’s ripple impact.
Exchange the earlier code snippet’s imported TouchableWithoutFeedback core element with TouchableNativeFeedback, as proven under:
import {
  SafeAreaView,
  TouchableNativeFeedback, // Up to date
  StyleSheet,
  Textual content,
  View,
} from 'react-native';
Subsequent, add the next format definition to the App element’s SafeAreaView:
<TouchableNativeFeedback
  onPress={onTap}>
  <View model={[styles.button, { backgroundColor: '#2277ee' }]}>
    <Textual content model={kinds.buttonText}>Depend ({ counter })</Textual content>
  </View>
</TouchableNativeFeedback>
The above code produces the next button:
You may also customise the Android ripple impact with element props, as proven under:
<TouchableNativeFeedback
  onPress={onTap} background={TouchableNativeFeedback.Ripple('blue', false)}>
  <View model={[styles.button, { backgroundColor: '#2277ee' }]}>
    <Textual content model={kinds.buttonText}>Depend ({ counter })</Textual content>
  </View>
</TouchableNativeFeedback>
Now you will note a distinct ripple impact than the default one we noticed earlier:
Verify the Ripple static methodology documentation to be taught extra about all supported parameters.
TouchableOpacity vs. TouchableHighlight vs. TouchableWithoutFeedback vs. TouchableNativeFeedback
Take a look at the next desk to see when to make use of every touchable element in your app:
| Touchable element identify | TouchableOpacity | TouchableHighlight | TouchableWithoutFeedback | TouchableNativeFeedback |
|---|---|---|---|---|
| Operate | Reduces the opacity when the consumer presses a selected touchable factor | Adjustments the underlying View factor’s background coloration when the consumer presses a selected touchable factor | Doesn’t play UI animations when the consumer presses the factor, however triggers occasion handlers | Performs the Android-specific ripple impact when the consumer presses the factor |
| Platform compatibility | Works on each Android and iOS platforms | Works on each Android and iOS platforms | Works on each Android and iOS platforms | Works solely on the Android platform |
| Assist for little one components | Capable of wrap a number of little one components with out wrapping them in a View | Capable of wrap just one little one factor, however including nested components is possible by wrapping them in a View | Capable of wrap just one little one factor , however including nested components is possible by wrapping them in a View | Capable of wrap just one little one factor , however including nested components is feasible by wrapping them in a View |
| Applicable use instances | Builders can use this element to create {custom} buttons, menu objects, and checklist tiles | Use instances are the identical as TouchableOpacity — the one distinction is the suggestions animation habits. Many builders use this element for creating hyperlinks | Use instances are very uncommon — use provided that you don’t want to point out any button press suggestions to the consumer | Appropriate for any touchable element on the Android platform |
React Native Pressable elements
As mentioned, React Native affords 4 totally different touchable elements to deal with primary consumer gestures. To introduce new results, like a zoom impact, the React Native crew wanted to create one other element. We have been additionally unable to mix arbitrary animations for one touchable factor when utilizing pre-built touchable elements, and needed to follow the actual, fastened suggestions animation that got here out of the field.
To deal with this, the React Native crew launched the Pressable element with the Pressability API in v0.63. In the event you use Expo, you’ll want to make use of Expo SDK 40 or a later model to entry this API.
The React Native Pressability API doesn’t supply a number of inbuilt, animated elements, as touchable elements do — as an alternative, it offers you one core element referred to as Pressable. The Pressable element is versatile and lets app builders use any suggestions animations they need. We will recreate any pre-defined, touchable element habits with Pressable.
Pressable element examples
Let’s create a number of buttons with totally different suggestions animations to get began. I uploaded the instance mission supply code to a GitHub repository, because it’s a bit massive so as to add right here straight.
Clone the repository with the next Git command and set up dependencies:
git clone https://github.com/codezri/react-native-pressable-examples.git
cd react-native-pressable-examples

npm set up
# --- or ---
yarn set up
Now, run the pattern software in your cell phone or emulator:
npm begin
# --- or ---
yarn begin

npx react-native run-android
# --- or ---
npx react-native run-ios
You will note a number of buttons created with the Pressable element, as proven within the following preview:

The primary two buttons implement TouchableOpacity and TouchableHighlight-like elements, respectively. The following three buttons implement numerous suggestions results with dynamic kinds.
We will dynamically replace any View model with the pressed state variable. For instance, look how we modify the factor’s opacity worth based on the pressable state:
const PressableOpacityButton = ({title, onTap}) => {
  return (
    <Pressable
      onPress={onTap}
      model={({ pressed }) => [
        {
          opacity: pressed
            ? 0.2
            : 1,
          backgroundColor: '#2277ee'
        },
        styles.button,
      ]}>
        <Textual content model={kinds.buttonText}>{ title }</Textual content>
    </Pressable>
  );
}
We will additionally replace little one components of the Pressable element based mostly on the pressed state variable — take a look at the ComplexButton element supply and see how we dynamically change the textual content coloration.
We created easy buttons for demonstration, however you’ll be able to wrap any advanced element with Pressable. Attempt to use Pressable in a fancy app that’s already developed with touchable elements.
You may also allow the Android ripple impact by utilizing the android_ripple prop as follows:
android_ripple={{coloration: 'white'}}
Attempt to create totally different pressable components with distinctive suggestions results. You should utilize Pressable to create any interactive UI factor as alternate options to inbuilt touchable elements.
These suggestions animations will not be clean, nevertheless, since we toggle kinds based mostly on the boolean pressable state, so we’ve to make use of the React Native Animations API to implement clean suggestions animations.
The excellent news is {that a} mixture of the Pressability and Animation APIs can change all current touchable elements in React Native!
For instance, the next picture button supply modifications its opacity easily when the consumer touches it:
import React from 'react';
import {
  SafeAreaView,
  Pressable,
  Animated,
  StyleSheet,
  Textual content,
  Picture,
} from 'react-native';

const App = () => {
  const animated = new Animated.Worth(1);
  const fadeIn = () => {
    Animated.timing(animated, {
      toValue: 0.4,
      period: 150,
      useNativeDriver: true,
    }).begin();
  };

  const fadeOut = () => {
    Animated.timing(animated, {
      toValue: 1,
      period: 250,
      useNativeDriver: true,
    }).begin();
  };
  return (
    <SafeAreaView model={kinds.container}>
      <Pressable onPressIn={fadeIn} onPressOut={fadeOut}>
        <Animated.View
          model={[styles.button, { backgroundColor: '#2277ee', opacity: animated }]}>
          <Picture
            model={kinds.tinyLogo}
            supply={{
              uri: 'https://reactnative.dev/img/tiny_logo.png',
            }}
          />
          <Textual content model={kinds.buttonText}>Picture button</Textual content>
        </Animated.View>
      </Pressable>
    </SafeAreaView>
  );
};

const kinds = StyleSheet.create({
  container: {
    flex: 1,
    justifyContent: 'middle',
    marginHorizontal: 36,
  },
  button: {
    padding: 12,
    marginBottom: 12,
    flexDirection: 'row',
    borderRadius: 6
  },
  buttonText: {
    marginTop: 10,
    marginLeft: 20,
    fontSize: 20
  },
  tinyLogo: {
    width: 50,
    peak: 50,
  },
});

export default App;
When you run the above code, you will note the next picture button:
The above element behaves the identical because the inbuilt TouchableOpacity element.
Pressable elements additionally assist hitSlop and pressRetentionOffset for customizing the accepted consumer gesture, and onPress, onPressIn, onPressOut, and onLongPress for subscribing to gesture lifecycle occasions.
Touchable vs. Pressable elements
Some React Native builders will point out that the Pressability API got here as an improved substitute for the prevailing touchable elements, whereas others imagine that the Pressability API is a results of refactoring within the React Native codebase.
Take a look at the next comparability desk to seek out the appropriate element kind on your app:
| Touchable | Pressable |
|---|---|
| Comes with inbuilt suggestions animations: Opacity change Background coloration change The ripple impact (Android solely) |
Doesn’t supply any inbuilt suggestions animations; the developer has to implement suggestions results |
| Presents touchable options by way of 4 core elements | Presents Pressability API options by way of one core element referred to as Pressable |
| Impact customization is proscribed, however satisfies major developer necessities | Very versatile and customizable as a result of there are not any inbuilt suggestions animations |
| Some animations are clean and engaging (i.e., TouchableOpacity opacity transition) | The developer wants to make use of the Animations API to implement clean animations; if not, animations grow to be instantaneous and conventional |
| Appropriate for implementing interactive components that require easy suggestions results, like opacity change and background change | Appropriate for implementing interactive components that require distinctive results and animations. Builders can even use the Pressability API to implement UI kits and wrapper libraries because of intensive customization assist. Libraries can be found with inbuilt suggestions animations, i.e., react-native-pressable-opacity |
Virtually all React Native functions use touchable elements to implement {custom} buttons, interactive lists, and tile-like generic UI components. Additionally, in style UI toolkits like NativeBase use touchable elements internally as constructing blocks for UI components. Subsequently, the React Native crew might not deprecate touchable elements any time quickly.
Nevertheless, they do advocate builders use the Pressability API when constructing new functions as a result of it affords a greater normal for dealing with consumer gestures, as they talked about of their official weblog:
We anticipate that most individuals will construct and share elements using
Pressablebeneath the hood as an alternative of counting on the default expertise of one thing likeTouchableOpacity. — React Native v0.63 announcement
It’s undoubtedly a good suggestion to attempt the versatile Pressability API to construct interactive UI components in new apps. The core touchable elements now use the Pressability API internally, so migration to the Pressability API will not be obligatory — till, after all, we obtain a React Native secure model that deprecates inbuilt touchable elements.
Conclusion
We mentioned and virtually explored each touchable and pressable elements in React Native. Each element sorts supply options for implementing interactive UI components that reply to consumer gestures.
Exhibiting suggestions results for a consumer gesture is called a very good UI/UX follow. For instance, if we modify a specific menu merchandise’s coloration for the pressed state, customers know that the app accepted the latest consumer gesture. Subsequently, each app usually exhibits suggestions animations for interactive UI components.
However overusing suggestions animations reduces your app’s high quality, so don’t use too many animations or colourful results for consumer gestures . A minimal suggestions animation that’s consistent with your software’s theme will preserve your app’s look skilled.
Touchable elements include pre-built suggestions animations with restricted customization choices — so you need to use them extra rapidly, however you’ll face points with customization. In the meantime, the Pressability API permits you to construct suggestions animations as you would like, so you will have full freedom to implement suggestions results regardless that it takes some effort to implement. In the event you use a UI equipment like NativeBase, you don’t want to make use of each element sorts straight — since UI kits usually include a pre-defined gesture suggestions system.
LogRocket: Immediately recreate points in your React Native apps.

LogRocket is a React Native monitoring resolution that helps you reproduce points immediately, prioritize bugs, and perceive efficiency in your React Native apps.
LogRocket additionally helps you improve conversion charges and product utilization by exhibiting you precisely how customers are interacting together with your app. LogRocket’s product analytics options floor the the explanation why customers do not full a specific circulation or do not undertake a brand new function.
Begin proactively monitoring your React Native apps — attempt LogRocket without cost.
