
As builders, we frequently try to optimize our workflows as a lot as attainable, saving time by leveraging instruments just like the terminal. A command palette is one such software that shows latest exercise in an online or desktop utility, enabling fast navigation, quick access to instructions, and shortcuts, amongst different issues.
To raise your productiveness stage, a command palette is basically a UI element that takes the type of a modal. A command palette is particularly helpful in massive, advanced purposes with many transferring components, for instance, the place it’d take you many clicks or skimming by a number of dropdowns to entry a useful resource.
On this tutorial, we’ll discover find out how to construct a completely useful command palette from scratch utilizing the Headless UI Combobox element and Tailwind CSS.
Actual-world use instances for a command palette
As a developer, there’s a really excessive probability that you simply’ve used a command palette earlier than. The most well-liked one is the VS Code command palette, however there are lots of different examples, together with the GitHub Command Palette, Linear, Figma, Slack, monkeytype, and extra.
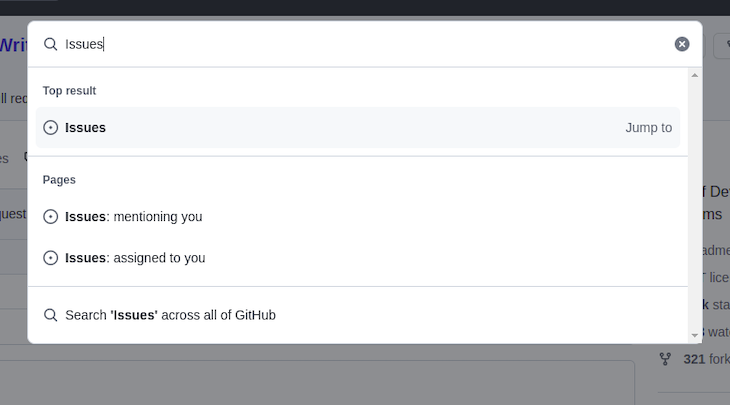
The GitHub app
GitHub not too long ago launched a command palette function that’s nonetheless in public beta on the time of writing. It helps you to shortly soar to totally different pages, seek for instructions, and get options based mostly in your present context. You too can slim the scope of the assets you’re searching for by tabbing into one of many choices or utilizing a particular character:
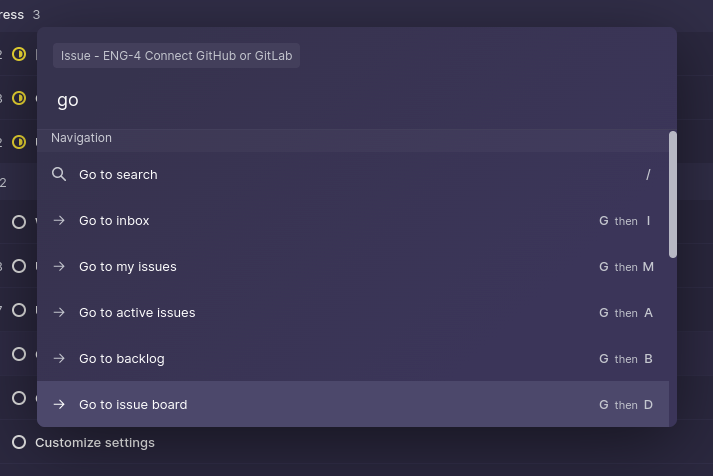
The Linear app
Should you’re not acquainted with Linear, it’s a undertaking administration software just like Jira and Asana that gives a extremely nice consumer expertise. Linear has a really intuitive command palette that permits you to entry your entire utility’s performance with its keyboard-first design. On this tutorial, we’ll construct a command palette just like Linear:
Important options of a command palette
A number of trendy purposes are implementing command palettes as a function, however what makes a great command palette element? Right here’s a concise checklist of issues to look out for:
- A easy shortcut to open the palette, i.e.,
ctrl + ok - It may be accessible from wherever within the utility
- It has in depth search options, comparable to fuzzy search
- Instructions talk intent and are simple to grasp
- It offers entry to each a part of the appliance from one place
Within the subsequent part, we’ll construct our personal element that features all of the options listed above. Let’s get into it!
Constructing the element
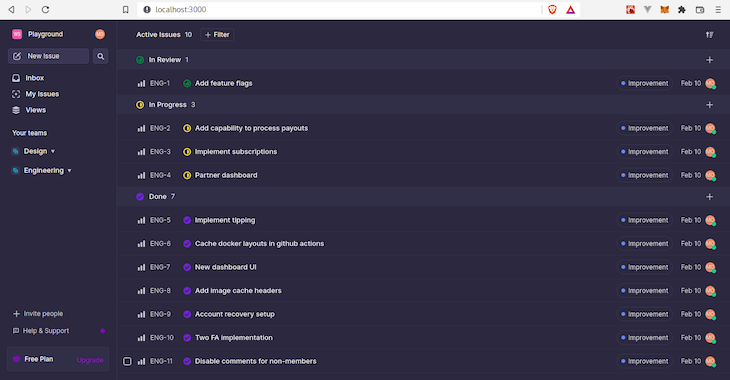
The command palette will not be really as advanced because it appears, and anybody can construct one shortly. I’ve ready a starter undertaking for this tutorial so to simply comply with alongside. The starter undertaking is a React and Vite SPA that replicates the Linear points web page.
Organising the undertaking
To get began, clone the repository into your native listing, set up the mandatory dependencies, and begin the event server. The undertaking makes use of Yarn, however when you’re extra snug with npm or pnPm, you may delete the yarn.lock file earlier than operating npm set up or pnpm set up:
// clone repository
$ git clone https://github.com/Mayowa-Ojo/command-palette
// swap to the 'starter-project' department
$ git checkout starter-project
// set up dependencies
$ yarn
// begin dev server
$ yarn dev
Should you go to localhost:3000, you’ll see the next web page:
The CommandPalette element
Subsequent, we’ll construct the element. We’ll use the Headless UI combobox and dialog parts. combobox would be the base element for our command palette. It has built-in options like focus administration and keyboard interplay. We’ll use the dialog element to render our command palette in a modal.
To model the parts, we’ll use Tailwind CSS. Tailwind is a CSS utility library that permits you to simply add inline kinds in your HTML or JSX recordsdata. The starter undertaking already consists of the configuration for Tailwind.
Set up the mandatory dependencies as follows:
$ yarn add @headlessui/react @heroicons/react
Within the parts folder, create a CommandPalette.jsx file and add the next code block:
import { Dialog, Combobox } from "@headlessui/react";

export const CommandPalette = ({ instructions }) => {
  const [isOpen, setIsOpen] = useState(true);

  return (
    <Dialog
      open={isOpen}
      onClose={setIsOpen}
      className="mounted inset-0 p-4 pt-[15vh] overflow-y-auto"
    >
      <Dialog.Overlay className="mounted inset-0 backdrop-blur-[1px]" />
      <Combobox
         as="div"
         className="bg-accent-dark max-w-2xl mx-auto rounded-lg shadow-2xl relative flex flex-col"
         onChange={(command) => {
            // we now have entry to the chosen command
            // a redirect can occur right here or any motion might be executed
            setIsOpen(false);
         }}
      >
         <div className="mx-4 mt-4 px-2 h-[25px] text-xs text-slate-100 bg-primary/30 rounded self-start flex items-center flex-shrink-0">
            Difficulty
         </div>
         <div className="flex items-center text-lg font-medium border-b border-slate-500">
            <Combobox.Enter
               className="p-5 text-white placeholder-gray-200 w-full bg-transparent border-0 outline-none"
               placeholder="Sort a command or search..."
            />
         </div>
         <Combobox.Choices
            className="max-h-72 overflow-y-auto flex flex-col"
            static
         ></Combobox.Choices>
      </Combobox>
   </Dialog>
  );
};
Just a few issues are occurring right here. First, we import the Dialog and Combobox parts. Dialog is rendered as a wrapper across the Combobox, and we initialize an area state known as isOpen to manage the modal.
We render a Dialog.Overlay contained in the Dialog element to function the overlay for the modal. You may model this nonetheless you need, however right here, we’re simply utilizing backdrop-blur. Then, we render the Combobox element and cross in a handler operate to the onChange prop. This handler known as each time an merchandise is chosen within the Combobox. You’d usually wish to navigate to a web page or execute an motion right here, however for now, we simply shut the Dialog.
Combobox.Enter will deal with the search performance, which we’ll add later on this part. Combobox.Choices renders a ul aspect that wraps the checklist of outcomes we’ll render. We cross in a static prop that signifies we wish to ignore the internally managed state of the element.
Subsequent, we render our CommandPalette within the App.jsx file:
const App = () => {
   return (
      <div className="flex w-full bg-primary h-screen max-h-screen min-h-screen overflow-hidden">
         <Drawer groups={groups} />
         <AllIssues points={points} />
         <CommandPalette instructions={instructions}/>
      </div>
   );
};
Let’s discuss how our command palette will operate. We’ve a listing of predefined instructions within the information/seed.json file. These instructions can be displayed within the palette when it’s opened and might be filtered based mostly on the search question. Pretty easy, proper?
The CommandGroup element
CommandPalette receives a instructions prop, which is the checklist of instructions we imported from seed.json. Now, create a CommandGroup.jsx file within the parts folder and add the next code:
// CommandGroup.jsx
import React from "react";
import clsx from "clsx";
import { Combobox } from "@headlessui/react";
import { PlusIcon, ArrowSmRightIcon } from "@heroicons/react/strong";
import {
   CogIcon,
   UserCircleIcon,
   FastForwardIcon,
} from "@heroicons/react/define";
import { ProjectIcon } from "../icons/ProjectIcon";
import { ViewsIcon } from "../icons/ViewsIcon";
import { TemplatesIcon } from "../icons/TemplatesIcon";
import { TeamIcon } from "../icons/TeamIcon";

export const CommandGroup = ({ instructions, group }) => {
   return (
      <React.Fragment>
         {/* solely present the header when there are instructions belonging to this group */}
         {instructions.filter((command) => command.group === group).size >= 1 && (
            <div className="flex items-center h-6 flex-shrink-0 bg-accent/50">
               <span className="text-xs text-slate-100 px-3.5">{group}</span>
            </div>
         )}
         {instructions
            .filter((command) => command.group === group)
            .map((command, idx) => (
               <Combobox.Possibility key={idx} worth={command}>
                  {({ lively }) => (
                     <div
                        className={clsx(
                           "w-full h-[46px] text-white flex items-center hover:bg-primary/40 cursor-default transition-colors duration-100 ease-in",
                           lively ? "bg-primary/40" : ""
                        )}
                     >
                        <div className="px-3.5 flex items-center w-full">
                           <div className="mr-3 flex items-center justify-center w-4">
                              {mapCommandGroupToIcon(
                                 command.group.toLowerCase()
                              )}
                           </div>
                           <span className="text-sm text-left flex flex-auto">
                              {command.title}
                           </span>
                           <span className="text-[10px]">{command.shortcut}</span>
                        </div>
                     </div>
                  )}
               </Combobox.Possibility>
            ))}
      </React.Fragment>
   );
};
We’re merely utilizing the CommandGroup element to keep away from some repetitive code. Should you take a look at the Linear command palette, you’ll see that the instructions are grouped based mostly on context. To implement this, we have to filter out the instructions that belong to the identical group and repeat that logic for every group.
The CommandGroup element receives two props, instructions and group. We’ll filter the instructions based mostly on the present group and render them utilizing the Combobox.Possibility element. Utilizing render props, we will get the lively merchandise and magnificence it accordingly, permitting us to render the CommandGroup for every group within the CommandPalette whereas conserving the code clear.
Be aware that we now have a mapCommandGroupToIcon operate someplace within the code block above. It is because every group has a special icon, and the operate is only a helper to render the right icon for the present group. Now, add the operate just under the CommandGroup element in the identical file:
const mapCommandGroupToIcon = (group) => {
   swap (group) {
      case "situation":
         return <PlusIcon className="w-4 h-4 text-white"/>;
      case "undertaking":
Now, we have to render the CommandGroup element in CommandPalette.
Import the element as follows:
import { CommandGroup } from "./CommandGroup";
Render it contained in the Combobox.Choices for every group:
<Combobox.Choices
   className="max-h-72 overflow-y-auto flex flex-col"
   static
>
   <CommandGroup instructions={instructions} group="Difficulty"/>
   <CommandGroup instructions={instructions} group="Venture"/>
   <CommandGroup instructions={instructions} group="Views"/>
   <CommandGroup instructions={instructions} group="Staff"/>
   <CommandGroup instructions={instructions} group="Templates"/>
   <CommandGroup instructions={instructions} group="Navigation"/>
   <CommandGroup instructions={instructions} group="Settings"/>
   <CommandGroup instructions={instructions} group="Account"/>
</Combobox.Choices>
You need to see the checklist of instructions being rendered now. The following step is to wire up the search performance.
Implementing the search performance
Create an area state variable in CommandPalette.jsx:
// CommandPalette.jsx
const [query, setQuery] = useState("");
Go the state replace handler to the onChange prop in Combobox.Enter. The question can be up to date with each character you kind within the enter field:
<Combobox.Enter
  className="p-5 text-white placeholder-gray-200 w-full bg-transparent border-0 outline-none"
  placeholder="Sort a command or search..."
  onChange={(e) => setQuery(e.goal.worth)}
/>
One of many key properties of a great command palette is in depth search performance. We will simply do a easy string comparability of the search question with the instructions, nonetheless that wouldn’t account for typos and context. A a lot better resolution that doesn’t introduce an excessive amount of complexity is a fuzzy search.
We’ll use the Fuse.js library for this. Fuse.js is a strong, light-weight, fuzzy search library with zero dependencies. Should you’re not acquainted with fuzzy looking, it’s a string matching method that favors approximate matching over the precise match, implying that you could get right options even when the question has typos or misspellings.
First, set up the Fuse.js library:
$ yarn add fuse.js
In CommandPalette.jsx, instantiate the Fuse class with a listing of instructions:
// CommandPalette.jsx
const fuse = new Fuse(instructions, { includeScore: true, keys: ["name"] });
The Fuse class accepts an array of instructions and configuration choices. The keys discipline is the place we register what fields are within the instructions checklist to be listed by Fuse.js. Now, create a operate that can deal with the search and return the filtered outcomes:
// CommandPalette.jsx
const filteredCommands =
  question === ""
     ? instructions
     : fuse.search(question).map((res) => ({ ...res.merchandise }));
We test if the question is empty, return all of the instructions, and if not, run the fuse.search methodology with the question. Additionally, we’re mapping the outcomes to create a brand new object. That is to take care of consistency as a result of the outcomes returned by Fuse.js have some new fields and won’t match the construction we have already got.
Now, cross the filteredCommands to the instructions prop in every CommandGroup element. It ought to appear to be the code beneath:
// CommandPalette.jsx
<CommandGroup instructions={filteredCommands} group="Difficulty"/>
<CommandGroup instructions={filteredCommands} group="Venture"/>
<CommandGroup instructions={filteredCommands} group="Views"/>
<CommandGroup instructions={filteredCommands} group="Staff"/>
<CommandGroup instructions={filteredCommands} group="Templates"/>
<CommandGroup instructions={filteredCommands} group="Navigation"/>
<CommandGroup instructions={filteredCommands} group="Settings"/>
<CommandGroup instructions={filteredCommands} group="Account"/>
Attempt looking within the command palette and see if the outcomes are being filtered:
We’ve a completely useful command palette, however you would possibly discover that it’s at all times open. We want to have the ability to management its open state. Let’s outline a keyboard occasion that can pay attention for a key mixture and replace the open state. Add the next code to CommandPalette.jsx:
// CommandPalette.jsx
useEffect(() => {
  const onKeydown = (e) => {
     if (e.key === "ok" && (e.metaKey || e.ctrlKey)) {
        e.preventDefault();
        setIsOpen(true);
     }
  };
  window.addEventListener("keydown", onKeydown);
  return () => {
     window.removeEventListener("keydown", onKeydown);
  };
}, []);
We’re utilizing a useEffect Hook to register a keydown keyboard occasion when the element is mounted, and we use a clean-up operate to take away the listener when the element unmounts.
Within the Hook, we test if the important thing mixture matches ctrl + ok. If it does, then the open state is ready to true. You too can use a special key mixture, but it surely’s necessary to not use combos that conflict with the native browser shortcuts.
That’s it! You will discover the completed model of this undertaking on the finished-project department.
react-command-palette: Prebuilt element
We’ve explored find out how to construct a command palette element from scratch. Nonetheless, you’d in all probability reasonably not construct your individual each time you want a command palette. That’s the place a prebuilt element might be helpful. Most element libraries don’t supply a command palette, however react-command-palette is a effectively written element that’s accessible and browser appropriate.
To make use of this element, set up it as a dependency in your undertaking:
$ yarn add react-command-palette
Import the element and cross your checklist of instructions to it as follows:
import React from "react";
import CommandPalette from 'react-command-palette';

const instructions = [{
  name: "Foo",
  command() {}
},{
  name: "Bar",
  command() {}
}]

export default operate App() {
  return (
    <div>
      <CommandPalette instructions={instructions} />
    </div>
  );
}
There are plenty of config choices that you should utilize to customise the look and habits to fulfill your necessities. For instance, the theme config helps you to select from various built-in themes or create your individual customized theme.
Subsequent steps
On this article, you’ve realized about command palettes, the best use instances for them, and what options make up a great command palette. You’ve additionally explored in detailed steps find out how to construct one utilizing the Headless UI combobox element and Tailwind CSS.
Should you simply wish to shortly ship this function in your utility, then a prebuilt element like react-command-palette is the way in which to go. Thanks for studying, and remember to depart a remark when you have any questions.
Is your frontend hogging your customers’ CPU?
As net frontends get more and more advanced, resource-greedy options demand an increasing number of from the browser. Should you’re thinking about monitoring and monitoring client-side CPU utilization, reminiscence utilization, and extra for all your customers in manufacturing, attempt LogRocket.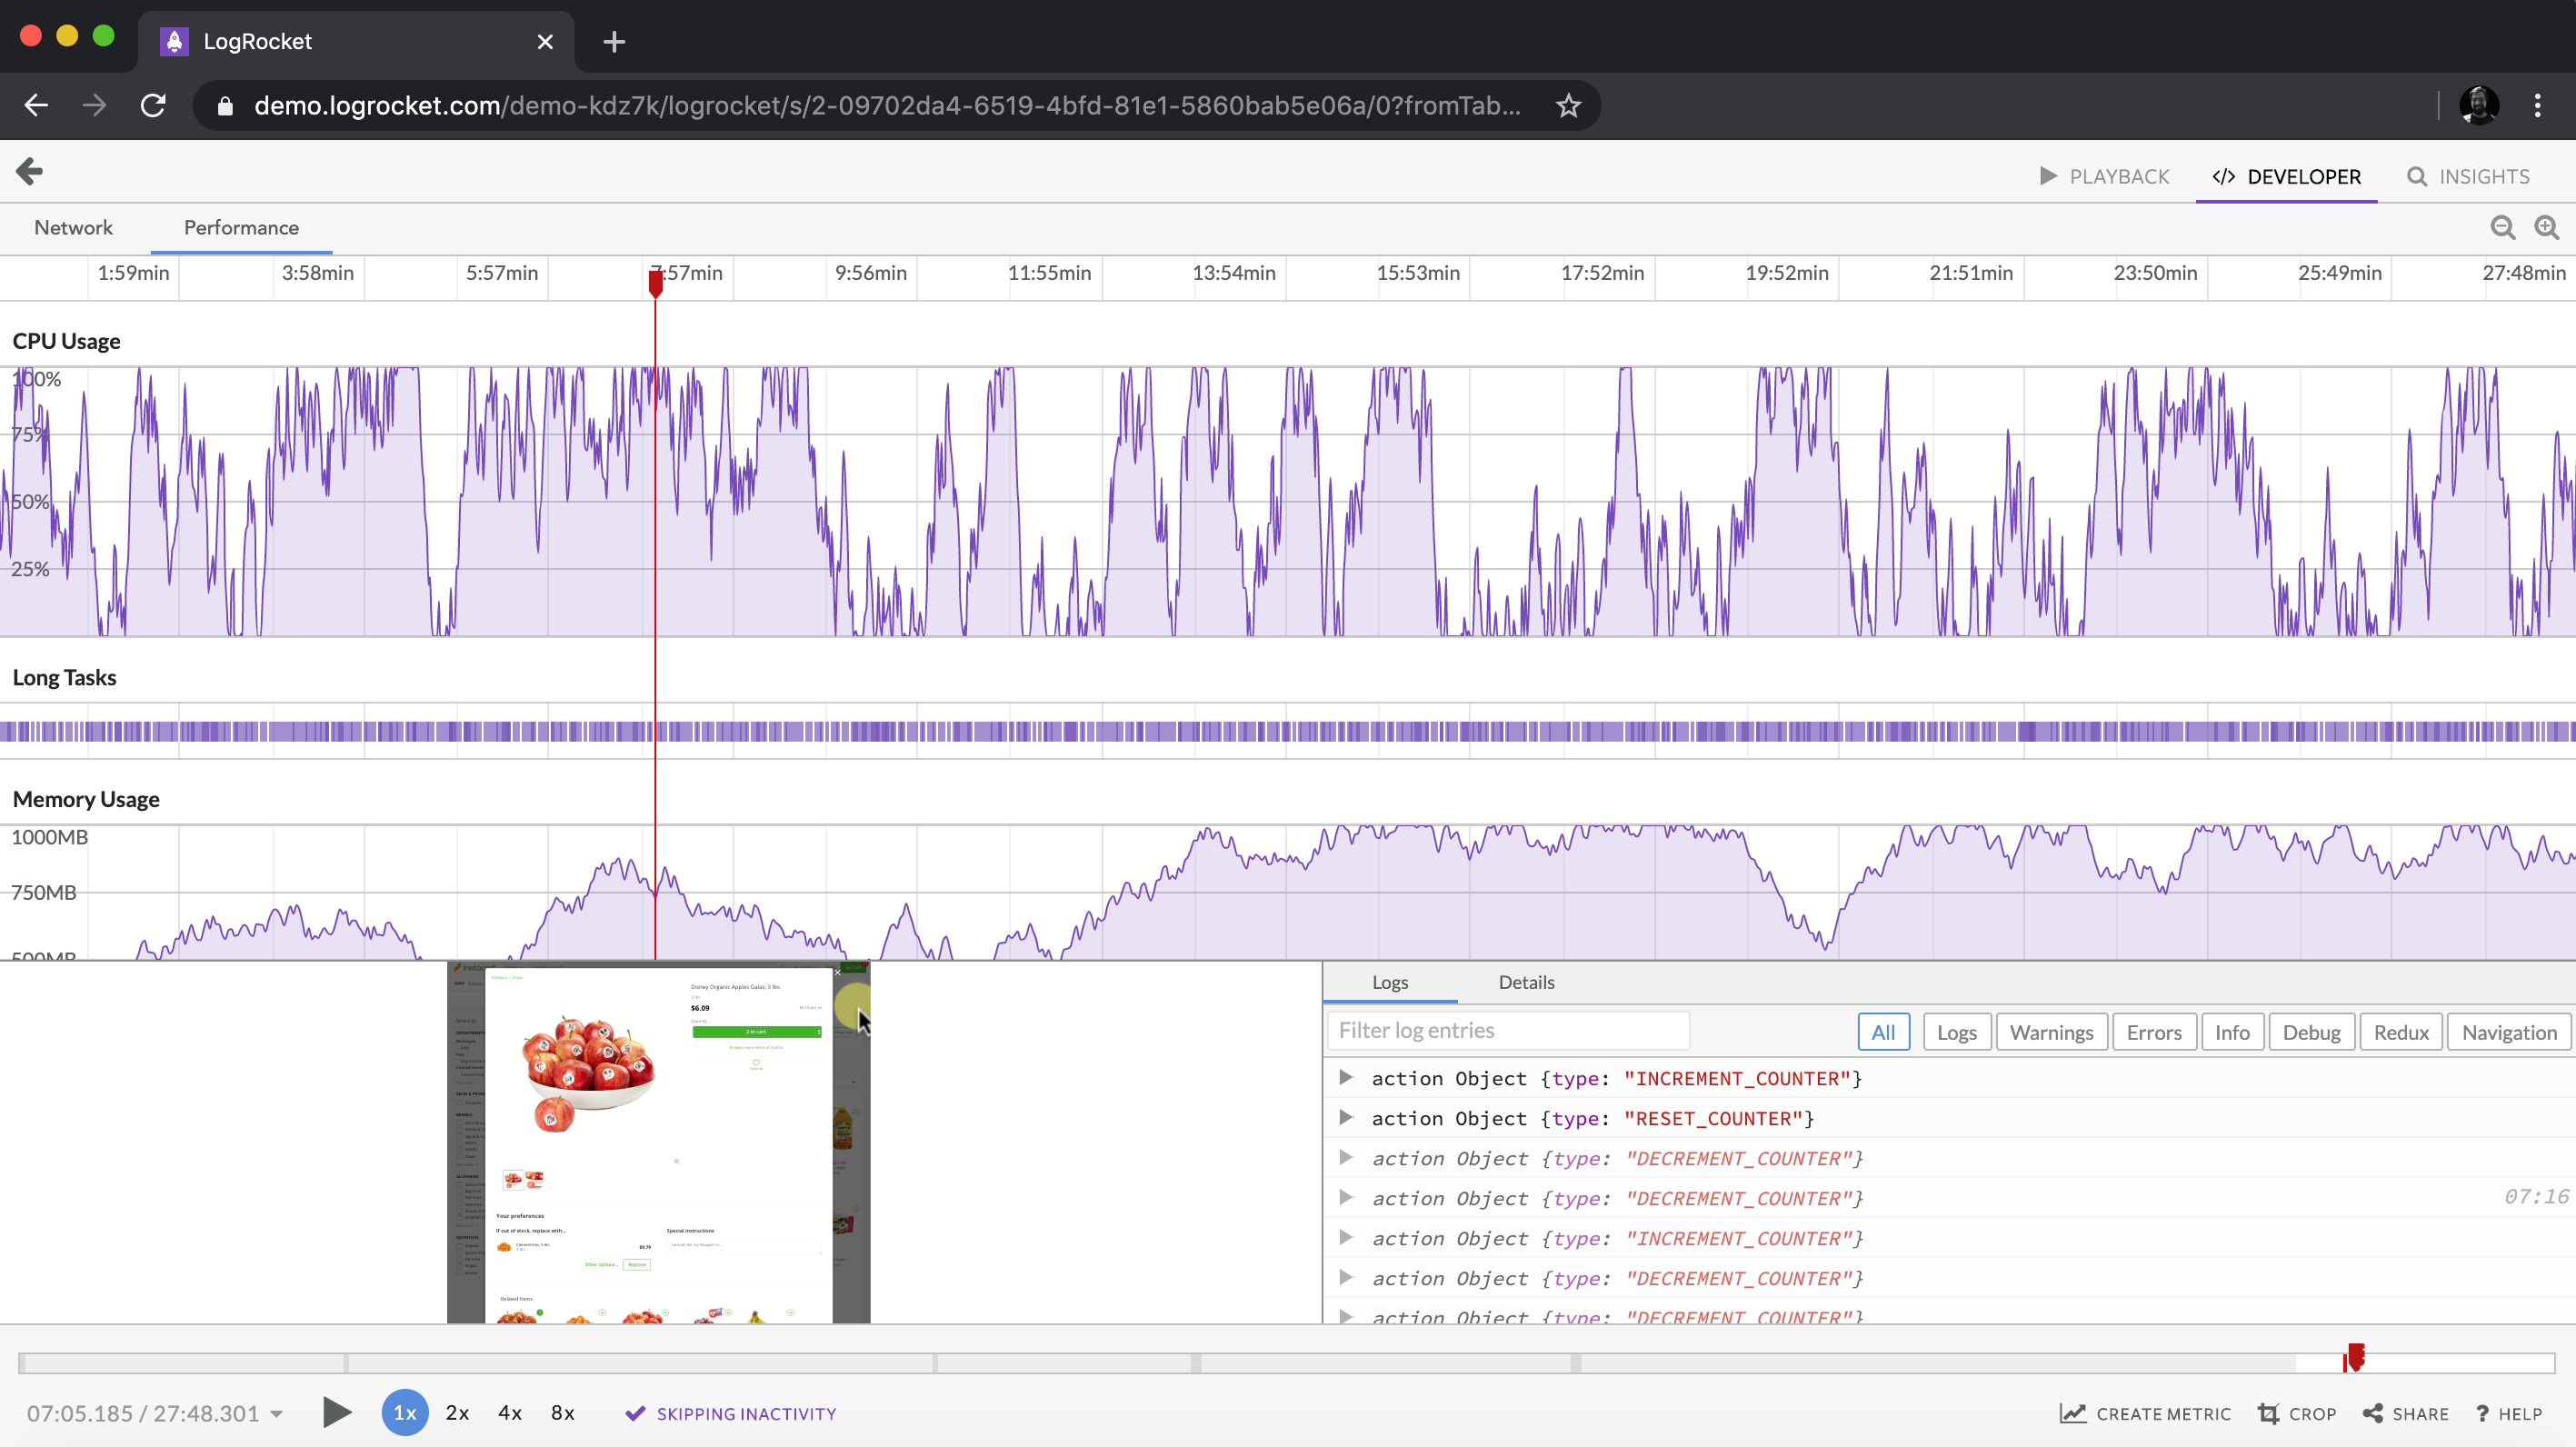 https://logrocket.com/signup/
LogRocket is sort of a DVR for net and cellular apps, recording all the pieces that occurs in your net app or website. As a substitute of guessing why issues occur, you may combination and report on key frontend efficiency metrics, replay consumer classes together with utility state, log community requests, and robotically floor all errors.
Modernize the way you debug net and cellular apps — Begin monitoring without spending a dime.
