Canvas-gif is a wonderful software for accessing and enhancing GIF frames in Node.js initiatives, together with including textual content, furthering animations, and enhancing frames. Canvas-gif harnesses all of the superpowers of Canvas, permitting you to control each a part of the picture past simply including textual content to every GIF body.
On this article, we’ll write a pattern code to learn and edit a GIF utilizing canvas-gif in your subsequent Node.js mission. Earlier than diving into enhancing GIFs, be sure you become familiar with creating and saving photos with node-canvas.
Bounce forward:
Getting began with canvas-gif
The canvas-gif library permits you to learn enter GIFs as a buffer with the choice to coalesce the GIF. Nevertheless, if you happen to intend to coalesce the GIF, you’ll want to put in ImageMagick.
First, canvas-gif decodes the GIF into an UInt8Array(s) and creates a canvas occasion for every body that the GIF returns. Then, it transforms the UInt8Array into canvas ImageData and places it into the CanvasRenderingContext. From there, the library passes the context and different related data to the capabilities to edit the body.
The library will then manipulate the context and add the newly edited body’s context to the encoder. Lastly, canvas-gif will return the encoder’s information as a buffer, which we’ll write right into a GIF file.
Now that we’ve coated the background, let’s dive in and arrange a mission to discover an instance in motion.
Mission setup
You’ll have to have Node.js and npm put in to work with canvas-gif.
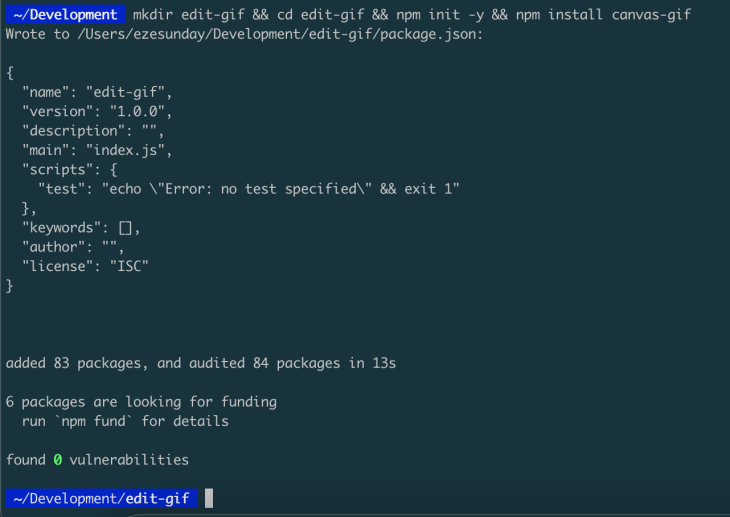
Create a listing for the mission, initialize a Node.js mission, and set up the canvas-gif npm library with the command beneath:
mkdir edit-gif && cd edit-gif && npm init -y && npm set up canvas-gif
Right here’s an instance of what is going to occur once you run the code:
After the setup and set up are full, obtain a GIF and place it within the root listing. For this text, we’ll use this GIF:

Subsequent, create an app.js file and add the next content material to it:
const canvasGif = require("canvas-gif");
const fs = require("fs");

canvasGif(path.be part of(__dirname, "mr-rogers-nightmare.gif"), callBack, choices)
  .then((buffer) =>
    fs.writeFileSync(path.resolve(__dirname, "output1.gif"), buffer)
  )
  .catch((error) => {
    console.log(error);
  });
Right here, canvasGif exposes the callBack operate to just accept the GIF file path and requires a 3rd non-obligatory configuration argument. Don’t fear; we’ll take a look at dealing with that quickly.
Utilizing the callBack operate with canvas-gif
callBack permits you to modify the body’s context as part of the Canvas API. Right here, you possibly can render 2D drawings, draw shapes, create photos, textual content, and extra. We’ll leverage this API to switch our GIF.
Enter the operate definition beneath:
const callBack = (context, width, peak, totalFrames, currentFrame) => {
};
As you possibly can see, callBack accepts a context as the primary argument, adopted by width, peak, totalFrames, and currentFrame, as proven within the code above.
Modifying and including textual content to our Node.js GIF
So as to add textual content to every body, we’ll modify the context by inputting the next code:
const callBack = (context, width, peak, totalFrames, currentFrame) => {
// Edit the body
  context.fillStyle = "#FFA500";
  context.font="30px "Fira Code Retina"";
  context.fillText("Edited by Eze!", 40, 80);
};
Once you cross callBack to canvasGif, it is going to manipulate the GIF frames and add the textual content, font, shade, and the font household.
Now, our present code will appear to be this:
const canvasGif = require("canvas-gif");
const fs = require("fs");

const callBack = (context, width, peak, totalFrames, currentFrame) => {
// Edit the body
  context.fillStyle = "#FFA500";
  context.font="30px "Fira Code Retina"";
  context.fillText("Edited by Eze!", 40, 80);
};
const choices = {}

canvasGif(path.be part of(__dirname, "mr-rogers-nightmare.gif"), callBack, choices)
  .then((buffer) =>
    fs.writeFileSync(path.resolve(__dirname, "output1.gif"), buffer)
  )
  .catch((error) => {
    console.log(error);
  });
Then, once we run it, we’ll get this output:

Utilizing the configurations in canvas-gif
The textual content is within the GIF, however the GIF is rendering too quick, proper? That’s as a result of, by default, canvas-gif renders 60 frames per second (fps). To gradual it down, let’s edit the fps in our choice parameter and scale back it to 20fps by including a key fps with a worth of 20:
let choices = {
  fps: 20
};
After we rerun the script, we get the next end result:
That is a lot slower and resembles the unique GIF  . Now, you possibly can add extra configurations, like looping the GIF or setting a stopping level.
Right here is the pattern configuration template:
let choices = {
   coalesce: false,
   delay: 0,
   repeat: 0,
   algorithm: "neuquant",
   optimiser: true,
   fps: 20,
   high quality: 100,
};
Let’s take a look at every configuration:
delay: This units the delay between every body in milliseconds and defaults to0repeat: This describes what number of instances the GIF ought to repeat and defaults to0, which runs the GIF infinitelyalgorithm: This defines which algorithm the encoder ought to use asneuquant, however might be set tooctree. Thoughoctreemight enhance the processing time, it may possibly lower the file dimensionoptimiser: This tells the encoder whether or not to make use of the inbuilt optimizer and defaults tofalsefps: This describes the variety of frames to render per second, with a default of 60fpshigh quality: This units the standard of the GIF from 1 to 100. The upper the quantity, the higher the standard. By default, it units to100coalesce: This lets you coalesce the GIF, and it defaults tofalse
Including a context drawing
Up to now, we’ve edited our GIF and added textual content to every body. Nevertheless, you are able to do extra, together with drawing shapes, manipulating pixels, and composing.
For instance, right here’s one other context drawing that renders a smiley face:
const canvasGif = require("canvas-gif");
const fs = require("fs");

const callBack = (context, width, peak, totalFrames, currentFrame) => {
// Edit the body
  context.fillStyle="#FFA500";
  context.strokeStyle="black";
  context.lineWidth = 5;
  context.beginPath();
  context.arc(80, 60, 50, 0, 2 * Math.PI);
  context.fill();
  context.stroke();
  context.closePath();
  //eyes
  context.fillStyle="white";
  context.beginPath();
  context.arc(67, 43.75, 7.5, 0, 2 * Math.PI);
  context.fill();
  context.stroke();
  context.closePath();
  context.beginPath();
  context.arc(92.5, 43.75, 7.5, 0, 2 * Math.PI);
  context.fill();
  context.stroke();
  context.closePath();
  //mouth
  context.strokeStyle="magenta";
  context.lineWidth = 5;
  context.beginPath();
  context.arc(80, 60, 37.5, 0, -1 * Math.PI);
  context.stroke();
  context.closePath();

};

let choices = {
   coalesce: false,
   delay: 0,
   repeat: 0,
   algorithm: "neuquant",
   optimiser: true,
   fps: 20,
   high quality: 100,
};

canvasGif(path.be part of(__dirname, "mr-rogers-nightmare.gif"), callBack, choices)
  .then((buffer) =>
    fs.writeFileSync(path.resolve(__dirname, "output1.gif"), buffer)
  )
  .catch((error) => {
    console.log(error);
  });
Right here’s the ultimate product:

Options to canvas-gif
Though there are alternate options to canvas-gif, comparable to jimp, gifwrap, and text-on-gif, they don’t straight remedy the identical issues as canvas-gif.
- Jimp is a JavaScript library that permits you to manipulate photos in your code. With jimp, you possibly can resize, add brightness, flip, crop, and even add opacity to pictures
- Gifwrap is a Node.js jimp compactible library for working with GIFs. With gifwrap, you possibly can create and browse GIFs into an inside illustration prepared for manipulation
- Textual content-on-gif is one other library that permits you to edit GIFs, however it’s centered on manipulating GIFs so as to add textual content
Utilizing gifwrap and jimp
To realize one thing much like what we did with canvas-gif, we’ll have to mix the capabilities of jimp and gifwrap. Right here is an instance of how you need to use each of them to switch a GIF by putting textual content over it:
const { GifUtil, GifFrame, BitmapImage } = require("gifwrap");
const Jimp = require("jimp");
async operate editGif() {
  var frames = [];
  let font = await Jimp.loadFont(Jimp.FONT_SANS_32_WHITE);
  let readGif = await GifUtil.learn("mr-rogers-nightmare.gif");

  for (const body of readGif.frames) {
    let jimpCopied = GifUtil.copyAsJimp(Jimp, body);

    jimpCopied.print(font, 10, 0, "LogRocket");

    const modifiedFrame = new GifFrame(
      new BitmapImage(jimpCopied.bitmap, {
        disposalMethod: body.disposalMethod,
        delayCentisecs: body.delayCentisecs,
      })
    );

    frames.push(modifiedFrame);
  }

  GifUtil.quantizeDekker(frames);
  GifUtil.write("modified.gif", frames);
}
editGif()
In let readGif = await GifUtil.learn("mr-rogers-nightmare.gif");, we learn the GIF into reminiscence with gifwrap after which looped by way of the frames to make use of jimp to create jimpCopied.print(font, 10, 0, "LogRocket");. From there, we made a brand new body based mostly on the textual content and the picture in that particular body.
Lastly, we pushed all new frames into the frames array to create a brand new edited GIF.
That is the end result you’ll get once you run the code:

Though this course of works, it has efficiency issues and is simply too gradual. Canvas-gif took about three seconds to switch a GIF, however it took 21 seconds to control the identical GIF with gifwrap and jimp.
This distinction is as a result of gifwrap generates a brand new GIF based mostly on the present GIF, whereas canvas-gif straight modifies the frames. Due to this, Canvas-gif implementation performs extra effectively than Gifwrap and Jimp implementation.
Utilizing text-on-gif in Node.js
Though text-on-gif is easy, it focuses on manipulating GIFs to solely add textual content. In contrast to canvas-gif, which harnesses the options of Canvas, text-on-gif can not manipulate each a part of the picture and solely provides textual content to every GIF body.
Right here’s an instance from the docs:
const TextOnGif = require("text-on-gif");
const generate = async ()=>{

  var gif = new TextOnGif({
    file_path: "mr-rogers-nightmare.gif"
  });

  gif.font_color = "orange";
  gif.font_size = "30px";

  var buffer = await gif.textOnGif({
    textual content: "Made with Love ",
    write_path: "mrroger.gif"
  });
}
generate()
The code above will generate this GIF:

Conclusion
On this article, we realized the way to use canvas-gif to edit GIF animations and add shapes, textual content, or photos. Since most of what you are able to do with canvas-gif is dependent upon the Canvas API, I encourage you to study extra concerning the canvas API on MN and within the Node-canvas docs.
Joyful hacking!
200’s solely  Monitor failed and gradual community requests in manufacturing
Deploying a Node-based net app or web site is the simple half. Ensuring your Node occasion continues to serve assets to your app is the place issues get harder. If you happen to’re considering making certain requests to the backend or third celebration providers are profitable, attempt LogRocket.  https://logrocket.com/signup/
LogRocket is sort of a DVR for net and cellular apps, recording actually every part that occurs whereas a person interacts together with your app. As an alternative of guessing why issues occur, you possibly can combination and report on problematic community requests to shortly perceive the foundation trigger.
LogRocket devices your app to file baseline efficiency timings comparable to web page load time, time to first byte, gradual community requests, and likewise logs Redux, NgRx, and Vuex actions/state. Begin monitoring at no cost.
