
DynamoDB is a NoSQL database, which means that it doesn’t have a pre-defined construction. With DynamoDB, you’ll be able to retailer any information you need with out worrying concerning the information mannequin, making it a strong software to make use of when working with unstructured information.
However NoSQL comes at a value. Not defining a construction means it’s essential to constantly keep the construction and information sorts, or danger your utility crashing.
Builders have give you methods to forestall these points. On this article, we are going to discover why you need to use ORM, or object-relational mapping, with DynamoDB to handle the fashions of your database. We may even see why Dynamoose is the perfect ORM software to make use of for our functions. Lastly, we’ll combine Dynamoose with a NestJS utility and construct an entire CRUD app that you need to use as a reference.
To leap forward on this article:
Let’s get began!
Ache factors with DynamoDB
The most typical option to work together with DynamoDB from a JavaScript utility is through the use of the DynamoDB shopper of aws-sdk. However this comes with a number of points.
1. DynamoDB doesn’t have a option to handle information fashions
The aws-sdk shopper doesn’t supply a option to handle your utility fashions. This turns into a problem in case your utility requires consistency.
2. DynamoDB doesn’t have information validation
This is usually a debatable subject as a result of one of many important advantages of utilizing DynamoDB is the power to retailer something within the database.
However, in actuality, we don’t typically require that. For instance, we don’t put electronic mail into the age discipline, proper? So what will we do?
if(title.size > 0 && isEmail(electronic mail)){
  // retailer the worth
}
We’ve got to do the validation ourselves, and for each discipline, which turns into tough to take care of.
3. Bizarre syntax with DynamoDB
The syntax for accessing DynamoDB is unusual and infrequently depends upon string queries, which is inconvenient. Beneath is an instance from the official documentation that queries a desk containing details about an episode from a video sequence.
var params = {
  ExpressionAttributeValues: {
    ':s': {N: '2'},
    ':e' : {N: '09'},
    ':subject' : {S: 'PHRASE'}
  },
  KeyConditionExpression: 'Season = :s and Episode > :e',
  ProjectionExpression: 'Episode, Title, Subtitle',
  FilterExpression: 'incorporates (Subtitle, :subject)',
  TableName: 'EPISODES_TABLE'
};

ddb.question(params, perform(err, information) {
   // deal with the error and the opposite issues right here
});
This will take a very long time to grasp. And when there are a number of fields to purpose with, it turns into a nightmare!
4. DynamoDB is tough to take care of
These points with DynamoDB give builders (together with myself) a tricky time reasoning with the queries. And since the syntax is unfamiliar, it requires a steep studying curve, which isn’t fascinating for fast-paced tasks.
The answer to DynamoDB’s points
We are able to remedy the beforehand talked about points with ORM, or object-relational mapping. ORM instruments make it straightforward to handle the fashions of your database, and make accessing the database simpler through the use of easier syntax.
There are numerous advantages to utilizing ORM:
- Syntax is simple
- Managing the fashions turns into simpler when you’ll be able to reap the benefits of your favourite TypeScript
- It’s safer
- Information validation could be finished simply
- It will possibly talk with the DynamoDB tables and supply TypeScript help
Why you need to select Dynamoose as your ORM software
There are numerous ORM instruments to decide on for DynamoDB, together with dynamodb-data-types, dyngodb, and dynasaur.
However none of them are almost as in style as Dynamoose, which:
Extra nice articles from LogRocket:
- Is straightforward to make use of
- Is just like Mongoose, which is the ORM software for MongoDB, making the syntax very acquainted to builders
- Gives Good Varieties help
- Has highly effective filtering capabilities
- Helps DynamoDB transactions
- Gives callback and promise help
Right this moment, we are going to see how we will use Dynamoose with a NestJS utility.
Making a NestJS app with Dynamoose
Step one to creating our NestJS mission is to put in the NestJS CLI.
npm i -g @nestjs/cli
Subsequent, initialize the boilerplate mission.
nest new nestjs-dynamoose-integration
Then, set up the required dependency.
yarn add dynamoose
And we’re prepared to begin!
1. Configuring Dynamoose
To ensure that Dynamoose to speak to your DynamoDB tables in your AWS account, it wants the correct permission. You will discover the alternative ways to configure that right here.
For our functions, we are going to set the credentials utilizing the access_key and the secret_key inside the applying.
Open the principal.ts file, and add the next configuration code:
import { NestFactory } from '@nestjs/core';
import { AppModule } from './app.module';

import * as dynamoose from 'dynamoose';

async perform bootstrap() {
  // do that earlier than the app is created.
  dynamoose.aws.sdk.config.replace({
    accessKeyId: 'YOUR_ACCESS_KEY',
    secretAccessKey: 'YOUR_SECRET_ACCESS_KEY',
    area: 'YOUR_PREFERRED_REGION',
  });

  const app = await NestFactory.create(AppModule);
  await app.pay attention(3000);
}
bootstrap();
If you’re not sure easy methods to get these keys, you’ll be able to check with the documentation. Ideally, you need to load them utilizing the surroundings variables, and don’t use them as plain textual content contained in the mission.
2. Creating the consumer endpoints
The good factor about NestJS is that it mechanically creates many boilerplates for you. Right this moment we’re going to construct a CRUD endpoint utilizing Dynamoose. Let’s create the boilerplate codes for it.
Run the next command in your command line.
nest g useful resource consumer
After working the command, you will note that every one the mandatory codes are auto-generated.
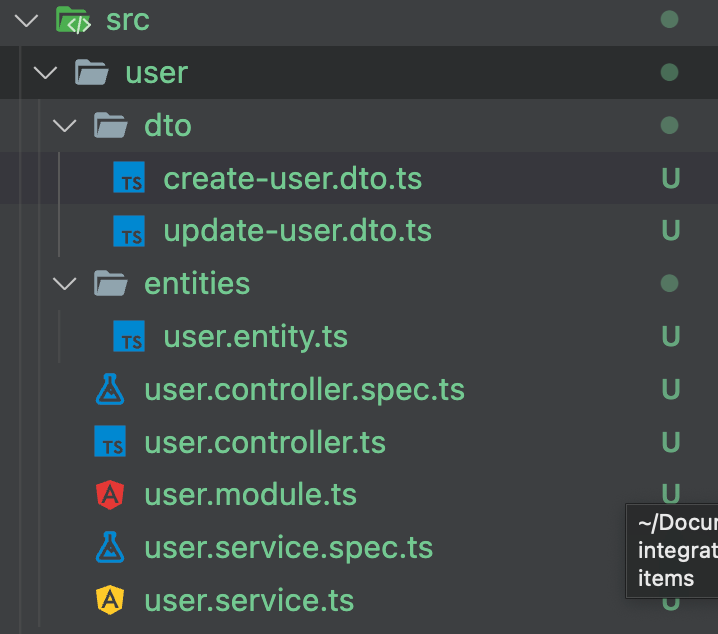
How cool is that?
3. Defining the information construction
The subsequent step is to create an entity class that extends the Doc class offered by Dynamoose, which is able to outline the construction of our entity.
Open up the consumer.entity.ts file and paste the next code.
import { Doc } from 'dynamoose/dist/Doc';

export class Person extends Doc {
  Id = 0;
  Identify="";
}
This construction serves two functions:
- It helps different builders take a fast take a look at the information construction
- It auto-suggests the fields utilizing the facility of the TypeScript
This step is non-obligatory, however I’d extremely advocate it!
4. Creating the schema to outline Dynamoose database fashions
Following the footprint of the Mongoose library, Dynamoose additionally defines the database fashions utilizing the idea of a schema. A schema is the definition of a knowledge mannequin our DynamoDB desk understands.
As mentioned earlier, DynamoDB doesn’t limit the information that we will add to the database tables. However we will outline the specified information form utilizing the schema, and Dynamoose will be sure that our information conforms to that construction.
Another advantages embrace:
- We are able to mark a discipline as
required, which is able to be sure that discipline won’t ever be empty - We are able to outline the
sortof a property - We are able to outline the construction of the nested objects
- We are able to present a
customized validationperform to validate a discipline’s worth - We are able to generate
timestampsmechanically
Let’s create a brand new consumer.schema.ts file within the entities listing and paste the next code there.
import * as dynamoose from 'dynamoose';

export const UserSchema = new dynamoose.Schema(
  {
    Id: {
      sort: Quantity,
      hashKey: true,
      required: true,
    },
    Identify: {
      sort: String,
      required: true,
      index: {
          title: nameIndex,
          world: true
      }
    },
  },
  {
    timestamps: true,
  },
);
Let’s perceive what’s occurring right here:
- The
Iddiscipline is specified as aQuantity, so we will’t go simply any key right here - The
Identifydiscipline isrequired, so whether it is empty, it’s going to trigger an error - The kind of the
IdentifyisString, so no different information sort can go there - We added the
timestampsproperty, which is able to mechanically generate and keep thecreatedAtandupdatedAtfields for us - We created a world index on the
Identifydiscipline
These items occurred with out us writing pointless validation features.
5. Creating CRUD operations
Let’s open up the consumer.service.ts file the place we are going to create all of the required CRUD operations.
First, guarantee we now have a neighborhood dbInstance and initialize it with consumer info.
Understand that, ideally, we need to create a separate consumer.repository.ts file to maintain our database logic. We often use service courses for enterprise logic.
For simplicity, we are actually placing the DB operations contained in the service class.
@Injectable()
export class UserService {
  non-public dbInstance: Mannequin<Person>;

  constructor() {
    const tableName="customers";
    this.dbInstance = dynamoose.mannequin<Person>(tableName, UserSchema);
  }

  //... crud features
}
Right here, we’re including a personal dbInstance with the Person mannequin. Contained in the constructor, we specify which desk we need to use and supply the UserSchema right here.
Now, our dbInstance is aware of which DynamoDB desk to entry, and the anticipated information sorts.
Making a consumer
To create a consumer, we will write the next perform.
async create (createUserDto: CreateUserDto) {
    return await this.dbInstance.create({
      Id: createUserDto.Id,
      Identify: createUserDto.Identify,
    });
}
Discover that we’re utilizing the CreateUserDto request object, which NestJS already outlined for us.
It’ll look one thing like this:
export class CreateUserDto {
  Id: quantity;
  Identify: string;
}
Getting a consumer
To get a single consumer, we will question the database utilizing the first key like this:
async findOne(id: quantity) {
    return await this.dbInstance.get({ Id: id });
}
You can too question utilizing many issues, like a partial match, or lower than, or higher than operators. You will discover extra particulars within the documentation.
Updating a consumer
To replace the consumer, we get an replace perform offered by Dynamoose.
async replace(id: quantity, updateUserDto: UpdateUserDto) {
    return await this.dbInstance.replace({
      Id: id,
      Identify: updateUserDto.Identify,
    });
}
Deleting a consumer
To delete a consumer by ID, enter this code:
async take away(id: quantity) {
    return await this.dbInstance.delete({ Id: id });
}
The ultimate model ought to seem like this:
import * as dynamoose from 'dynamoose';
import { Injectable } from '@nestjs/frequent';
import { CreateUserDto } from './dto/create-user.dto';
import { UpdateUserDto } from './dto/update-user.dto';
import { Person } from './entities/consumer.entity';
import { Mannequin } from 'dynamoose/dist/Mannequin';
import { UserSchema } from './entities/consumer.schema';

@Injectable()
export class UserService {
  non-public dbInstance: Mannequin<Person>;

  constructor() {
    const tableName="customers";
    this.dbInstance = dynamoose.mannequin<Person>(tableName, UserSchema);
  }

  async create(createUserDto: CreateUserDto) {
    return await this.dbInstance.create({
      Id: createUserDto.Id,
      Identify: createUserDto.Identify,
    });
  }

  async findOne(id: quantity) {
    return await this.dbInstance.get({ Id: id });
  }

  async replace(id: quantity, updateUserDto: UpdateUserDto) {
    return await this.dbInstance.replace({
      Id: id,
      Identify: updateUserDto.Identify,
    });
  }

  async take away(id: quantity) {
    return await this.dbInstance.delete({ Id: id });
  }
}
6. Check consumer endpoints
Let’s head over to Postman and create a consumer utilizing the next physique.
endpoint: http://localhost:3000/consumer
technique: POST
physique: {
    "Id": 1,
    "Identify" : "Faisal"
}
Should you attempt to get the actual consumer like this…
endpoint: http://localhost:3000/consumer/1
technique: GET
… it provides you with the next response:
{
    "Id": 1,
    "Identify": "Faisal",
    "createdAt": 1660504687981,
    "updatedAt": 1660504687981
}
You possibly can see there are two further fields: createdAt and updatedAt, that are generated mechanically.
Equally, you may as well play with the replace and delete strategies.
Now you’ve a completely working CRUD utility able to speaking to the precise DynamoDB utilizing Dynamoose.
On this article, you realized easy methods to use Dynamoose with a NestJS utility. Try the GitHub repository for this mission right here. An alternate package deal referred to as nestjs-dynamoose provides some syntactic sugar across the utilization.
I hope you realized one thing new at present. Have an ideal day!
