Deploy your individual GitLab occasion with automated back-ups
Just a few months in the past, GitLab introduced adjustments to the Free tier, together with limiting personal namespaces to five customers. As my staff will probably be impacted by these adjustments, we determined it was time to present a attempt to Self-Internet hosting! The replace will quickly come reside, so right here I’m sharing some steering on the steps I adopted, gathering and synthetizing the documentation I used.

On this information, I’ll element :
- Deploy a Self-Hosted GitLab occasion with Docker
- Migrate from GitLab SaaS to a Self-Hosted occasion
- Migrate GitLab container registry
- Configure scheduled back-ups importing to a S3-compatible storage
What you have to obtain the identical configuration:
- A VM occasion
- A DockerHub account (emigrate your container registries solely)
- A S3 bucket with learn and write entry (to retailer back-up archives)
- Fundamental understanding of Docker to launch the GitLab server
The very first step is to find out the sources you have to deploy your server. You may comply with GitLab’s necessities relying in your variety of customers, repository storage, but in addition container storage and so forth. You may select to retailer information immediately on the VM storage for higher information switch pace, or on cloud-based storage for scalability.
GitLab’s official documentation provides a number of deployment strategies for Self-Hosted servers. Right here I selected the Docker methodology as I’m accustomed to Docker deployments. Different strategies embody the Omnibus package deal, or Helm for Kubernetes clusters, and are suitable with this information.

Please notice that the Docker deployment truly deploys the Omnibus package deal inside a container, many configuration choices will probably be related.
Configure your VM
In the event you’re deploying on a model new machine, you would possibly wish to test some pre-requisite first, particularly for learners.
- SSH : some suppliers ship machines with a set of default person and password, change it to safe your server. You may create a password-less person and join with ssh keys for instance (see this tutorial).
- Set up docker and different instruments: select the server model that fits your OS. At this level, you might wish to set up a textual content editor additionally.
Deploy with Docker compose
GitLab documentation provides a pattern Docker compose configuration. Right here I share my model with just a few modifications defined bellow:
model: "3.6"
providers:
net:
container_name: gitlab
setting:
GITLAB_OMNIBUS_CONFIG: |
external_url 'https://X.X.X.X'
gitlab_rails['gitlab_shell_ssh_port'] = '2222'
gitlab_rails['omniauth_providers'] = {
title: "gitlab",
app_id: "###",
app_secret: "###"
}
gitlab_rails['backup_keep_time'] = 86400
gitlab_rails['backup_upload_connection'] = {
'supplier' => 'AWS',
'area' => '###',
'aws_access_key_id' => '###',
'aws_secret_access_key' => '###',
'host' => '###',
'endpoint' => '###',
'path_style' => '###',
'aws_signature_version'=> 2
}
gitlab_rails['backup_upload_remote_directory'] = 'backup/gitlab'
picture: gitlab/gitlab-ee:newest
ports:
- 2222:22/tcp
- 443:443/tcp
- 80:80/tcp
restart: all the time
volumes:
- $GITLAB_HOME/logs:/var/log/gitlab
- $GITLAB_HOME/information:/var/choose/gitlab
- $GITLAB_HOME/config:/and so forth/gitlab
Many of the configuration is supplied within the GITLAB_OMNIBUS_CONFIG variable that may comprise any gitlab.rb argument. Right here I used :
gitlab_shell_ssh_port: to map the port utilized by GitLab and preserve the usual SSH port 22 free for SSH connexions. Match with the Docker ports configuration.omniauth_providers: comply with this configuration to allow simple tasks import administration from GitLab.com.backup_*: to add backup archives to S3, extra particulars within the back-ups part bellow.volumes: to entry and persist configuration and information directories positioned contained in the container. Be aware the$GITLAB_HOMEvariable, to specify the foundation folder of volumes inside your VM native storage.
To launch, execute the next command : docker compose up -d
Updating your server
You would possibly later want to vary your server’s configuration. To take action, you’ll be able to edit the compose file then delete the container to create a brand new one.
You can even apply adjustments to the present server by modifying configuration information within the $GITLAB_HOME/config folder, and replace with the next command: docker exec gitlab gitlab-ctl reconfigure . This execute the reconfigure command contained in the container named gitlab .
Migrate your tasks
Now your server is prepared and needs to be out there on https://<your-host>/ . To hook up with the root person, you’ll be able to retrieve the password within the file $GITLAB_HOME/config/initial_root_password and log into your server. Now you can begin to populate your server with all the information you wish to migrate.
First, you’ll be able to create a brand new group or import current ones from you GitLab.com account. Be aware that importing teams solely retreive the sub-groups construction, tasks will probably be imported within the subsequent step. Right here is the checklist of all objects migrated with teams import.
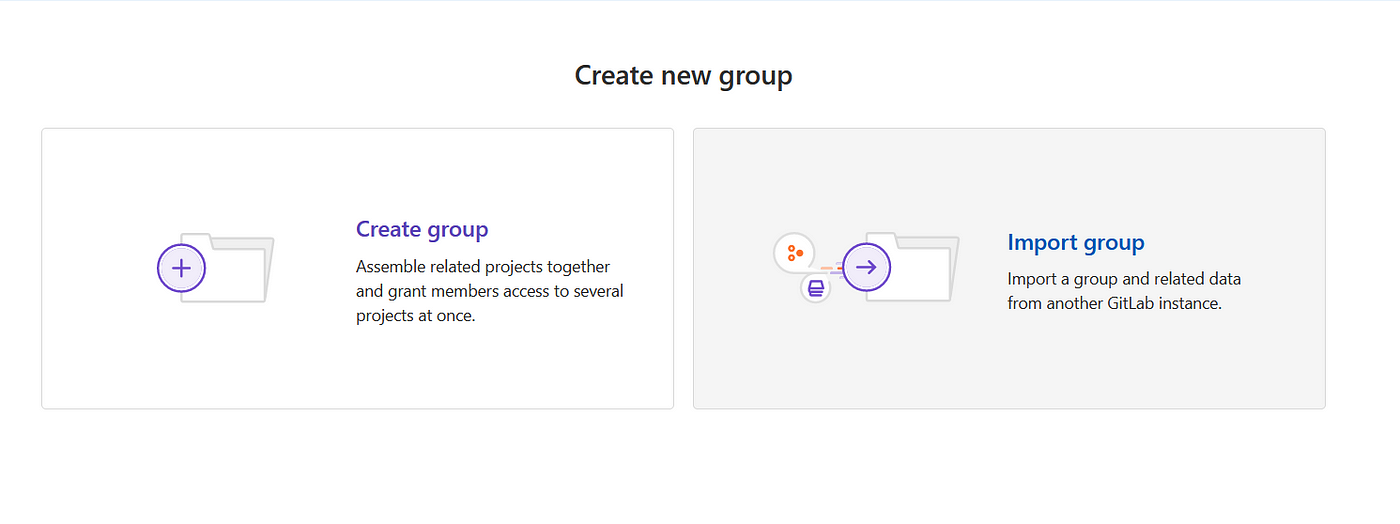
Then, you’ll be able to head to the create venture web page and select your import methodology.

In the event you configured the omniauth_providers possibility, you’ll be able to entry the GitLab.com import web page to simply import many tasks without delay, that is the recommanded methodology for importing numerous tasks, by specifying the goal group and queuing a number of imports without delay.

Be aware you can additionally import tasks from GitLab.com via the URL import. Test right here the checklist of things migrated with the venture import.
In the event you’re utilizing GitLab.com container registry extensively, migrating your photos to your self-hosted occasion would possibly take up plenty of area, greater than your VM may deal with maybe. I personally selected emigrate my photos to DockerHub with a professional account for limitless personal repositories. No matter resolution you go for, you have to contemplate the next:
- photos must be pushed to the brand new container registries,
- you have to replace your CI/CD pipelines in the event that they push/pull photos. I like to recommend utilizing GitLab variables to simply change your registry url and logins,
- you have to replace any service that interacts with the registry: docker-registry secrets and techniques for Kubernetes, or docker login in your servers and builders’ pc for instance.
One remaining step for a dependable deployment is to make sure your information is protected and recoverable from storage failure. GitLab self-hosted model provides built-in back-up features to create and add archives of a server’s information. I used this features to automate a day by day back-up of all my repositories and add the archive to a S3 suitable storage.
Automated back-ups
GitLab provides a built-in operate to create an archive of your server’s information (repositories, builds, artifacts…). It additionally uploads the generated archive to the cloud storage specified within the docker-compose file. I used the next configuration:
gitlab_rails['backup_keep_time'] = 86400
gitlab_rails['backup_upload_connection'] = {
'supplier' => 'AWS',
'area' => '###',
'aws_access_key_id' => '###',
'aws_secret_access_key' => '###',
'host' => '###',
'endpoint' => '###',
'path_style' => '###',
'aws_signature_version'=> 2
}
gitlab_rails['backup_upload_remote_directory'] = 'backup/gitlab'
Be aware:
backup_keep_time: time in seconds of archive retention in your VM, archives older than this threshold will probably be deleted throughout the subsequent back-up execution. It doesn’t deal with archives uploaded on cloud storage.- In case of a S3-compatible storage, use
'supplier'=>'AWS'withendpointas your service’s url, and a few suppliers require the following model for compatibility'aws_signature_version'=>2.
Nevertheless, GitLab built-in back-up operate doesn’t backup the configuration information, so right here I share the bash script used to back-up my server. It makes use of MinIO consumer to avoid wasting information not included within the built-in operate, and delete outdated archives, and assumes that the S3 suitable storage is aliased as my-s3. It shops the one the present configuration and preserve information archive for as much as one week, then notifies by mail the output of this script.
#!/bin/bash# transfer outdated config information
mc mv --recursive my-s3/backup/gitlab/config my-s3/backup/gitlab/outdated
# copy information to s3
{ mc cp $GITLAB_HOME/config/gitlab-secrets.json my-s3/backup/gitlab/config/gitlab-secrets.json ;
mc cp $GITLAB_HOME/config/gitlab.rb my-s3/backup/gitlab/config/gitlab.rb ;
mc cp --recursive $GITLAB_HOME/config/ssl my-s3/backup/gitlab/config/ssl ;
mc cp --recursive $GITLAB_HOME/config/trusted-certs my-s3/backup/gitlab/config/trusted-certs ;
} 1> /tmp/mc_logs.txt 2>&1
# auto backup with gitlab
if docker exec gitlab gitlab-backup create skip=builds,artifacts,registry CRON=1 1> /tmp/backup_logs.txt 2>&1
then
standing="Success"
# take away outdated information
echo 'Eradicating outdated config information'
{ mc rm --recursive --force my-s3/backup/gitlab/outdated ;
mc rm --recursive --force my-s3/backup/gitlab/* --older-than 7d ;
} 1>> /tmp/mc_logs.txt 2>&1
else
standing="Failed"
fi
cat /tmp/mc_logs.txt | mail -s "GitLab Backup $standing" my-mail@firm.com -a FROM:backup@gitlab-server -A /tmp/backup_logs.txt
Please notice :
- step one strikes the configuration at the moment saved on S3 to an
outdatedfolder as a substitute of overwritting it in case of copy failure, - mc steps are executed in a listing adopted by
1>> /tmp/mc_logs.txt 2>&1to avoid wasting the logs in a short lived file to later ship it within the mail notification. Learn extra about UNIX redirections right here, - you’ll be able to ship the mail notification from a non-existing deal with, nonetheless it’d finish in spam folders, particularly with attachments. There are a number of mail consumer to select from, and you may authenticate the sender to an current account, or create filters in your inbox to stop the notification from getting tagged as spam (instance with Gmail).
I selected to run this script as a CRON each morning with the next cronjob : 0 7 * * 5 /bin/sh /residence/admin/self-host/backup.sh . Learn extra about cronjobs right here.
Restoring your information
GitLab supplies official restoration tips right here. Nevertheless, we have to retreive the file from S3 earlier than execution the restore operate. The next script gathers all of the steps to obtain the back-up information, cease the providers and launch the restore operate.
#!/bin/bashbackup_name=$1_gitlab_backup.tar
# obtain config information
mc cp my-s3/backup/gitlab/config/gitlab-secrets.json ./config/gitlab-secrets.json
mc cp my-s3/backup/gitlab/config/gitlab.rb ./config/gitlab.rb
mc cp --recursive my-s3/backup/gitlab/config/ssl ./config/ssl
mc cp --recursive my-s3/backup/gitlab/config/trusted-certs ./config/trusted-certssudo cp -r ./config $GITLAB_HOME/config
# obtain archive
sudo rm -rf ./config
mc cp my-s3/backup/gitlab/$backup_name $backup_name
sudo mv ./$backup_name $GITLAB_HOME/information/backups/$backup_name# auto backup with gitlab
docker exec -it gitlab gitlab-ctl cease puma
docker exec -it gitlab gitlab-ctl cease sidekiq
docker exec -it gitlab gitlab-ctl standingdocker exec -it gitlab gitlab-backup restore --force BACKUP=$1
docker restart gitlab
docker exec -it gitlab gitlab-rake gitlab:test SANITIZE=true
Utilization : ./restore.sh <BACKUP_NAME>
Notes :
BACKUP_NAMEis the title of the backup archive with out the_gitlab_backup.tarextension.- MinIO shops the S3 storage aliases as user-dependant configuration. Althoug writting to my GitLab config folder wants root permission, operating this script as sudo requires to configure the MinIO aliases for
root. I prefered to not execute this script with sudo and as a substitute divided the obtain operation in 2 components : first obtain to a short lived file, thensudotransfer the file to the specified path.
On the finish of this tutorial, you need to have the ability to deploy a functioning GitLab self-hosted server with automated back-ups. You can even handle you container registries with exterior instruments in the event that they take up an excessive amount of area, and restore your server in case of storage failure. Upon getting migrated your tasks, you can begin utilizing your occasion by cloning your repositories regionally and invite different customers on the server.
Did you’ve gotten any problem in organising your server? Did you discover another methodology helpful? Don’t hesitate to share any suggestions and completely satisfied coding !
