Do you wish to create an internet listing in WordPress?
Internet directories will let you earn cash from content material that’s submitted by the individuals who go to your web site.
On this article, we are going to present you how one can create an internet listing in WordPress, and even tips on how to settle for funds for posting premium internet listings.

Why Create a Internet Listing in WordPress?
An online listing is sort of a catalog that lists companies or people.
Yow will discover info comparable to their location, enterprise electronic mail handle, and the companies they provide.

Yellow Pages, Angi, and Yelp are all examples of common internet directories that assist folks discover a place or service.
To assist guests discover what they’re in search of, these common directories typically divide their content material utilizing subjects, classes and tags, pursuits, and different traits, as you possibly can see within the following picture.

Internet directories are a common on-line enterprise thought and an effective way to earn cash on-line from user-generated content material.
Typically, you’ll discover tutorials that present you tips on how to create a listing utilizing an internet listing theme. Nevertheless, this locks you into the theme ceaselessly. As a substitute, we suggest putting in an internet listing plugin that you should utilize with any WordPress theme you need.
With that in thoughts, let’s check out tips on how to create an internet listing in WordPress. Merely use the fast hyperlinks under to leap straight to the strategy you wish to use.
Technique 1: Create a Listing Utilizing Enterprise Listing Plugin
This methodology is best and is advisable for many customers. We might be utilizing the Enterprise Listing plugin. This WordPress listing plugin has all the things you’ll want to create a easy enterprise listing.
There’s additionally a free model of Enterprise Listing plugin obtainable, however you will have to improve to entry the extra superior options.
First, you’ll want to put in and activate the plugin. Should you need assistance, then please see our information on tips on how to set up a WordPress plugin.
After activating the plugin, go to Directories » Settings. You’ll now see a popup asking your permission to create a brand new web page.
The Enterprise Listing plugin wants this web page to work correctly, so go forward and click on on ‘Create required pages for me.’

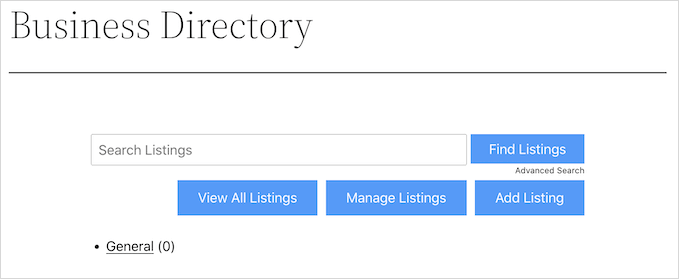
The plugin will now create a brand new paged known as ‘Enterprise Listing.’
By default, this web page has all of the controls guests must look by your totally different listings, and submit their very own listings.
To begin, it’s a good suggestion to test the plugin’s settings by going to Listing » Settings.
Right here, you’ll discover totally different sections:
- Listings
- E mail
- Fee
- Look.
We suggest deciding on every tab after which wanting by the settings, to see whether or not you’ll want to make any modifications.
For instance, in ‘Listings’ you possibly can change what number of listings the plugin reveals on every web page.
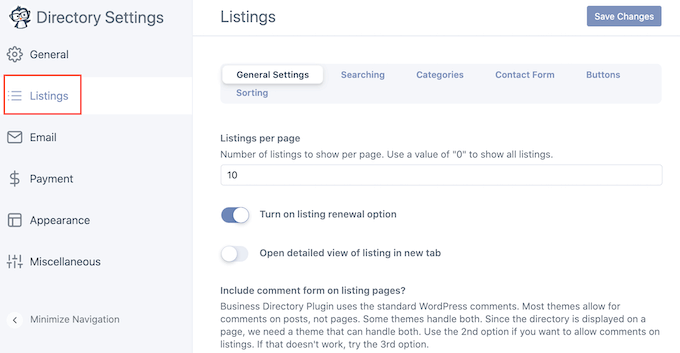
While you’re completed, don’t neglect to click on on ‘Save Modifications’ to retailer your settings.
Enterprise Listing has a regular type that it reveals to guests. You’ll be able to customise that type by going to Listing » Listing Content material.
Within the left-hand menu, click on on ‘Kind Fields.’
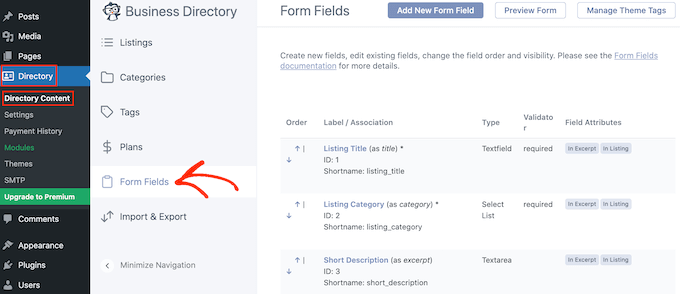
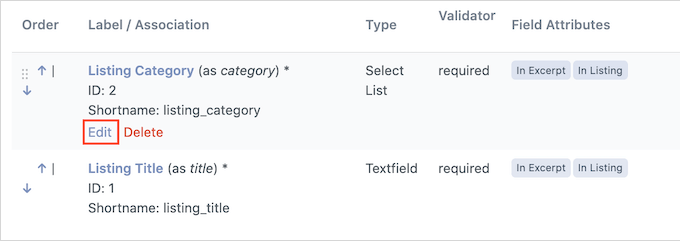
This display screen reveals all of the fields that make up the usual type.
To alter the place a area seems in your type, merely click on on the little up and down arrows within the ‘Order’ column.
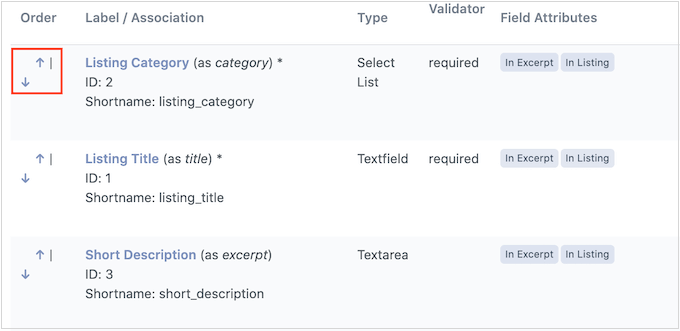
To take away a area, hover your mouse over it after which click on on the ‘Delete’ hyperlink when it seems.
Lastly, if you wish to make some modifications to a specific area then hover your mouse over it after which click on on the ‘Edit’ hyperlink.
This opens a web page the place you possibly can change the sphere label, mark the sphere as obligatory, add an optionally available description, and extra.
While you’re completed, don’t neglect to click on on the ‘Replace Discipline’ button to save lots of your modifications.

Subsequent, it’s a good suggestion to create some classes that folks can use when submitting their listings. These classes will even assist guests browse your listing and discover what they’re in search of.
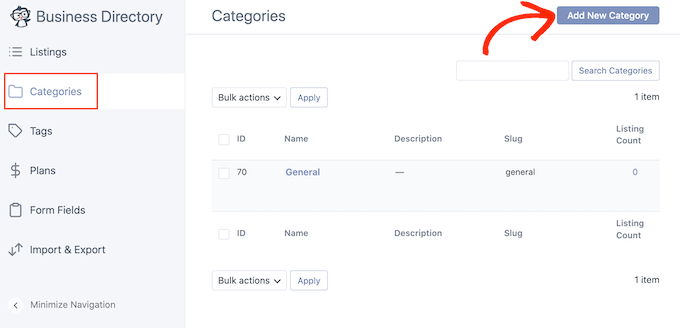
By default, this plugin has a single ‘Basic’ class, however you possibly can add extra by clicking on the ‘Classes’ tab. Then, go forward and choose ‘Add New Class.’
Within the popup that seems, kind in a reputation for the class.
It’s also possible to manage your classes into child-parent relationships, just like baby pages in WordPress. To show a class right into a subcategory, simply open the ‘Guardian Class’ dropdown and select a mum or dad.
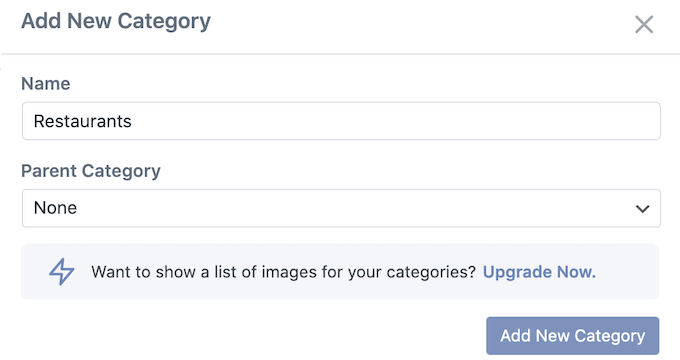
To create the class, go forward and click on on ‘Add New Class.’
You’ll be able to add extra classes to your corporation listing, by repeating the identical course of described above.
Now, guests can create a brand new itemizing by heading over to your Enterprise Listing web page and clicking on the ‘Add Itemizing’ button.
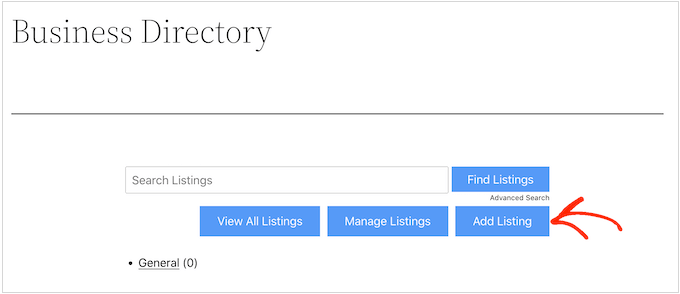
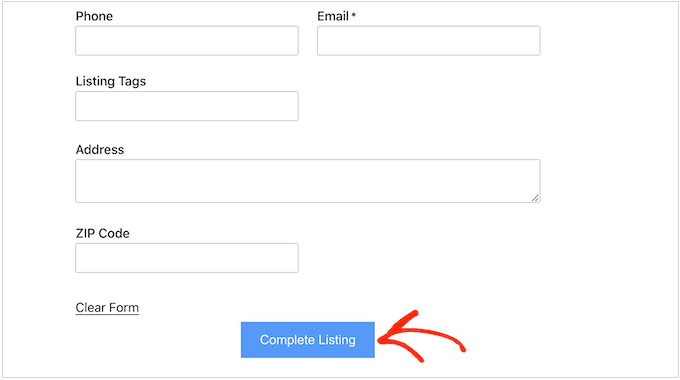
This takes them to a display screen the place they will kind in all the knowledge for the itemizing.
Then, they merely must click on on the ‘Full Itemizing’ button on the backside of the web page to submit their itemizing.
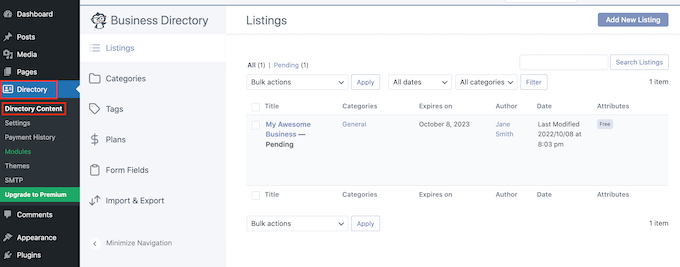
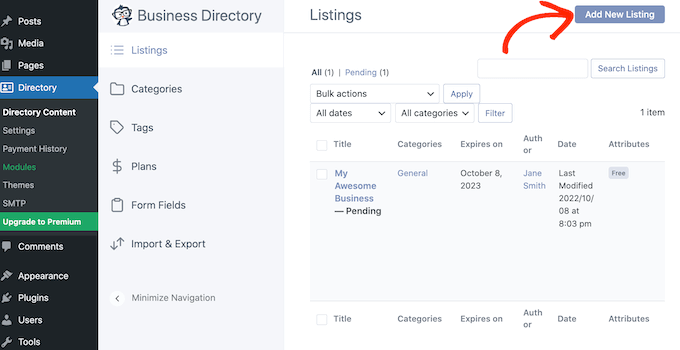
Each time a guests submits an inventory on this manner, you’ll must manually approve it. To do that, head over to Listing » Listing Content material in your WordPress dashboard.
You’ll now see an inventory of pending listings.
To take a more in-depth take a look at an inventory, merely hover your mouse over it after which click on on the ‘Preview’ hyperlink when it seems.
This may open the itemizing in a brand new tab.
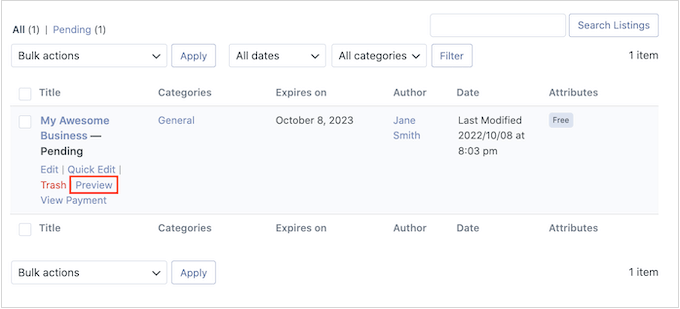
To make any modifications to the itemizing, as soon as once more hover your mouse over the itemizing however this time click on on ‘Edit.’
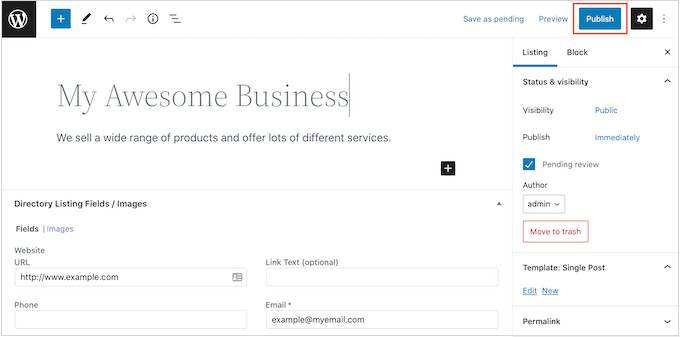
Now you can make any modifications you need. While you’re pleased with the way it appears to be like, click on on the ‘Publish’ button.
As a WordPress admin, you too can create listings within the dashboard. For instance, you may wish to create listings in your companions, in order that they don’t should do the work themselves.
To create an inventory, go to Listing » Listing Content material after which click on on ‘Add New Itemizing.’
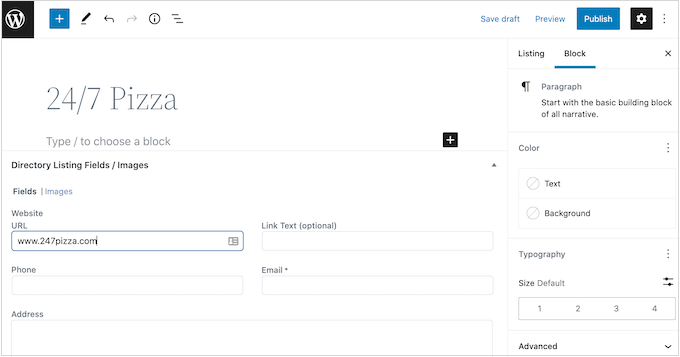
This opens a display screen the place you possibly can kind in all the knowledge.
While you’ve completed, click on on ‘Publish’ to make the itemizing reside.
Accepting Funds for Listing Listings
The Enterprise Listing plugin means that you can settle for funds for publishing an inventory. By default, the plugin solely helps the Authorize.web fee gateway, however you possibly can add different gateways like PayPal, Stripe, Payfast, as a part of their Professional model.
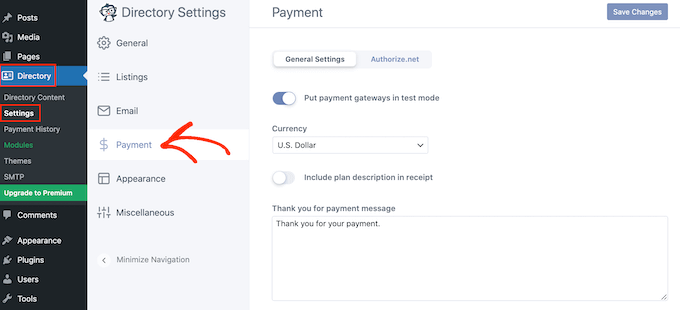
To arrange Authorize.web, go to Listing » Settings, after which click on on the ‘Fee’ tab.
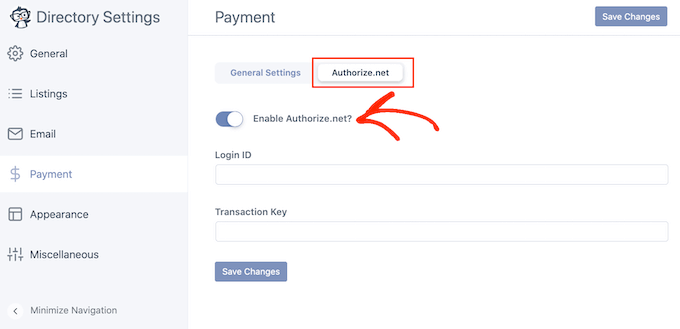
You’ll be able to then go forward and choose ‘Authorize.web.’ Right here, click on on the ‘Allow Authorize.web’ change in order that it turns energetic.
This provides some new settings the place you possibly can kind within the login ID and transaction key in your Authorize.web account.
When you’ve carried out that, click on on the ‘Basic Settings’ tab.
Should you’re not prepared to begin accepting funds but, then make certain to allow ‘Put fee gateways in check mode?’
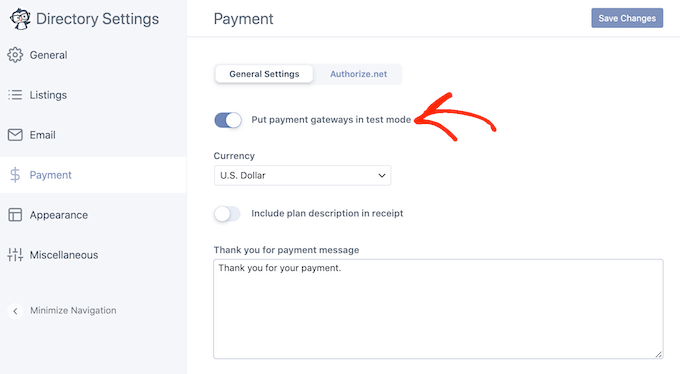
By default, the plugin accepts funds in {dollars}, however you possibly can choose a distinct foreign money utilizing the ‘Foreign money’ dropdown.
It’s also possible to kind in a distinct thanks message, which might be proven to customers after they ship you a fee.
While you’ve completed configuring the fee settings, don’t neglect to click on on ‘Save Modifications’ to retailer your settings.
Earlier than you possibly can settle for funds, you’ll additionally must create at the very least one fee plan. To begin, click on on ‘Plans’ within the left-hand menu.
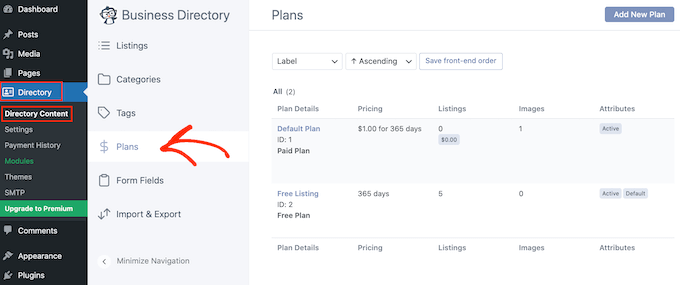
The plugin comes with a free plan and a default plan, which is $1.00 for three hundred and sixty five days.
To alter both of the plans, merely hover over it after which click on on the ‘Edit’ hyperlink.
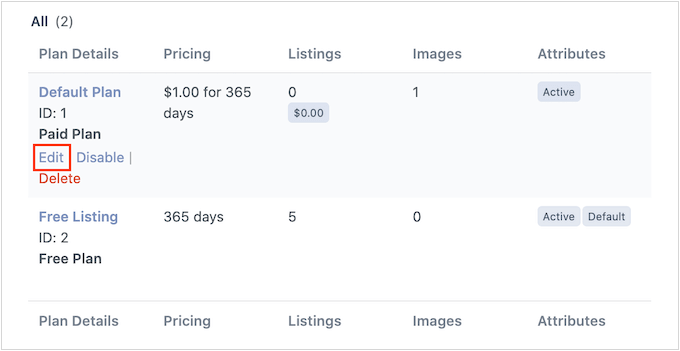
This takes you to a display screen the place you may make every kind of modifications to the plan.
This contains altering the worth, and even creating totally different costs for particular classes.
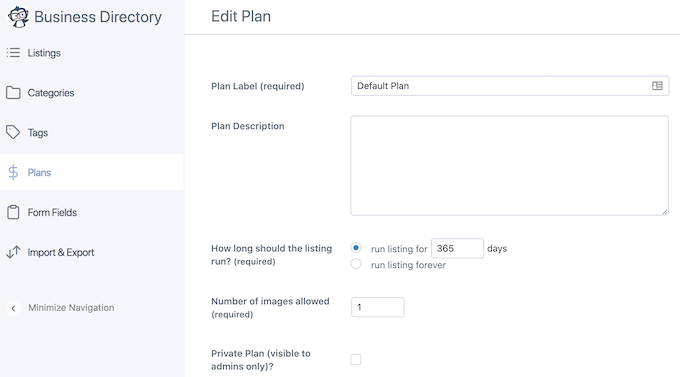
While you’re pleased with the modifications you’ve made, don’t neglect to click on on the ‘Save Modifications’ button to make your plan reside.
Technique 2: Making a WordPress Listing with Formidable Kinds
The second methodology to create a enterprise listing is through the use of Formidable Kinds.
It’s the most superior WordPress type builder plugin out there and lets you create a lot of totally different kinds together with surveys, fee kinds, reserving kinds, and extra.
Formidable Kinds additionally comes with a strong ‘Visible Views’ function that you should utilize to show user-submitted information in your web site. Utilizing this function, you possibly can simply create directories, actual property listings, job boards, occasion calendars, and extra.
With that in thoughts, let’s create a enterprise listing utilizing the Formidable Kinds plugin.
1. Create a Kind to Gather Information for Your Listing
Very first thing you’ll want to do is set up and activate the Formidable Kinds plugin. For detailed directions, see our information on tips on how to set up a WordPress plugin.
Upon activation, you’ll want to put in Formidable Kinds Lite. This free plugin gives the core basis for the premium plugin’s extra superior options.
When you’ve carried out that, go to the Formidable Kinds » International Settings web page and choose ‘Click on to enter a license key manually.’
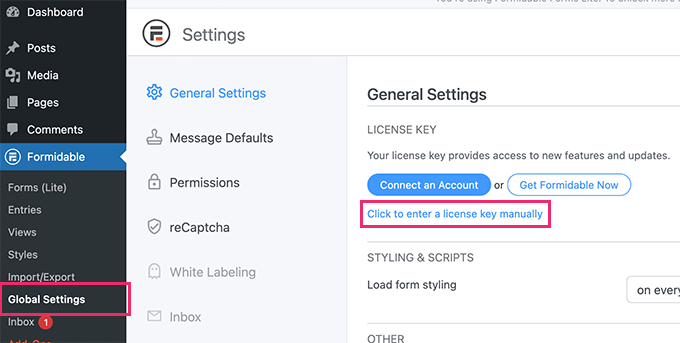
Yow will discover the license key underneath your account on the Formidable Kinds web site.
After coming into this info, go forward and click on the ‘Save License’ button.
Many web site homeowners cost guests to submit an inventory. If you wish to create a premium internet listing and settle for bank card funds, then you definately’ll want to put in an addon and arrange a fee gateway.
Formidable Kinds can accumulate funds with PayPal, Stripe, or Authorize.web.
On this information, we are going to present you tips on how to settle for funds utilizing PayPal, however the steps might be related for different fee gateways.
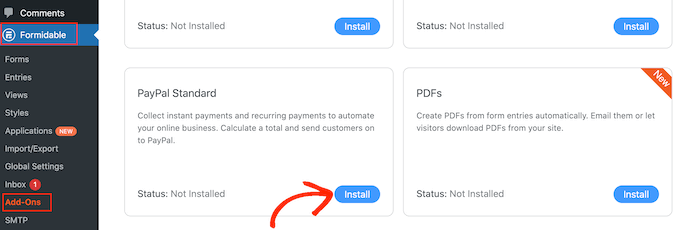
In your WordPress dashboard, go to Formidable » Add-Ons. Within the ‘PayPal Normal’ part, click on on ‘Set up.’
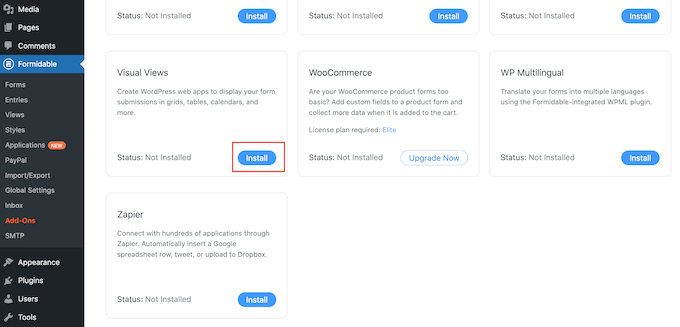
Later on this information we’ll use ‘Visible Views’ to show all the knowledge that guests enter into our type.
With that in thoughts, discover the ‘Visible Views’ addon and click on on its ‘Set up’ button, as we’ll want this addon later.
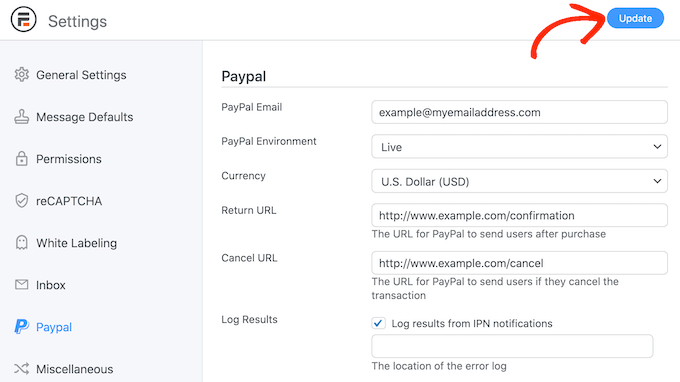
When you’ve carried out that, head over to Formidable » International Settings.
Then, choose ‘PayPal’ within the left-hand menu.

On this display screen, kind within the electronic mail handle that’s linked to your PayPal account. It’s also possible to change the foreign money and the URLs that can load after a customer completes their fee or cancels their order.
After coming into this info, click on on the ‘Replace’ button to save lots of your modifications.
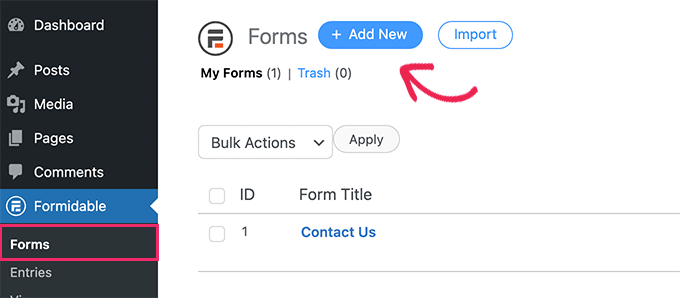
Now you’re able to create a type by heading over to the Formidable » Kinds web page.
Right here, click on on ‘Add New.’
This may carry up an inventory of all the shape templates that you should utilize.
On this information, we’ll be creating an actual property listing so click on on the ‘Actual Property’ class.
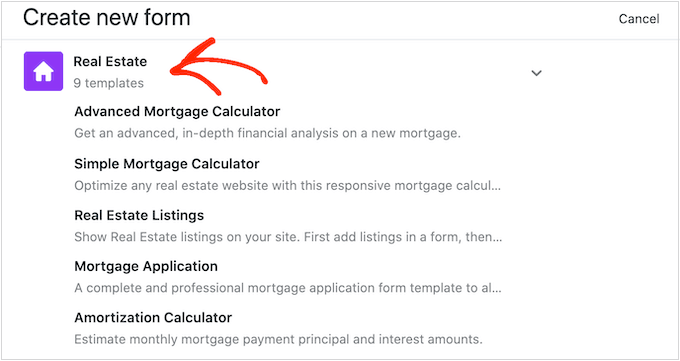
Now you can see all the totally different templates inside this class, together with a number of mortgage calculator templates.
To preview a template, simply hover your mouse over it after which click on the little icon that appears like a watch.
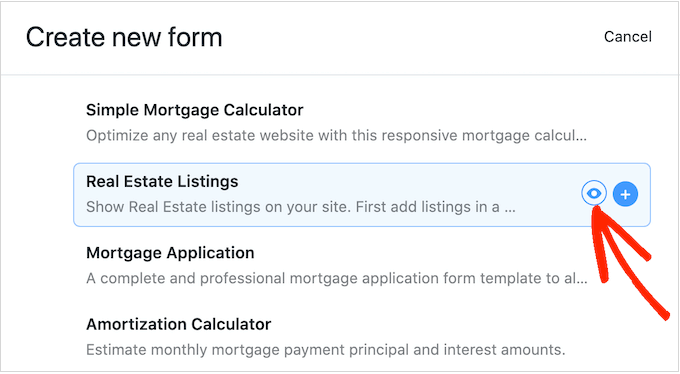
To make use of a template, simply hover over it after which click on on the ‘+’ icon.
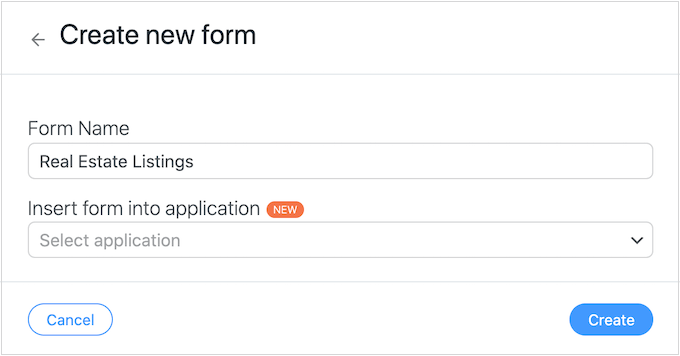
One you’ve carried out that, kind a title into the ‘Kind Identify’ area and enter an optionally available description. This info is simply in your reference so you should utilize something you need.
Then, click on on the ‘Create’ button.
This may open the template within the Formidable Kinds editor.
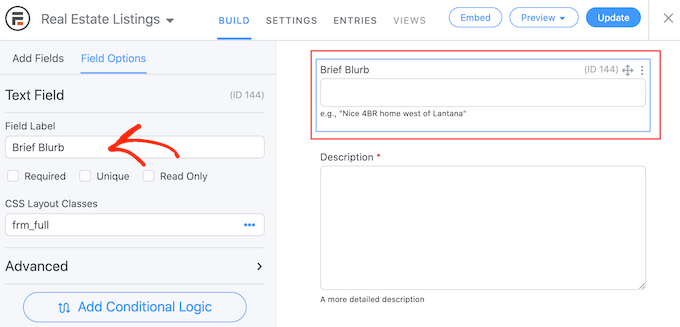
From right here, you possibly can merely level and click on to customise any area within the type. For instance, you may click on on the ‘Temporary Blurb’ area after which kind some new textual content into ‘Discipline Label.’
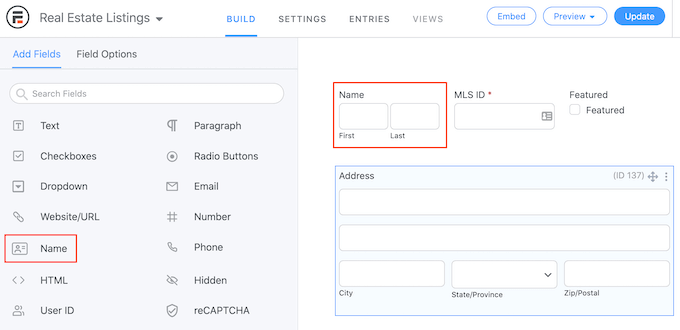
It’s also possible to add extra fields by deciding on ‘Add Fields’ within the left-hand menu.
Then, drag any of the fields onto the shape structure. For instance, you might wish to add a area the place the customer can kind of their identify.
To proceed customizing the template, merely repeat these steps.
While you’re pleased with how the shape is about up, click on the ‘Replace’ button on the prime proper nook of the display screen.
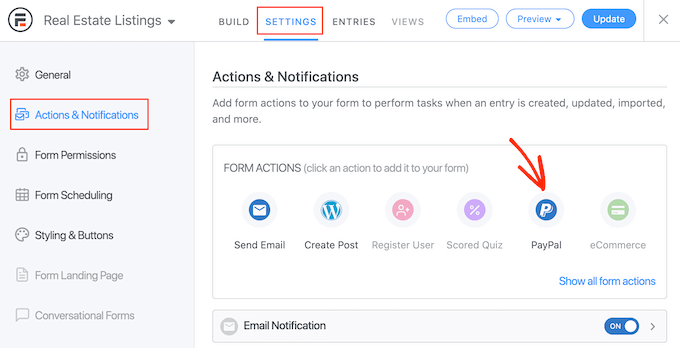
If you wish to accumulate funds, then you definately’ll want so as to add an motion to your type. To do that, click on on the ‘Settings’ tab after which choose ‘Actions & Notifications.’
After that, click on on ‘PayPal’ so as to add the motion to your type.
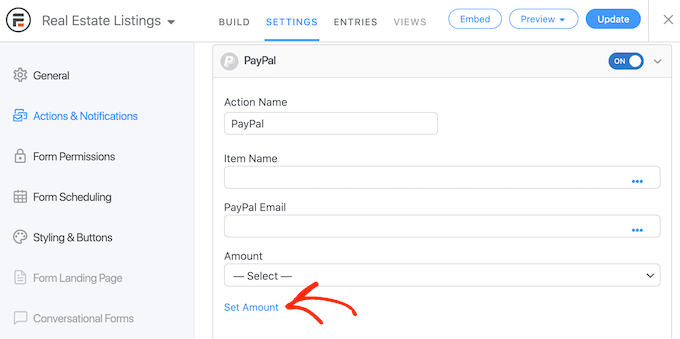
Subsequent, scroll to the ‘PayPal’ part.
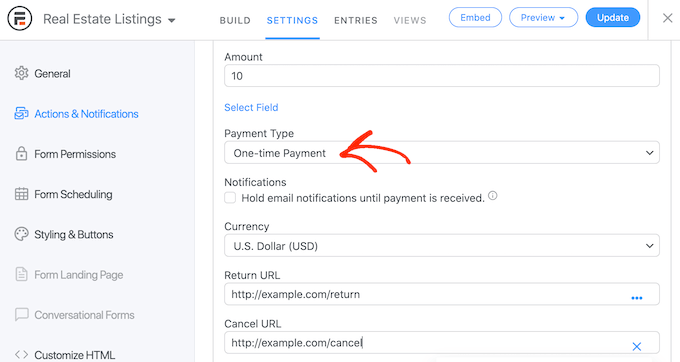
We wish to cost guests a flat payment for creating a brand new itemizing, so click on on ‘Set Quantity.’
Now you can kind in how a lot you wish to cost.
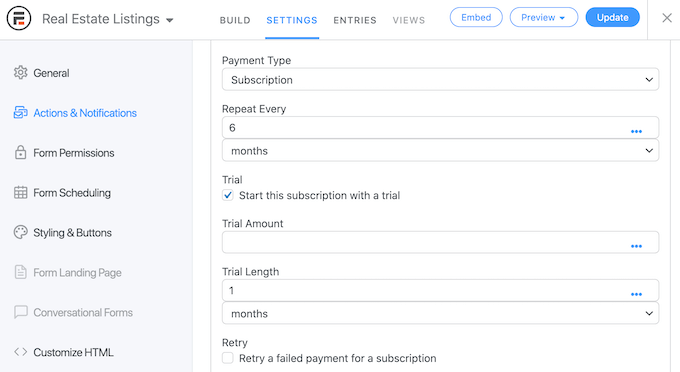
It’s also possible to select whether or not to make this a one-off fee, a donation, or a recurring fee utilizing the ‘Fee Sort’ dropdown.
If you choose ‘Subscription’ then you should utilize the controls to specify how typically the particular person might be charged.
On this manner, you possibly can earn cash out of your listings over the long-term. It’s also possible to supply prospects a free trial.
When you’ve completed configuring PayPal, don’t neglect to click on on ‘Replace’ to save lots of your modifications. Now, guests might want to make a fee earlier than they will submit the shape.
2. Publish Your Kind in WordPress
While you’re joyful together with your type, it’s time to publish it in your web site by including it to any put up or web page.
We’re going so as to add the shape to a brand new web page by heading over to Pages » Add New within the WordPress dashboard. Now you can give this web page a reputation, add a featured picture, and add some other content material that you simply wish to present on the web page.
After that, click on on the ‘+’ icon and sort in ‘Formidable Kinds.’
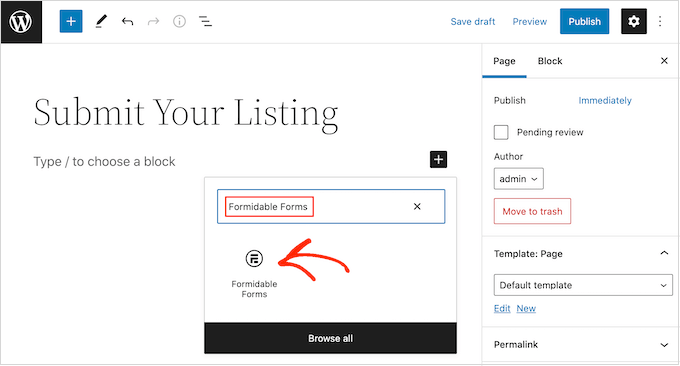
When the proper block seems, give it a click on so as to add it to the web page.
Subsequent, merely open the ‘Choose a type’ dropdown and select the true property itemizing type.
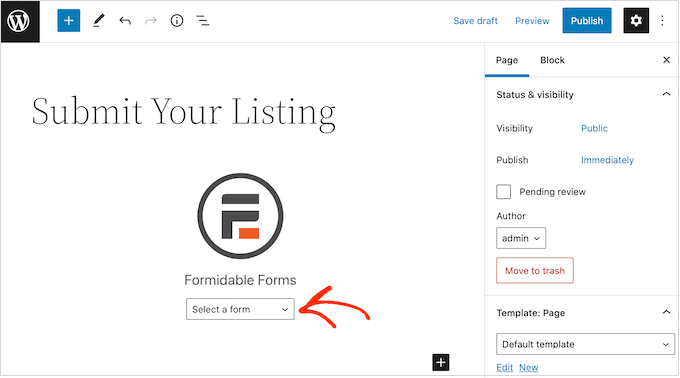
Formidable Kinds will then add the shape to the put up, and present a preview within the block editor.
While you’re able to make the shape reside, go forward and publish the web page.
After that, it’s a good suggestion so as to add the web page to your WordPress navigation menu so folks can discover it simply. You may additionally wish to ship a message to your electronic mail checklist so your viewers know they will now submit listings to your web site.
3. Construct Your Internet Listing with Formidable Views
Subsequent, you’ll wish to create an internet listing so the user-submitted content material seems in your WordPress web site.
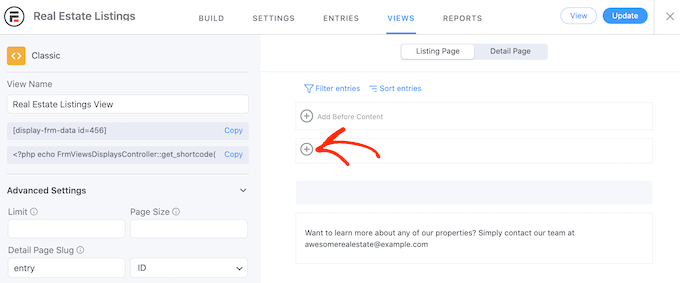
You are able to do this utilizing the Visible Views function, so head over to Formidable » Views after which click on on ‘Add New.’
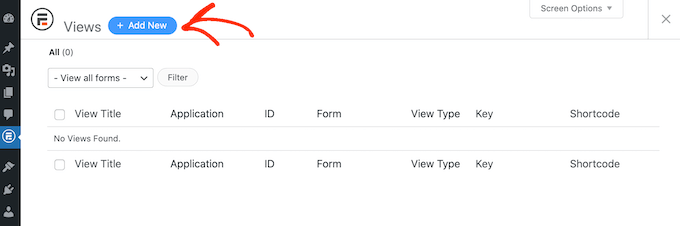
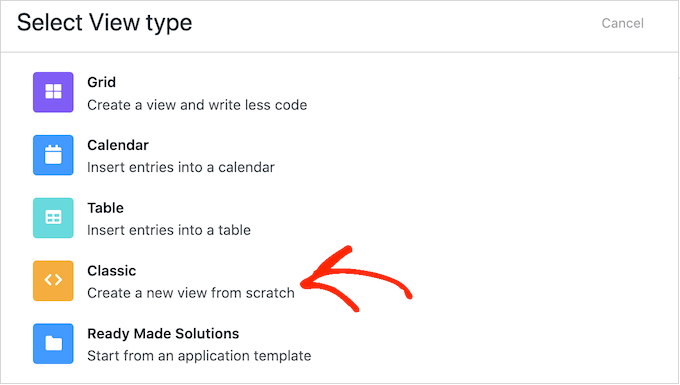
A popup will now present the totally different layouts that you should utilize in your listing.
Simply click on on ‘Basic’ as this lets you create a brand new structure from scratch.
On the subsequent display screen, open the ‘Use Entries from Kind’ dropdown and select the true property type we created earlier.
Formidable Kinds will give your view a reputation based mostly on the shape you’re utilizing as the info supply. Nevertheless, you possibly can change this if you need.
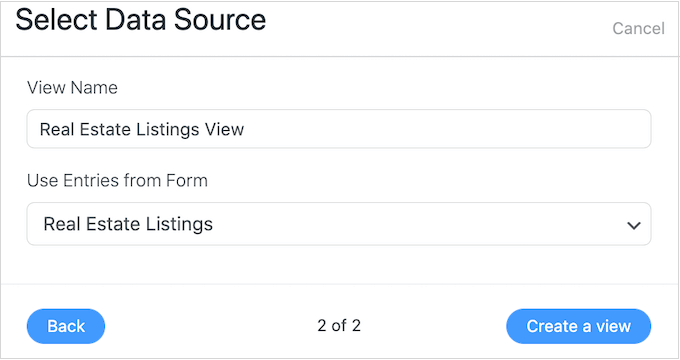
While you’re pleased with the knowledge you’ve entered, click on on ‘Create a view.’
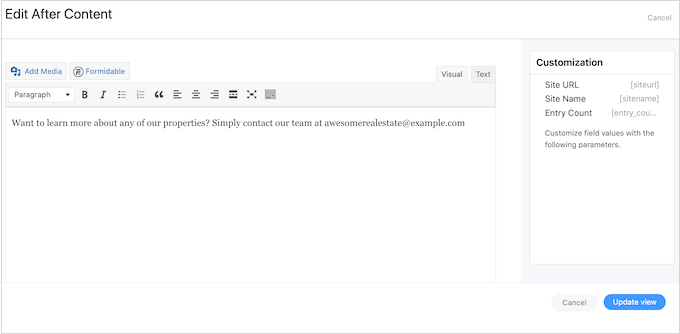
Now you can kind in any info that you simply wish to seem above and under the listings. For instance, you might wish to add your contact info on the backside of the web page or kind out a brief introduction.
To do that, merely click on on ‘Add Earlier than Content material’ or ‘Add After Content material.’
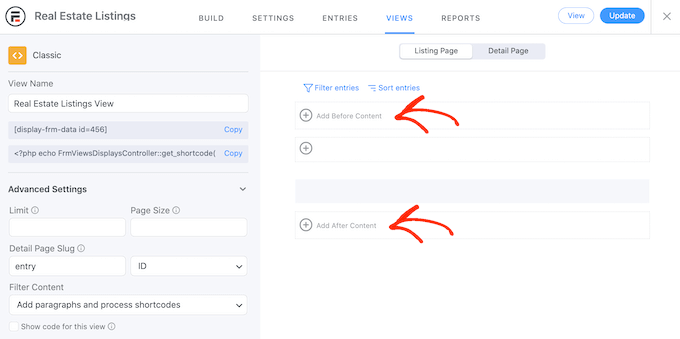
This may open a popup the place you possibly can kind in any textual content that you simply wish to present above or under your listings.
To the proper, there are additionally some parameters that you should utilize. Formidable Kinds will change these parameters with actual values in your web site. For instance, it would change [siteurl] together with your website’s URL.
While you’re pleased with the knowledge you’ve entered, click on on ‘Replace View’ to save lots of your modifications and return to the principle view editor display screen.
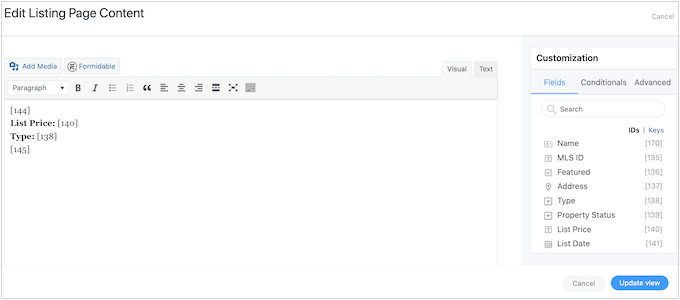
When you’ve carried out that, you’re able to create the structure for the totally different listings on the listing web page. To get began, click on on the center ‘+’ icon.
Now you can kind textual content into the principle textual content editor, and choose totally different parameters within the left-hand menu.
Within the following picture, we’re making a easy structure that reveals every property’s transient blurb, adopted by the itemizing’s value and sort.
Lastly, we’ll present the complete description.
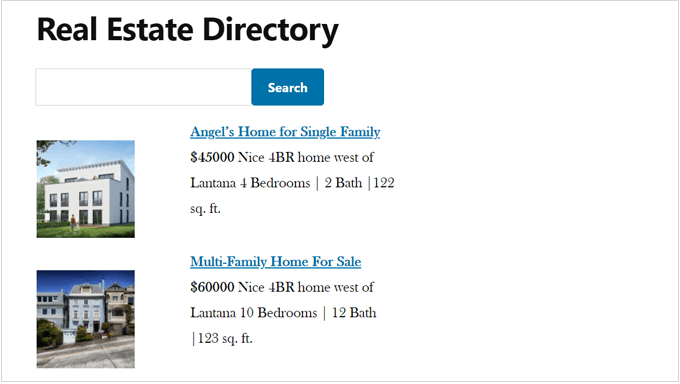
Within the following picture, you possibly can see an instance of how this easy structure will look in your WordPress web site.
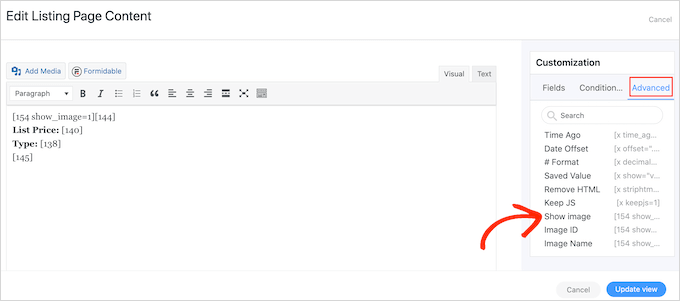
To broaden on this quite simple structure, simply hold including extra parameters and plain textual content following the identical course of described above.

Chances are high you’ll wish to present a photograph of every property. To do that, go forward and click on on the ‘Superior’ tab of the ‘Customization’ field.
Then, click on on ‘Present Picture,’ which shows any photos that guests submit.
When you’re working in your structure, you possibly can preview the way it will look to guests by clicking on ‘Replace View.’
This takes you again to the principle editor, which reveals a preview of the structure you’re creating.
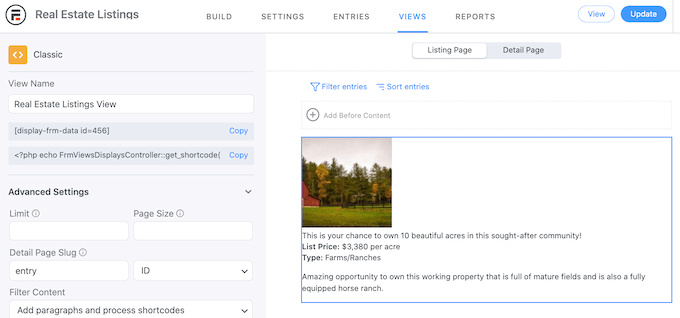
While you’re pleased with how the listing appears to be like, you possibly can add it to any web page or put up utilizing the shortcode within the left-hand menu, underneath ‘View Identify.’ Merely discover this code after which click on on its ‘Copy’ button.
For extra particulars on tips on how to place the shortcode, you possibly can see our information on tips on how to add a shortcode in WordPress.
When you’ve carried out that, merely go to the web page or put up to see the completed internet listing.
We hope this text helped you create an internet listing utilizing WordPress. You may additionally wish to see our knowledgeable choose of the finest electronic mail advertising companies for small companies, and see our final WordPress search engine optimisation information to enhance your rankings.
Should you preferred this text, then please subscribe to our YouTube Channel for WordPress video tutorials. It’s also possible to discover us on Twitter and Fb.
