
Hey and welcome again to the half 2 of this collection, within the earlier article, I confirmed you how you can setup and configure elasticsearch in your PC, in case you missed it, no worries, test it out right here.
On this article, I might be strolling you thru how you can setup and hook up with elasticsearch by way of Kibana and NestJs software to create a backend server.
Maintain up, what’s Kibana?
Kibana is a source-available information visualization dashboard software program for Elasticsearch, whose free and open supply successor in OpenSearch is OpenSearch Dashboards. Learn extra
How does Kibana assist us on this case it’s possible you’ll ask?
Kibana is a superb visualization device that helps us with our elasticsearch queries and manipulation. It’s a part of B.E.L.Okay (Beats, Elasticsearch, Logstash and Kibana) stack. In case you do not know a lot about it, comply with alongside and you’ll be simply fantastic! (A separate article on Kibana might be written as an addendum to this collection in order for you, let me know within the remark part!)
Establishing and Configuring Kibana
To be able to obtain Kibana, goto Kibana Obtain Web page, click on on the obtain button. 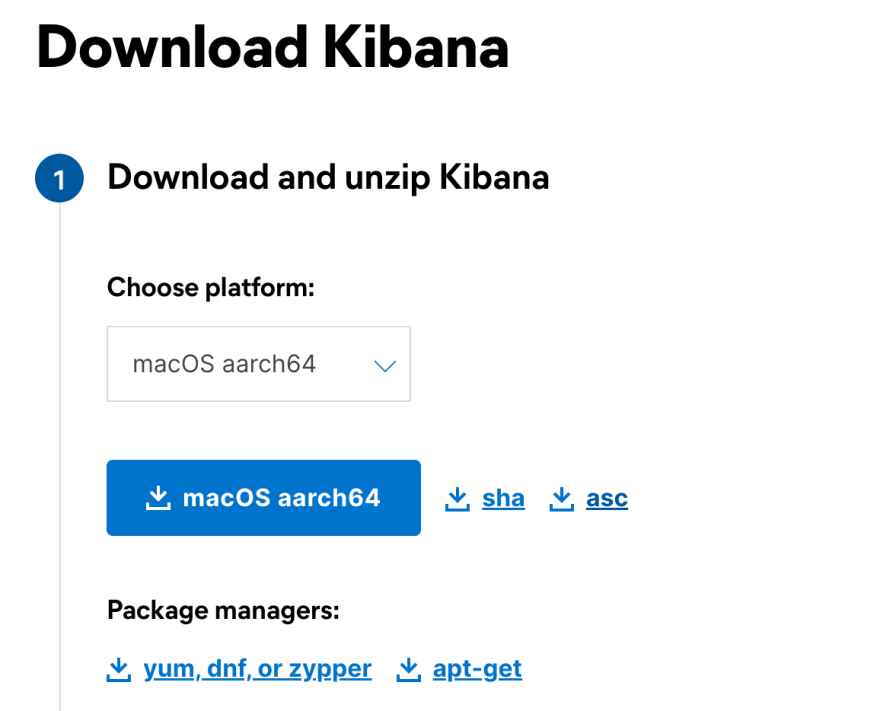
After downloading, extract the zip file utilizing this command
$ tar -xzvf kibana-8.4.1-darwin-aarch64.tar.gz
$ cd kibana-8.4.1
There are two methods to configure and join Kibana to elasticsearch, a technique is to manually enter the required keys into kibana.yml (in config/kibana.yml) or run Kibana and configure on the UI. I am selecting the latter  !
!
Run kibana utilizing this command:
bin/kibana
When beginning Kibana for the primary time, you’ll be offered with this display screen
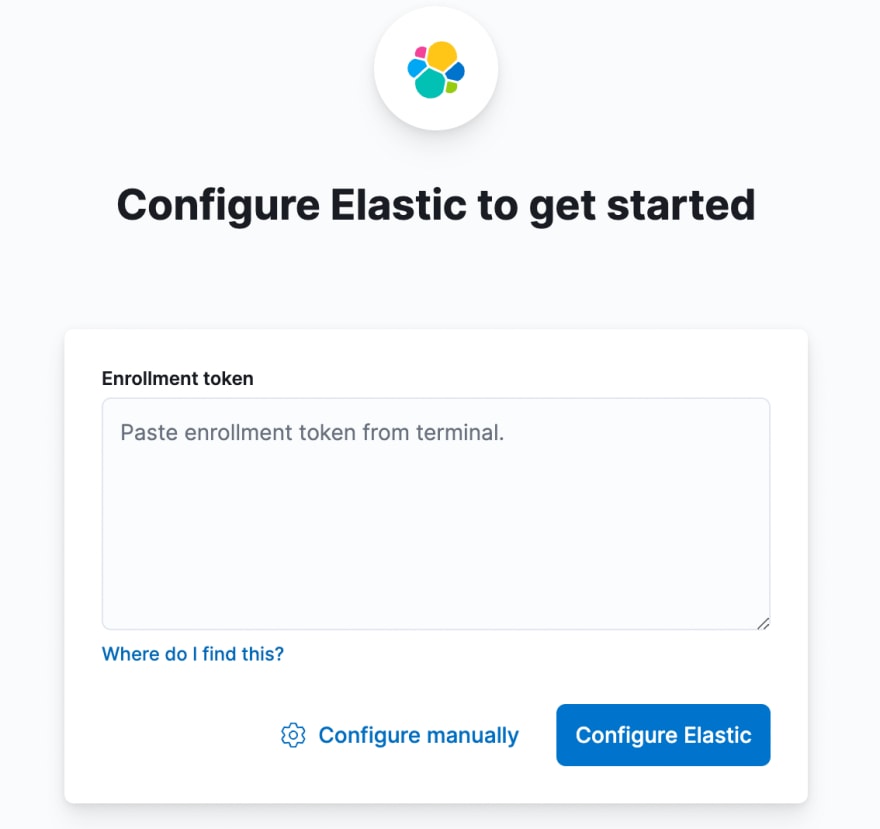
There are two methods to sort out this;
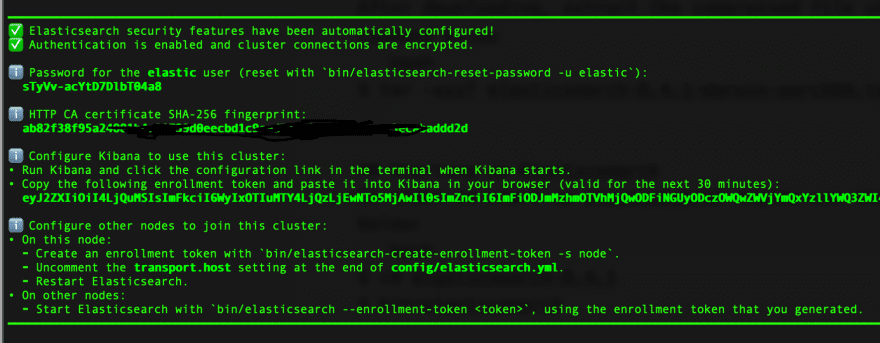
- Use the elastic enrollment token (often generated in your terminal when beginning elastic for the primary time) see under;
Copy and paste the enrollment token above to Kibana and click on Configure Elastic. You’ll be fantastic
- Manually configure Kibana with elastic utilizing the elastic URL. Click on on examine tackle and click on
Configure elastic.
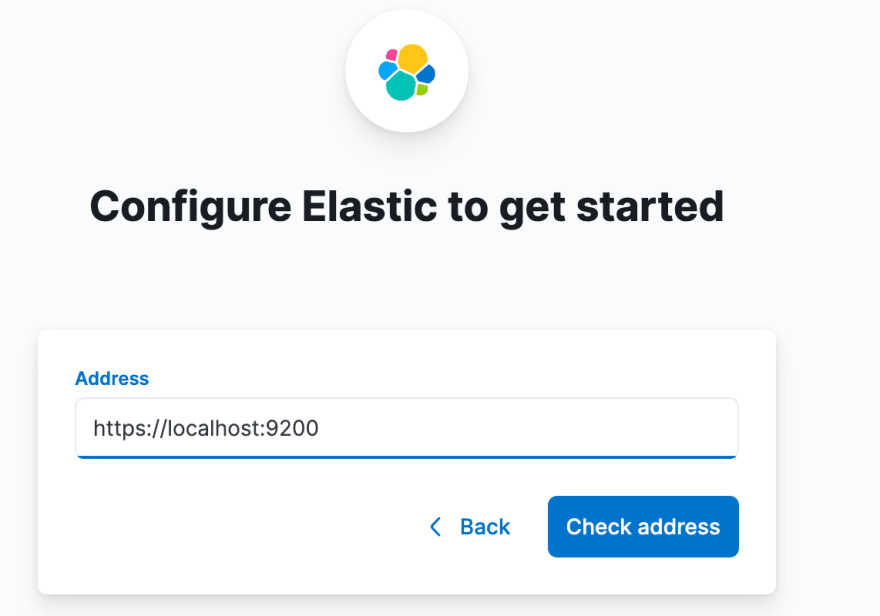
Enter kibana_system password generated. Or click on forgot password (if you cannot recall the password), paste the command under to your terminal to reset the password.
bin/elasticsearch-reset-password --username kibana_system
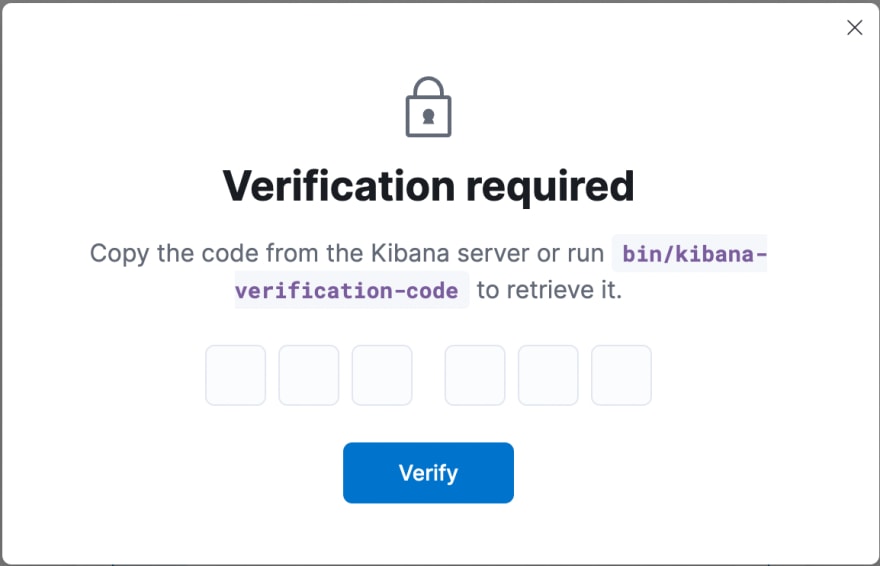
You’ll be requested to enter a verification code, examine your terminal (the place you might be operating kibana to retrieve it)
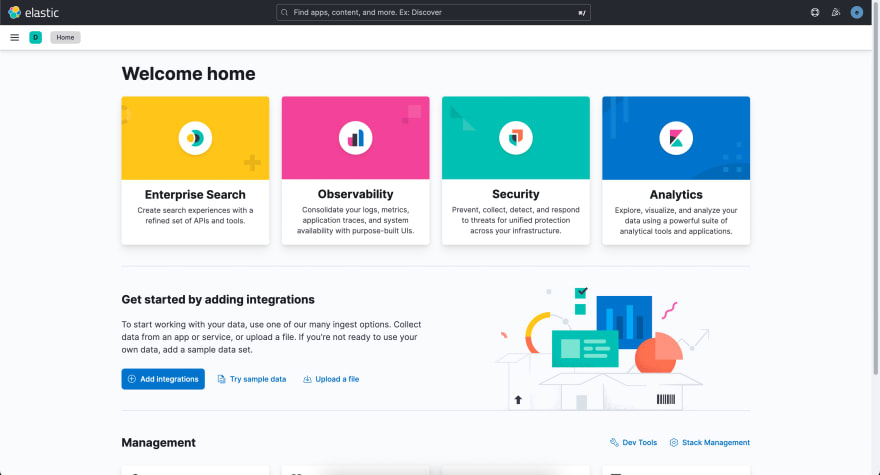
That is it! You might be all arrange.
Enter your elastic username and password to login to kibana and you might be in!
Querying elastic utilizing Kibana
Let’s run a pattern question to check our connection, we could?
- Click on on the hamburger (three strains on the highest left nook of your display screen)
- Scroll all the way down to the underside of the web page
- Click on on
Dev instruments
You must see one thing like this: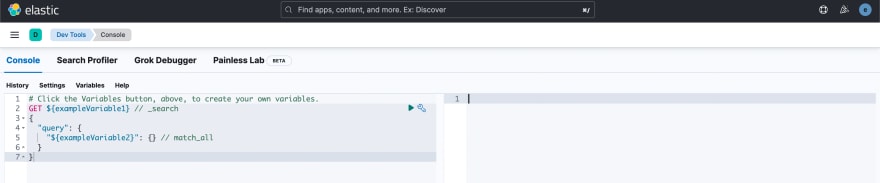
On the left pane is the place queries are written, the fitting pane is the place the outputs are offered.
Make sure you click on on any a part of the question and choose the play button.
The output of the question might be offered on the fitting pane.
Abstract
On this article, we’re in a position to join efficiently to elasticsearch and run pattern queries utilizing Kibana.
Within the subsequent article, I’ll present you how you can Import information to elastic utilizing Kibana and stroll you thru how you can use the imported information in your NestJS software.
