 Carrying a machine all over the place, which is able to doing moral hacking with out getting observed, is vital in some hacking associated duties for which you will not like to hold an enormous laptop computer. For this we’d like a wise gadget to check the exploitation and community penetration and injection of malware and viruses. Moral hacking requires small-size machine that’s as succesful as a full-specs laptop computer however sufficiently small to be hidden and carried wherever. So, right here is how one can make the world’s smallest hacking gadget that has a full contact keyboard.
 To start with, we’ve got to determine some thrilling specs for the laptop computer, in order that we will choose the {hardware} components and working system (OS) for the hacking machine accordingly. The next are some options we would like in our laptop computer for hacking:
Linux is taken into account to be one of the best working system (OS) for moral hacking and Kali is among the finest Linux flavoured OS as a result of it comes with pre setup of varied exploitation instruments for penetration hacking and testing, corresponding to Metasploit, Aircrack-ng, and Wireshark.
Designing the laptop computer
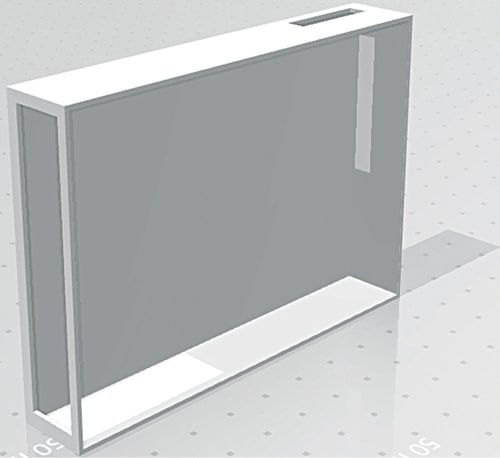
After gathering the elements listed within the Invoice of Supplies, we have to design the case or physique of the laptop computer that’s to carry the {hardware} inside it safely. We might design the laptop computer physique in three components. First, the bottom half the place we hold the primary {hardware}, viz, Raspberry Pi, battery, and charging system. Within the base we make two cuts: one in entrance for the Ethernet and USB and the opposite for energy and charging of the battery.
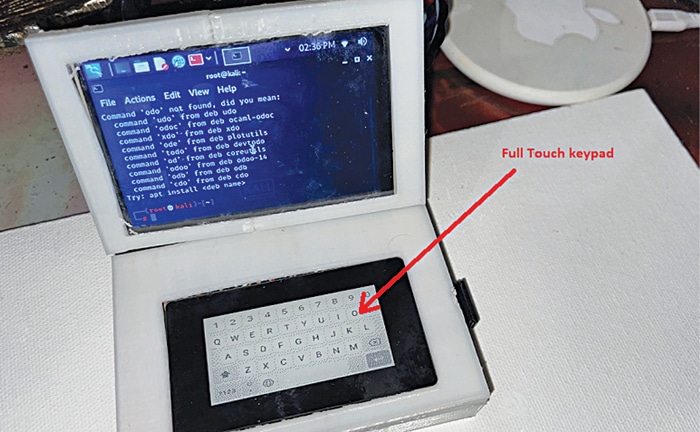
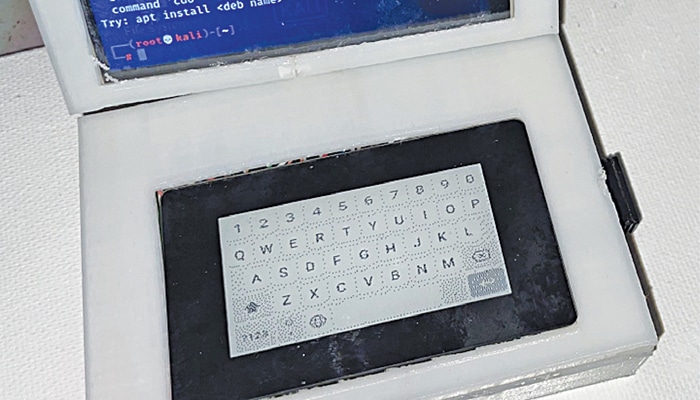
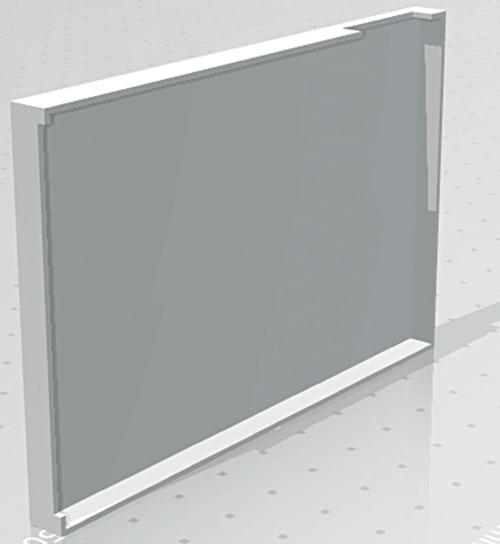
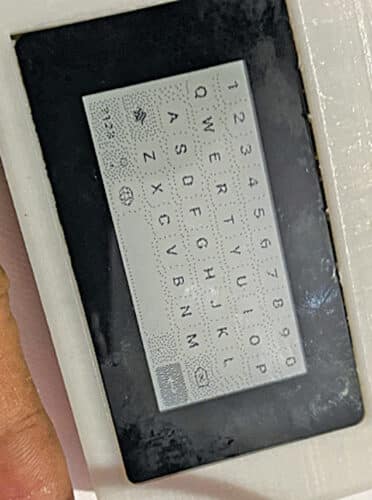
Subsequent, we design the highest cowl of the bottom to carry a contact e-paper primarily based keyboard. We make a lower within the prime cowl to repair the contact panel keyboard inside it, as proven in Fig. 7.

Subsequent, we design the LCD panel’s assist for the laptop computer. For that we make the enclosure in the identical measurement because the show and hold the thickness identical as effectively.

After designing the laptop computer physique, we will 3D print its components.
Prerequisite
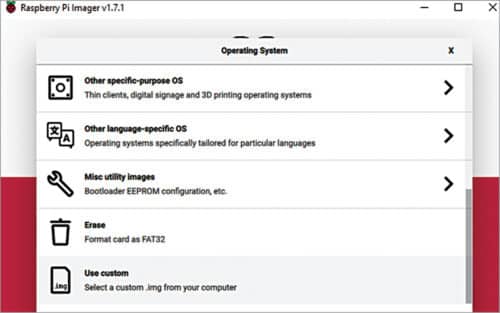
Earlier than continuing additional, we have to put together the Raspberry Pi board with Kali Linux. For that, go to Kali Linux official web site and obtain its newest model for an ARM primarily based gadget like Raspberry Pi. Subsequent, obtain the Raspberry Pi disk imager and set up it. Insert the SD card in USB drive and put together it with Kali Linux OS utilizing Raspberry Pi disk imager by selecting Kali Linux OS picture file in Raspberry Pi disk imager.
Getting ready OS for SPI show
For our laptop computer we will select any show for Raspberry Pi that’s as much as 8.9cm (3.5-inch) in measurement. An HDMI primarily based contact show is advisable as we’re utilizing a contact e-ink show for the keyboard panel, which is an SPI, and two SPI shows could cause battle in communication. Nevertheless, the SPI contact e-ink show used for keyboard makes use of solely its contact operate that’s I2C primarily based, so the SPI of different shows doesn’t trigger that a lot of an issue.
An SPI primarily based show was used within the prototype as a result of it had already been purchased, however use of 8.9cm HDMI contact show is advisable as a substitute. Through the use of the HDMI show, you may skip the next steps (required for SPI show) and go straight to the keyboard preparation part.
To make use of the SPI show, we have to set up the drivers and setup the SPI contact show. So, open the terminal and run the next command in Linux terminal to put in the driving force and setup the show for Raspberry Pi:
git clone https://github.com/goodtft/
LCD-show.git
chmod -R 755 LCD-show
cd LCD-show/
sudo ./LCD35-show
After putting in the driving force, join the SPI show, as proven in Fig. 11, and solder the pins to Raspberry Pi as per Desk 2.
Getting ready the contact keyboard
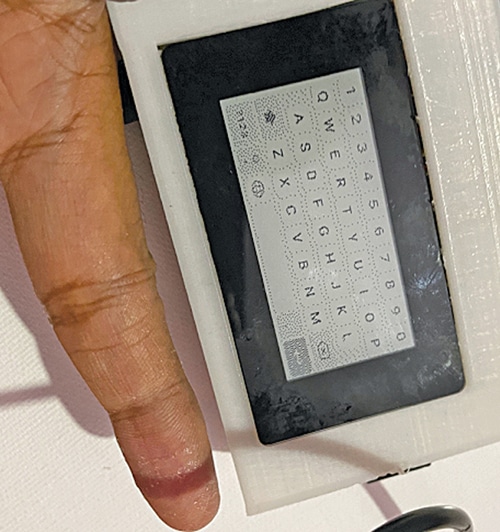
We have to put together the keypad system for the laptop computer for giving enter to the laptop computer. As we want to make a full contact keyboard panel, we’re utilizing the contact e-ink show because the contact primarily based keypad, however we’d like software program to make use of it as keyboard.

For making the contact keyboard, we have to show the keys on the e-ink show. So, obtain a vector picture having the keys on the keyboard. Resize the picture to the dimensions of e-ink show, then obtain the library for contact e-ink show. Right here we’re utilizing the waveshare contact e-ink show, so open Linux and run the next command to get the library and driver for the e-ink show:
sudo pip3 set up gpiozero
wget http://www.airspayce.com/mikem/
bcm2835/bcm2835-1.68.tar.gz
tar zxvf bcm2835-1.68.tar.gz
cd bcm2835-1.68/
sudo ./configure && sudo make && sudo make
examine && sudo make set up
sudo apt-get set up wiringpi
sudo apt-get replace
sudo apt-get set up python3-pip
sudo apt-get set up python3-pil
sudo apt-get set up python3-numpy
sudo pip3 set up RPi.GPIO
sudo pip3 set up spidev
cd ~
git clone https://github.com/waveshare/
Touch_e-Paper_HAT
Go to Instance and run the code to point out the picture on e-ink show. In that code change ‘pic’ to keyboard structure vector picture and run the code (Notice: Connect the e-ink contact show with Raspberry on its GPIO pins earlier than working the code) after which flip off the Raspberry. 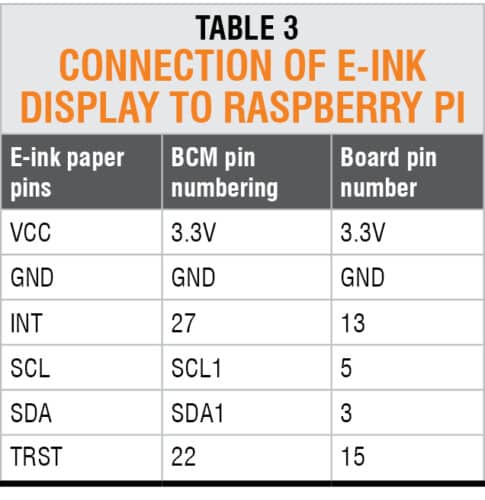 The show will stay with the identical picture even after energy is disconnected, till you refresh the show. E-ink show makes use of a particular expertise the place the ink molecules which might be activated electrically stay on the show, just like the printed ink on paper.
Subsequent, create the code that can determine the contact factors on the contact e-ink show that we contact and convert these keyboard indicators to inputs for Kali Linux in Raspberry Pi. To enter indicators of mouse and keyboard just about, with out really connecting any mouse or keyboard, we’ve got many Python libraries. In prototype we used pynput Python library module to offer a digital keyboard enter to Raspberry Pi. So, open the Linux terminal and run the next command to put in pynput:
sudo pip3 set up pynput
Subsequent, put together the code that can examine the contact factors and convert them into key enter for every key that we contact on the keyboard.
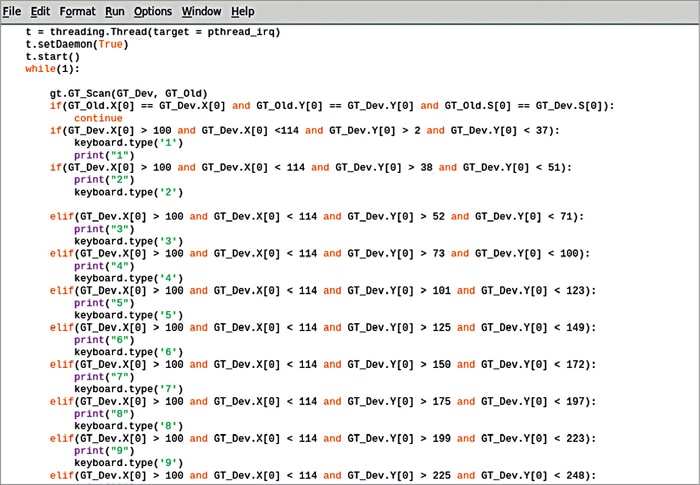
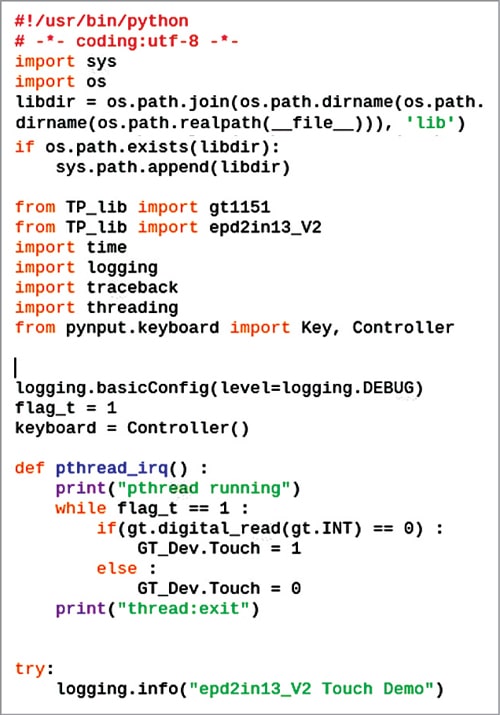
Import the library and pynput modules for digital enter to Raspberry Pi, as proven in Fig. 13, and examine the contact factors on show the place we will likely be touching the e-ink show that’s getting used as a keyboard. Subsequent, create some time loop and outline the operate to make use of pynput for the keyboard inputs to Raspberry Pi, as proven in Fig. 14.

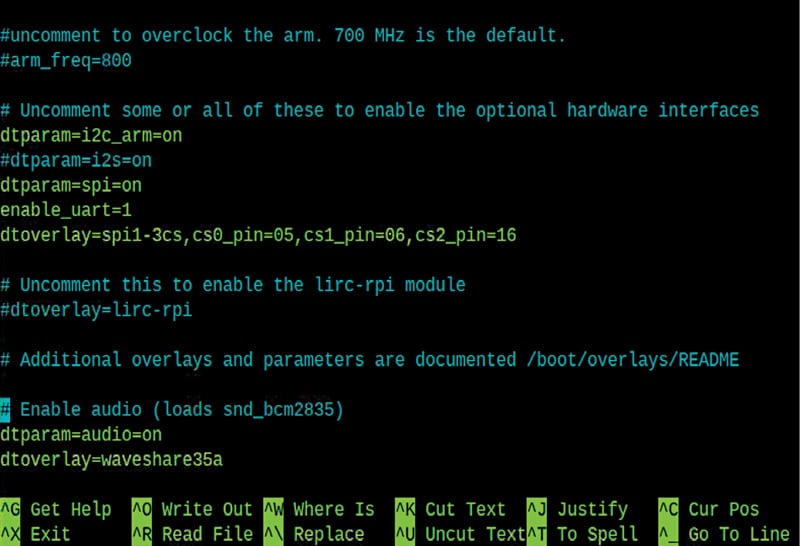
Now we have to change the SPI(0,0 ) of the Raspberry Pi SPI port to a second SPI. Open the lib folder and make a change within the code file of e-ink contact show by altering to SPI(1,0) in each file the place SPI(0,0) is written and save that. Subsequent, allow the second SPI port of Raspberry Pi by including the road marked by arrow in Fig. 15 in config.txt file of Raspberry Pi in boot folder in root of Raspberry Pi.
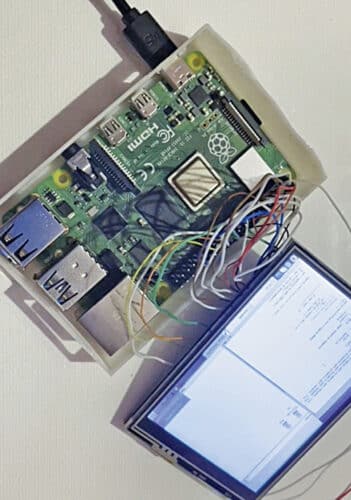
Join the e-ink show to Raspberry Pi pins as proven in Desk 2. As we’re utilizing solely contact half, and contact controller is I2C primarily based, we’re connecting the pins of contact controller of e-ink show solely to Raspberry Pi.
Getting ready the laptop computer
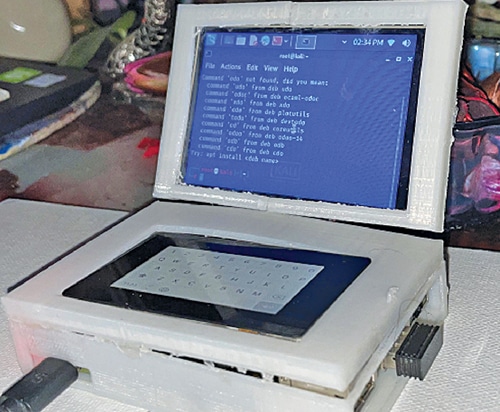
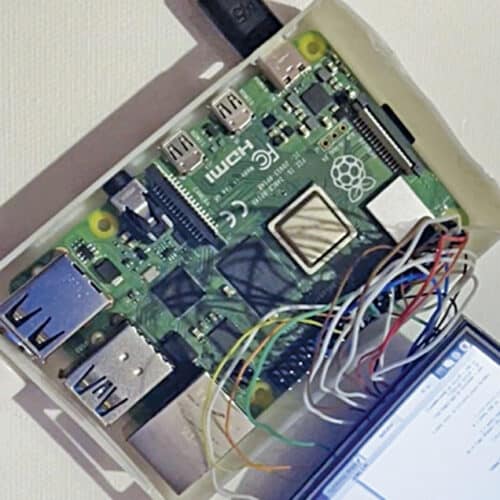
After organising the whole lot within the library and modules, and connecting the elements and soldering, repair all of the {hardware} within the 3D-printed laptop computer case that we made earlier. Repair the elements as proven in Fig. 17 by Fig. 20. Match the battery and charging system contained in the case, leaving Raspberry Pi 5V pin and GND pin outdoors.
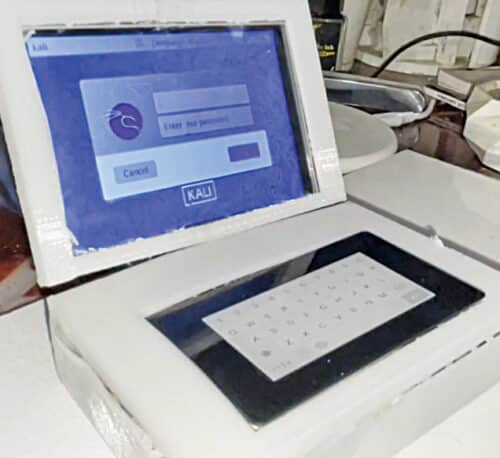
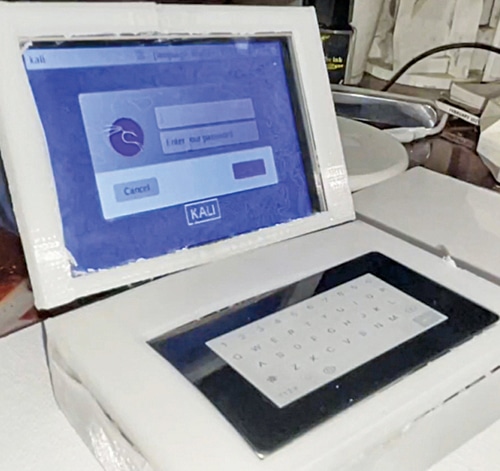
Testing
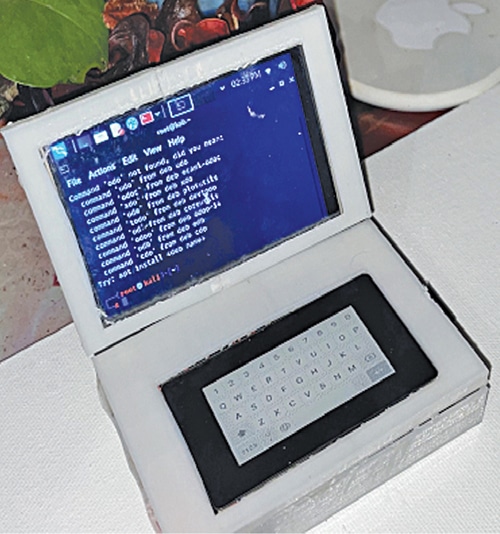
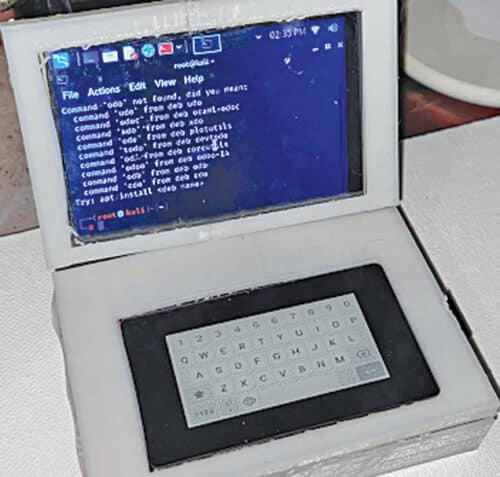
Congratulations! The world’s smallest hacking laptop computer is able to present its magic. Energy the laptop computer and run the keyboard code. You are actually prepared to make use of it as a hacking machine that’s as highly effective as a commercially out there hacking laptop computer, regardless of its tiny measurement.
You’ll be able to carry the laptop computer wherever for penetration testing, securing community, after which testing the community safety. You can even use it, in fact, like some other laptop computer for regular working, taking part in video games, watching movies, or looking the web. No matter you do in your common laptop computer, this smallest laptop computer is able to doing the identical.
Obtain supply code
Ashwini Kumar Sinha is a expertise fanatic
Please notice this text is transferred from Electronics For You April 2022 Situation. This text was first printed on-line.
