
Curious about transferring your WordPress web site to WP Engine? On this step-by-step WP Engine migration tutorial, you’ll learn to simply switch your web site to WP Engine internet hosting while not having any particular technical data.
If you wish to be taught extra about WP Engine itself and why it makes possibility for internet hosting, you’ll be able to learn our tutorial on how to decide on a WordPress host. In case you haven’t signed up for one in all their internet hosting plans but, you’ll be able to seize our WP Engine coupon code to get 4 months free in your first 12 months!
On this article, although, we’re strictly targeted on the right way to migrate a web site to WP Engine utilizing WP Engine’s easy, code-free migration instruments.
We’ll begin with a common overview of how the WP Engine migration course of works after which we’ll get into the step-by-step information on the right way to migrate a WordPress web site to WP Engine.
Let’s dig in…
WP Engine Migration: How Does It Work?

As a result of WP Engine is such a well-liked managed WordPress host, there are lots of people who have to migrate their websites to WP Engine. In case you’re studying this, you’re most likely a type of folks.
To make issues simpler for his or her new clients, the WP Engine group created their very own WP Engine Automated Migration plugin that allows you to migrate your web site with out resorting to code or extra common plugins like Duplicator.
The WP Engine migration plugin is a full migration resolution and covers all the pieces it’s good to do, together with looking and changing database particulars as wanted.
Right here’s a high-level have a look at the method of utilizing the WP Engine Automated Migration plugin:
- Buy and join your WP Engine account (this hyperlink will get you 4 months free) should you haven’t achieved so already. You’ll additionally wish to add a web site if wanted.
- Set up the plugin on the location that you just wish to migrate to and begin the migration course of by coming into your WP Engine SFTP credentials.
- Wait a couple of minutes whereas the plugin handles migrating your web site.
- Preview your web site to verify all the pieces is working proper.
- Replace your area to level to your new WP Engine internet hosting and also you’re set to jet!
Learn how to Migrate a Website to WP Engine
Right here’s your full step-by-step information for the right way to migrate a WordPress web site to WP Engine.
1. Signal Up for WP Engine and Add Website
To start, you’ll need to join your WP Engine account/plan should you haven’t achieved so already. Once more, you need to use our particular WP Engine coupon code to avoid wasting cash (4 free months in your first 12 months) should you haven’t registered but.
Whenever you join, WP Engine ought to robotically create a WordPress web site and manufacturing surroundings for you.
If it doesn’t for some cause or if in case you have a number of websites, you’ll wish to create a brand new web site for the migration vacation spot.

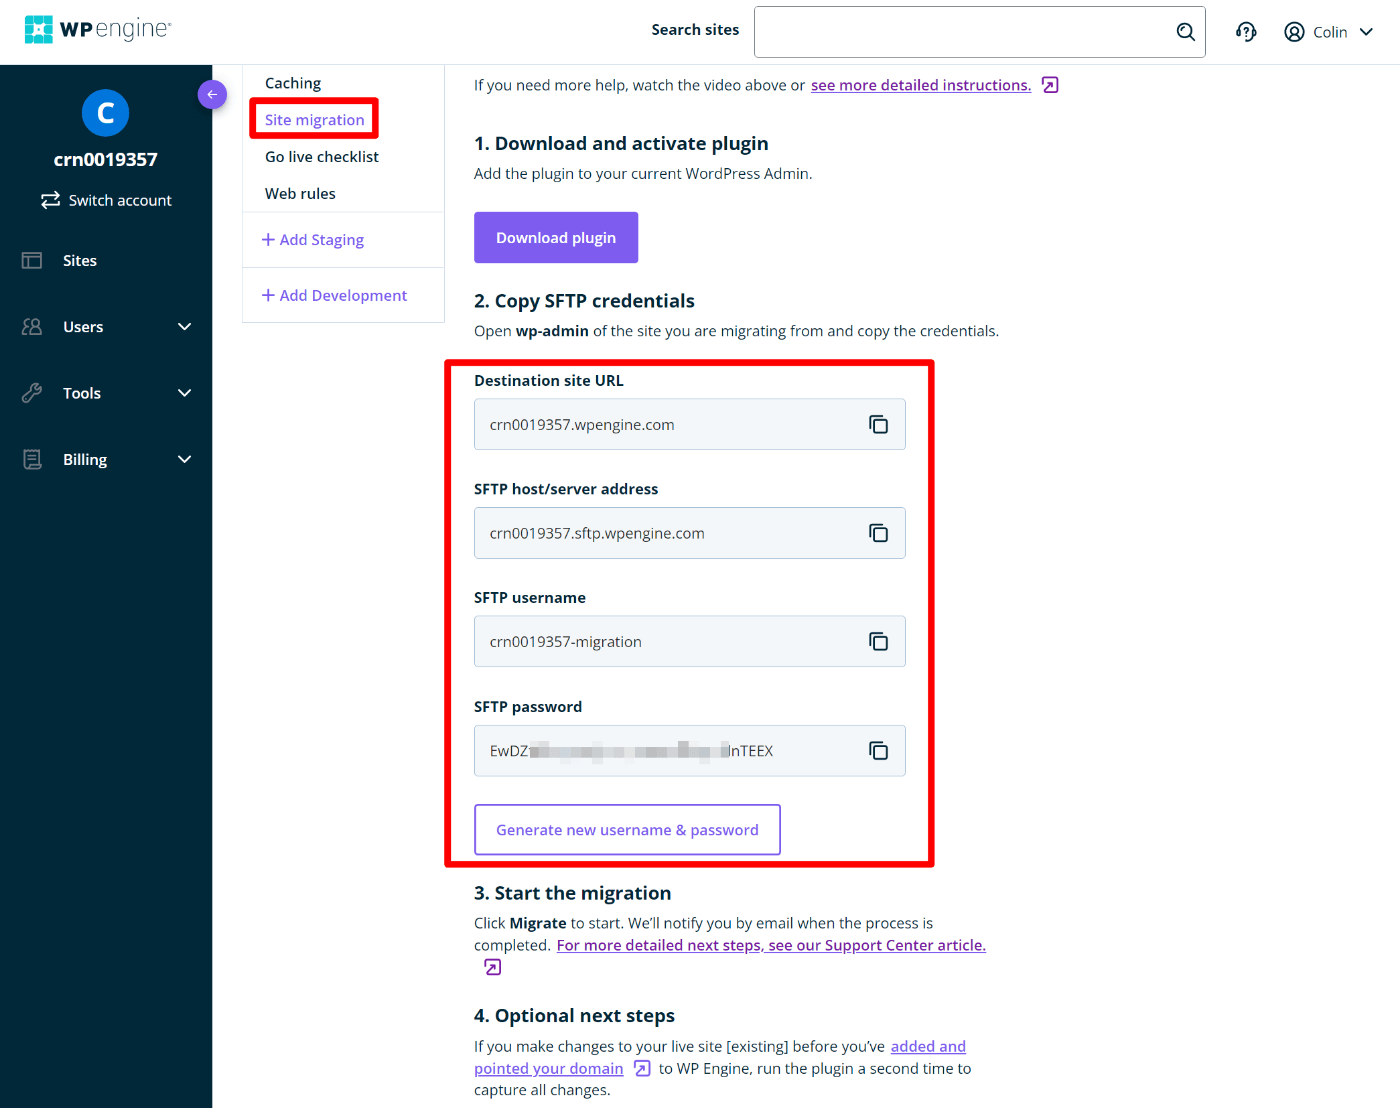
When you’ve added your web site, you’ll wish to navigate to the Website migration space in that web site’s dashboard. To do this, click on on the location after which choose Website migration underneath Manufacturing.
In case you scroll down a bit, you’ll see your SFTP credentials. In case you don’t see an SFTP username or password but, you’ll be able to click on the button to generate new credentials.
Hold this tab useful since you’ll want this data in a second.
2. Set up the WP Engine Automated Migration Plugin
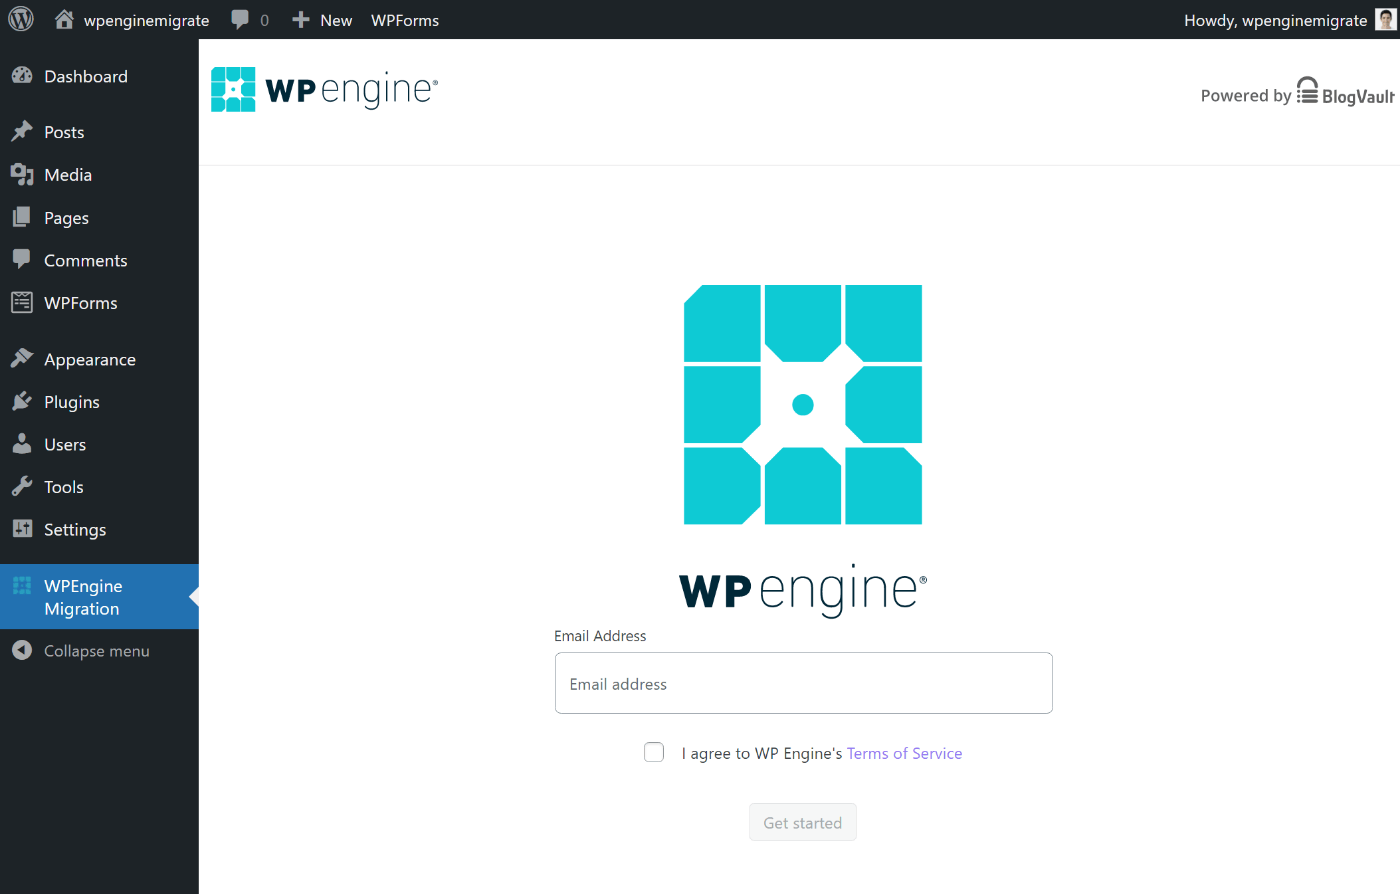
Subsequent, go to your present WordPress web site (the one that you just wish to migrate) and set up the free WP Engine Automated Migration plugin from WordPress.org.
Whenever you go to the brand new WPEngine Migration tab in your WordPress dashboard, you’ll be prompted to enter the e-mail handle of your WP Engine account:
Then, you’ll have to enter the 4 items of data from the earlier step:
- Vacation spot Website URL – this will likely be your non permanent WP Engine area title often. You’ll have the ability to replace it to your stay handle afterward.
- SFTP host/server handle
- SFTP username
- SFTP password
The opposite settings are 100% elective. Most websites gained’t want to alter them from the defaults, however you may give them a glance to see in the event that they apply to your state of affairs. For instance, you might exclude sure information from the migration if wanted:

When you’re proud of how issues look, click on the Migrate button to start out the method.
3. Watch for the Migration to End
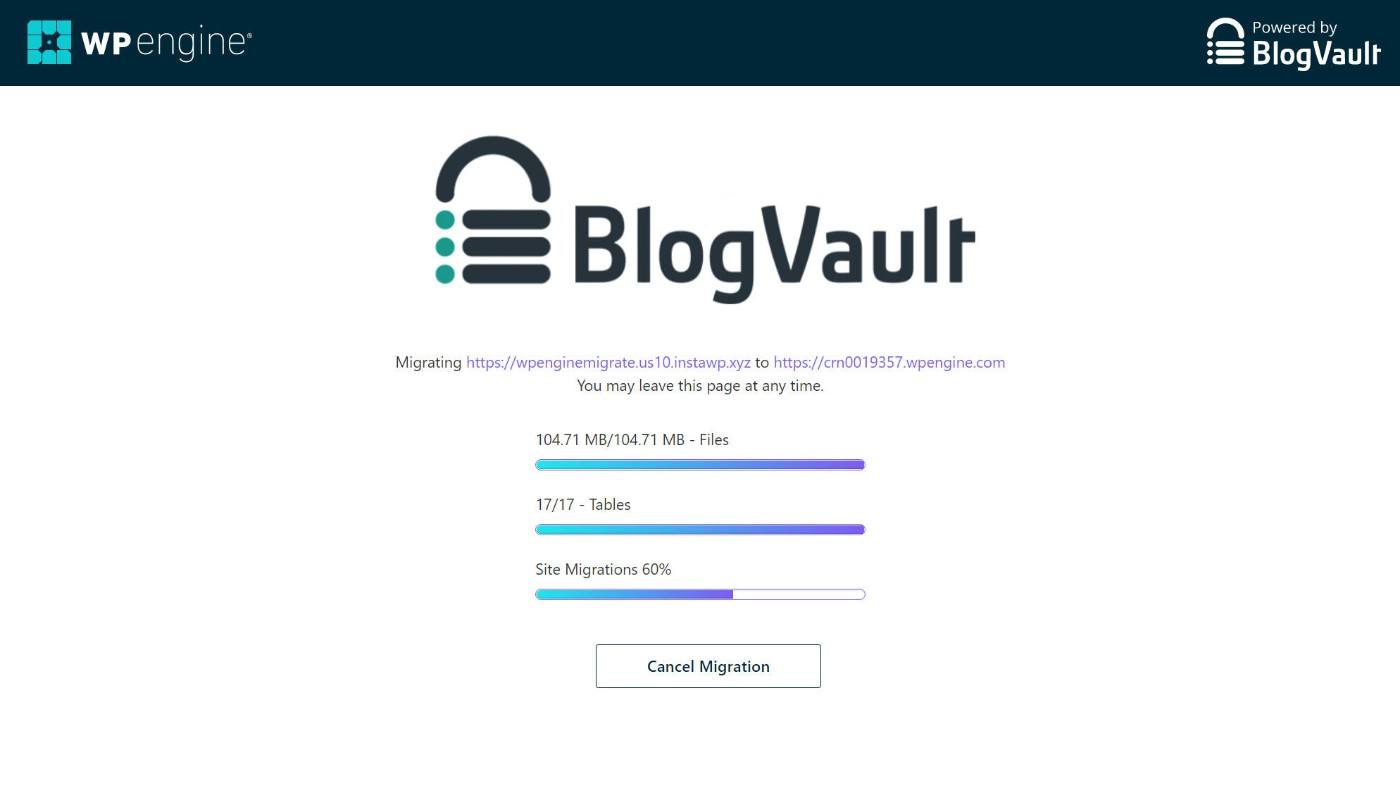
WP Engine will validate that your credentials are appropriate after which begin migrating your web site.
How lengthy this takes will rely upon the scale of your web site.
For small websites, it ought to solely take a minute or two. Bigger websites would possibly take longer, however nonetheless shouldn’t take that lengthy. For instance, I migrated a 2 GB web site and it nonetheless took lower than 5 minutes.
You’ll have the ability to see the progress of the migration as it really works – the interface ought to robotically replace with out requiring you to reload the web page:
As soon as it finishes, it is best to see a hit message.
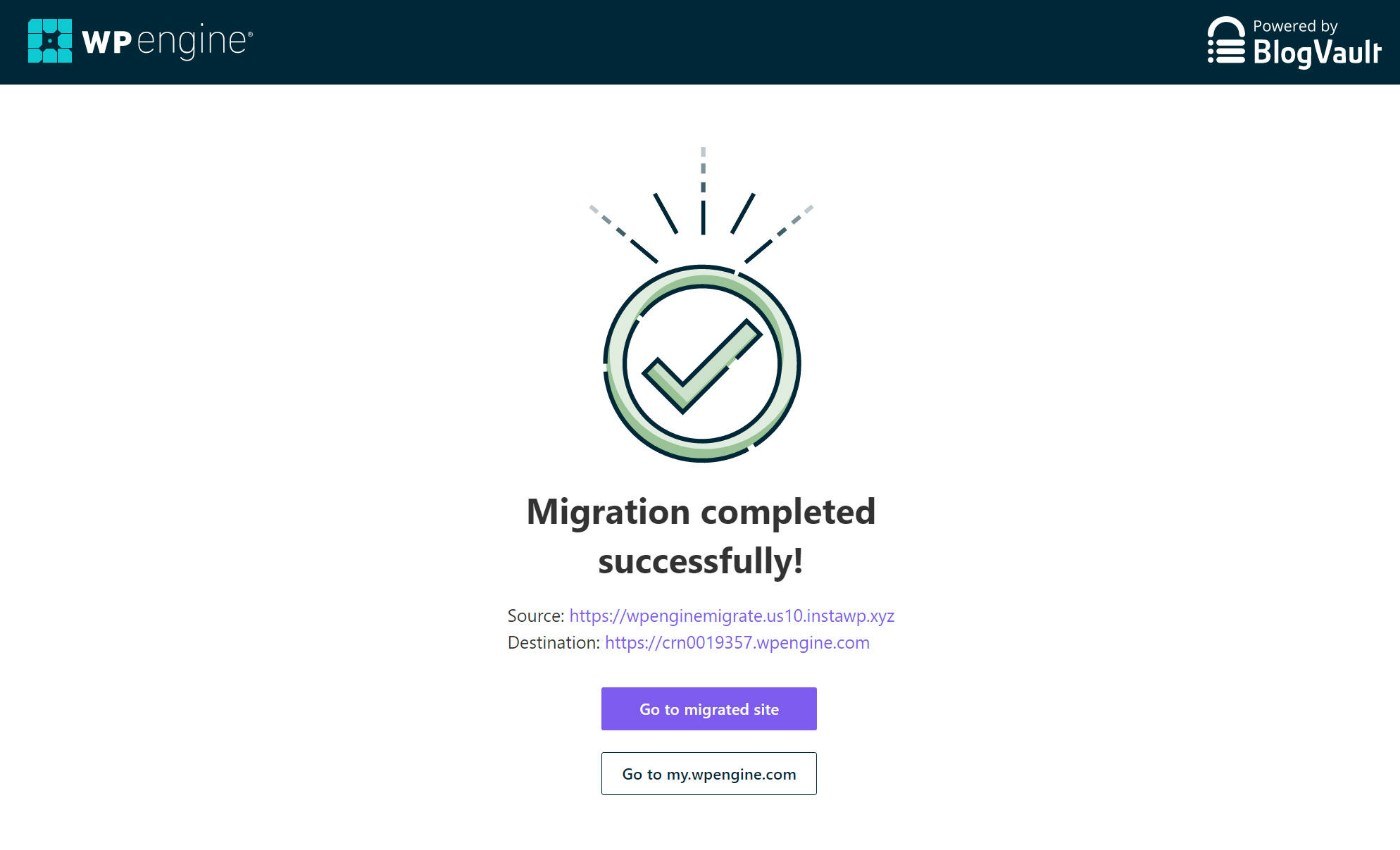
4. Preview Your Website to Make Positive It’s Working
At this level, your web site must be efficiently migrated.
To ensure all the pieces is working, although, you’ll wish to check the migrated model of your web site.
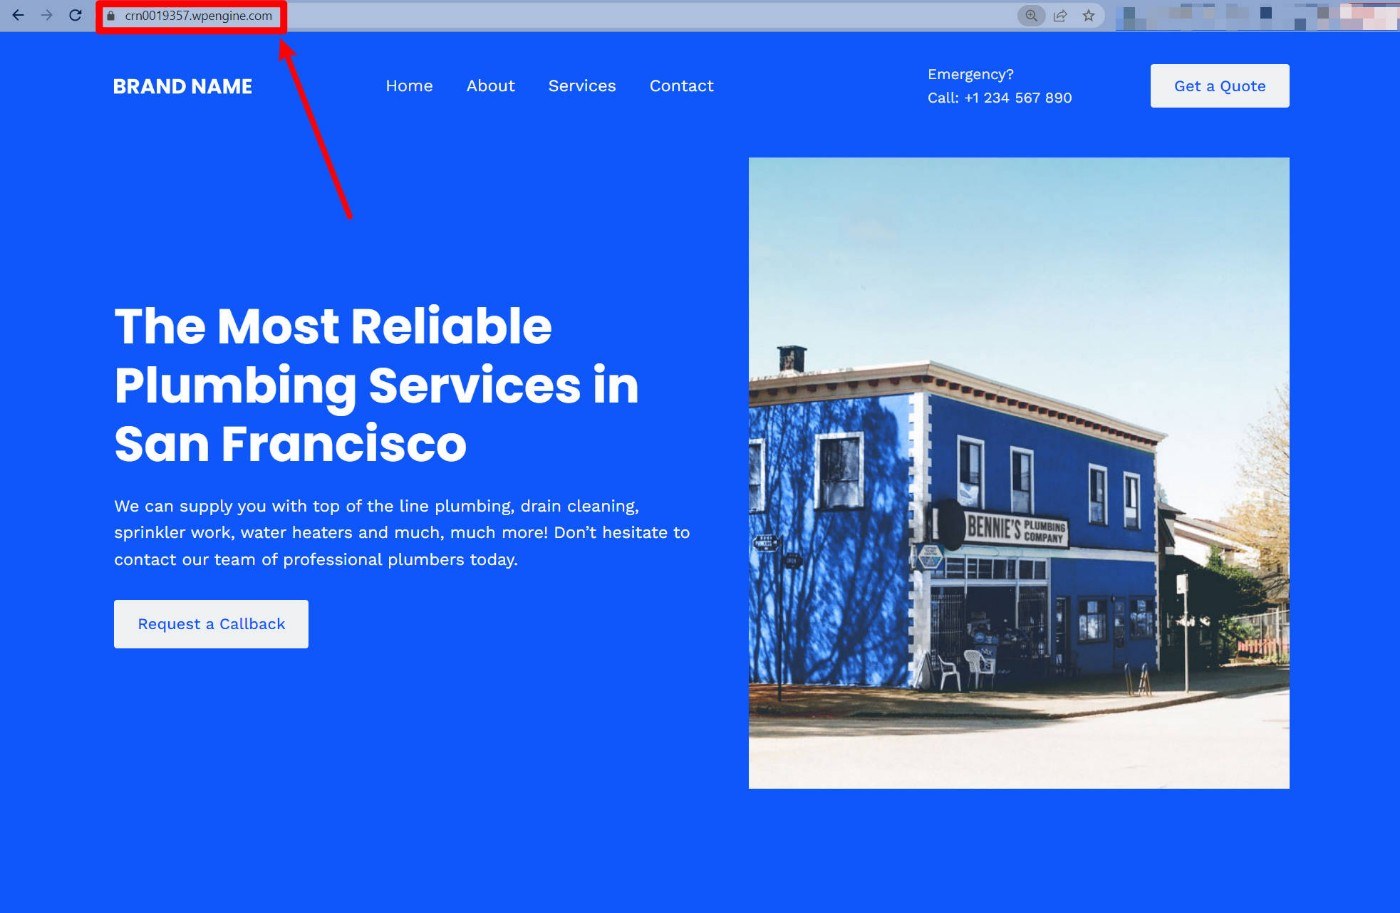
In case you moved your web site to the non permanent WP Engine area title, for now, you are able to do that by simply coming into the WP Engine area title.
You must see your web site precisely the identical because it seems in your present internet hosting:
In case you already arrange your stay area at WP Engine and migrated your web site to the stay area, you gained’t have the ability to simply enter the area title.
Why? As a result of should you try this, you’ll nonetheless see the model of your web site at your present internet hosting till you replace your area’s DNS data.
To get round this, you need to use SkipDNS:
- Enter the IP handle of your WP Engine server within the IP Handle area.
- Enter your stay area title.
The software will then present you the model of your web site hosted on WP Engine in an effort to check it out. Alternatively, it’s also possible to edit your pc’s hosts file.
When you’ve verified that the migrated model of your web site is working correctly, you’re able to proceed to the final step.
5. Add Area to WP Engine and Replace DNS
To complete issues out, it’s good to add your customized area title to WP Engine after which replace your area’s DNS configuration to level to your new WP Engine internet hosting.
When you do that, guests will see the model of your web site hosted at WP Engine each time they enter your area title.
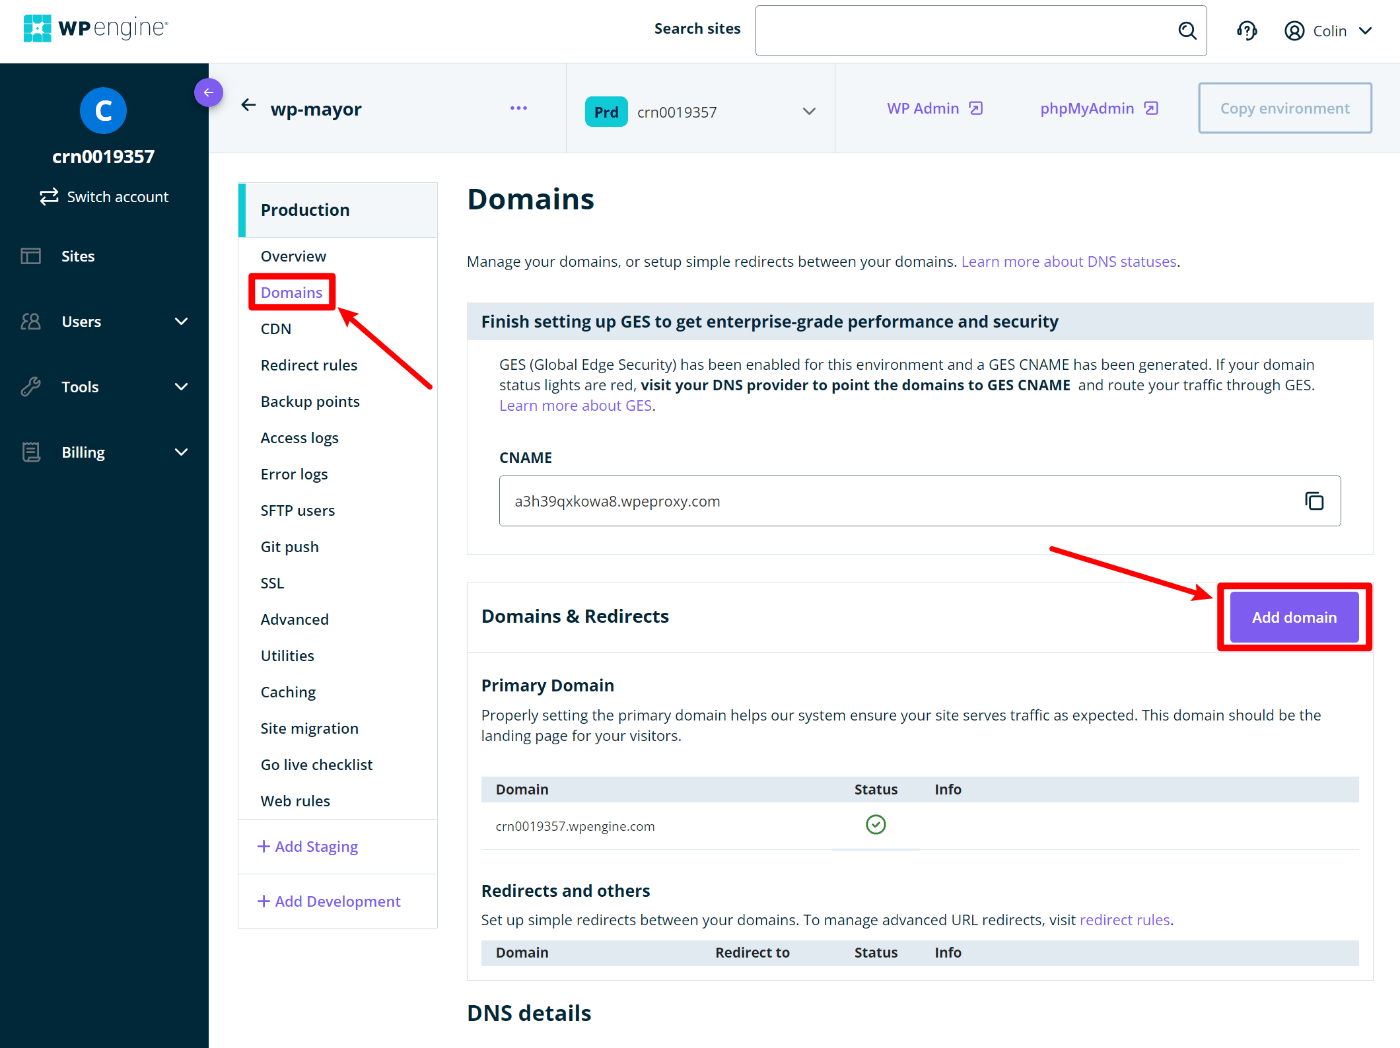
So as to add your area title to WP Engine, go to the Domains tab in your web site’s dashboard. Then, click on the Add area button:
It will launch a wizard that may take you thru including your area title and updating your DNS data. You’ll sometimes replace your DNS data at the place the place you acquire your area title. Nevertheless, if you’re utilizing Cloudflare, you’ll have to replace the DNS data through Cloudflare’s dashboard:
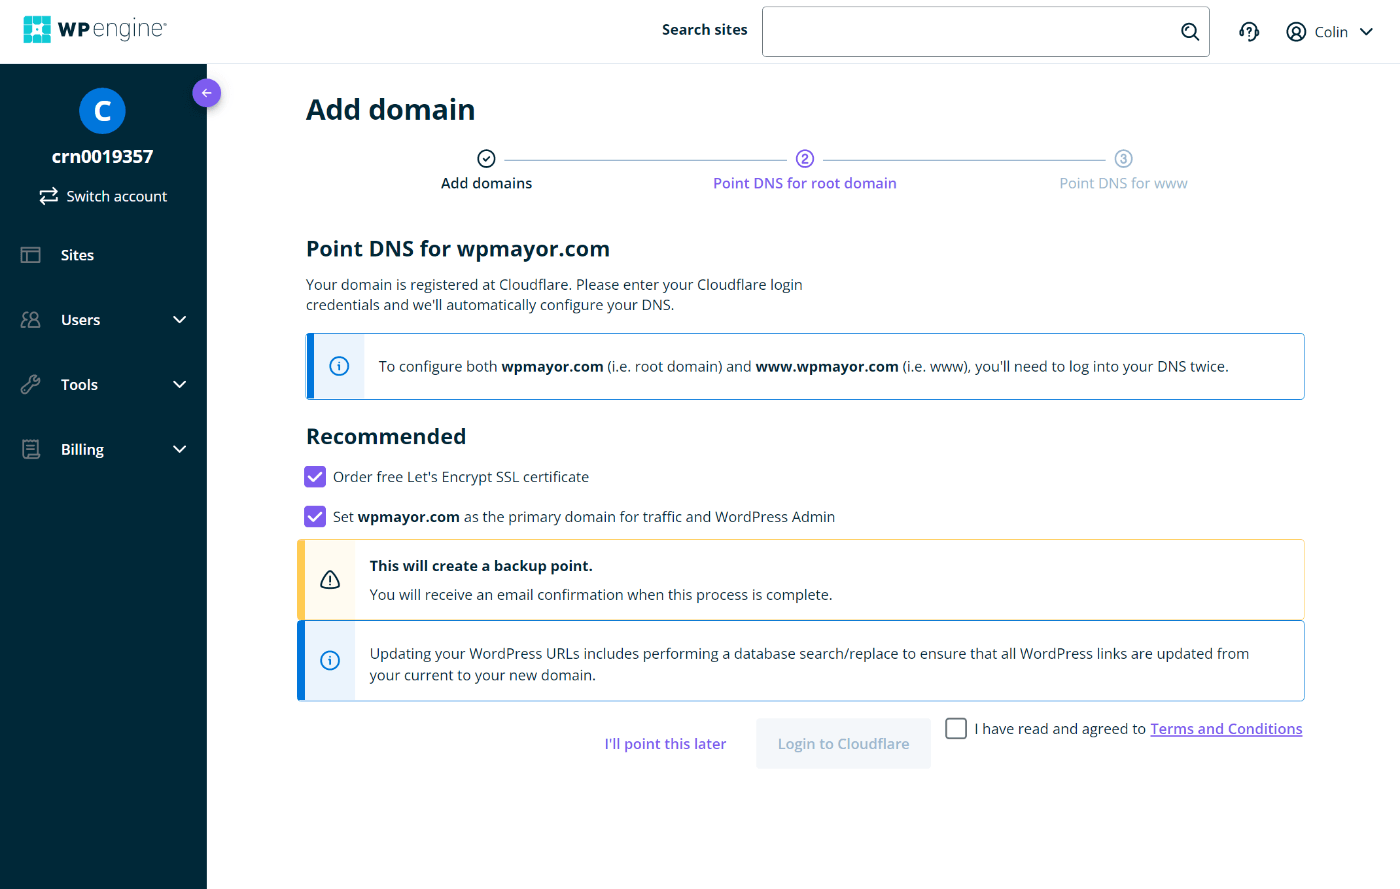
WP Engine will do its greatest to robotically detect your area’s registrar to offer you related directions. In case you hit any roadblocks, you’ll be able to all the time seek the advice of your area registrar’s assist documentation.
When you add your area title and replace the DNS data, you’ve formally migrated your web site!
Whenever you enter your area title, you’ll now see the model of your web site hosted at WP Engine (although it may well take as much as 24 hours for DNS adjustments to propagate).
It’s value giving it one other check simply to verify, however try to be good to go at this level.
Migrate Your Website to WP Engine Right now
In case you’re trying to find performance-optimized managed WordPress internet hosting, WP Engine is a good possibility.
Whereas transferring your web site to a brand new host would possibly really feel intimidating, you don’t want to fret. With the WP Engine Automated Migration plugin, you’ll have the ability to migrate your web site simply by copying and pasting a number of items of data out of your WP Engine dashboard into the plugin’s settings.
In case you’ve already signed up for WP Engine, go forward and migrate your web site utilizing this methodology.
And should you’re nonetheless on the fence, make certain to seize our WP Engine coupon code earlier than you signal as much as save massive in your first 12 months.
Do you continue to have any questions on the right way to migrate a web site to WP Engine? Tell us within the feedback!
