Do you wish to customise the WordPress admin dashboard?
The WordPress admin space can generally get too cluttered with widgets, menu objects, and choices added by WordPress itself or different plugins and themes.
On this newbie’s information, we’ll present how one can simply customise the WordPress admin dashboard by hiding undesirable objects and rearranging admin screens. We may also cowl how one can change admin menus, and an entire lot extra.
Here’s a transient overview of the matters we’ll cowl on this article.
- Why Customise WordPress Admin Space?
- Hiding WordPress Admin Parts with Display screen Choices
- Customise Block Editor Display screen in WordPress Admin Space
- Present or Conceal WordPress Admin Menu Gadgets
- Customise What Seems in WordPress Admin Toolbar
- Change The WordPress Admin Coloration Scheme
- Create a Customized Login Web page for WordPress Admin Space
Prepared? Let’s get began.
Why Customise WordPress Admin Space?
When you’ve got been managing a WordPress web site for some time now, you might have seen totally different widgets, notices, and menu objects in your WordPress admin space.
Some objects like plugin notices and alerts go away while you shut or dismiss them. Nevertheless, many different objects keep in place on totally different WordPress admin screens.
What most WordPress rookies don’t know is that they’ll simply disguise this stuff, transfer them round, and customise their WordPress admin dashboard on their web site.
Lots of builders customise the WordPress admin dashboard for his or her shoppers to make it simpler.
That being stated, let’s take a look at how one can simply customise your WordPress admin space and enhance your WordPress expertise.
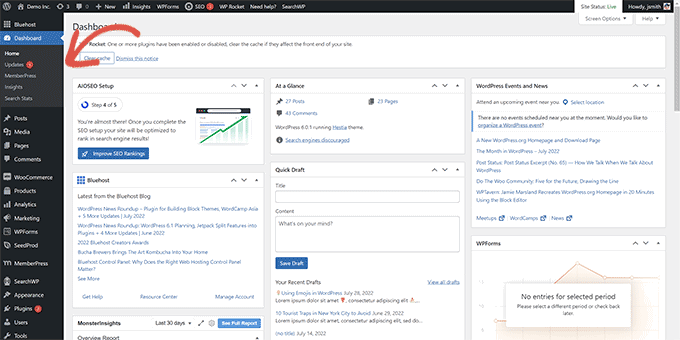
1. Hiding WordPress Admin Parts with Display screen Choices
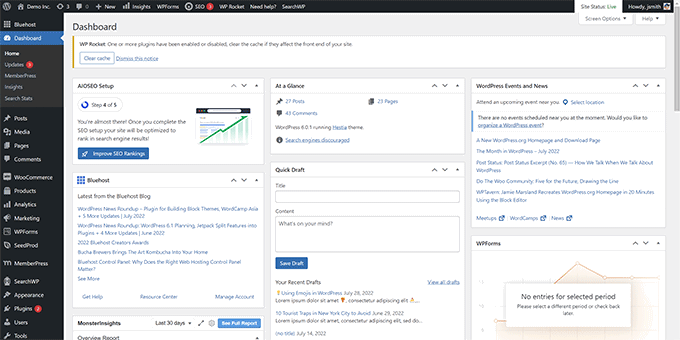
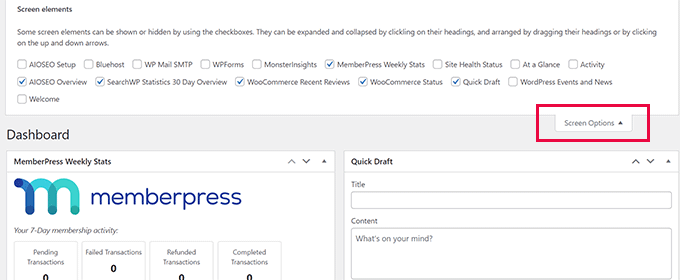
Many WordPress admin pages, together with the primary Dashboard, have a Display screen Choices button on the prime proper nook of the display screen.
Clicking on it should carry a fly-down menu with totally different choices. Merely uncheck the choices you don’t wish to see, and they’ll disappear from that web page.
For example, on the ‘Dashboard’ web page, you’ll be able to disguise widgets you will have by no means used and maintain the widgets that present precious info.
Whereas on the ‘Dashboard’ web page, you may as well drag and drop widgets to rearrange them on the display screen. For example, you’ll be able to transfer your ‘At a Look’ widget and ‘Web site Well being‘ widget to the highest.
The ‘Display screen Choices’ button will present you totally different choices relying on which web page contained in the WordPress admin space you’re looking at.
For example, on the Posts » All Posts web page, the display screen choices button will can help you present or disguise columns, change the variety of posts displayed, or swap to an prolonged view.
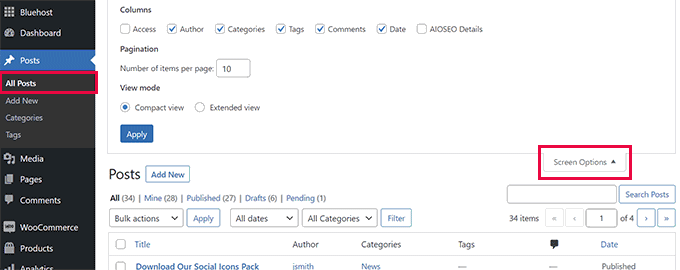
Strive utilizing the ‘Display screen Choices’ function on totally different pages inside your WordPress admin space to see the choices obtainable to regulate these pages to your individual wants.
Be aware: Display screen Choices settings are saved for every consumer. Your modifications is not going to apply to different customers or authors in your WordPress web site.
2. Customise Block Editor Display screen in WordPress Admin Space
A mean WordPress consumer spends most of their time utilizing the Block Editor. That is the default WordPress content material editor that you just use to jot down weblog posts and create pages in your web site.
The block editor already comes with a clutter-free consumer interface that gives you with a number of room to edit your content material.
Nevertheless, it additionally means that you can modify sure settings to make your writing expertise even higher.
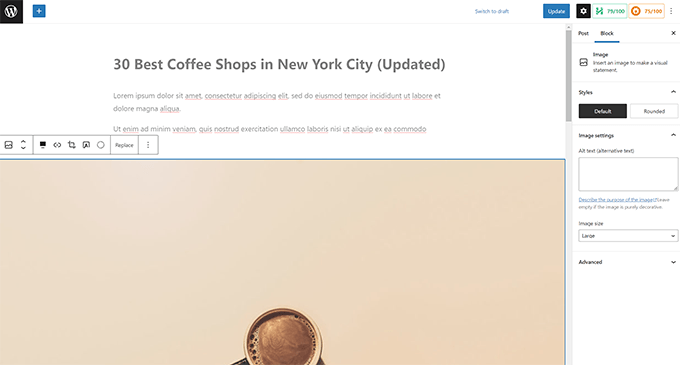
Merely click on on the three-dot menu button on the prime proper nook of the display screen and click on on the Preferences possibility.

This can carry up a popup the place you’ll be able to modify totally different settings for the block editor.
First, below the ‘Basic’ tab, you’ll be able to cut back the Consumer Interface, which can make the interface extra compact.
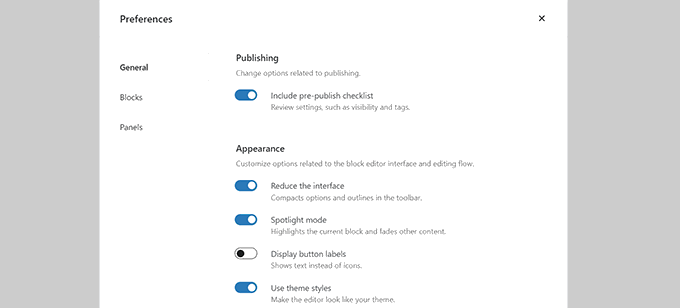
You may as well activate the ‘Highlight mode,’ which can solely spotlight the block you might be in and fade different components of the display screen.
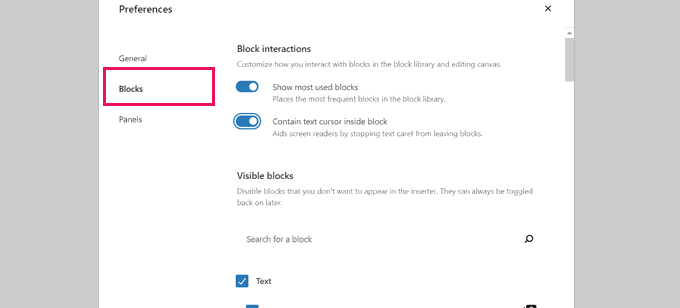
Subsequent, you’ll be able to swap to the ‘Blocks’ tab. From right here, you’ll be able to present and conceal blocks which can be obtainable for you contained in the editor.
Lastly, the ‘Panels’ tab has much more choices.
From right here, you’ll be able to resolve which panels are proven or hidden contained in the block editor’s right-hand sidebar.

After you have hidden the options you don’t use, you’ll be able to click on the ‘X’ within the upper-right nook to return to the publish editor.
Subsequent, clicking on the ‘Gear’ icon on the prime will develop or disguise the settings panel. This turns out to be useful when you find yourself working with full-width content material layouts.
Contained in the sidebar introduced up by the Gear icon, you’ll be able to select to break down any tab by clicking on the upward arrow.
This can clear extra muddle and assist create a distraction-free block editor display screen for you.
You may additionally wish to see these additional tips about mastering the WordPress content material editor to make your content material creation expertise extra nice.
3. Present or Conceal WordPress Admin Menu Gadgets
As you put in extra WordPress plugins in your web site, you will notice that a lot of them add their very own menu objects to the left-hand sidebar menu in your WordPress admin dashboard.
Now a few of them chances are you’ll must entry recurrently. For example, chances are you’ll wish to have quick access to contact kind entries or fine-tune the web optimization settings in your WordPress weblog.
Nevertheless, chances are you’ll not want fixed entry to a few of these menu objects, or chances are you’ll not need different customers in your web site to see them.
Fortunately, there’s a plugin that will help you management which menu objects seem in your WordPress admin sidebar. You may as well management which consumer function can see a menu merchandise within the admin space.
First, it’s good to set up and activate the Admin Menu Editor plugin. For extra particulars, see our step-by-step information on how one can set up a WordPress plugin.
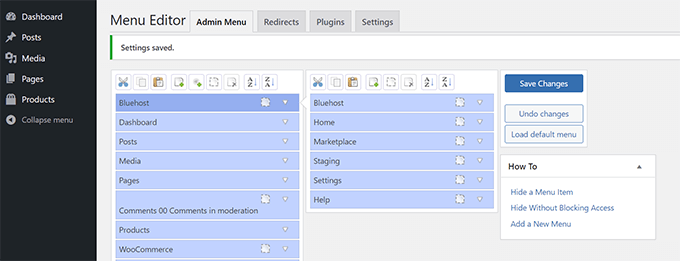
Upon activation, it’s good to go to the Settings » Menu Editor web page to configure admin space menus.
You will notice all the primary menu objects within the first column. Clicking on a menu merchandise will present youngster objects nested beneath it within the second column.
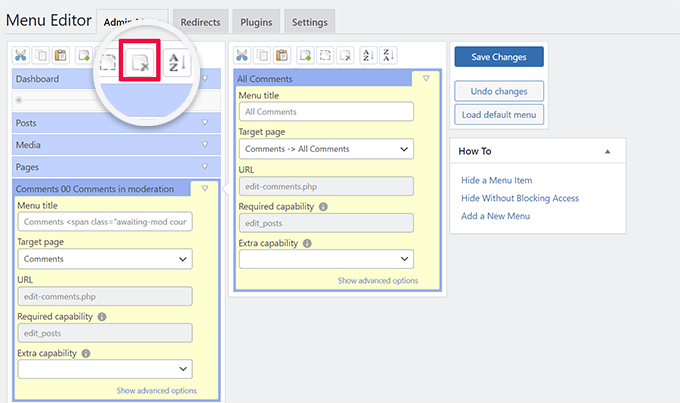
You possibly can click on to pick out a menu merchandise after which click on on the delete button on the prime toolbar to take away it.
You may as well prohibit who can see a menu merchandise within the WordPress admin sidebar. Merely click on to pick out a menu merchandise, after which below settings, set a restriction below ‘Additional functionality.’
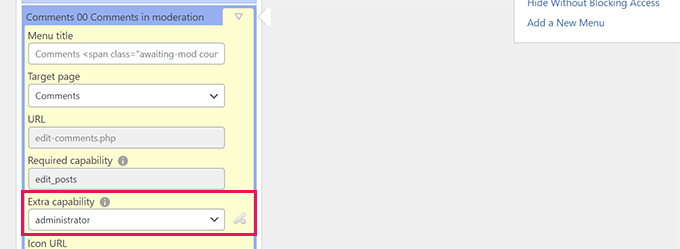
For example, within the picture above, we now have hidden the Feedback menu merchandise from all customers besides these with the Administrator consumer function.
After you have made modifications to the admin space menus, don’t neglect to click on on the ‘Save Adjustments’ button to retailer your settings.
The plugin will present your custom-made WordPress admin space menus on the display screen.
In the event you don’t see the modifications seem instantly, you might need to refresh your web page or log off and again in for the menu customizations to point out up.
For extra particulars, see our full tutorial on how one can disguise pointless menu objects within the WordPress admin space.
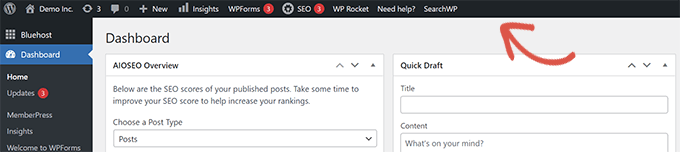
4. Customise What Seems in WordPress Admin Toolbar
The admin toolbar is the menu on prime of WordPress admin space screens. The toolbar can also be seen while you go to the general public areas of your web site whereas logged in.
To customise the WordPress admin toolbar, set up and activate the Adminimize plugin. For extra particulars, see our step-by-step information on how one can set up a WordPress plugin.
Upon activation, go to the Settings » Adminimize web page and search for the ‘Admin Bar Backend Choices’ and ‘Admin Bar Entrance Finish Choices’ tabs.
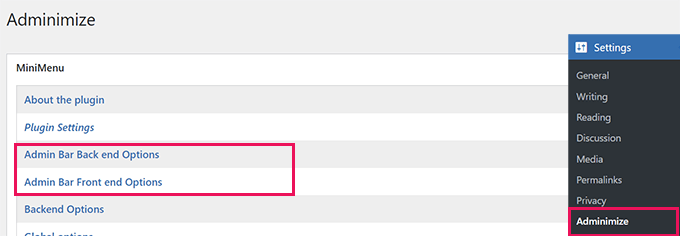
Clicking on both of them will take you to an choices display screen the place you’ll be able to choose which objects to show within the WordPress admin bar.
You may as well select objects that can be seen to every consumer function.
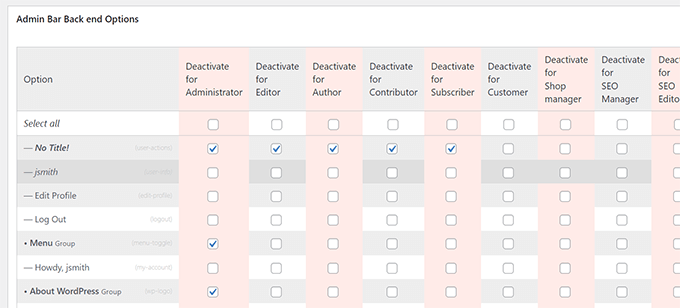
Don’t neglect to click on the ‘Replace choices’ button to avoid wasting your modifications.
For extra particulars, see our newbie’s information to the WordPress admin toolbar.
5. Change The WordPress Admin Coloration Scheme
WordPress comes with just a few fundamental shade choices that you should utilize for the admin space.
Merely head over to the Customers » Profile web page and discover the ‘Admin Coloration Scheme’ choices.
You then simply should click on a shade scheme to preview it within the WordPress admin space.
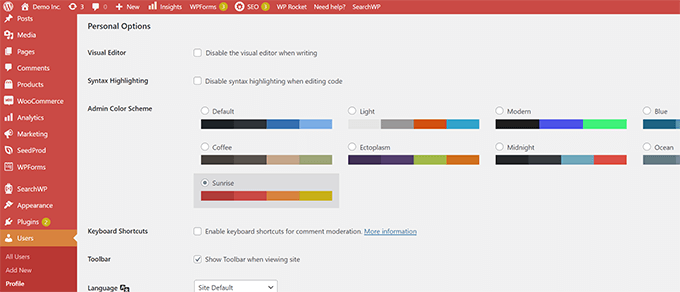
Don’t neglect to click on on the ‘Replace Profile’ button on the backside to avoid wasting your modifications.
Don’t just like the obtainable shade schemes?
You may make your individual shade scheme by putting in and activating the Admin Coloration Schemer plugin. For extra particulars, see our step-by-step information on how one can set up a WordPress plugin.
Be aware: Admin Coloration Schemer plugin might present a warning that it hasn’t been up to date for some time. That’s as a result of the plugin didn’t want an replace. It’s created by the WordPress Core Crew and is protected to put in.
Upon activation, it’s good to go to the Instruments » Admin Colours web page to create your shade scheme.
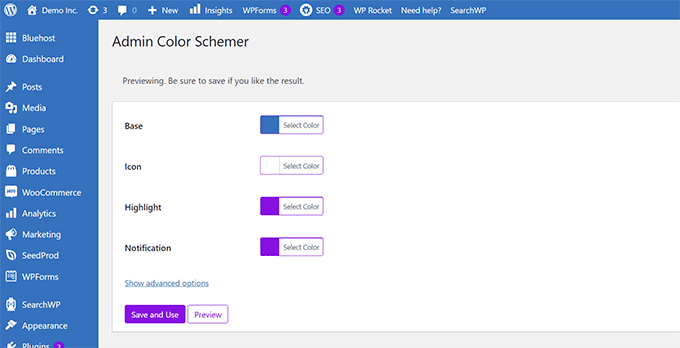
If you’re completely happy together with your customizations, you’ll be able to click on ‘Save and Use’ to use them to the dashboard.
Be aware: You possibly can undo the colour modifications by merely deactivating the plugin or loading the default shade scheme below the Customers » Profile web page.
For extra particulars, see our tutorial on how one can change the WordPress admin shade scheme for rookies.
6. Create a Customized Login Web page for WordPress Admin Space
Wish to substitute the default WordPress login web page with your individual customized login web page with out writing code?
For that, you’ll want SeedProd. It’s the finest WordPress web page builder that means that you can design your WordPress web site with a gorgeous drag-and-drop software (no coding required).
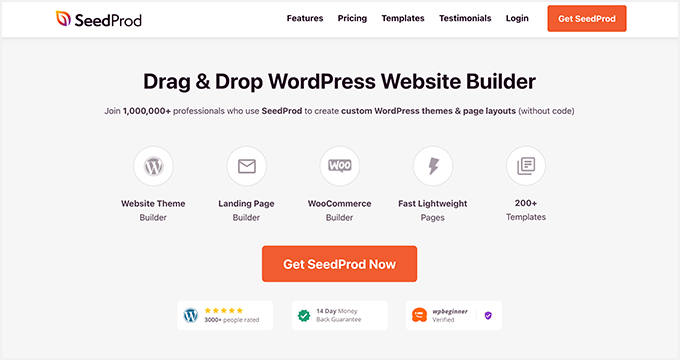
First, it’s good to set up and activate the SeedProd plugin. For extra particulars, see our step-by-step information on how one can set up a WordPress plugin.
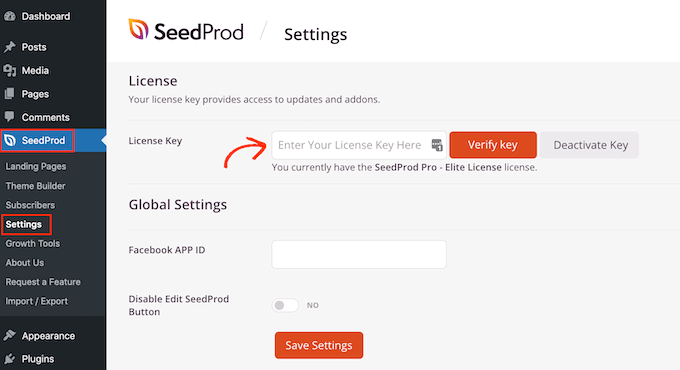
Upon activation, go to SeedProd » Settings web page to enter your license key. You’ll find this info below your account on the SeedProd web site.
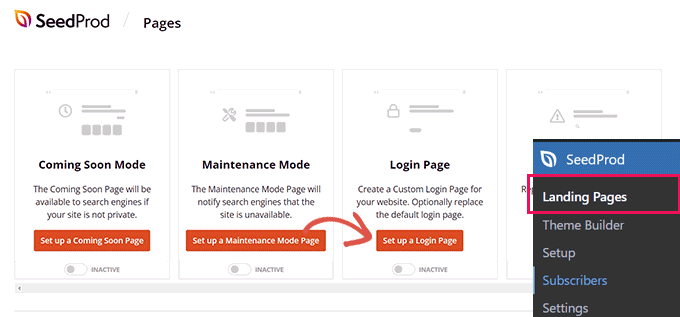
After that, head over to the SeedProd » Touchdown Pages.
You’ll now see a alternative of various sorts of touchdown pages you’ll be able to create, so discover the one labeled ‘Login Web page’ and click on on the ‘Arrange a Login Web page’ button.
Subsequent, you’ll be requested to decide on a template in your login web page design.
SeedProd comes with a bunch of gorgeous designs that you should utilize as a place to begin.
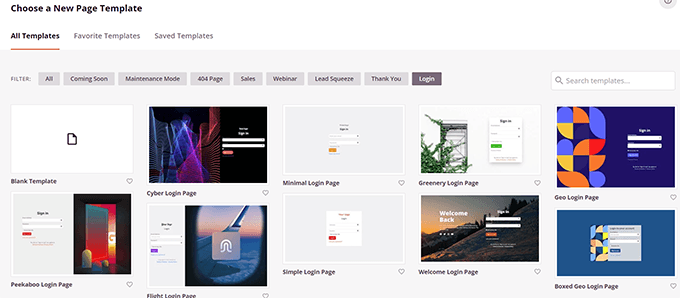
Merely click on to pick out a template after which present a reputation in your login web page.
This identify can be used internally to establish this web page when it’s good to edit it once more.
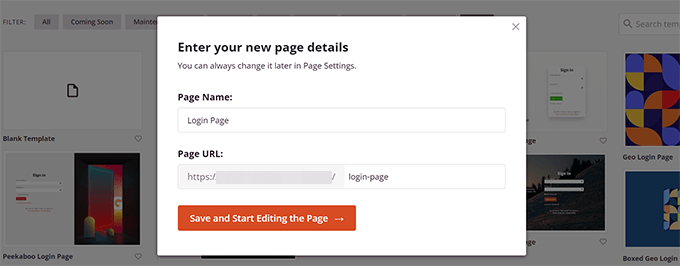
Click on on the ‘Save and Begin Enhancing the Web page’ button to proceed.
This can launch the SeedProd web page builder interface. It’s a drag-and-drop design software the place you’ll be able to level and click on on any merchandise on the display screen to edit it.
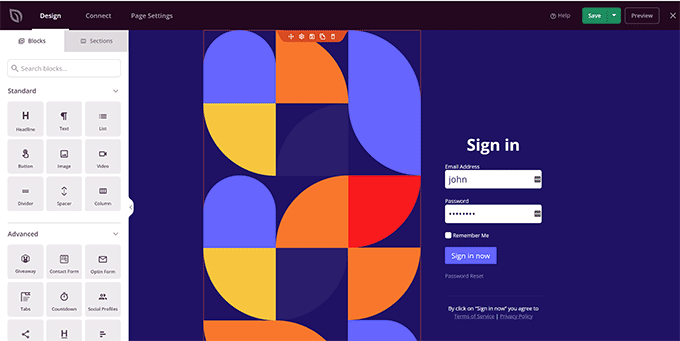
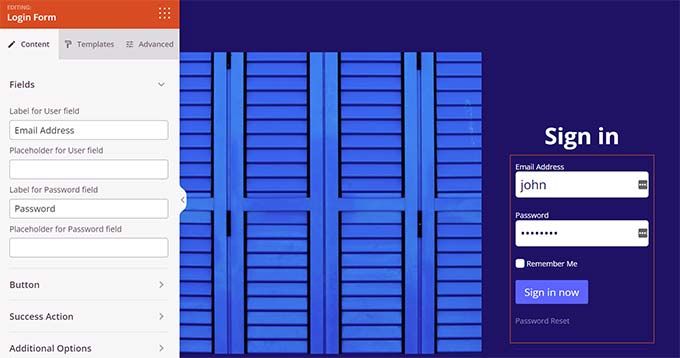
You possibly can add new objects from the sidebar or edit the login kind to decide on what occurs after customers log in.
You may as well modify any kind labels or textual content, along with the web page design itself.
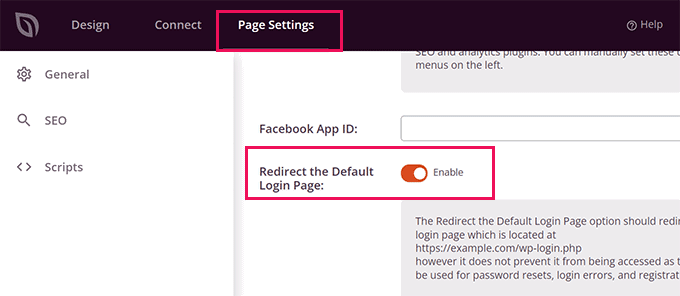
As soon as you might be completed, swap to the ‘Web page Settings’ tab within the builder.
Scroll right down to ‘Redirect the Default Login Web page’ possibility to show it on.
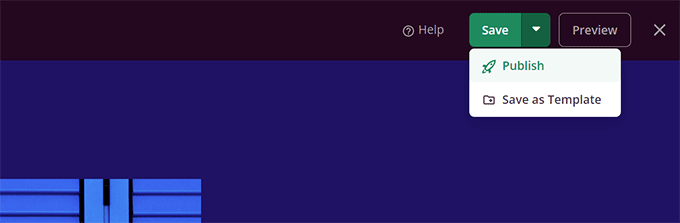
Lastly, don’t neglect to click on on the ‘Save’ button within the top-right.
Then click on ‘Publish’ to create your new login web page.
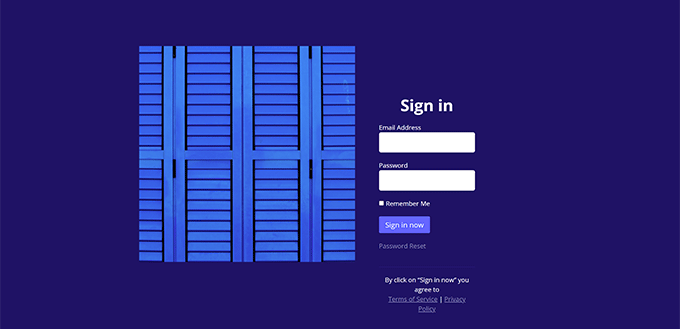
Now you can go to the conventional login web page of your WordPress web site.
You’ll see your customized design as a substitute, and so will your customers.
For extra particulars, see our information on how one can create a customized login web page for WordPress.
We hope this text helped you learn to simply customise WordPress admin space. You may additionally wish to see our information on how one can defend the WordPress admin space or take a look at our full WordPress safety information to safeguard your complete web site.
In the event you appreciated this text, then please subscribe to our YouTube Channel for WordPress video tutorials. You may as well discover us on Twitter and Fb.
The publish Learn how to Customise WordPress Admin Dashboard (6 Suggestions) first appeared on WPBeginner.
