Do you wish to routinely drip content material in your WordPress website?
Should you’re operating a membership website or promoting premium content material, then it’s possible you’ll wish to arrange drip content material as a substitute of exhibiting all of your posts, pages, and different content material immediately.
On this article, we’ll present you how you can add computerized drip content material to your WordPress web site.

Why Add Drip Content material in WordPress?
Drip content material is the place you progressively launch posts, pages, movies, and different content material as a substitute of giving it away abruptly.
When you’ve got a membership web site then releasing content material routinely at common intervals can maintain members engaged for a very long time.
When you’ve got a library of previously-published content material then new members could assume these posts are previous and outdated. Nonetheless, content material dripping could make previous content material appear new and thrilling, significantly for those who let members know in regards to the content material utilizing automated drip notifications or customized e-mail advertising.
Content material dripping can be helpful for those who provide month-to-month memberships, sincce individuals will wish to renew their subscription with the intention to maintain unlocking content material.
You too can use drip content material to promote extra on-line programs.
As an alternative of giving college students entry to your complete course, you may launch classes throughout a scheduled coaching interval so your college students don’t really feel overwhelmed. This will enhance the educational expertise, which can encourage college students to purchase extra of your programs.
Learn how to Add Routinely Drip Content material in Your WordPress Web site
To begin, you’ll want a WordPress membership plugin that permits you to schedule drip content material in your web site.
That is the place MemberPress is available in.
It’s the greatest WordPress membership plugin in the marketplace. It permits you to create paid subscriptions and set guidelines about who can entry your content material, and when. This makes it simple to create a complicated drip content material schedule.
First, that you must set up and activate the MemberPress plugin. For extra particulars, see our step-by-step information on how you can set up a WordPress plugin.
Upon activation, that you must go to MemberPress » Settings and enter your license key into the ‘License Key’ area.
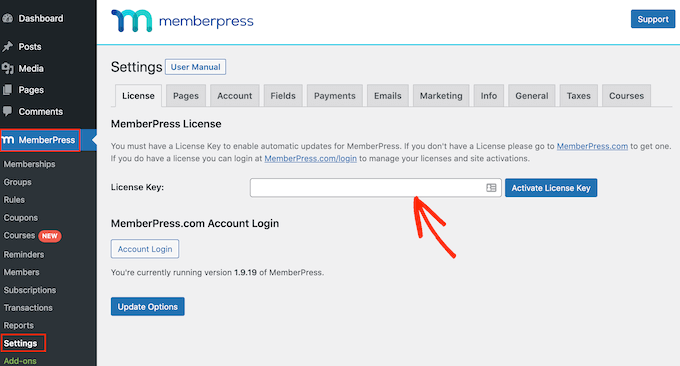
You could find the important thing by logging into your account on the MemberPress web site. It’s additionally within the e-mail you bought whenever you bought MemberPress.
After coming into the license key, click on on the ‘Activate License Key’ button.
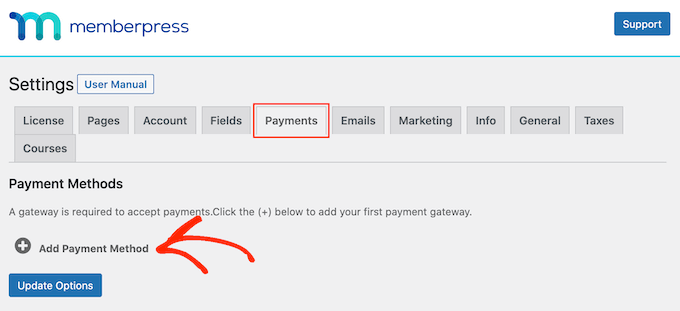
Subsequent, that you must add a fee gateway so you may simply settle for bank card funds in WordPress. To get began, choose the ‘Funds’ tab and click on on ‘Add Fee Methodology.’
MemberPress helps PayPal and Stripe funds below their Primary and Plus plans. You too can use Authorize.internet by buying their Professional plan.
Merely open the ‘Gateway’ dropdown and choose the gateway that you simply wish to use.
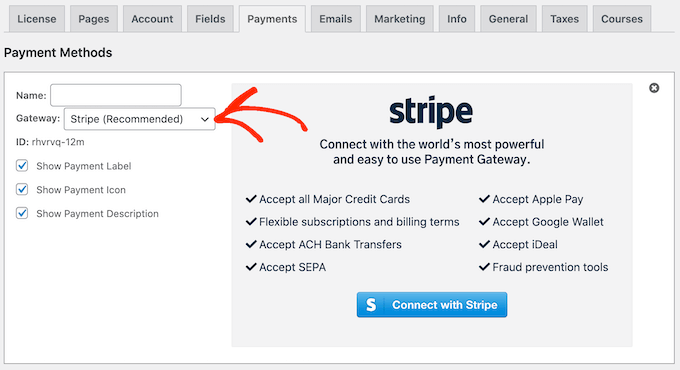
MemberPress will then present all of the settings that you must configure with the intention to use this fee gateway.
These settings will fluctuate relying on the gateway, for instance within the following picture we’re including PayPal fee to WordPress.
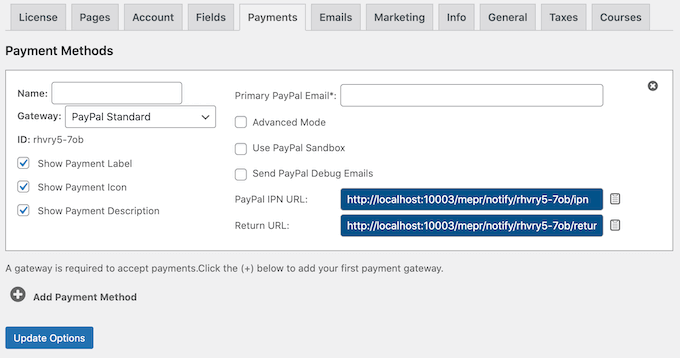
When you’ve configured the gateway, click on on ‘Replace Choices’ to avoid wasting your settings.
You might be able to get extra gross sales and enhance the client expertise by permitting customers to decide on a fee methodology. So as to add a number of gateways to your website, merely click on on Add Fee Methodology and repeat the identical course of described above.
When you’ve added a number of fee strategies, it’s time so as to add a membership plan.
Merely go to MemberPress » Memberships after which click on on the Add New button.
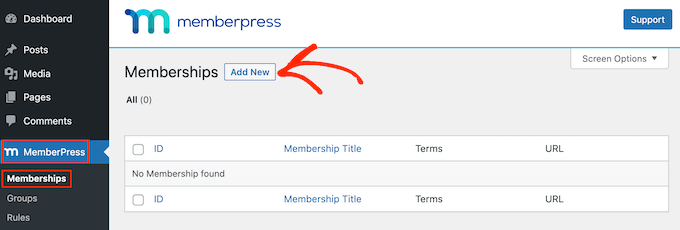
On the following display screen, that you must sort in a title to your membership plan. This can seem in your WordPress admin space and also will be seen to the individuals who go to your website.
After that, you may sort an non-obligatory description into the principle put up editor.
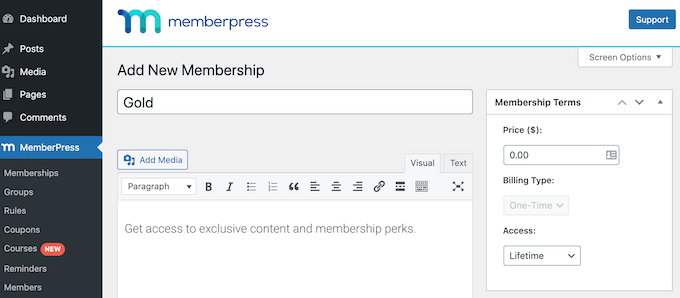
Subsequent, sort how a lot this membership will value into the ‘Worth’ area.
After that, open the ‘Billing Sort’ dropdown and select whether or not this can be a one-time or recurring fee.
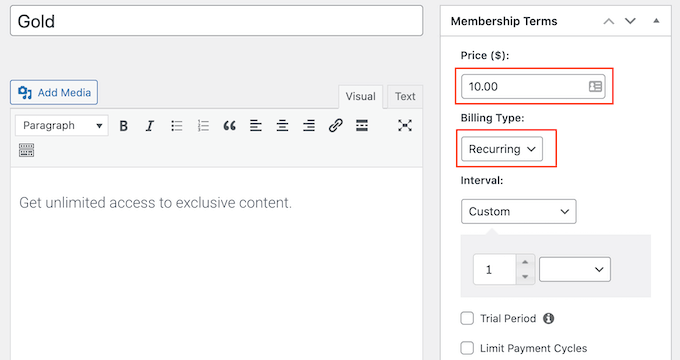
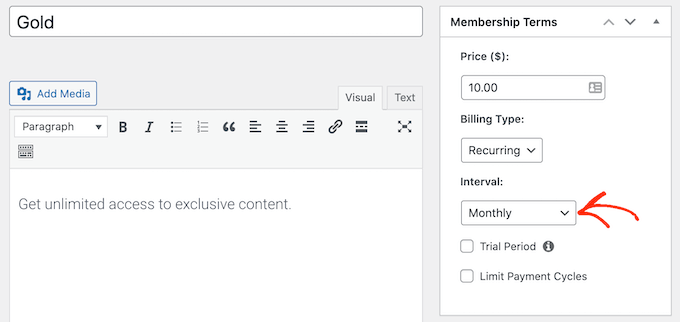
Should you select ‘Recurring’ then you need to use the settings to cost members on a weekly, month-to-month, quarterly, or annual foundation.
By accepting recurring funds in WordPress, you may automate the billing course of. This will prevent a ton of time and customarily results in fewer fee delays and errors. It additionally means you don’t need to ship invoices manually.
The opposite choice is a one-time fee, which may enhance the person expertise by giving members full management over whether or not they renew their subscription.
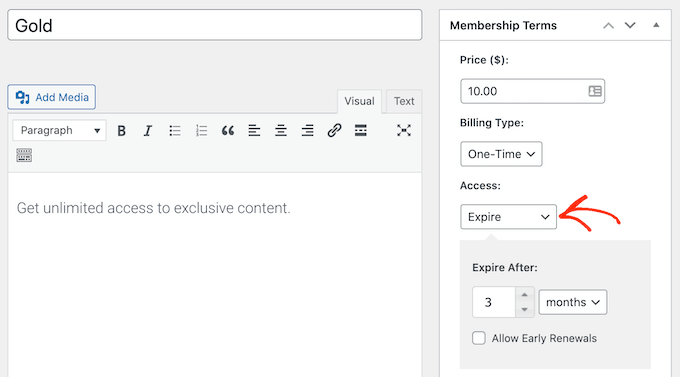
Should you select ‘One-Time’ then open the brand new ‘Entry’ dropdown and select between expire or fastened expire. ‘Expire’ permits you to set what number of days, months, weeks, or years the membership will final.
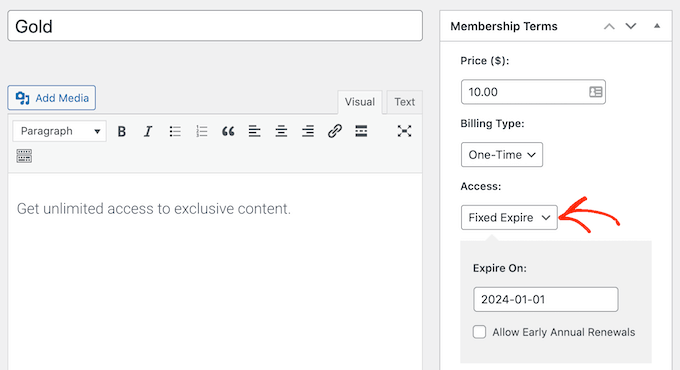
In the meantime, ‘Mounted expire’ permits you to set a calendar date when the membership will expire.
‘Mounted expire’ could also be helpful if you wish to maintain all members on the identical schedule. For instance, all of your memberships ought to expire on the first of the month.
The ultimate alternative is ‘Lifetime.’ Content material dripping encourages individuals to resume their subscription, so it’s possible you’ll wish to keep away from providing lifetime membership.
After selecting a billing sort, there is likely to be some additional settings that you must configure corresponding to selecting whether or not to supply a trial.
Most of those settings are pretty simple, so after finishing them scroll to the ‘Membership Choices’ field which has all of the completely different settings to your membership plan.
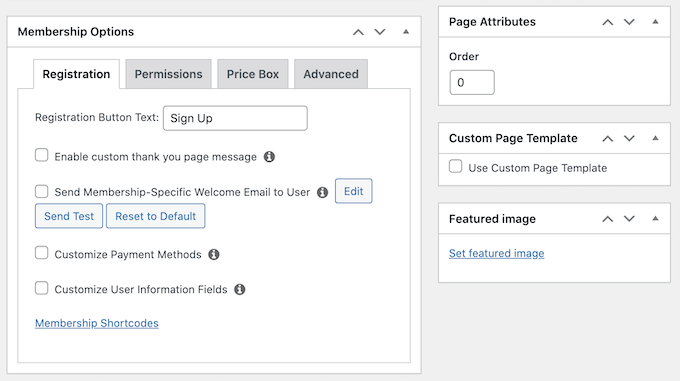
There are many completely different settings that you could look via, together with a couple of that might enhance the person expertise.
To create a great first impression together with your new members, we advocate enabling the customized thanks message and customized welcome e-mail.
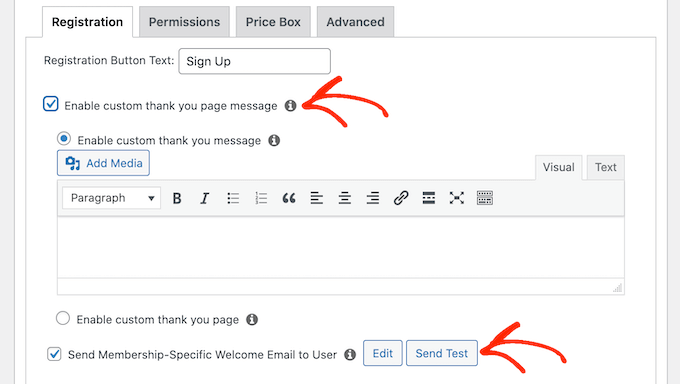
After checking these containers, use the settings to create your custom-made message.
Tip: Should you click on on ‘Ship Take a look at’ and don’t obtain an e-mail, then there could also be an issue together with your WordPress configuration. If this occurs then an SMTP service supplier can enhance your e-mail deliverability charges.
While you’ve completed organising your membership plan, click on on the ‘Publish’ button to make it reside.

To create extra membership ranges, simply observe the identical course of described above.
Professional Tip: When you’ve created no less than one membership degree, you’re able to create drip content material guidelines. Nonetheless, there are nonetheless tons extra options you may add to your membership web site. To be taught extra, see our final information to making a WordPress membership website.
Scheduling Routinely Drip Content material Guidelines
MemberPress is a robust plugin that allows you to limit entry to your content material in numerous other ways. For instance, you may limit WordPress pages by person function.
You should utilize these superior guidelines to drip content material and provide your members ongoing worth.
To create a drip schedule, merely head over to MemberPress » Guidelines and click on on the Add New button.
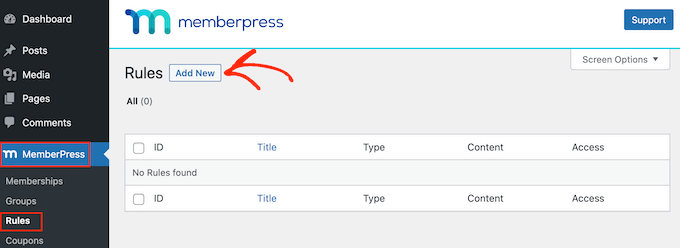
This takes you to a display screen the place you may create your guidelines.
MemberPress permits you to limit entry to particular pages and posts. For instance, it’s possible you’ll solely enable members to entry a selected weblog put up after they’ve been a member for 10 days.
This will work properly when you’ve got a small quantity of content material, otherwise you wish to construct a really detailed and exact schedule.
Nonetheless, when you’ve got numerous content material then scheduling every web page or put up individually can take a number of effort and time.
Fortunately, MemberPress additionally permits you to create guidelines for particular classes and tags. This allows you to launch units of associated content material, for instance you may give members entry to all posts tagged ‘Newbie’s Information’ throughout their first week of membership.
You may even undergo your content material library and label all of the posts that you simply wish to launch collectively. For instance, you may create a ‘First Week’ tag.
For extra data, please see our step-by-step information on how you can add classes and tags for WordPress pages.
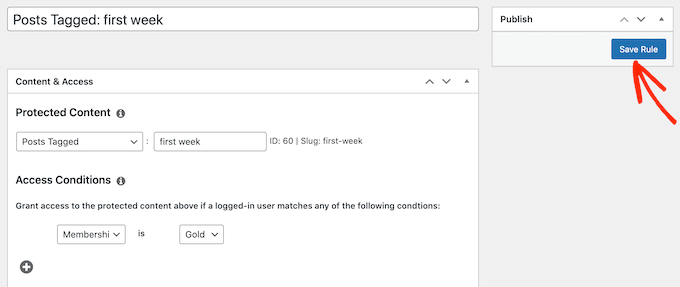
While you’re prepared, open the ‘Protected content material’ dropdown and select the content material that ought to use this rule, corresponding to ‘A Single Submit,’ ‘Posts Categorized,’ ‘Little one Pages Of,’ or another choice within the checklist.
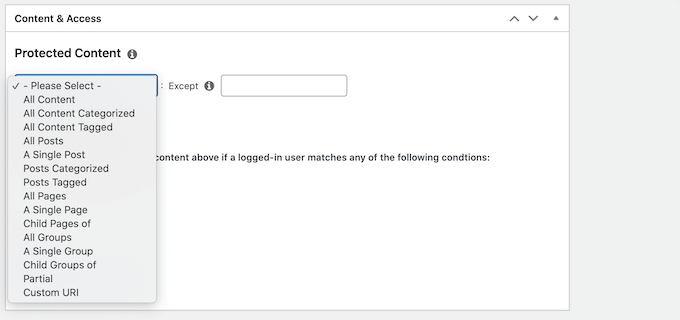
Relying on what you select, you’ll get entry to some additional settings. For instance, if you choose ‘A Single Web page’ then you definitely’ll have to sort within the web page that you simply wish to use within the rule.
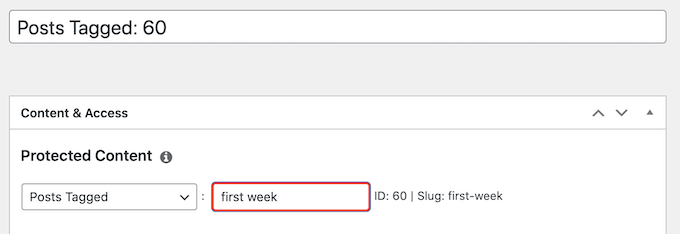
If you choose ‘Posts Tagged’ then you may sort in a number of tags.
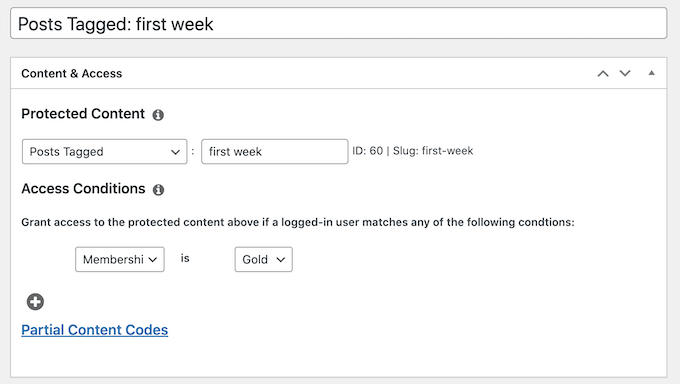
Subsequent, open the dropdown within the ‘Entry Circumstances’ part and choose ‘Members.’
You may then merely open the second dropdown and select the membership degree this rule will apply to.
Subsequent, you may inform MemberPress when to drip the content material.
Scroll to ‘Drip /Expiration’ and test the ‘Allow Drip’ field to disclose some new drip settings.
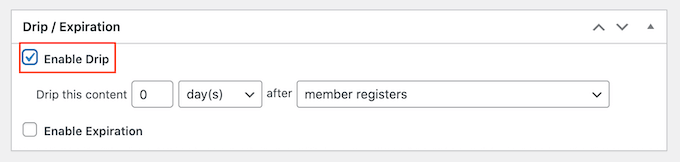
To begin, use the dropdown to decide on whether or not to launch this content material after a sure variety of days, weeks, months or years.
You may then sort in a quantity. For instance, within the following picture we’re releasing the content material after 1 week.
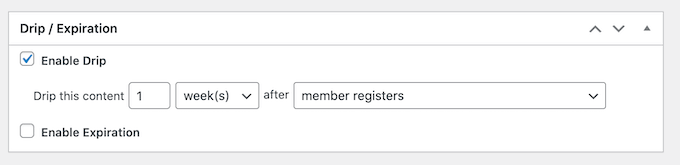
When you’ve finished that, use the ‘after’ dropdown to decide on the occasion that ought to set off the countdown. For instance, you may drip the content material 2 week after the member registers or 1 week after they purchase a selected product.
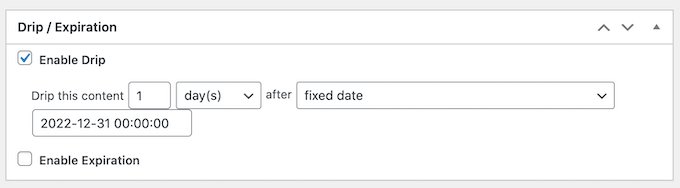
Should you’re working with time-sensitive content material, then you may even select a hard and fast date. For instance, you may publish a brand new put up on Black Friday or announce a New 12 months giveaway or contest on the first of January.
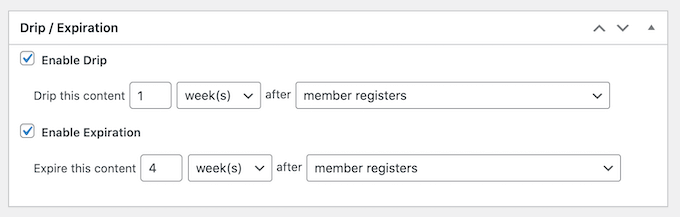
Optionally, you may set an expiration date by checking the ‘Allow Expiration’ field.
This will create a way of urgency, for the reason that content material is barely obtainable for a restricted time. It could additionally encourage extra individuals to purchase memberships, in order that they don’t miss out on the time-restricted content material.
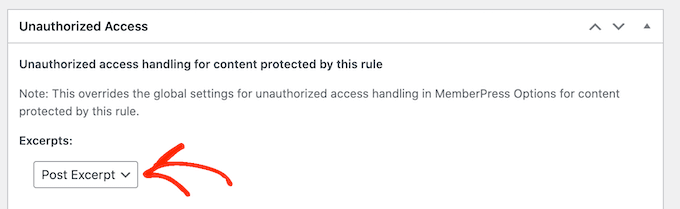
When you’ve finished that, scroll to ‘Unauthorized Entry’ and resolve what MemberPress will present to guests who attempt to entry the content material with out authorization.
One choice is to tease guests by exhibiting an ‘Excerpt’ of the restricted content material corresponding to the primary 100 characters or the put up excerpt.
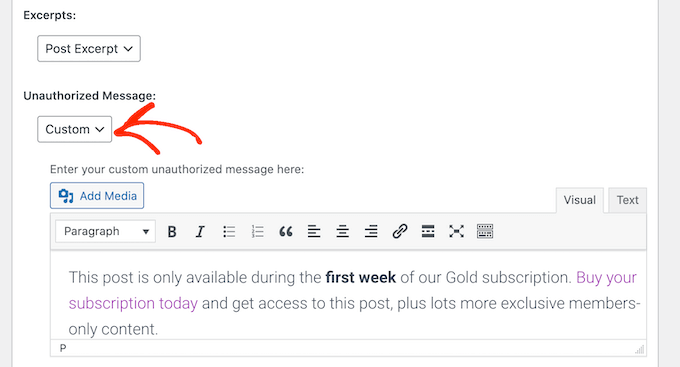
Should you don’t set a customized message, then MemberPress will present the default unauthorized entry message to all customers. Because of this, we advocate creating your individual message by opening the ‘Unauthorized’ message dropdown and selecting ‘Customized.’
For instance, you may let guests know they will unlock this content material by shopping for a membership subscription.
Lastly, it’s a good suggestion to point out the MemberPress login type simply in case the unathorized customer already has an account together with your web site. To do that, open the ‘Login type’ dropdown and click on on ‘Present.’
When you’re finished, scroll to the highest of the web page and click on on the ‘Save Rule’ button.
So as to add extra guidelines merely observe the identical course of described above.
Tips about Managing Drip Content material in WordPress
When used accurately, drip content material can maintain members completely satisfied and engaged, and get you numerous new registrations.
Listed below are a couple of suggestions that can assist you get much more new members, and maintain these individuals engaged for a very long time.
1. Plan a Easy Content material Technique
It’s vital to plan your schedule fastidiously. You don’t wish to give away your entire content material immediately, however there needs to be sufficient content material to fulfill new members.
Because of this, it’s a good suggestion to create completely different membership accounts and check the client expertise. You may then fine-tune your content material dripping guidelines so that you’re offering a great expertise to all customers.
When testing your website, it’s vital to cover your WordPress pages from Google and different serps. In case your premium content material will get cached by the major search engines throughout testing then unauthorized customers might be able to entry it without spending a dime.
There are a couple of methods to cease serps from crawling a WordPress website however when your website continues to be in growth we advocate placing it into upkeep mode.
2. Create an E mail Listing
E mail advertising is likely one of the most cost-effective methods to advertise your drip content material and get members again to your website. An e-mail may also reinforce that that is new and thrilling content material that members ought to take a look at.
We advocate utilizing Fixed Contact to combine your drip content material technique together with your e-mail advertising.
Fixed Contact is the greatest e-mail advertising service for small companies and comes with simple automation instruments that may allow you to arrange automated campaigns for brand new subscribers.
These automated workflows can prevent a number of effort and time.

For extra highly effective advertising automation instruments, you may take a look at HubSpot or Omnisend.
3. Promote Merchandise with On-Web site Retargeting
To develop your enterprise, you’ll want individuals to resume their membership, improve their plan, or purchase different merchandise.
That is the place OptinMonster comes on. It’s the greatest conversion optimization instrument that helps you promote extra to your current clients.

You should utilize OptinMonster to point out members focused messages with lightbox popups, slide-in containers, countdown timers, and extra.
It even has gamified spin to win optins that you need to use reward members with reductions, coupon codes, and different prizes.
4. Study from Consumer Habits
Each website can profit from monitoring web site guests, which is why analytics is a must have.
By monitoring what’s working and what’s not working in your membership website, you may constantly fine-tune your content material dripping to get much more signups and renewals.
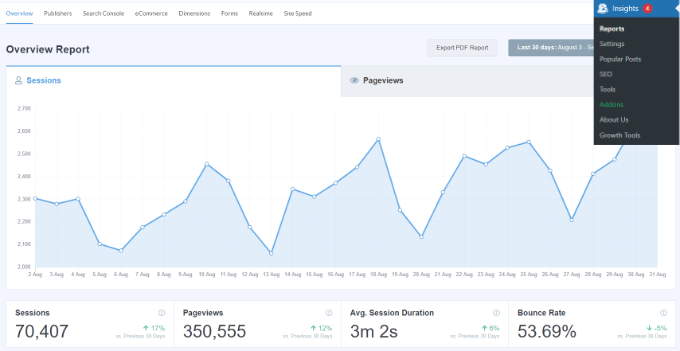
The best approach to set up Google Analytics in WordPress is by utilizing MonsterInsights.
It’s the greatest Analytics answer for WordPress and allows you to monitor guests and members out of your website’s admin space.
With this information, you can also make knowledgeable choices and alter your drip content material technique to develop your enterprise.
To be taught extra, see our step-by-step information on WordPress conversion monitoring made easy.
We hope this text helped you learn to add routinely drip content material in WordPress. You may additionally wish to see our information on how you can create a contact type in WordPress and our knowledgeable choose of the greatest reside chat software program for small companies.
Should you favored this text, then please subscribe to our YouTube Channel for WordPress video tutorials. You too can discover us on Twitter and Fb.
The put up Learn how to Add Automated Drip Content material in Your WordPress Web site first appeared on WPBeginner.
