Earlier than beginning with this a part of the tutorial, ensure you completed the primary half as this half will construct upon the basics laid down there.
On this second a part of the tutorial, you’re going to study in regards to the following:
- The fundamentals of state machines.
- Including and eradicating nodes with code.
- Making a digicam that follows a node.
- Utilizing UI parts to tell the participant.
With out additional ado, it’s time to get again to scripting!
Getting Began
Obtain the initiatives by clicking Obtain Supplies on the prime or backside of the tutorial. Subsequent, unzip the file and import the starter folder into Godot. Alternatively, you possibly can proceed with the mission you used within the earlier half.
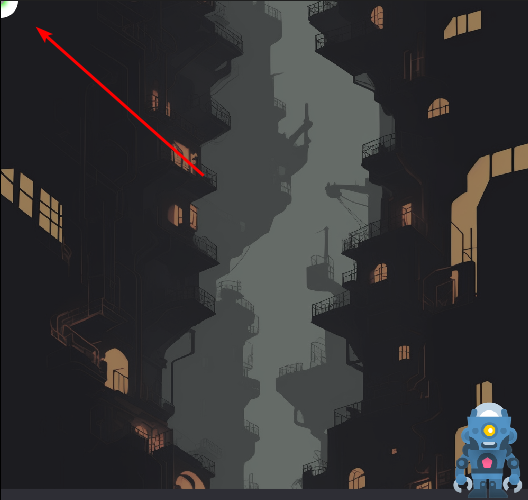
On the finish of the earlier a part of this tutorial, gravity was continuously being utilized on the participant avatar, permitting it to leap and fall again down. This had the facet impact of the avatar by no means having the ability to stand on the bottom under, so you need to constantly bounce now.
![]()
Ideally, the avatar ought to keep on the bottom and may solely fall down as soon as he’s within the air. A technique of maintaining observe of those states is utilizing a finite state machine.
Finite State Machines
A finite state machine (FSM) is a option to break down a recreation or utility into completely different states. Take a easy journey recreation as an illustration: you might need a recreation state for strolling round, a state for combating and a state for when the recreation menu is open. Whereas the participant is exploring, you may conceal the UI for full immersion, whereas in battle you need to present well being bars, expertise and so forth. In the meantime, you need to pause the sport within the background when the menu is open so the participant can handle his stock and alter settings.
Programming what ought to occur in every state of affairs with no FSM results in messy code with a whole lot of if-statements strewn about. It’s additionally vulnerable to errors and more durable to debug. With a FSM, you create three states:
The present state is saved in a variable and relying on the energetic state, a unique code path is adopted. You may even add transitions between states the place UI parts fade in or out for instance.
For this recreation, there are two doable states: on the bottom and within the air. The sport begins with the avatar on the bottom, the place it might probably do a guide bounce and isn’t effected by gravity. As soon as the avatar has jumped up, it’s within the air and gravity will get utilized to it. So as to add this to the script, begin by including the next line on the prime of the script, under var velocity : Vector2 = Vector2.ZERO:
enum AvatarState {ON_GROUND, IN_AIR}
AvatarState isn’t a variable, however an enum, which is a set of constants. Enums are helpful as you possibly can entry their worth by their key, that are ON_GROUND and IN_AIR on this case. Behind the scenes, the values of those keys are integers ranging from 0. You should use an enum as a kind as you’ll see under.
To maintain observe of the energetic state, add this variable declaration proper above the enum you added:
var state : AvatarState = AvatarState.ON_GROUND
The state variable makes use of AvatarState as its sort and units its default worth to AvatarState.ON_GROUND. This variable will are available in use to maintain observe of the avatar’s state and react accordingly. To use the finite state machine idea to the remainder of the script, you’ll have to make a number of adjustments to its construction. To begin with, add these two features under the _process perform:
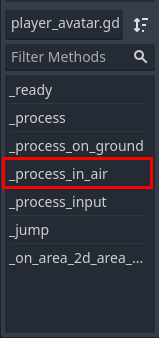
func _process_on_ground() -> void:
    cross

func _process_in_air(delta) -> void:
    cross
Relying on the state, the corresponding perform will likely be known as each body. This splits up the logic in response to the state, which is the idea of each FSM.
Now add this block of code to _process, proper under var cursor_right:
match state: # 1
    AvatarState.ON_GROUND: # 2
        _process_on_ground()
    AvatarState.IN_AIR: # 3
        _process_in_air(delta)
Right here’s what this code does:
- This
matchassertion reads the worth ofstateand branches the additional execution circulation relying on its worth. This could change if-statements the place the one distinction is a single worth and leads to a cleaner, extra readable end result. If you happen to’re conversant in different programming languages, thematchassertion is just like aswapassertion, albeit with some further options. - In case the worth of
stateisAvatarState.ON_GROUND, name_process_on_ground. - In case the worth of
stateisAvatarState.IN_AIR, name_process_in_air.
Be aware that the match assertion, its branches and the logic for every department wants its personal indentation.
With the finite state machine in place, it’s time to maneuver the method code to their acceptable features. To begin off, transfer the decision to _process_input from _process to _process_on_ground, changing the cross key phrase. This ensures the avatar can’t manually bounce if it’s not on the bottom. The _process_on_ground perform ought to appear like this now:
func _process_on_ground() -> void:
    _process_input()
Subsequent, the gravity ought to solely be utilized when the avatar is within the air, so transfer the road velocity.y += delta * gravity from _process to _process_in_air, changing the cross key phrase. The _process_in_air perform now appears like this:
func _process_in_air(delta) -> void:
    velocity.y += delta * gravity
If you happen to run the mission now and make the avatar bounce, you’ll discover the avatar is again to his house rocket methods as gravity isn’t being utilized. This is sensible, as gravity is now solely utilized within the IN_AIR state, whereas the avatar by no means switches to that state. To repair that, add the next line to _jump perform:
state = AvatarState.IN_AIR
This adjustments the state to IN_AIR after a bounce, so gravity will begin getting utilized. Run the mission once more and take a look at leaping, the avatar will now bounce and fall down and… retains falling down. Hey, it’s progress!
![]()
As with all the opposite points you’ve confronted all through the tutorial, this too could be mounted with some code. The present downside is the avatar has no concept the place the bottom is, and consequently, has no option to react to falling on the bottom. Fortunately, it’s simple to determine the place the bottom is, as that’s the avatar’s beginning place. You simply want to save lots of that place someplace, if solely there was some type of container to retailer values into. :]
Sure, you want one other variable! Add this line to the highest of the script, proper under var state:
var start_height : float
This may retailer the Y place of the avatar at first of its lifetime, its beginning peak. You don’t have to present it a default worth on this case, as its worth will likely be set within the _ready perform. Talking of which, add this line to _ready, changing the print assertion that’s in there:
start_height = global_position.y
This units start_height to the preliminary Y place of the avatar. To make use of this beginning peak to detect the bottom when falling, add the next to the _process_in_air perform:
if velocity.y > 0: # 1 (falling)
    if global_position.y >= start_height: # 2
        var _result = get_tree().reload_current_scene() # 3
else:  # 4 (going up)
    cross
For simplicity’s sake, the scene will get reloaded if the avatar hits the bottom after falling. This resets the sport state with out having to reset any variables. Right here’s a breakdown of the completely different elements:
- If the avatar’s vertical velocity is constructive, meaning it’s falling down.
- If the Y place of the avatar is the same as the beginning peak or strikes previous it whereas falling…
- Restart the present scene utilizing
get_tree().reload_current_scene(). Theget_tree()name returns an occasion ofSceneTree, which is a node supervisor class that accommodates helpful strategies for working with scenes and nodes. A kind of strategies isreload_current_scene(), which reloads the energetic scene and returns a end result code. The end result code is ignored for this instance. - If the avatar is transferring up, do nothing for now.
Run the mission once more, this time the scene will reset as soon as the avatar hits the bottom, permitting you to maintain “enjoying” indefinitely. There’s now a recreation loop, even when it’s not probably the most thrilling one.
Now is an effective time to make the avatar bounce up when hitting jumpers, in any case, that’s what they’re for!
To take action, you simply want to attach the Area2D‘s area_entered sign to the player_avatar script such as you did with the jumpers. To recap, choose Area2D within the Scene dock, open the Node tab on the proper facet of the editor and double click on the area_entered sign. Lastly, click on the Join button to create the brand new _on_area_2d_area_entered perform.
Add this line to the newly created _on_area_2d_area_entered perform, changing its cross key phrase:
_jump()
This makes the avatar routinely bounce when hitting jumpers. Guess what? It’s time for one more take a look at run! Run the mission and see should you can hit all three jumpers earlier than hitting the bottom once more.

I hope you agree that this begins to really feel like a recreation now. It would even already slot in with WarioWare‘s microgames. :]
Avatar Ending Touches
As a remaining addition to the avatar script, the animation and route of the sprite ought to change relying on the state and motion route. Step one to do this is getting a reference to the kid node AnimatedSprite2D. Bear in mind the drag-and-drop trick so as to add node references: drag AnimatedSprite2D onto the player_avatar script and maintain CTRL/CMD earlier than releasing.
This may add the next code:
@onready var animated_sprite_2d: AnimatedSprite2D = $AnimatedSprite2D
Rename animated_sprite_2d to sprite as the unique identify is a bit wordy. Subsequent, add the next if-statement to the _process_on_ground perform:
if velocity.x == 0:
    sprite.animation = "idle"
else:
    sprite.animation = "run"
This may change the avatar’s animation when it’s on the bottom. If there’s no horizontal velocity, the idle animation is performed, whereas run is performed if the avatar is transferring. As with the jumpers, yow will discover these animations by clicking the AnimatedSprite2D node and having a look on the backside of the editor.
![]()
Take a look at the sport once more to see the outcomes. Discover the avatar isn’t switching to his idle animation, why is that?
To research the issue, add this print name proper above the if-statement you added in _process_on_ground:
print(velocity)
This may print out the avatar’s present velocity, which ought to be (0, 0) when the avatar is on the identical horizontal place because the cursor. Run the mission as soon as once more and regulate the console within the editor.
Discover how the avatar’s X velocity isn’t zero. It’s because there are solely two methods the avatar can transfer in the intervening time: left or proper. That is because of the method the motion code is about up in _process:
var cursor_right : bool = (mouse_pos.x - global_position.x) > 0

...

if cursor_right:
    if global_position.x < viewport_size.x - viewport_border:
        velocity.x = move_speed
else:
    if global_position.x > viewport_border:
        velocity.x = -move_speed
Mainly, the avatar could have a constructive X velocity if the cursor is true and in all different circumstances it should have a adverse X velocity. You may add a case the place the X velocity will likely be zero if the cursor is already near the avatar. For this, you have to hold observe of the space to the cursor, which is already accomplished by the cursor_right variable with mouse_pos.x - global_position.x.
To retailer this calculation in a variable, change the cursor_right variable declaration with the next two traces:
var cursor_x_pos_relative_to_avatar : float = mouse_pos.x - global_position.x
var cursor_right : bool = cursor_x_pos_relative_to_avatar > 0
This provides a descriptive variable named cursor_x_pos_relative_to_avatar that replaces the relative place calculation cursor_right was utilizing. As earlier than, the worth of this calculation is the space between the avatar and the cursor, with a constructive worth which means the cursor is to the proper of the avatar.
Now you want a variable that units the minimal distance to the cursor earlier than the avatar strikes horizontally, so add this on the prime of the script, under var gravity:
@export var min_distance_before_move : float = 10.0
This units the space in pixels to the cursor earlier than the avatar will transfer. To make use of the variables you added, change the if-statement in _process with the next:
if abs(cursor_x_pos_relative_to_avatar) > min_distance_before_move: # Added this line
    if cursor_right:
        if global_position.x < viewport_size.x - viewport_border:
            velocity.x = move_speed
    else:
        if global_position.x > viewport_border:
            velocity.x = -move_speed
Solely the primary line is new code right here, which does the next:
-
absis brief for absolute and returns absolutely the worth of any given parameter, which suggests the worth turns into constructive. -1 turns into 1 for instance. -
cursor_x_pos_relative_to_avatar, the space to the avatar, is now at all times constructive. If this distance is larger than the minimal transfer distance, proceed with the motion logic.
Now run the mission once more and also you’ll see the avatar lastly stands idle when the cursor is close to.
![]()
Go forward and take away the print line from _process_on_ground now, as that’s not wanted anymore.
To make the avatar flip in the proper route, add this one-liner to _process, proper under var cursor_right:
sprite.flip_h = !cursor_right
This units the flip_h property on the avatar’s Sprite2D node to true if the cursor is to the proper, and false if it’s to the left. The exclamation level inverts the worth of cursor_right, altering true into false and vice-versa.
Take a look at out the adjustments by urgent F5 and making the avatar transfer round, it ought to now rotate as anticipated.
![]()
As a remaining cherry on prime, the animations for leaping and falling ought to be set as effectively. To do that, add the next line to the _process_in_air perform, contained in the if velocity.y > 0 case:
sprite.animation = "falling"
Subsequent, add this line to the else case of the identical if-statement, changing the cross:
sprite.animation = "bounce"
These two traces change the energetic animation like they did for the idle and run animations.
The total _process_in_air perform ought to appear like this now:
func _process_in_air(delta) -> void:
    velocity.y += delta * gravity

    if velocity.y > 0:
        sprite.animation = "falling"
        if global_position.y >= start_height:
            var _result = get_tree().reload_current_scene()
    else:
        sprite.animation = "bounce"
Run the mission as soon as extra to check the bounce and fall animations.
That completes the participant avatar for now!
With the jumpers and avatar absolutely working, it’s time so as to add a complete bunch extra jumpers so the avatar can get to new heights.
Instantiating Scenes With Code
The following step on this little recreation is routinely spawning a bunch of jumpers by way of code. To begin off, delete all Jumper nodes from the recreation scene by choosing all of them and hitting Delete in your keyboard.

Subsequent, create a brand new little one node for the Recreation node by right-clicking it and choosing Add Little one Node. Within the Create New Node window, choose Node2D for its sort and click on the Create button on the backside.
This new node will act as a dad or mum node for the jumpers you’ll be producing, so identify it Jumpers. You are able to do this by urgent F2, or by right-clicking the node and choosing Rename within the context menu. Now that you just ready the sport scene, it’s time so as to add one other script! Choose the Recreation node and click on the Add Script button so as to add a brand new script, go away it at its default identify and ensure to create it within the scripts folder.
Godot will now open the brand new recreation script within the script editor, prepared so that you can add logic. Firstly, you’ll want a reference to the jumper scene to have the ability to create new situations of it. Probably the most versatile method to do that is by exporting a PackedScene variable, so you possibly can change what scene to spawn by way of the editor. To do this, add the next line under extends Node2D:
@export var jumper_scene : PackedScene
PackedScene is an interface to a scene file which lets you instantiate nodes in your scene in a while. Save the script and reselect the Recreation node within the Scene dock. You’ll now see a brand new property showing within the Inspector named Jumper Scene.

To assign a scene, drag the jumper.tscn scene file from the FileSystem dock onto the property or click on the property and choose Fast Load ▸ scenes/jumper.tscn.
Subsequent, you want a reference to the Jumpers node, so drag that node onto the script editor whereas holding CTRL/CMD so as to add this line:
@onready var jumpers: Node2D = $Jumpers
Rename this variable to jumpers_parent to keep away from confusion in a while. With each references in place, now you can create new jumpers. For a fast take a look at, add the next to the _ready perform, changing the cross key phrase:
var new_jumper = jumper_scene.instantiate() # 1
jumpers_parent.add_child(new_jumper) # 2
This may instantiate a brand new jumper and add it as a toddler of the Jumpers node:
- Instantiate an occasion of the jumper scene and retailer its reference in a
new_jumpervariable. - Make the brand new jumper a toddler of
jumpers_parent, the Jumpers node within the Scene dock.
Now run the mission by urgent F5 and have a look round. Can you see the jumper?
It’s on the prime left of the window, principally hidden. This isn’t as a result of it’s shy, however as a result of its default place is at (X:0, Y:0), which occurs to be the highest left of the window.
The code works although, which is the necessary half! To randomly spawn the jumpers, you’ll want to consider what number of and the place to spawn them first. Take into account the next parameters:
- Quantity of jumpers
- Top of first jumper
- Y-spacing between jumpers
- Random X-position vary
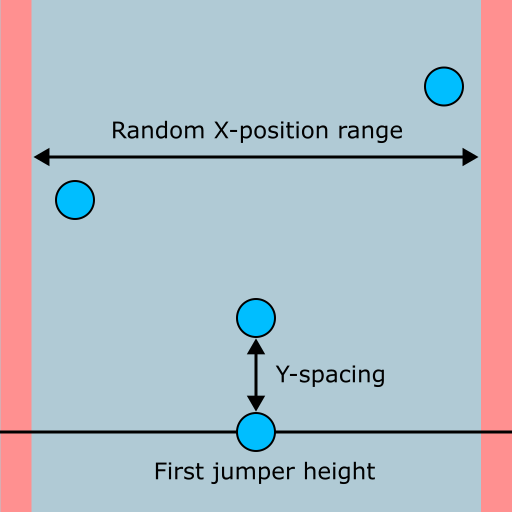
The illustration above is a visible illustration of most of those parameters. With this in thoughts, add the next variables proper under @export var jumper_scene:
@export var jumpers_to_spawn : int = 50 # 1
@export var first_jumper_height : float = 400.0 # 2
@export var spacing_between_jumpers : float = 350.0 # 3
@export var jumper_x_pos_spawn_range : Vector2 = Vector2(80, 930) # 4
These will permit you to tweak the parameters within the editor till the gameplay feels good. The defaults I present right here felt proper to me, however be at liberty to alter them in a while.
Right here’s a fast rundown:
- I believe this one speaks for itself, it’s the quantity of jumpers to spawn.
- That is the Y-position of the primary jumper.
- The vertical quantity of pixels between every jumper. Smaller values make the sport simpler, whereas larger values present extra problem.
- The minimal and most X-position of every jumper, represented with a
Vector2. Each new jumper could have a random place inside this vary.
Now for the enjoyable half: coding the logic that may use these parameters to generate a load of jumpers. Create this new perform under _ready:
func _create_jumpers(start_pos : float) -> void: # 1
    for y in vary(0, jumpers_to_spawn): # 2
        var new_jumper = jumper_scene.instantiate() # 3
        jumpers_parent.add_child(new_jumper) # 4
        var jumper_x_pos = randf_range(jumper_x_pos_spawn_range.x, jumper_x_pos_spawn_range.y) # 5
        var jumper_y_pos = -y * spacing_between_jumpers + start_pos # 6
        new_jumper.global_position = Vector2(jumper_x_pos, jumper_y_pos) # 7
At first look, this may look a bit daunting. By trying on the separate items although, you’ll see it’s not too difficult:
- The
_create_jumpersperform takes a single parameter:start_pos, which is the place of the primary jumper. - It is a
for-loop, it should execute the code under it a certain quantity of instances and hold observe of the instances it has ran. On this case,varyis used to make it run from 0 to the quantity of jumpers to spawn. The quantity of instances it has looped is saved within theyvariable. - Instantiate a brand new jumper and retailer a reference to it in
new_jumper. - Make the brand new jumper a toddler of
jumpers_parent. - The
randf_rangemethodology accepts two numbers and returns a random quantity between the 2. TheXandYvalues ofjumper_x_pos_spawn_rangeare handed into it, as these are the minimal and most X-positions for the jumpers. The output is saved injumper_x_pos. - Right here, the
yvariable from the loop is negated and multiplied with the spacing between the jumpers. Bear in mind, adverseYis up in Godot, which is why the worth is negated. The beginning place is used as an offset, so it’s added as effectively. The result’s the Y-position for the jumper, which is saved injumper_y_pos. - Set the place of the brand new jumper to the X and Y-position calculated within the earlier two steps.
I hope that cleared up how this perform works. It makes use of among the mostly utilized strategies like vary and randf_range, that are invaluable instruments when creating your individual video games.
Now you simply have to name it to truly create the jumpers, so change every part in _ready with this line:
_create_jumpers(first_jumper_height)
This calls the perform you created and passes the peak of the primary jumper it ought to create. Time for one more take a look at run! Play the mission and verify if the jumpers are created. If all went effectively, you ought to be seeing two jumpers on the display screen.
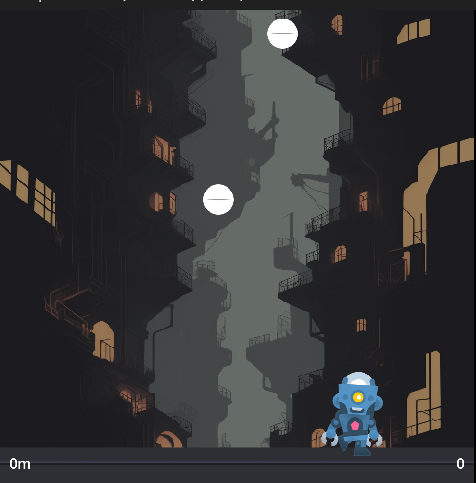
If you happen to bounce on them, you will get the avatar to great heights and… Oh proper, the digicam is stationary so the avatar vanishes within the air if you hit the jumpers.
Digicam Observe and Background Scrolling
Up till now this wasn’t a problem because the avatar couldn’t bounce excessive. Now although, it’s clear the digicam must comply with the avatar. For this you’ll have to create one other script.
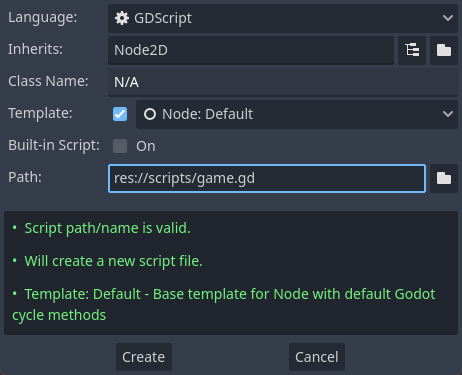
Choose Camera2D and create a brand new script named follow_cam.gd within the scripts folder. Take away its _ready perform and add these variables as a replacement:
@export var node_to_follow : Node2D # 1
@export var follow_speed : float = 10.0 # 2
@export var y_offset : float = -650.0 # 3
These are all variables you want for a digicam to comply with a node round:
- The
Node2Dto comply with. You’ll assign the avatar node to this. - The velocity in pixels per second at which the digicam will transfer in direction of its goal.
- An offset of digicam’s Y-position relative to the goal. This transfer the digicam up vertically so the avatar on the backside of the view.
Now save the script and reselect Camera2D within the Scene dock. Drag the PlayerAvatar node from the Scene dock onto the Node to Observe property within the Inspector to set it because the digicam’s goal.
![]()
Subsequent, add this to the _process perform, changing the cross:
var target_position = Vector2(global_position.x, # 1
    node_to_follow.global_position.y + y_offset)
global_position = global_position.lerp(target_position, delta * follow_speed) # 2
This makes the digicam comply with its goal easily:
- Calculate the place the digicam ought to be. It’s X-position will at all times keep the identical, however its desired Y-position is the same as that of the node it’s following plus the Y-offset. Retailer this worth in
target_position. - This adjustments the digicam’s place through the use of the
lerpmethodology, which stands for linear interpolation.lerppermits you to easily transition from one place to a different. Its first parameter is the remaining place and the second parameter is the quantity of pixels to maneuver in a body to achieve that place. The digicam will transfer nearer to its objective a tiny bit each body.
Play the mission to check the digicam out. It ought to now comply with the avatar round when leaping and falling.
Superior! The fundamental gameplay is now full, should you wished this recreation to final lower than a minute anyway. Right here’s a problem for you should you really feel prefer it: attempt to attain the highest of the jumpers. This will provide you with a really feel for the steadiness of the sport, so you possibly can tweak the space between jumpers, the avatar’s bounce peak, gravity and so forth.
Whereas enjoying round, you might need seen the background doesn’t transfer. This isn’t an enormous situation, however if you wish to add that further splash of polish, comply with alongside the following elective steps to make it scroll. Alternatively, you possibly can skip to the Creating Infinite Jumpers part to complete up the sport.
The background is a Sprite2D with a seamless background as its texture. This implies it may be scrolled alongside its Y-axis with none gaps or noticeable adjustments. You can also make it scroll alongside primarily based on the digicam’s place with a couple of traces of code.
Choose Background and create a brand new script named scrolling_background.gd within the scripts folder. Add the next variables under extends Sprite2D:
@export var starting_position_offset : Vector2 = Vector2(0, 1024) # 1
@export var texture_size : Vector2 = Vector2(1024, 2048) # 2
@export var scroll_multiplier : float = 0.25  # 3
Right here’s what these are used for:
- That is an offset that will likely be utilized to the background’s place at first. That is wanted to maneuver the sprite up a bit, so it fills the window.
- The scale of the ultimate texture. The background texture’s measurement is 1024×1024 pixels, however you want extra vertical house so no gaps will seem on the edges. For regular textures, this is able to stretch the feel and make it look horrendous. The background texture is about to repeat although, so it merely provides extra of the identical texture vertically.
- This worth will get multiplied with the digicam’s place for a parallax-like impact because the background strikes slower than the digicam.
Subsequent, add this to _ready to set the preliminary place for the background:
global_position = get_parent().global_position - starting_position_offset
This adjustments the background’s place to that of its dad or mum, Camera2D and subtracts the place offset from it.
Lastly, add this to _process to finish the script:
region_rect = Rect2(0, global_position.y * scroll_multiplier, texture_size.x, texture_size.y)
A Rect2 represents a rectangle utilizing 4 parameters: X-position, Y-position, width and peak. By adjusting the background’s region_rect, the rectangle that units what a part of the feel ought to be displayed, the feel will get scrolled. Extra particularly, by transferring the Y-position up and down together with the digicam’s place, you get a pleasant scrolling impact.
Now run the mission to see what impact this has on the sport.
Now that appears cool! It’s a small contact, but it surely provides quite a bit to the texture of the sport, don’t you suppose?
Subsequent up is spawning and eradicating jumpers infinitely to maintain the sport going so long as the participant can sustain, or offers up. :]
Creating Infinite Jumpers
The plan is to maintain spawning new jumpers in each time the avatar will get to a sure peak. To attain this, you have to hold observe of the highest level the avatar reached and the place of the final spawned jumper. It can save you the latter as you already know the place of all spawned jumpers whereas instantiating them. To retailer the Y-position of the final jumper spawned, add the next variable under the others within the recreation script:
var last_jumper_y_position : float
You may assign this worth by including this to the _create_jumpers perform, on the finish of the for-loop:
last_jumper_y_position = new_jumper.global_position.y
This set the worth of last_jumper_y_position to the Y-position of each new jumper. Every time the for-loop finishes operating, this worth will likely be set to the very best jumper.
Cool, however how is the recreation script speculated to know what the avatar’s highest bounce is? Why, with alerts after all!
The participant avatar must hold observe of its present peak and highest achieved peak. Then, each time it reaches a brand new excessive level, it ought to emit a sign which could be linked to the sport script. To retailer the very best level reached, open the player_avatar script and add this variable above the _ready perform:
var highest_point_reached : float
This may retailer the very best Y-position that the avatar has reached.
Subsequent is the sign that must be emitted each time a brand new peak is reached. Add it by including this line under the variable you simply added:
sign new_height(peak : float)
In contrast to the alerts you’ve seen up, this sign accepts a parameter: the brand new peak that was reached. That is tremendous helpful as this manner you possibly can notify the sport script of the brand new peak and cross the worth in a single go.
To replace highest_point_reached and emit this sign, add the next on the finish of the _process_in_air perform:
if global_position.y < highest_point_reached: # 1
    highest_point_reached = global_position.y # 2
    new_height.emit(highest_point_reached - start_height) # 3
This checks if the present place is increased than the one recorded, then updates the variable and emits a sign if that’s the case:
- Examine if the present Y-position is decrease than the one saved in
highest_point_reached. Bear in mind, adverse Y is up in Godot, so the decrease the adverse worth within the Y-position, the upper up the avatar is. - Set the worth of
highest_point_reachedto the present Y-position. - Emit the
new_heightsign and cross the very best level reached minus the beginning peak. By subtractingstart_height, the emitted peak will begin at 0.
Now you can join the new_height sign to the recreation script by opening the recreation scene, choosing PlayerAvatar and double-clicking the new_height sign within the Node menu on the proper.
Be certain Recreation is chosen and click on the Join button within the sign connection window.

This may add a brand new _on_player_avatar_new_height perform to the recreation script. Now the recreation script is conscious of the avatar’s prime peak, it might probably react to it by spawning in additional jumpers. Change the cross within the perform that was simply added with the next:
if peak < last_jumper_y_position: # 1
    _create_jumpers(peak) # 2
Right here’s what this does:
- If the peak handed by the avatar is decrease than the final created jumper…
- Create a batch of jumpers, beginning on the handed peak.
Time to take the sport for one more spin! Decrease the quantity of jumpers to spawn without delay from 50 to 10 by altering the Jumpers to Spawn property of the Recreation node and urgent Enter. This may make it simpler to check if every part is working. Now run the mission, hold leaping up and see if the jumpers hold showing.
The sport is getting near being accomplished now, with just some tidbits remaining. Within the remaining part under, you’ll discover ways to replace UI parts utilizing scripting.
Conserving Rating
To make it simple for the participant to trace how excessive the avatar has gotten and what number of factors had been earned, you’ll have to replace the labels on the backside of the window to mirror these values. The consumer interface has its personal scene to which you’ll add logic, so open the ui scene and add a brand new script to its root component, UI. Identify this new script ui.gd and put it aside to the scripts folder. As common, this opens the script within the script editor.
The scene accommodates two labels you’ll want references to in your script: HeightLabel and ScoreLabel. I’ll share a fast tip with you, choose each Label nodes within the Scene dock, right-click and choose Entry as Distinctive Identify within the context menu.

This may add a % signal subsequent to their names. By marking nodes as having distinctive names, you don’t want to supply a full path for them when creating references. Extra importantly, you possibly can freely transfer the nodes wherever within the node tree with out having to alter any paths in your scripts! When creating your individual video games and initiatives, you must use this liberally as it might probably save an enormous period of time.
Now drag the nodes to your ui script whereas holding CTRL/CMD so as to add the references. This may add these two traces:
@onready var height_label : Label = $"%HeightLabel"
@onready var score_label : Label = $"%ScoreLabel"
Discover how the trail accommodates a % signal at first, that’s the way you reference nodes with an distinctive identify.
To replace the labels, add these two features:
func update_height(peak : float) -> void: # 1
    height_label.textual content = str(spherical(peak)) + "m" # 2

func update_score(rating : int) -> void: # 3
    score_label.textual content = str(rating) # 4
Right here’s a abstract of the traces:
- The
update_heightperform accepts apeakparameter, which is the very best level the avatar reached. - Spherical
peakto the closest integer utilizing thesphericalmethodology and convert the end result to astringutilizingstr. Replace the textual content of theheight_labelwith this new worth. - This perform takes a
ratingparameter. I’ll clarify how the scoring works under. - Convert the
ratingto a string and replace thescore_labeltextual content.
There’s one remaining necessary line so as to add to the script: its class identify. Up till now, the communication between completely different scripts occurred by way of alerts, which emit an replace up the node tree. On this case although, the recreation script will name the ui script, which is decrease down the node tree. In eventualities like this, it’s greatest to assign the script that’s going to be known as a class identify to make autocompletion work.
A well-liked line to recollect when to make use of a sign versus a perform name among the many Godot group is: “Sign up, name down”.
So as to add a category identify, add this line proper under extends CanvasLayer:
class_name UserInterface
This makes it so the ui script could be accessed as a sort by the identify UserInterface.
With the ui script accomplished, it’s time to maneuver on to the recreation script once more, because it wants a reference to the UI node and its UserInterface class. This time, you received’t be capable of depend on the drag-and-drop methodology as Godot received’t routinely add the right sort you created. As a substitute, add this line under @onready var jumpers_parent within the recreation script:
@onready var ui := $"UI" as UserInterface
There are some things this node reference does completely different than those you’ve seen so far:
- The
:=operator, additionally known as the “walrus operator”, is used to let Godot guess the kind of the UI node, which isCanvasLayer. -
as UserInterfacecasts the node because theUserInterfacesort. This makesuithe right sort and allows autocompletion.
@onready var ui: UserInterface = $UI is due to a bug in Godot involving customized lessons which prevents autocompletion from working with the same old syntax. This may not be an issue for this tutorial as you possibly can copy the code with out counting on autocompletion, however watch out for this in your individual initiatives should you discover that the autocompletion isn’t working as anticipated.
Subsequent, to replace the peak label, add this to the top of _on_player_avatar_new_height:
var height_in_metres = -height/100.0 # 1
ui.update_height(height_in_metres) # 2
This converts the peak in pixels to an arbitrary decrease quantity and calls the ui script to replace its peak label:
-
Negate the peak so it’s a constructive quantity and divide it by 100. That is purely to have a decrease quantity as an alternative of utilizing the pixel worth. The calculated worth is saved in
height_in_metres. - Name the ui script’s
update_heightperform and cross the brand new peak quantity.
With that, the peak label ought to now replace routinely to mirror the peak of the avatar. Run the mission and bounce as much as take a look at if this works.
Nice! That leaves simply the rating label to hook up.
Every time the avatar hits a jumper, the rating ought to go up by 100 factors. To make this work, the avatar ought to let the recreation script know when it hit a jumper, which in flip can name the ui script to replace the rating label.
So as to inform the recreation script of the avatar’s jumper hits you’ll have to create a brand new sign. Add this to the player_avatar script under sign new_height:
sign hit_jumper
To make the avatar emit that sign each time it hit a jumper, add this line to the _on_area_2d_area_entered perform:
hit_jumper.emit()
Good, now you simply want to attach the hit_jumper sign to the recreation script. As common, you do that by opening the recreation scene, choosing PlayerAvatar and double-clicking the hit_jumper sign within the Node menu on the proper. Go away the receiver methodology at its default worth and click on Join, this may create the _on_player_avatar_hit_jumper perform within the recreation script.
To maintain observe of the rating, add this variable simply above the _ready perform within the recreation script:
var rating : int
The final code so as to add on this tutorial is updating the rating and making the ui script replace the related label. To do this, add this to the _on_player_avatar_hit_jumper perform:
rating += 100
ui.update_score(rating)
The += operator takes the present worth of rating and provides 100 to it. The rating then will get handed to the ui script by way of the update_score perform to replace the rating label.
Alright, time for a remaining run of the mission to see all of it come collectively! Play the sport and verify if the rating label is updating.
That winds up this tutorial and the small recreation you constructed up alongside the way in which. I hope you loved this journey by way of the land of scripts, alerts and nodes.
The place to Go From Right here?
Thanks for studying this tutorial to the top! You may obtain the mission information utilizing the hyperlink on the prime and backside of this web page.
You’ve realized every part you have to know to get began with GDScript 2.0 on this tutorial:
- The completely different sorts of variables declaration and numerous varieties
- Referencing nodes in numerous methods
- How and when to make use of alerts and features
- Studying participant enter
- Creating and utilizing state machines
- Node manipulation
To study much more about Godot, check out its official documentation.
In order for you a enjoyable problem, listed below are some strategies to enhance the sport additional to make it a extra full expertise:
- Finish the sport if the avatar is falling for a very long time
- Present an finish recreation display screen with the achieved peak and rating
- Preserve observe of excessive scores and present them within the UI
- Add a title display screen
- Add obstacles to keep away from whereas leaping
- Add transferring objects that award further factors when hit
- Change the background when sure heights are reached
- Add juicy results like display screen shake and light-weight results when a jumper is hit
We hope you loved this tutorial. Go away a remark under or be part of the discussion board dialogue to share your ideas and ask any questions you might need!
