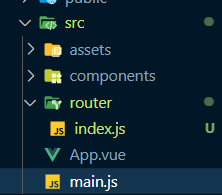
Sign in Welcome! Log into your account your username your password Forgot your password? Get help Password recovery Recover your password your email A password will be e-mailed to you. HomeProgrammingInformation To Vue Router Programming Information To Vue Router By Admin July 1, 2022 0 1 Share FacebookTwitterPinterestWhatsApp Introduction When creating net purposes with Vue.js, except you are constructing a Single-Web page Software (SPA), you may wish to join a number of pages to a touchdown web page to permit customers to navigate by them. This is called routing. Routing is the method by which a consumer is navigated to completely different pages on a web site. Vue.js is a JavaScript framework used to create Single Web page Apps, which signifies that this software is simply loaded as soon as from the server to the browser, and the browser doesn’t have to reload when routing; as a substitute, it merely requests these pages and they’re loaded. On this information, we’ll discover ways to do routing with Vue.js and take a deep dive into the assorted sorts of routing that may be completed and the way they are often completed. Getting Began Routing in Vue.js is finished with Vue Router, which works in tandem with the core Vue library to permit us to arrange a routing system. We want to use vue-router in two eventualities in our challenge. We both wish to use the router in an current challenge or add it whereas creating a brand new challenge. Setup Vue Router In Current Mission Integrating vue-router into an current challenge will be technical, and we’ll go over these particulars now. Step one can be to put in the vue router package deal utilizing the next command: ! npm set up [email protected] As soon as put in, navigate to the src folder and create a folder referred to as router, adopted by a file referred to as index.js within the router folder, which is able to function our router configuration file. Our src listing will now appear to be this: Within the index.js file, let’s make sure that we paste the code under, which is the router configuration code: import { createRouter, createWebHashHistory } from 'vue-router' import HomePage from '../views/HomePage.vue' const routes = [ { path: '/', name: 'home', component: HomePage }, ] const router = createRouter({ historical past: createWebHashHistory(), routes }) export default router We have now a routes array that incorporates a single object, which could possibly be a number of objects the place every object represents a single route. In the meanwhile, we solely created the one that may redirect to the homepage part. Every of those routes objects is often composed of the path, which is the url path relative to the positioning’s root, the title, which serves as an identifier, and the part, which we imported on the prime of the web page. Apart from the route array, we arrange the router occasion on the backside by making a createRouter() operate and passing within the historical past key values and the routes array, after which we export the router occasion to be used inside our software. To make use of this router configuration inside our software, open the most important.js file within the src folder, import router from "./router", after which add .use(router) between createApp(App) and .mount('#app') simply as it’s under: import router from './router' createApp(App).use(router).mount('#app') This vue-router has been globally configured inside our software, and the subsequent step is to make use of it inside our software. That is simply achieved by together with <router-view /> throughout the App.js template tag, which renders solely the matched route: <!--App.vue --> <template> <router-view /> </template> <script> export default { title: 'App', } </script> Setting Up Routes In Vue.js Routes are often created within the router/index.js file’s routes array, and these routes hook up with parts. It’s a good observe to create a views folder the place all web page views can be saved. For instance: At this level we now know how one can setup routes manually. Be aware: All of this can be completed for us if we use the vue-cli to put in vue-router when creating our challenge. Set up Vue Router With Vue CLI If we’re about to create a brand new challenge and consider that we’ll make use of vue-router, it’s simpler to take action whereas creating the challenge. All we’ve got to do is use Vue CLI to put in the newest model of vue-router whereas manually deciding on options within the course of of making our challenge: Learn and study extra about creating Vue.js challenge through our Information to the Vue CLI! Lazy Loading Routes With Vue Router As our software grows in dimension, the bundle dimension grows, inflicting our website to take longer to load. We will use vue-router to implement lazy loading to keep away from loading some particular routes till the consumer particularly requests them. That is usually achieved within the router configuration file by eradicating the import assertion on the prime and changing it with a dynamic import assertion within the part possibility of our route: import { createRouter, createWebHashHistory } from 'vue-router'; const routes = [ { path: '/', name: 'home', component: () => import( '../views/HomePage.vue'), }, { path: '/about', name: 'about', component: () => import( '../views/AboutPage.vue'), }, ]; const router = createRouter({ historical past: createWebHashHistory(), routes, }); export default router; Navigating Between Routes With <router-link> Up to now, we have been capable of create routes, however how will we navigate inside our software? We use the <router-link> tag as a substitute of the <a> aspect in HTML to deal with routing. For instance, if we wish to create a navigation bar on the prime of our software, we might do that within the App.js file above the <router-view/> tag so it reveals on all routes: <nav> <router-link to="/">Residence</router-link> | <router-link to="/about">About</router-link> </nav> The router-link accepts the to='path' attribute that takes the consumer to path of the part as have set when configuring route. This works just like the href='path``' attribute in HTML. Utilizing Named Routes Utilizing named routes permits us go within the title key that has entry to the title property which we set whereas configuring the routes as a substitute of utilizing the trail by binding the info this fashion: Try our hands-on, sensible information to studying Git, with best-practices, industry-accepted requirements, and included cheat sheet. Cease Googling Git instructions and really study it! <router-link :to="{ title: 'About' }">About</router-link> One benefit of utilizing this methodology is in case we resolve to alter the route path for our massive purposes, we don’t want to begin altering all hyperlinks path which could possibly be cumbersome. Dynamic Routing Conditions might come up that necessitate the usage of dynamic routing to keep away from pointless web page repetition. For instance, suppose we’ve got an inventory of fruits and we would like a which a consumer to have the ability to click on on a selected fruit and solely particulars about that fruit are displayed on a fruit-details web page. On this case, we use dynamic routing. We would have two pages – one to showcase the fruits in an inventory and one to point out the main points of every fruit, which is a “blueprint” web page to be populated with the fruit’s particulars. We’ll create the pages within the Vue folder after which add the routes to the routes array: import FruitsPage from '../views/FruitsPage.vue'; import FruitDetails from '../views/FruitDetails.vue'; const routes = [ { path: '/fruits', name: 'Fruits', component: FruitsPage, }, { path: '/fruits/:id', name: 'FruitDetails', component: FruitDetails, }, ]; We are going to discover that for the FruitDetails web page, we added a dynamic id property so it will get the id parameter and makes use of it to question the actual information that reveals on that web page utilizing $route.params in our template, thus making the route dynamic. Within the FruitsPage, suppose we’ve got an array of fruits which we loop into our software, we are able to wrap every fruit with a hyperlink alongside params this fashion: <!-- FruitsPage.vue --> <template> <h1>Fruits web page</h1> <div :key="fruit.id" v-for="fruit in fruits"> // dynamic linking by attaching the id as params <router-link :to="{ title: 'FruitDetails', params: { id: fruit.id } }"> <h3>{{ fruit.title }}</h3> </router-link> </div> </template> <script> export default { information() { return { fruits: [ { id: 1, name: 'Apple', description: "Apples are an incredibly nutritious fruit.", }, { id: 2, name: 'Mango', description: 'A mango is an edible stone fruit produced by the tropical.', }, { id: 3, name: 'Banana', description: 'A banana is an elongated, edible fruit of the genus Musa.', }, ], }; }, }; </script> At this level when a consumer clicks every fruit, it would take them to the FruitDetails web page the place we are able to entry the id parameter and use it to determine which fruit’s particulars ought to be proven within the FruitDetails web page. Entry the Route Parameters Up to now we’ve got seen how one can go down params to a selected web page dynamically, let’s now see how we are able to entry that param in our FruitDetails web page. There are two methods we are able to entry parameters in Vue – through $route.params or making use of props: Utilizing $route.params The parameters are instantly accessible through $route.params: <template> <h1>Fruit Particulars</h1> <p>That is fruit with the id of {{ $route.params.id }}</p> </template> Or we are able to entry it inside our information() methodology utilizing this: <template> <h1>Fruit Particulars</h1> <p>That is fruit with the id of {{ id }}</p> </template> <script> export default { information() { return { id: this.$route.params.id, }; }, }; </script> Utilizing Vue Props One other simple methodology to entry information dynamically through routes is utilizing props. We first must set props to true within the routes configuration object: { path: '/fruits/:id', title: 'FruitDetails', part: FruitDetails, props: true, }, This manner, all we’ve got to do subsequent is so as to add props choice to the script tag after which make use of the props inside our template tag: <template> <h1>Fruit Particulars</h1> <p>That is fruit with the id of {{ id }}</p> </template> <script> export default { props: ['id'], }; </script> 404 Errors – No Discovered Route Within the occasion {that a} consumer navigates to a non-existent route, Vue will load the web page however with none parts, producing an empty web page. On this case, the very best factor to do is show a 404 web page with maybe a button main them to the homepage or wherever we consider they want to go. That is simply dealt with by making a part for our 404 web page after which including a 404 path to our router configuration file’s routes array, however this time we’ll use an everyday expression to catch all routes that haven’t been declared beforehand: { path: '/:catchAll(.*)', title: 'ErrorPage', part: ErrorPage, } The :catchAll is the dynamic section which recieves an everyday expression of (.*) during which Vue Router makes use of to test if the route the consumer navigates to is outlined in our router’s configuration file. If such routes don’t exist, the consumer is directed to the part, which in our case is the ErrorPage part: <template> <h2>404 Web page</h2> <p>This can be a 404 web page</p> <p>Go to dwelling web page <router-link to="/">right here</router-link></p> </template> Redirects In a state of affairs the place we would like customers to be redirected after they go to a selected route, for instance, if we had a former route that we not use, we would like customers to be redirected to the brand new one after they go to that route. That is simply achieved by including a brand new object to our routes configuration array, with a redirect subject: { path: '/fruits', title: 'Fruits', part: FruitsPage, }, { path: '/all-frults', redirect: '/fruits', }, All of the code above does is that if a consumer visits, the trail /all-fruits, it might redirect them to the /fruits route. Programmatic Navigation Up to now, we have discovered rather a lot about routing, however there’s another factor you may wish to know: how one can carry out programmatic navigation. We outline programmatic navigation as a state of affairs during which a consumer is redirected/directed primarily based on a selected motion that happens on a route, resembling a login or signup motion, or by clicking a selected button, resembling a “return” button. Router Historical past We will use the browser historical past to simply navigate backwards or forwards, relying on our preferences. Should you recall, we’ve got a createRouter() operate within the router configuration file the place we set a historical past worth, permitting Vue router to maintain observe of our router historical past as we route by the net software. This enables us to traverse the browser’s historical past, primarily based on a conditional resembling a button click on: <template> <h1>Fruit Particulars</h1> <p>That is fruit with the id of {{ id }}</p> <button @click on="goBack">Go Again</button> </template> <script> export default { props: ['id'], strategies:{ goBack(){ this.$router.go(-1) } } }; </script> We will additionally resolve to go foward by utilizing the 1 as a substitute of -1 and suppose we wish to transfer by 2 steps we are able to use both 2 or -2. Push push() is often used after an motion has occurred and provides a brand new entry to the historical past stack. For instance, if a consumer indicators in efficiently, we want to be navigated to the dashboard web page programmatically. That is achieved by together with the push methodology alongside the route’s title: this.$router.push({ title: 'Dashboard' }); Be aware: We should make sure that route is said in our router configuration file, or else it won’t work and can redirect us to the 404 web page. Conclusion Routing is among the core functionalities of Vue. Until you are constructing a Single-Web page Software (SPA), you may wish to join a number of pages to a touchdown web page to permit customers to navigate by them. On this information, we have taken a take a look at what routing is, how one can set up the vue-router in new and current initiatives, how one can carry out lazy loading, navigate between routes, carry out dynamic routing, entry route parameters and peform programmatic navigation. Share FacebookTwitterPinterestWhatsApp Previous articleLet’s meet the scholars coding their method to a greater worldNext articleHome windows 11 Construct 25415 rolls out to Dev Channel simply in time for 4th of July weekend Adminhttps://www.handla.it RELATED ARTICLES Programming Seeing is believing: The Stack Overflow Podcast now accessible as video July 1, 2022 Programming Python Program to Discover Prime Elements of a Quantity July 1, 2022 Programming Exploring the attention-grabbing and unusual outcomes from our 2022 Developer Survey (Ep. 458) July 1, 2022 LEAVE A REPLY Cancel reply Comment: Please enter your comment! Name:* Please enter your name here Email:* You have entered an incorrect email address! Please enter your email address here Website: Save my name, email, and website in this browser for the next time I comment. - Advertisment - Most Popular Home windows 11 Construct 25415 rolls out to Dev Channel simply in time for 4th of July weekend July 1, 2022 Let’s meet the scholars coding their method to a greater world July 1, 2022 Single Aspect Loaders: Going 3D! | CSS-Methods July 1, 2022 GPU Benchmarks Hierarchy 2022 – Graphics Card Rankings July 1, 2022 Load more Recent Comments


