Do you need to ship automated coupons in WordPress to deliver again clients?
By sending the fitting coupon to the fitting individual on the proper time, you possibly can re-engage clients who’re dropping curiosity. This may get you extra gross sales, create model loyalty, and show you how to preserve your greatest clients.
On this information, we’ll present you a number of alternative ways to ship automated coupons in WordPress, and convey again clients.
Why Ship Automated Coupons to Deliver Again Prospects?
You could have heard the saying that it prices 5 occasions extra to get a brand new buyer than preserve an previous one.
Whereas lead era will assist develop your corporation, you additionally must preserve your present clients comfortable. Over time, individuals might lose curiosity in your web site, neglect about your merchandise, or begin purchasing with a competitor.
That’s the place automated coupons are available in.
The greatest WordPress automation instruments and plugins can watch your clients for indicators they’re turning into disengaged. For instance, a buyer might not place an order for two months or cease opening your emails.
One option to deliver these clients again is to routinely ship them a coupon code by way of e mail. By creating this automated workflow in WordPress, you possibly can retain clients with out having to do all of the laborious work your self.
Professional Tip: For those who ship coupons by way of e mail, then you definately’ll want to verify these messages land within the buyer’s inbox and never within the spam folder. Right here, a superb SMTP service supplier is important for bettering your e mail deliverability. We additionally suggest utilizing WP Mail SMTP because it permits you to simply ship WordPress emails utilizing any SMTP service supplier.
With that being stated, let’s see how one can ship automated coupons in WordPress and convey again clients. Merely use the fast hyperlinks under to leap to the strategy you need to use.
Methodology 1. Utilizing FunnelKit (Greatest for WooCommerce Customers)
One option to ship automated coupons in WordPress, is by utilizing FunnelKit Automations.
FunnelKit is a WordPress gross sales funnel builder and optimization plugin that permits you to create highly effective buyer winback campaigns. It additionally permits you to create distinctive, customized coupons, which might actually catch the patron’s consideration.
FunnelKit integrates with WooCommerce and has plenty of options which can be designed to develop your on-line retailer. With that in thoughts, FunnelKit is a superb selection in case you already use WooCommerce to promote services and products on-line.
How you can Arrange the FunnelKit WordPress Plugin
First, you’ll want to put in and activate the free model of FunnelKit Automations, because it supplies the bottom for the premium plugin’s options. For extra particulars, please see our information on tips on how to set up a WordPress plugin.
After that, you’ll want to put in and activate the FunnelKit Automations Professional plugin.
After activating each plugins, go to FunnelKit Automation » Settings. Now you can go forward and add the license key to the ‘License’ subject.
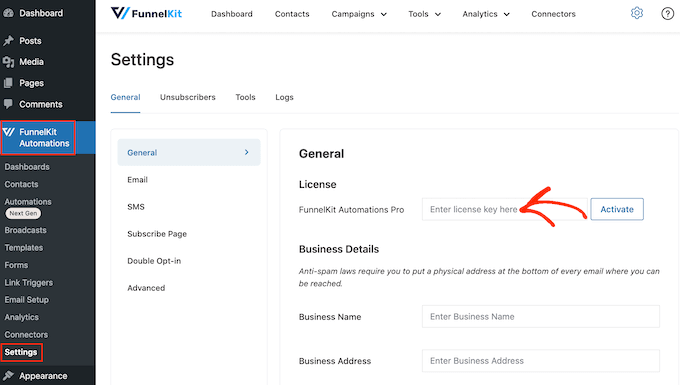
You’ll discover this data in your account on the FunnelKit web site. After including this data, click on on the ‘Activate’ button.
How you can Create an Automated Coupon Workflow for WordPress
Now, we’re going to create a workflow that can generate a personalised coupon and ship it to the client by way of e mail. This workflow will run as soon as 30 days have handed for the reason that buyer’s final order.
To create the workflow, go to FunnelKit Automations » Automations (Subsequent Gen) within the WordPress dashboard. Then, click on on the ‘Add New Automation’ button.
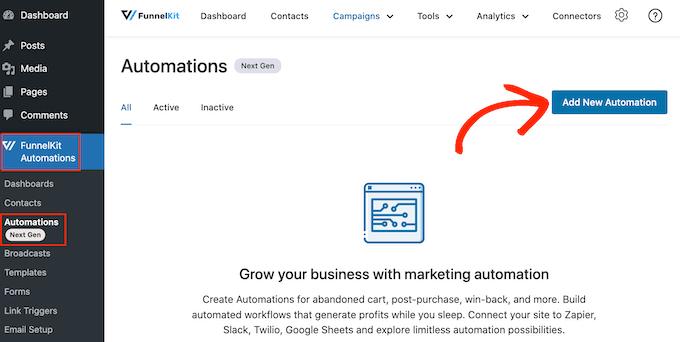
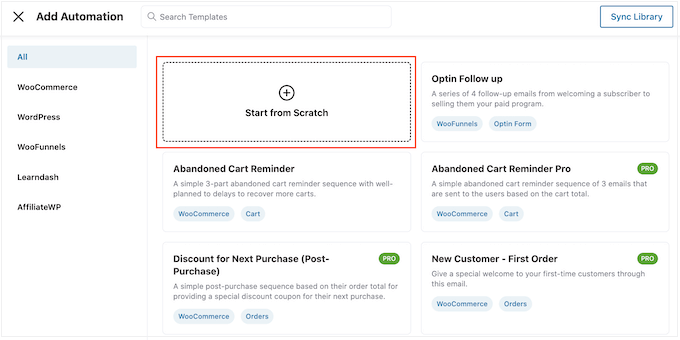
You’ll now see all of the completely different automation templates that you should utilize.
Since we need to create our personal workflow, choose ‘Begin from Scratch.’
Within the popup that seems, kind in a reputation for the automation. That is simply to your reference, so you should utilize something you need.
With that accomplished, click on on ‘Create.’

Now, we have to select the motion that can kickstart the workflow, so click on on ‘Choose Set off.’
Within the left-hand menu, select ‘WooCommerce’ after which click on to pick out ‘Buyer Win Again.’
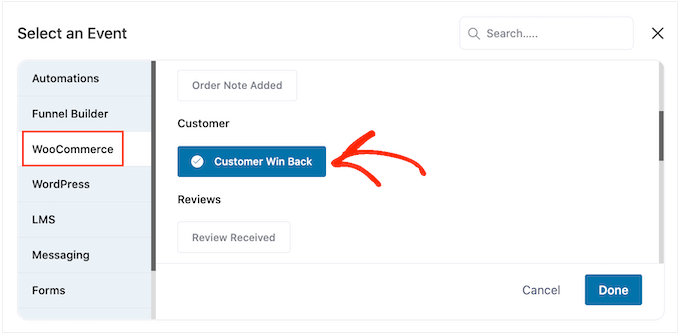
With that accomplished, click on on ‘Accomplished’ so as to add the set off to your automation workflow.
Again in the primary editor, click on on the ‘Buyer Win Again’ set off.

Within the ‘Buyer Final Ordered Interval’ part, you possibly can kind in how lengthy FunnelKit will wait earlier than working the workflow.
For instance, within the following picture the workflow will run when 30 days have handed for the reason that buyer’s final order.
FunnelKit will repeat this automation as soon as each 24 hours, so it’s necessary to solely run it for a brief time period. For that reason, we’ve set the workflow to cease when 35 days have handed for the reason that buyer’s final order.
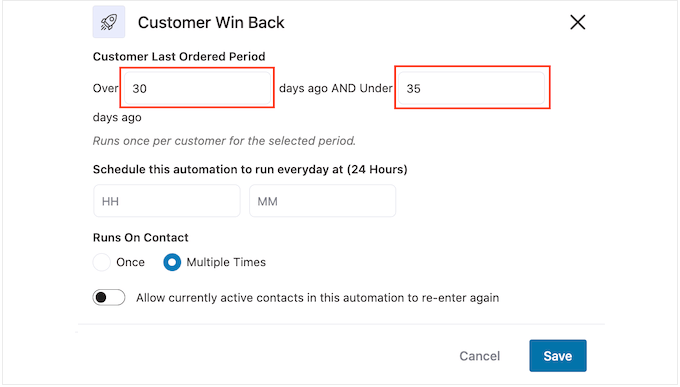
On this method, you received’t annoy clients by sending them dozens of emails.
Subsequent, you possibly can set the time when the automation will run, utilizing the ‘Schedule this….’ fields. FunnelKit will use your retailer’s timezone, so you could need to change your on-line retailer settings if you wish to use a special timezone as a substitute.

With that accomplished, click on on ‘Save.’
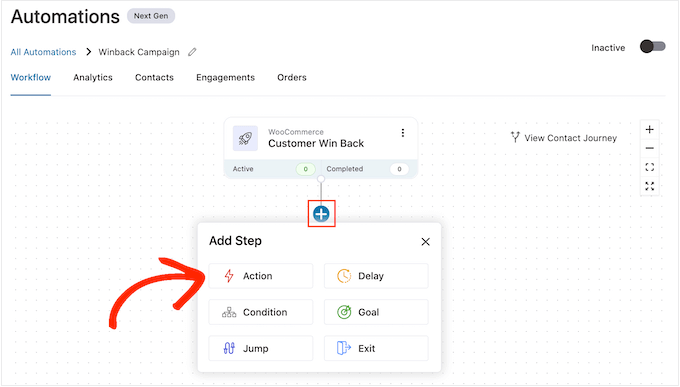
Again in the primary workflow editor, click on on ‘+’ after which choose ‘Motion.’
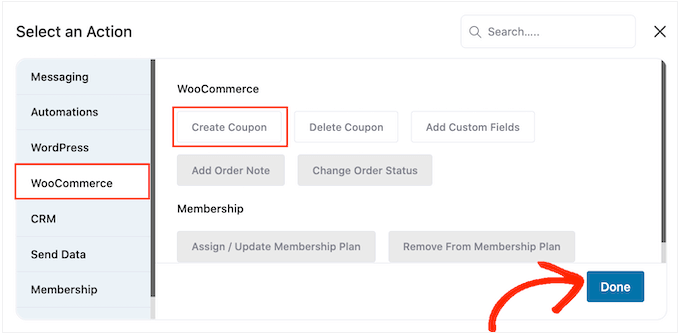
Within the popup that seems, choose ‘WooCommerce’ after which click on on ‘Create Coupon.’
Merely click on on ‘Accomplished’ so as to add this motion to the workflow.
Again in the primary FunnelKit editor, click on on the motion you simply added. This opens a popup the place you possibly can customise the ‘Create Coupon’ motion.
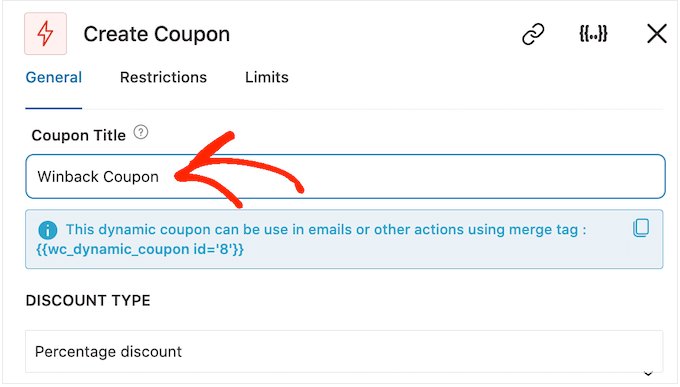
To begin, kind a reputation for the coupon into the ‘Coupon Title’ subject. That is simply to your reference so you should utilize something you need.
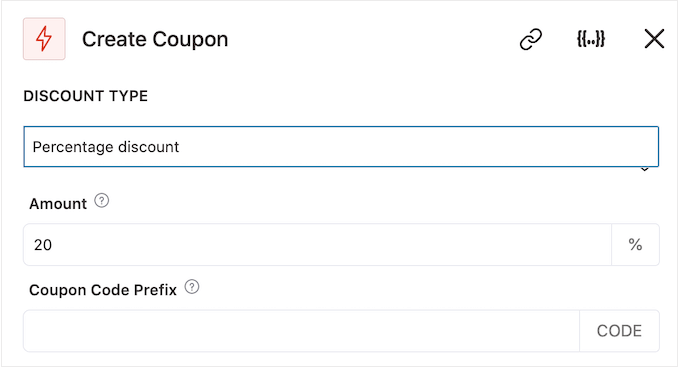
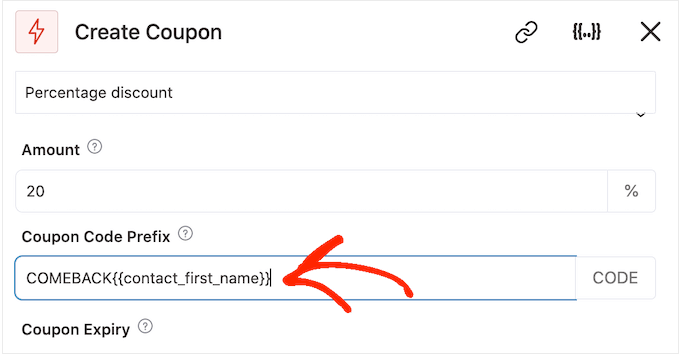
After that, select the kind of coupon that you simply need to create, utilizing the ‘Low cost Kind’ dropdown menu.
FunnelKit helps proportion low cost, fastened cart low cost, and glued product low cost. More often than not, you’ll need to choose ‘Share Low cost’ to verify all clients get the same profit, regardless of how a lot they spend or what merchandise they purchase.
After that, kind an quantity into the ‘Quantity’ subject. For instance, you may provide clients 20% off, or a $5 low cost on all purchases.
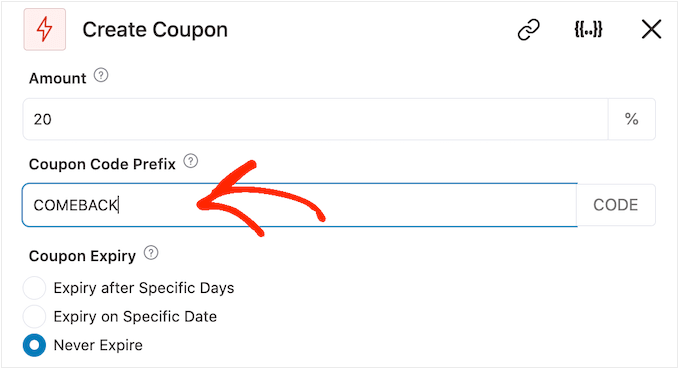
FunnelKit routinely creates a singular coupon code for every contact. Nonetheless, you possibly can add a prefix to the beginning of the coupon, which might both be plain textual content or dynamic tags. FunnelKit will substitute these tags with actual textual content each time it creates a code, so it is a nice option to create customized coupons.
Since we need to deliver consumers again in, you could resolve to incorporate the client’s identify within the coupon. This may catch their consideration, and likewise makes your code simpler to recollect.
So as to add plain textual content as a prefix, merely kind into the ‘Coupon Code Prefix’ subject.
So as to add a number of tags, click on on the ‘Merge tags’ icon.
That is the button that has curly braces.
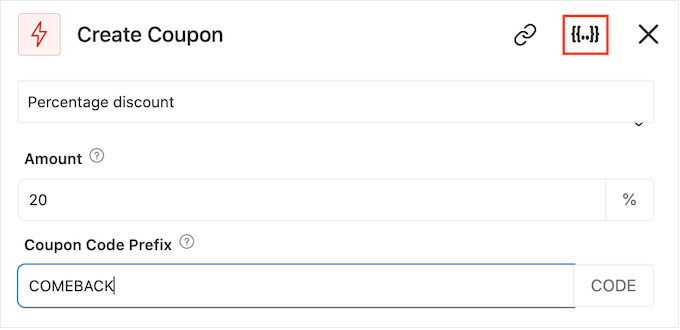
Now, you’ll see all of the tags that you should utilize within the automated coupon.
We’re going to make use of the {{contact_first_name}} tag, however you should utilize any tags you need.
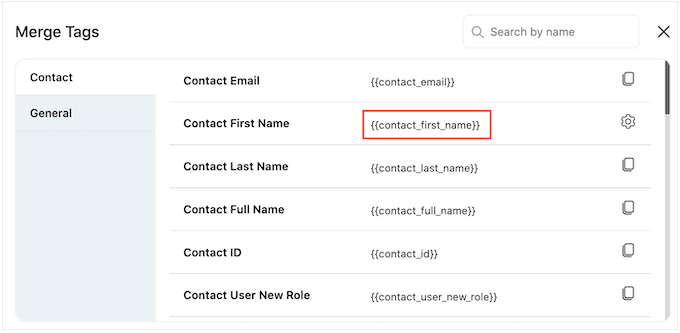
Merely copy every tag after which paste it into the ‘Coupon Code Prefix’ subject.
As you possibly can see within the following picture, you should utilize a mixture of plain textual content and tags.
By default, the coupon won’t ever expire. A way of urgency and FOMO can push clients to make use of a coupon, so you could need to choose the radio button subsequent to ‘Expire after Particular Days’ or ‘Expire on Particular Date.’
You possibly can then use the controls to specify when the coupon will expire.
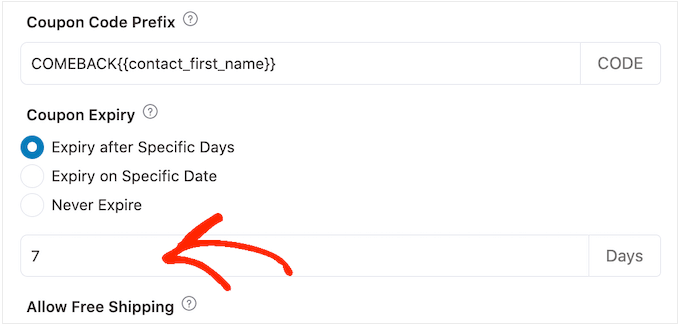
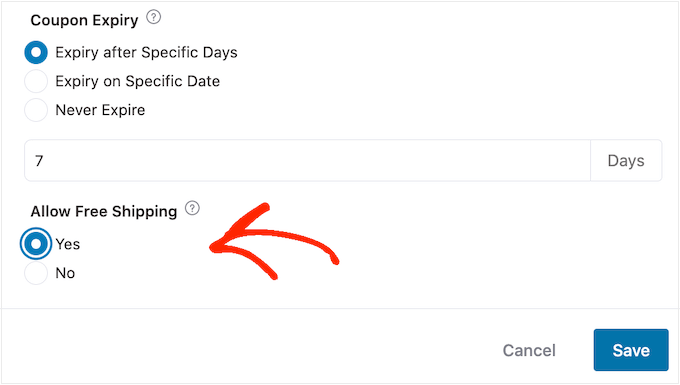
Lastly, you possibly can select whether or not the coupon provides clients a free delivery low cost.
Buyers love free delivery, so you could need to think about including this to your coupon by choosing the ‘Sure’ radio button underneath ‘Enable Free Transport.’
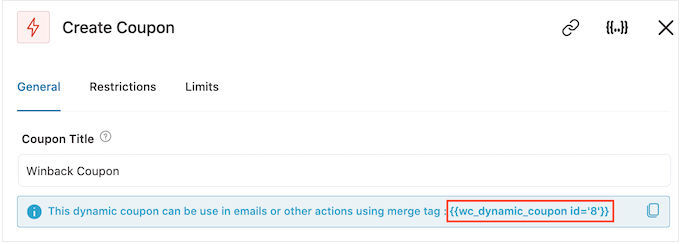
Once you’re pleased with how the coupon is about up, be sure you copy the small items of code underneath the ‘Coupon Title.’
You’ll want this coupon code for the e-mail we’ll be creating within the subsequent step, so retailer it someplace protected.
With that accomplished, click on on ‘Save’ to retailer your adjustments.
Now we’ve a coupon, it’s time to create the e-mail that FunnelKit will ship to your clients. So as to add an e mail motion, click on on the ‘+’ button after which choose ‘Motion.’
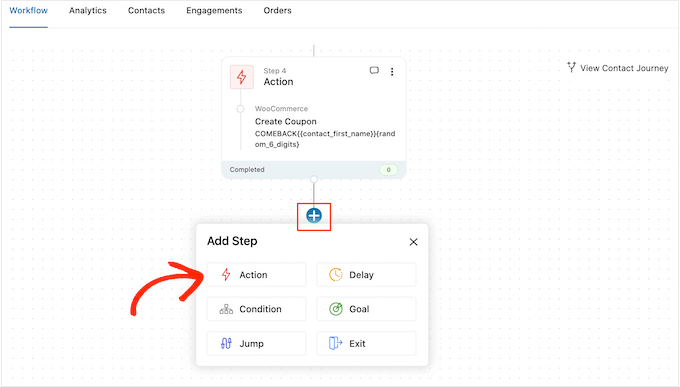
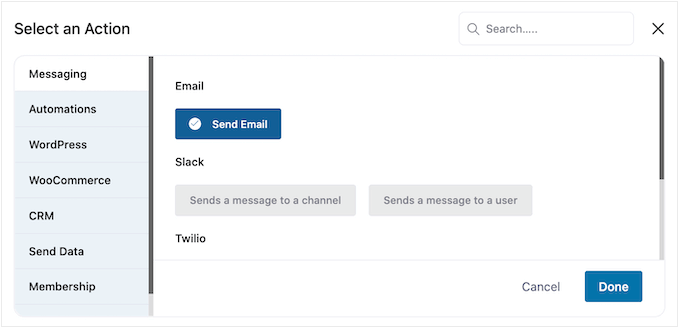
If it isn’t already chosen, then click on on ‘Messaging’ within the left-hand menu.
Then, choose ‘Ship Electronic mail’ and click on on ‘Accomplished.’
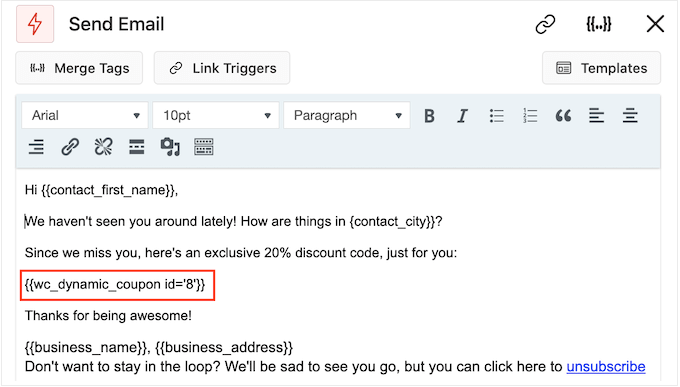
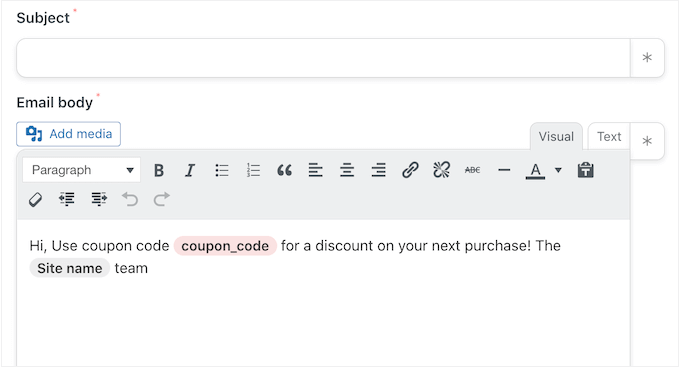
Now you can create an e mail by typing in a topic and preview, and including physique textual content.
Just like making a coupon, it’s greatest to make use of a mixture of plain textual content and tags. So as to add dynamic tags, click on on the ‘Merge Tags’ icons that seem subsequent to the To, Topic, and Preview Textual content fields.
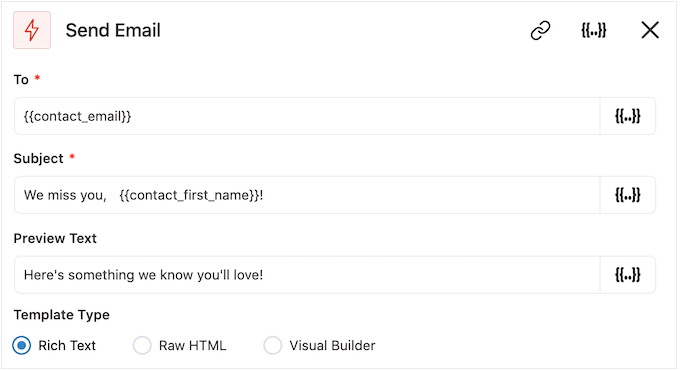
If you wish to add tags to the e-mail physique, then you possibly can click on on the ‘Merge Tags’ button.
So as to add your coupon code, merely paste or kind within the {{wc_dynamic_coupon id= code we copied within the earlier step.
Once you’re pleased with how the e-mail seems, click on on ‘Save & Shut.’
That’s it. Once you’re able to make the automation stay, click on on the ‘Inactive’ slider so it turns to ‘Lively.’
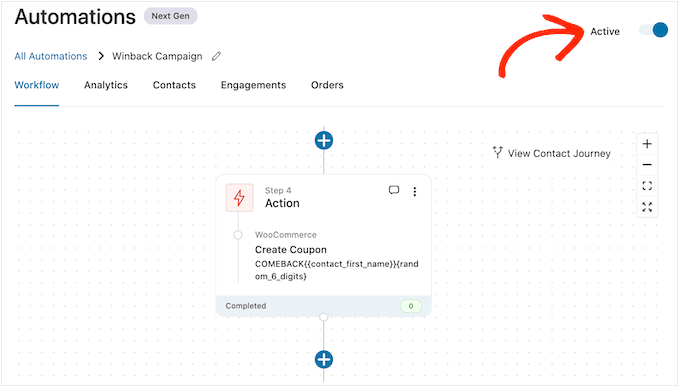
Now, FunnelKit will routinely ship the coupon to any buyer who hasn’t bought from you previously 30 days.
Methodology 2. Utilizing Uncanny Automator (Over 100 Integrations)
One other option to ship automated coupons in WordPress, is by utilizing Uncanny Automator. It is without doubt one of the greatest WordPress automation plugins in the marketplace and allows you to create highly effective workflows to save lots of time and show you how to reply to clients extra shortly.
Uncanny Automator works seamlessly with WooCommerce, plus all the will need to have WordPress plugins and third-party instruments. For those who’re already utilizing plenty of completely different software program in your on-line retailer, then Uncanny Automator could also be a sensible choice for you.
There’s a free Uncanny Automator plugin that permits you to automate many frequent duties. Nonetheless, we’ll be utilizing Uncanny Automator professional as a result of it really works with WooCommerce.
To begin, you’ll want to put in Uncanny Automator professional, plus the free plugin because it supplies the bottom for the premium model. For those who need assistance, then please see our information on tips on how to set up a WordPress plugin.
Upon activation, go to Automator » Settings and enter your license key into the ‘Uncanny Automator Professional license key’ subject.
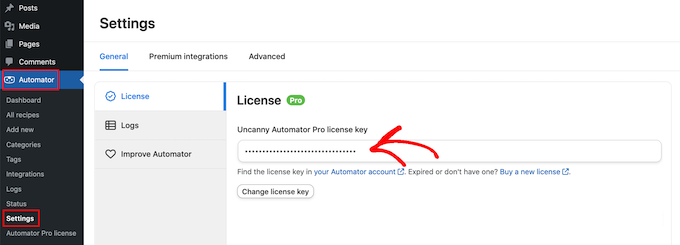
You’ll discover this data underneath your account on the Uncanny Automator web site.
Uncanny Automator is a strong and versatile plugin, so there’s plenty of alternative ways that you may deliver clients again to your web site. Let’s check out a number of choices.
Mechanically Ship Coupons to Logged-Out Prospects
It’s good to let clients create an account along with your on-line retailer, because it encourages model loyalty and makes it simpler for consumers to purchase from you sooner or later.
Consumer registration may also assist with lead era. For those who get the patron’s e mail tackle, then you possibly can goal them with e mail advertising, customized adverts, an e mail publication, and far more.
For those who’re utilizing WooCommerce, then this plugin routinely creates all of the pages clients must create and handle an account. WooCommerce additionally provides a brand new Buyer position, which it routinely assigns to any consumers who register along with your retailer.
Are you utilizing a special eCommerce resolution that doesn’t assist buyer registration? Then see our information on tips on how to permit person registration in your WordPress web site.
After that, you possibly can merely create a brand new position to your clients. For detailed directions, please see our newbie’s information to WordPress person roles and permissions.
For those who permit person registration, then you possibly can observe when a client logs out of their account, as this means they’re dropping curiosity in your retailer. You possibly can then ship a coupon to encourage them to log again in.
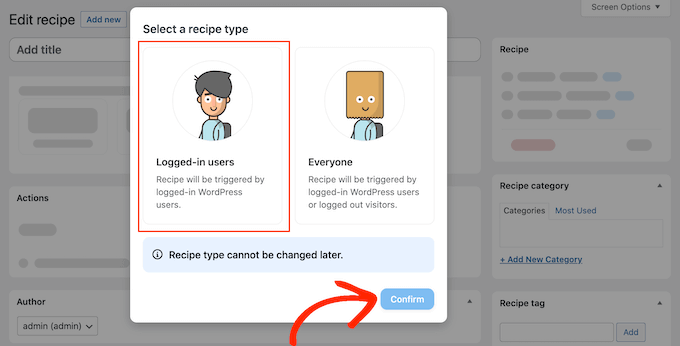
To create this recipe, merely go to Automator » Add new within the WordPress dashboard.
Uncanny Automator will now ask whether or not you need to create a recipe for logged-in customers, or everybody. Go forward and choose ‘Logged-in customers,’ then click on on the ‘Affirm’ button.
Subsequent, you can provide the recipe a reputation by typing into the ‘Title’ subject. That is simply to your reference so you should utilize something you need.
When you’ve accomplished that, click on on ‘WordPress’ within the ‘Choose an integration’ space.
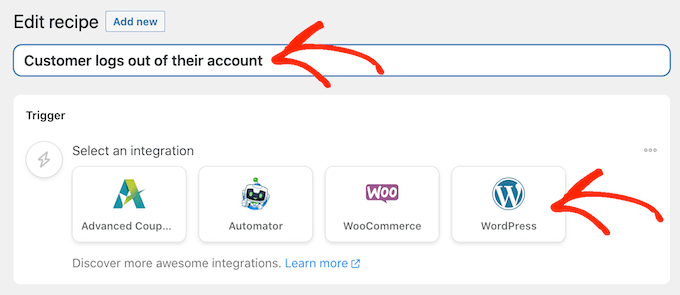
Now you can select a set off, which is something that kickstarts the recipe.
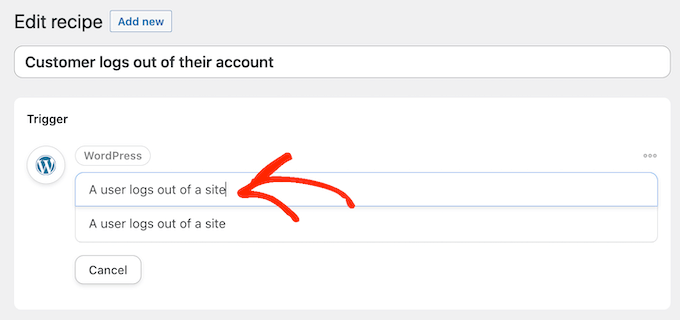
Within the dropdown menu, begin typing the next ‘A person logs out of a web site’ after which choose the fitting choice when it seems.
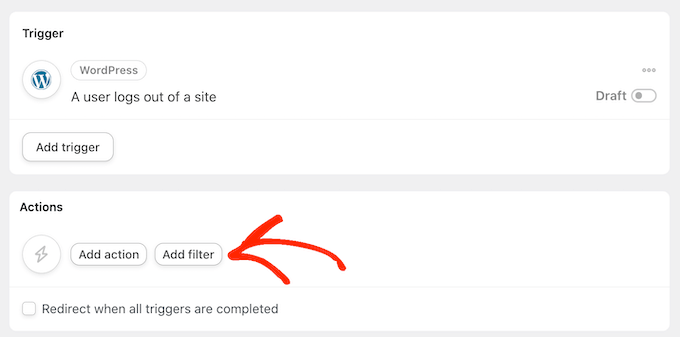
We solely need to run the workflow when somebody with the ‘Buyer’ person position logs out of their account.
With that in thoughts, click on on the ‘Add filter’ button.
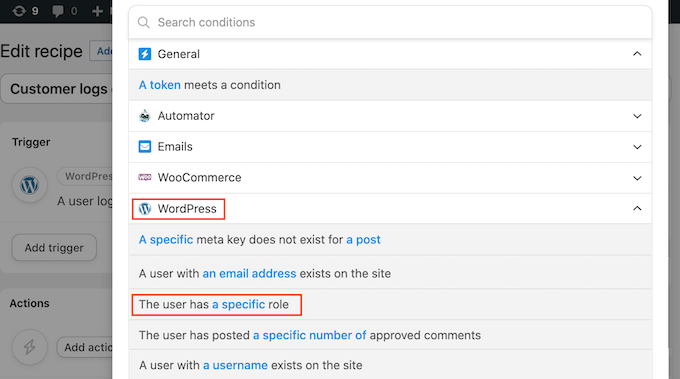
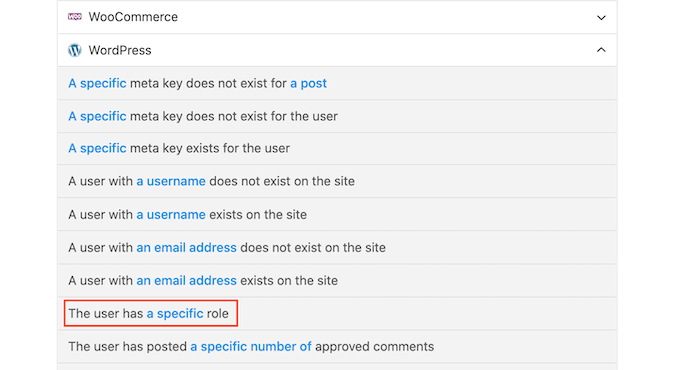
Within the popup that seems, click on on ‘WordPress.’
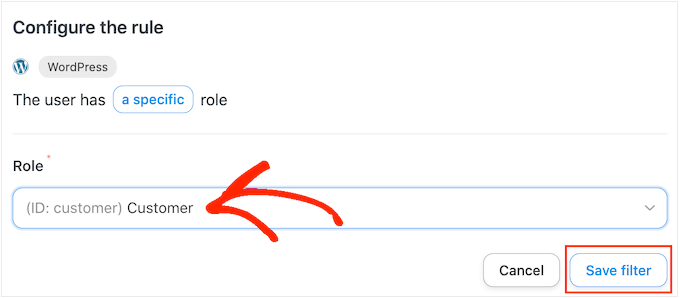
Subsequent, discover ‘The person has a particular position’ within the dropdown menu.
Open the ‘Function’ dropdown and choose the position you’re utilizing to your clients.
After that, go forward and click on on ‘Save filter.’
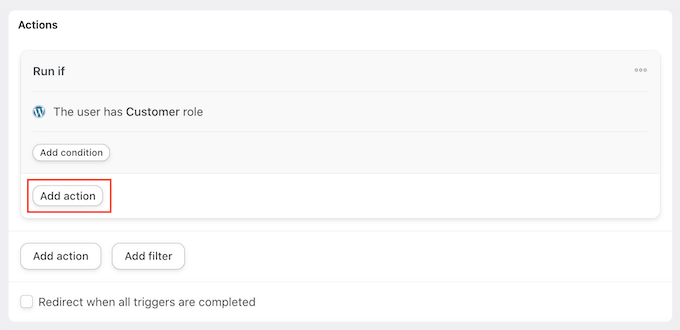
Now it’s time to specify the motion that Uncanny Automator will carry out each time this workflow runs.
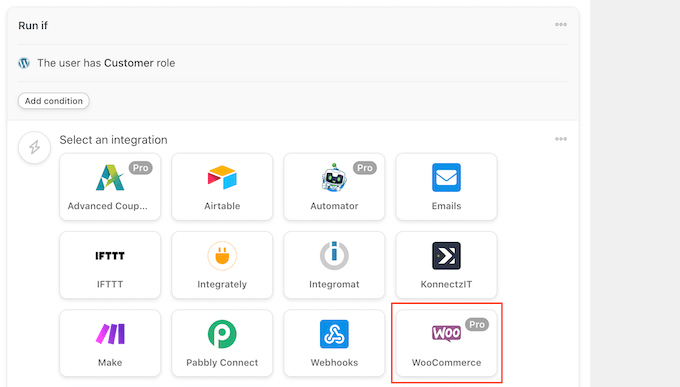
We’re going to ship the client an e mail containing a coupon, so go forward and click on on ‘Add motion.’
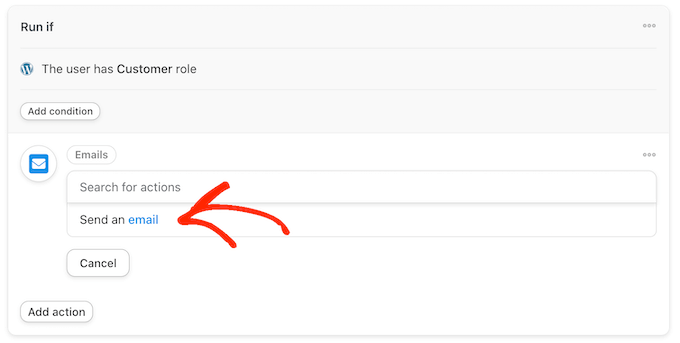
Since we need to ship an e mail, choose ‘Emails’ as the combination.
Within the dropdown that seems, click on on ‘Ship an e mail.’
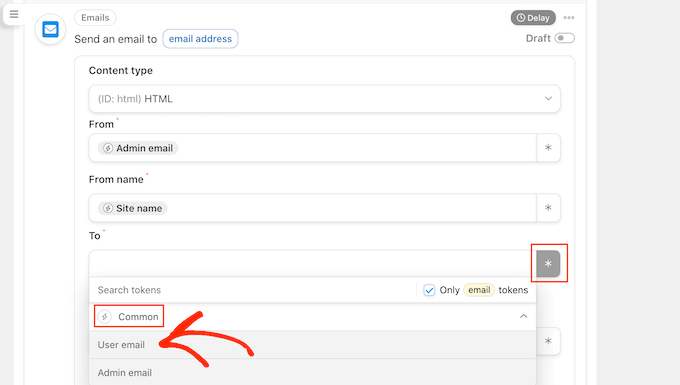
This provides all of the fields that you should utilize to create the e-mail.
To begin, we’d like to verify the message goes to the fitting person, by clicking on the asterisk subsequent to the ‘To’ subject. Then, choose ‘Frequent’ and ‘Consumer e mail.’
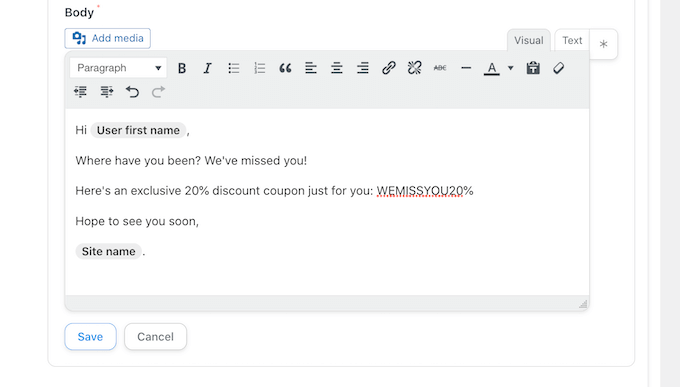
Now you can create the e-mail by including a topic line and physique textual content.
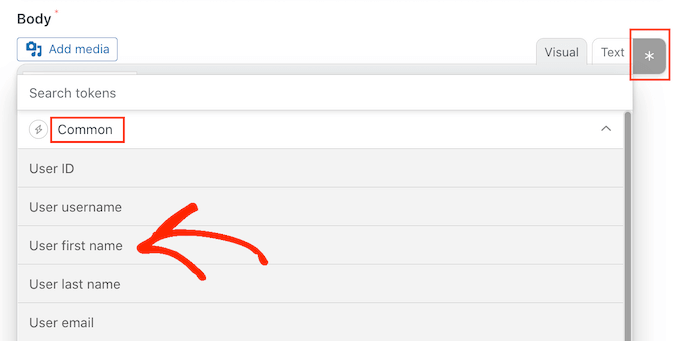
Right here, you should utilize a mixture of plain textual content and tokens, that are placeholders that Uncanny Automator replaces with actual values routinely. For instance, if you wish to use the client’s identify, then you possibly can click on on the asterix and choose ‘Frequent.’
Merely choose the ‘Consumer first identify’ token to create the customized greeting.
You’ll additionally must create a coupon and add it to the e-mail.
The simplest method is by utilizing the Superior Coupons plugin, which is the greatest WordPress coupon code plugin in the marketplace. It permits you to create plenty of completely different superior coupons to get extra gross sales and develop your corporation.
For a step-by-step information, please see our put up on tips on how to create good coupons.
After making a coupon, you possibly can merely add it to the e-mail.
Once you’re pleased with how the e-mail seems, click on on ‘Save.’
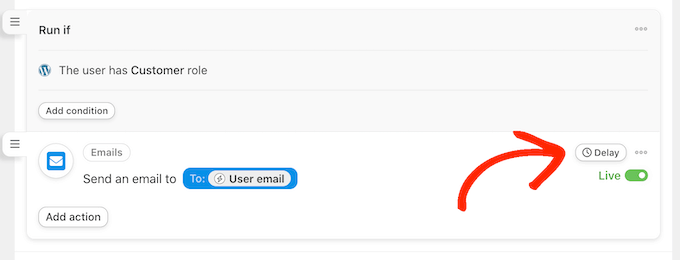
After that, it’s time to set a delay. That is how lengthy Uncanny Automator will wait after the client logs out, earlier than sending them the coupon.
So as to add a delay, hover your mouse over the ‘Electronic mail’ motion. When it seems, click on on ‘Delay.’
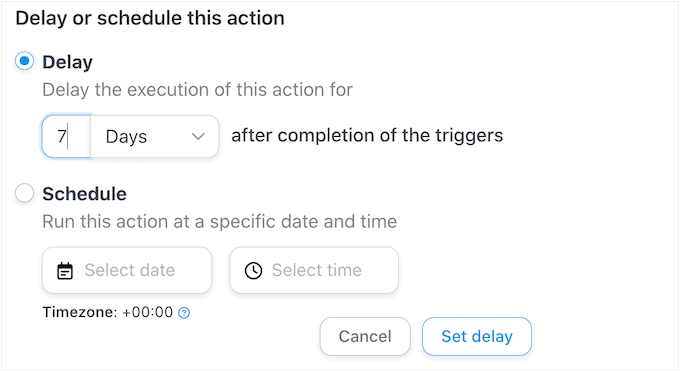
You possibly can then add your delay within the popup that seems.
When you’ve accomplished that, go forward and choose ‘Set delay.’
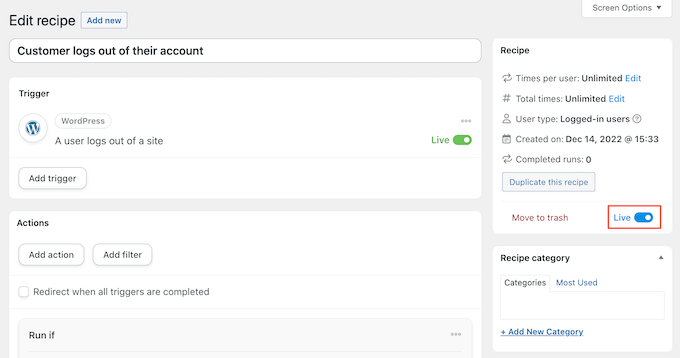
Once you’re pleased with how the recipe is about up, it’s time to make it lively.
Within the ‘Recipe’ field, click on the ‘Draft’ swap in order that it exhibits ‘Stay’ as a substitute.

That’s it. Now, when a buyer logs out of their account, Uncanny Automator will watch for the required period of time earlier than sending them a coupon code.
Mechanically Ship Coupons for a Particular Product
Generally a client might have a look at a product a number of occasions. This means they’re within the merchandise, however one thing is stopping them from making a purchase order.
On this case, you could need to ship them a coupon, which can encourage them to splash out on the product.
To get began, create a brand new recipe for logged-in customers following the identical course of described above. After that, click on on ‘WooCommerce’ within the ‘Choose an integration’ space.
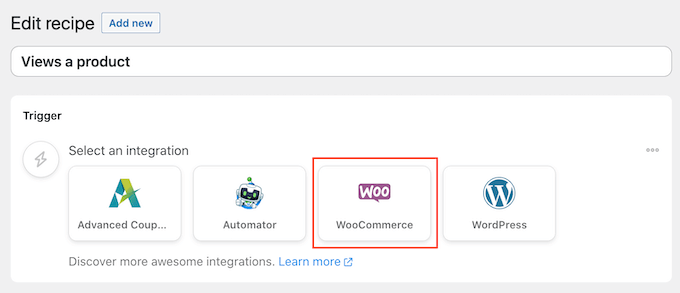
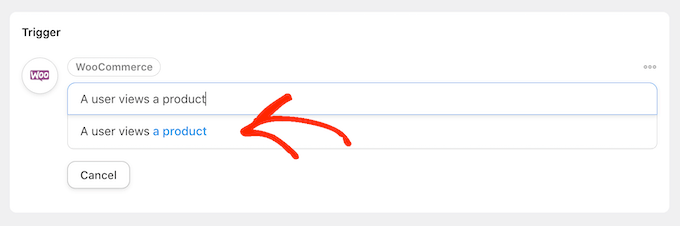
Subsequent, select a set off by typing the next ‘A person views a product.’
When the fitting set off seems, give it a click on.
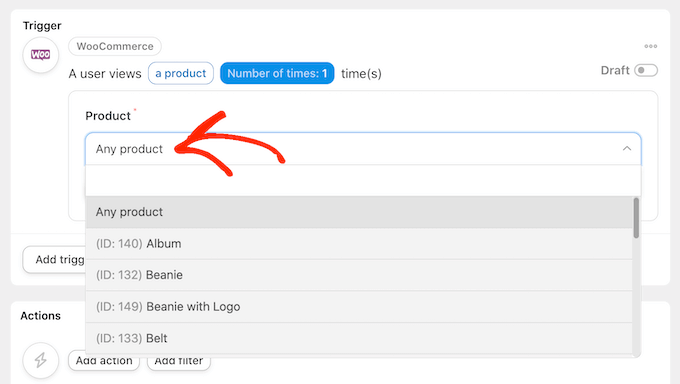
By default, this set off is about to ‘Any product.’
If you wish to hyperlink the recipe to a particular product, then open the ‘Product’ dropdown and select that product from the checklist.
When you’ve accomplished that, click on on the ‘Variety of occasions’ button.
By default, the recipe will run each time a buyer seems at a product. It is best to change this, so the client has to take a look at the product a number of occasions earlier than triggering the recipe. To do that, kind a special quantity into the ‘Variety of occasions’ subject.
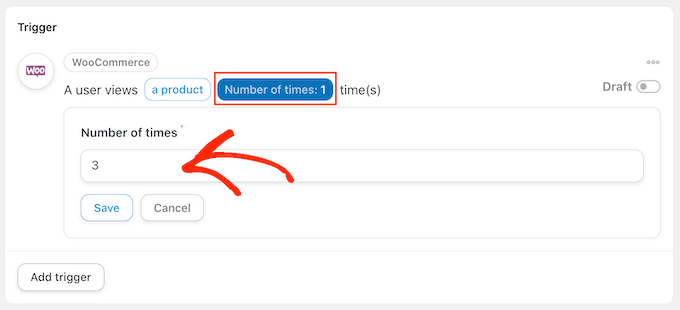
When that’s accomplished, click on on ‘Save’ to retailer your settings.
This recipe ought to solely run when a buyer views a product, so click on on ‘Add Filter.’ Within the popup that seems, click on on ‘WordPress’ after which select ‘The person has a particular position.’
After that, open the ‘Function’ dropdown and choose the position you’re utilizing to your clients.
Once you’re prepared, click on on ‘Save filter.’

Now it’s time so as to add the motion. There are a number of alternative ways to ship automated coupons out of your WordPress web site.
To e mail a code to your clients utilizing Uncanny Automator and Superior Coupons, merely comply with the identical course of described above.
Another choice is to generate the code utilizing WooCommerce. To do that, click on on ‘Add Motion’ after which choose ‘WooCommerce’ as the combination.
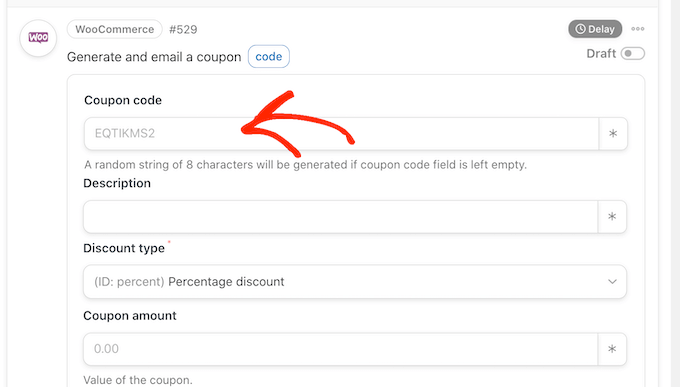
Within the search bar, begin typing ‘Generate and e mail a coupon code to the person.’
When the fitting choice seems, give it a click on.

It will add some new settings the place you possibly can create the coupon code.
To generate a code routinely, merely depart the ‘Coupon code’ subject clean.
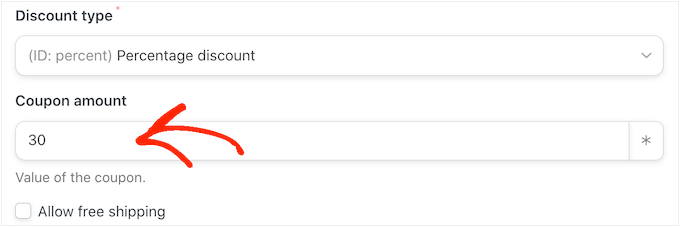
Within the ‘Low cost kind’ subject, select the sort of coupon that you simply need to create, resembling a set cart low cost or proportion low cost.
For this information, we’ll choose ‘Share low cost’.
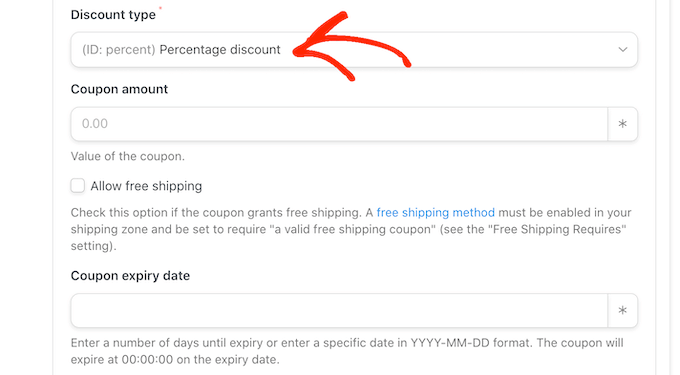
After that, kind the proportion low cost into the ‘Coupon quantity’ subject.
Within the following picture, we’re providing clients a 30% low cost on their buy.
Within the subsequent subject, you possibly can set an expiry date for the coupon, both by utilizing the YYY-MM-DD format or typing within the variety of days till the coupon expires.
For instance, within the following picture the coupon will expire after 7 days.

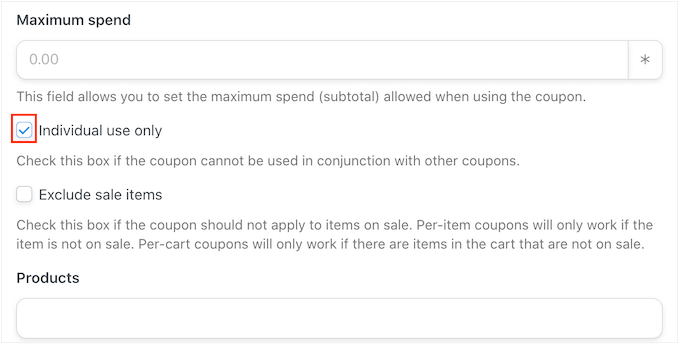
You may as well set a minimal and most spend for the coupon. We’ll depart these fields clean so the client can use the code with any buy.
You may additionally need to test the ‘For particular person use solely’ field so clients can’t use this code together with different coupons.
Subsequent, scroll to the ‘Utilization restrict per coupon’ part. The patron ought to solely be capable of use the coupon as soon as, so kind in ‘1.’
There are many different settings you possibly can change for the coupon. It’s a good suggestion to look via these settings to see whether or not you need to make any extra adjustments.
Once you’re pleased with how the coupon is about up, scroll to the ‘Electronic mail’ part. To begin, discover the ‘To’ subject after which click on on the asterisk subsequent to it. Then, click on on ‘Frequent’ and choose ‘Consumer e mail.’
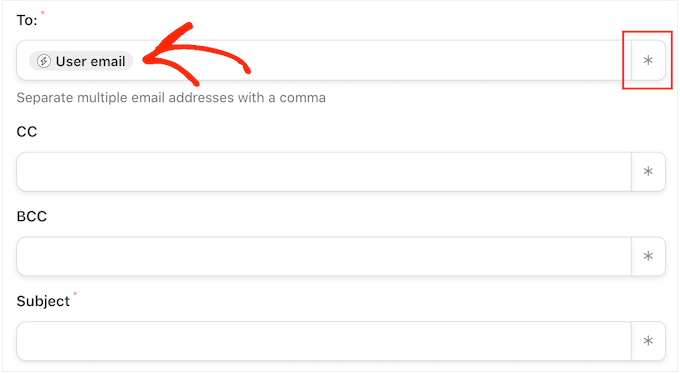
With that accomplished, you possibly can add a topic line and alter the textual content within the e mail physique.
To create a extra customized e mail, it’s a good suggestion to make use of a mixture of plain textual content and tokens, by following the identical course of described above.
Once you’re pleased with the e-mail, click on on the ‘Save’ button to retailer the recipe.
After that, you can also make the recipe stay by clicking the ‘Draft’ swap in order that it exhibits ‘Stay.’
Now, each time somebody views a product a number of occasions, it’ll set off the recipe workflow.
We hope this text helped you discover ways to ship automated coupons in WordPress to deliver again clients. You may additionally need to try our information on tips on how to create a WooCommerce popup to extend gross sales and the greatest WooCommerce plugins to your retailer.
For those who appreciated this text, then please subscribe to our YouTube Channel for WordPress video tutorials. You may as well discover us on Twitter and Fb.
