In the event you obtain the error message “Activity picture is corrupt or has been tampered with 0x80041321”, it’s as a result of a scheduled backup activity has grow to be corrupted. The difficulty right here is that the duty service validates some objects when it plans to carry out a activity. These duties can be marked as corrupted if Activity Scheduler detects any integrity challenge or registry corruption.
This error often happens when a scheduled backup activity turns into corrupted. It could actually additionally occur when there are issues with the registry’s integrity or corruption. The excellent news is that there’s a answer to this challenge.
What Is the ‘The duty picture is corrupt or has been tampered with (0x80041321)’ Error?
The 0x80041321 error code signifies an issue with the Activity Scheduler service. The message that seems is “The duty picture is corrupt or has been tampered with,” and it informs you that you’ve got a corrupted scheduled backup activity. The Activity Scheduler service is answerable for scheduling, however you may attempt to put together duties with out it as a result of it makes use of the file system to retailer info. Nevertheless, a number of the duties will not be acknowledged, and it is extremely more likely to refuse working duties which have been tampered with, ensuing within the aforementioned message.
This error often seems if you attempt to configure a backup of your Home windows 7 working system, and when you don’t repair it, you gained’t get very far as a result of Activity Scheduler acknowledges the picture as corrupt and refuses to do something with it, leaving you caught and the picture ineffective.
There are a number of options to this downside, and so they all contain both resetting the Activity Scheduler activity or deleting the picture in order that it could create a brand new, non-corrupt one and proceed working. You may strive any or the entire strategies listed under; certainly one of them will undoubtedly help you in resolving your challenge.
To resolve this error, use the Registry Editor to edit and restore the corrupted duties, delete the schedule keys or the WindowsBackup file, delete the duty from the Activity Scheduler, or refresh the Person Feed Synchronization.
However, earlier than you strive any of those potential fixes, double-check each choice to see if they’ve the right associations or if they’re making an attempt to run a file that it shouldn’t. Moreover, make a system restore level with the intention to undo any modifications you make if one thing goes flawed.
Troubleshooting Strategies for Home windows Error 0x80041321
While you get the “The duty picture is corrupt or has been tampered with 0x80041321” error, the very first thing you must do is shut all the pieces after which restart your pc. Run a scan utilizing Outbyte PC Restore to do away with junk and corrupted information earlier than attempting to test the Activity Scheduler if the error has been resolved. If the (0x80041321) error code persists, proceed with the options under.
Answer #1: Use the Registry Editor to repair corrupted duties.

Step one in resolving the difficulty is to edit these duties in Registry Editor and restore the corrupted ones in System32. Earlier than you start, needless to say since you are coping with a backup triggered by the Activity Scheduler, the entries for the duties could be present in numerous areas.
To seek out the Activity Scheduler, navigate to Activity Scheduler Library > Microsoft > Home windows > Home windows Backup. The Registry Editor could be discovered by navigating to this listing: HKEY_LOCAL_MACHINESOFTWAREMicrosoftWindows NTCurrentVersionScheduleWindowsBackupAutomaticBackup
The Home windows System folder is positioned on this folder: C:WindowsSystem32TasksMicrosoftWindowsWindowsBackup
Be aware of the title of the duty and ensure it’s constant all over the place.
When you’re completed with that, proceed to the steps under.
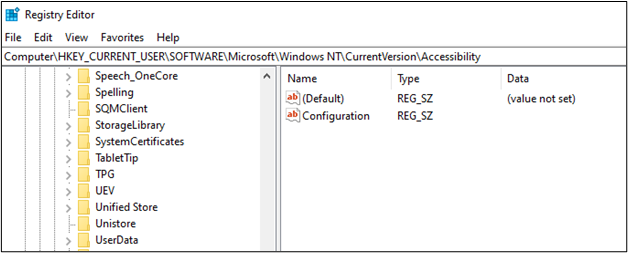
- To open the Registry Editor, press the Win + R keys to open Run, then kind “regedit” within the discipline and press Enter.
- Navigate to the next key:ComputerHKEY_LOCAL_MACHINESOFTWAREMicrosoftWindows NTCurrentVersionScheduleTaskCacheTreeMicrosoftWindowsWindowsBackup
- Be aware of the GUID worth within the activity’s “ID” entry within the folder AutomaticBackup and Home windows Backup Monitor.
- Then, from these areas, delete the duty registry entries related to the ID.
- You’ll discover the duty in certainly one of these areas:
- HKEY_LOCAL_MACHINESOFTWAREMicrosoftWindows NTCurrentVersionScheduleTaskCachePlain
- HKEY_LOCAL_MACHINESOFTWAREMicrosoftWindows NTCurrentVersionScheduleTaskCacheLogon
- HKEY_LOCAL_MACHINESOFTWAREMicrosoftWindows NTCurrentVersionScheduleTaskCacheBoot
- Make a backup of the corrupted activity file. Go to: C:WindowsSystem32TasksMicrosoftWindowsWindowsBackup
- Find the duty(s) — AutomaticBackup and Home windows Backup Monitor — and save them someplace secure.
- Restore the corrupted activity by deleting the an identical activity file from this folder: C:WindowsSystem32TasksMicrosoftWindowsWindowsBackup
The subsequent step is to recreate the duty from the short-term backup copy. You may import the duties in certainly one of two methods: through the use of Activity Scheduler’s Import Activity or through Command Immediate/PowerShell. Listed here are the steps:
Activity Scheduler
- Navigate toActivity Scheduler > Navigate to MicrosoftWindowsWindowsBackup.
- Choose the Import activity from the Motion menu.
- Navigate to the saved information and import them.
Command Immediate
- Begin Command Immediate with administrative privileges.
- Sort on this command: Schtasks.exe /CREATE /TN <New_Task_Name> /XML <Xml_File_Name>
After you’ve created the duties, run them manually to see if the error has been resolved.
Answer #2: Delete the Schedule keys from the Registry.
In case you are snug modifying and modifying the registry in your pc, that is one other technique for resolving the 0x80041321 error. You must again up your registry simply in case.
Initially, launch the Registry Editor. That is completed by concurrently urgent Home windows and R in your keyboard, typing regedit within the Run window that seems, after which urgent Enter. Use the navigation pane on the left to navigate to the next location: HKLMSOFTWAREMicrosoftWindows NTCurrent VersionSchedule
Delete the Schedule key and all of its subkeys. Exit the registry editor after saving your modifications. Now you can strive once more to see if the Activity Scheduler works correctly.
Answer #3: Delete the WindowsBackup file.
If the primary two choices didn’t resolve the issue, you may strive eradicating the WindowsBackup file. It’s doable that the difficulty is expounded to corrupted activity information. The duty information are XML information that include parameters, applications to make use of, and different info. If any of those information turns into corrupted, the duty scheduler can have problem working it and can show an error. There are two methods to do that: through File Explorer or the Command Immediate.
Through File Explorer
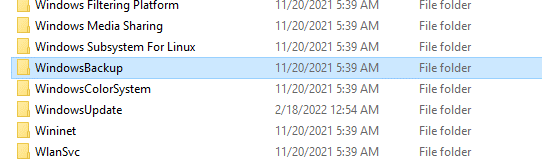
The Activity Scheduler will refuse to work with a corrupted file. You will discover it, manually delete it, after which let Activity Scheduler create a brand new one. The very first thing you must do is navigate to the folder containing the file. Open My Laptop and navigate to the partition containing your working system (often the C: drive). As soon as inside, go to the next folders: Home windows -> System32 -> Duties -> Microsoft -> Home windows -> WindowsBackup
You’ll discover the WindowsBackup file you must delete contained in the folder. Nevertheless, earlier than you delete it, make a backup in a unique location to make sure you nonetheless have the file in case one thing goes flawed. While you’re completed with the backup, take away the file. Attempt backing up your system once more and see if the issue reappears.
Through Command Immediate
To open an elevated command immediate, go to the Begin menu and kind cmd. Hit Run as Administrator after right-clicking on the consequence. You need to use the next command to navigate to WindowsBackup folder: cd %windirpercentsystem32tasksMicrosoftWindowsWindowsBackup
Now that you simply’re within the right folder, use the instructions under to delete the information:
- del AutomaticBackup
- del “Home windows Backup Monitor”
While you’re completed, shut the command immediate and restart the backup by going to the Backup and Restore Heart in Management Panel. You must now have the ability to again up with out incident.
Answer #4: Delete the duty from the Activity Scheduler.
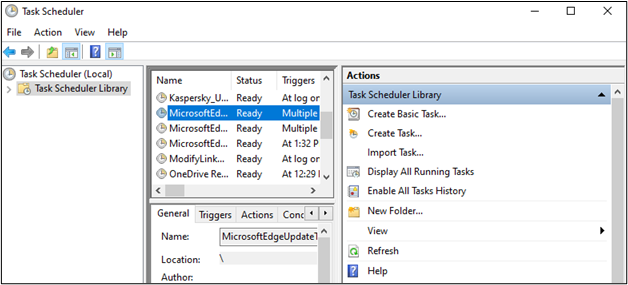
Deleting the duty is basically the identical as deleting the information from the WindowsBackup folder, so it’s helpful to pay attention to this selection as a backup technique. To start, launch the Activity Scheduler by urgent the Begin button in your keyboard, typing Activity Scheduler, and urgent Enter. To the left of the window that opens is a navigation pane. To navigate, use the dropdowns to go to this path: Activity Scheduler Library -> Microsoft -> Home windows -> WindowsBackup
As soon as inside, take away each the Automated Backup and the Home windows Backup Monitor duties. Shut the Activity Scheduler and attempt to restart the backup from the Backup and Restore Heart when completed.
Answer #5: Restart the Activity Scheduler service.
As beforehand acknowledged, the Activity Scheduler service could also be disabled. You would have disabled it whereas attempting to enhance the efficiency of your pc or one thing. Consequently, you need to first decide whether or not it’s working after which restart it.
- To start, press the Win + R keys in your keyboard to open the Run dialog field.
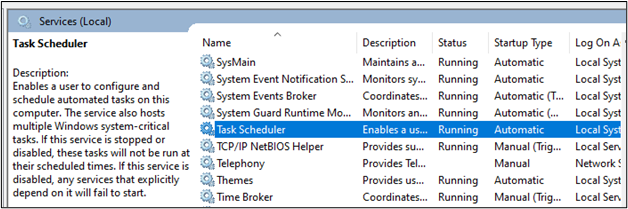
- Then, within the discipline, kind “companies.msc” and press OK or enter to open the Home windows Providers Supervisor.
- You will note a listing of Providers; search for and double-click on the Activity Scheduler service.
- Then, on the Basic tab, click on the Startup Sort choices, after which choose Routinely from the record.
- Choose the Restart the Service possibility from the Run menu.
- After which choose the Restart Service possibility after the After Second Failure possibility.
- Now, go to the After Subsequent Failures tab and choose Restart the Service.
- Lastly, click on the Apply and OK buttons earlier than working the Activity Scheduler to see if the issue has been resolved.
Answer #6: Refresh User_Feed_Synchronization.
The ‘Person Feed Synchronization’ activity in Web Explorer 7/8 is answerable for updating the RSS feeds. Nevertheless, as a result of it’s an automatic activity that works with the Activity Scheduler, disabling and enabling it might assist your downside. You will want an elevated command immediate for this, so click on Begin -> Sort cmd -> Run As Administrator. Sort the next instructions within the window that seems, one after the opposite, adopted by Enter in your keyboard:
- msfeedssync disable
- msfeedssync allow
These instructions will disable after which allow the Person Feed Synchronization activity, respectively. While you’re completed, exit the elevated command immediate and take a look at backing up once more.
Closing Ideas
The 0x80041321 error message is a standard challenge when creating backups, however it’s nothing to be involved about. You should utilize any of the strategies listed above that can assist you resolve it, after which it is possible for you to to proceed along with your Home windows backup with out incident. In the event you’re nonetheless getting the In the event you get the identical error after following the options listed above, you need to use third-party backup software program as a substitute.

In the event you’re working into errors and your system is suspiciously gradual, your pc wants some upkeep work. Obtain Outbyte PC Restore for Home windows or Outbyte Antivirus for Home windows to resolve widespread pc efficiency points. Repair pc troubles by downloading the appropriate software to your machine.

