If you wish to discover ways to create extra Affinity Picture textual content results, then this tutorial is for you. This straightforward but cool textual content impact relies on a daring font and a shadow layer impact with a number of minor changes. In only a few steps, you’ll discover ways to create it, after which it is possible for you to to use this system to make different cool Affinity textual content results. Let’s begin!
What You Will Be taught in This Affinity Picture Textual content Impact Tutorial
- How you can create a shadow textual content impact in Affinity Picture
- How you can work with the Affinity Picture textual content device
- How you can apply a drop shadow in Affinity Picture
Tutorial Belongings
You’ll need the next font in an effort to full this Affinity Picture textual content impact:
1. How you can Open a New Doc in Affinity Picture
Launch Affinity Picture and go to File > New to open the New Doc window. Sort the size of the brand new doc and use the settings proven under; then hit Create.
- Doc decision: 72
- Doc models: Pixels
- Colour format: RGB


2. How you can Create the Affinity Picture Textual content Impact Background
The background performs an essential function on this shadow textual content impact as this has a black and white look, however it will possibly additionally look nice utilizing two different high-contrast colours.
Seize the Rectangle Device (U) and draw a form the identical dimension as your artboard, which is 1920 x 1080 px. Colour it with black or a really darkish shade.


3. How you can Create a Shadow Textual content Impact in Affinity Picture
Step 1
Let’s begin through the use of the Affinity Picture Textual content device (T) to jot down the textual content, after which we’ll make a number of changes to it. Write “OMBRES” (which suggests shadows) on the middle of your artboard utilizing the Hartone Font, with a dimension of 550 pt. The fill colour is white.


Step 2
With the textual content nonetheless chosen, go to the Character panel (View > Studio > Character) and improve the Monitoring from 0% to -100% in an effort to cut back the house between the letters. The objective is to don’t have any house between the letters in order that they begin to overlap.
Reposition the textual content within the heart of the artboard by urgent Align Heart and Align Center within the Alignment panel on the prime of the appliance.


Step 3
Whereas the textual content continues to be chosen, go to Layer > Convert to Curves (Management-Return) adopted by Organize > Ungroup (Management-Shift-G), and you’ll get the person letters.


Step 4
Earlier than you proceed, you might want to change the layer order, that means that the letter “O” needs to be the primary layer on the prime of the Layers panel and the letter “S” needs to be the final one. Choose every letter and drag it upwards to reverse the order. We do that so the shadow will fall accurately on the letters.


Step 5
In Affinity Picture, add a shadow by selecting between Outer Shadow, Internal Shadow, and Outer Glow in some instances, relying on the graphics and the settings used. Let’s examine the way to add a shadow to textual content on this case.
Whereas all of the letters keep chosen, go to the Results panel (View > Studio > Results) and ensure to examine the field in entrance of the Outer Shadow impact to activate it. Subsequent, click on on the settings wheel on the fitting aspect to open the whole Layer Results window.


Step 6
You might want to change the default settings proven above to acquire shadows that work greatest for the look we are attempting to attain, a fairly sturdy shadow that falls on the fitting aspect of every letter. Within the picture under, you may see the settings used:
- Mix mode: Multiply
- Opacity: 100%
- Radius: 100 px
- Offset: 35 px
- Colour: black
- Angle: 0 levels


Step 7
Right here is an additional adjustment you can make to this Affinity Picture drop shadow textual content impact. Choose all of the letters and drag the fitting aspect of the bounding field inwards with the Transfer Device (V). This can make the letters overlap much more, and the shadow impact might be a bit extra intense.


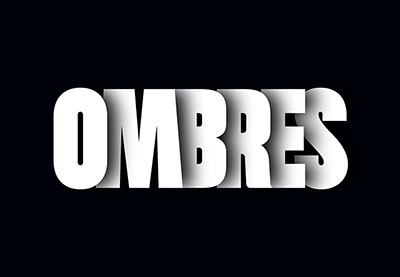
Congratulations! You are Accomplished!
Right here is how your shadow textual content impact ought to look. I hope you have loved this tutorial and can create extra Affinity textual content results sooner or later.
Be at liberty to regulate the ultimate shadow look of the letters and make it your individual. Additionally attempt different colours and make it your individual distinctive design. You will discover some nice sources of inspiration at Envato Components, with attention-grabbing options to stylize any textual content impact.


Need to Be taught Extra?
We have now a great deal of tutorials on Envato Tuts+, from newbie to intermediate degree, together with different Affinity Picture textual content impact tutorials, programs, and textual content results usually. Have a look!
