
Multi-page purposes (MPAs) are getting much less fashionable by the day. Well-known platforms similar to Fb, Twitter, YouTube, Github, and plenty of others are already utilizing single-page software (SPA) know-how as an alternative.
This stylish know-how permits customers to interact with net purposes speedily and responsively as a result of all the things is client-side-rendered. Nonetheless, it may be a ache for builders who construct server-side rendered purposes with frameworks like Laravel or Django.
Happily, Inertia.js stepped in and got here to the rescue.
The lacking ingredient your Laravel tasks want?  Inertia.js. Study extra on this thorough information
On this article, we’ll present how one can get began utilizing Inertia.js and the best way to use it with Laravel, Vue.js, and Tailwind CSS to create a contemporary weblog net app. We’ll additionally share the best way to make SPAs extra Website positioning-friendly, in addition to just a few different tips.
Should you’re simply getting began with Laravel, we advocate you learn this text first so that you’ll be able to roll.
Why SPA?
Earlier than we are able to ask why we should always use Inertia, we should first ask: “Why SPA?”
Why would anybody favor client-side rendered purposes over conventional server-side purposes? What would pressure a full-stack Laravel developer to say goodbye to blade parts?
The quick reply: as a result of pace and responsiveness are important for any profitable person engagement.
Within the case of MPAs, the browser continuously sends requests to the backend, which then executes quite a few database queries. After the database and server course of queries and ship them to the browser, the web page is rendered.
However SPAs are completely different. The appliance brings all the things the person would require straight to the web page, eliminating the necessity for the browser to ship queries or reload the web page to render new HTML parts.
Due to this one-of-a-kind person expertise, many big-name corporations are clamoring for his or her web sites to grow to be single-page purposes.
That being mentioned, making a single-page software might be tough for Laravel builders as a result of it could require them to start out utilizing Vue.js or React as an alternative of blade templates, ensuing within the lack of many Laravel gems that save effort and time.
Now that we’ve Inertia.js, although, that’s all modified.
Why Inertia?
If Laravel builders had been to construct net SPAs with Vue earlier than Inertia, they’d should arrange APIs and return JSON information with Laravel, then use one thing like AXIOS to retrieve the information in Vue parts. They’d additionally require one thing like Vue Router to handle routes, which might imply dropping Laravel routing, in addition to middlewares and controllers.
Inertia.js, however, permits builders to construct fashionable single-page Vue, React, and Svelte apps utilizing traditional server-side routing and controllers. Inertia was designed for Laravel, Ruby on Rails, and Django builders to permit them to construct apps with out altering their coding strategies of making controllers, fetching information from a database, and rendering views
Due to Inertia.js, Laravel builders will really feel proper at dwelling.
How Inertia Works
Constructing SPA solely with Laravel and Vue will provide you with a full JavaScript web page in your frontend, however this is not going to give you a single-page app expertise. Every clicked hyperlink will trigger your client-side framework to reboot on the following web page load.
That is the place Inertia enters the image.
Inertia is principally a client-side routing library. It lets you navigate between pages with out having to reload the whole web page. That is completed through the <Hyperlink> part, which is a light-weight wrapper round an ordinary anchor tag.
While you click on an Inertia hyperlink, Inertia intercepts the press and redirects you to XHR as an alternative. The browser received’t reload the web page this manner, giving the person a full single-page expertise.
Getting Began With Inertia
To know Inertia and the best way to combine it with Laravel, we’re going to construct a weblog net app named Kinsta Weblog utilizing probably the most highly effective combo, Laravel for the backend, Vue.js for the JavaScript frontend, and Tailwind CSS for styling.
Should you’d favor to comply with this tutorial in an area setting, you need to use DevKinsta, a strong software for builders, designers, and companies that permits them to assemble single and multi-page WordPress net apps. Happily, WordPress might be simply built-in with Laravel utilizing the Corcel bundle.
Stipulations
To get probably the most out of this tutorial, try to be aware of the next:
- Laravel fundamentals (set up, database, database migrations, Eloquent Fashions, controllers, and routing)
- Vue.js fundamentals (set up, construction, and kinds)
Should you’re feeling uncertain, try these implausible Laravel free and paid tutorials. In any other case, let’s soar in.
Step One: Set up Core Components
To deal with Inertia.js and get to the enjoyable half immediately, make certain you might have the next setup able to go:
- Freshly-installed Laravel 9 mission named
kinsta-blog - Tailwind CSS CLI put in in our Laravel mission
- Two blade parts in kinsta-blog/assets/views for viewing the weblog’s homepage and a single article on the weblog as displaying beneath:
“/assets/views/index.blade.php“:
<!DOCTYPE html> <html lang="{{ str_replace('_', '-', app()->getLocale()) }}"> <head> <meta charset="utf-8" /> <meta identify="viewport" content material="width=device-width, initial-scale=1" /> <title>Kinsta Weblog</title> </head> <physique> <header> <h1>Kinsta Weblog</h1> </header> <fundamental> <h2>Learn our newest articles</h2> <part> <article> <div> <img src="https://kinsta.com/photographs/kinsta-logo.png" alt="Article thumbnail" /> </div> <h3>Title for the weblog</h3> <p> Lorem, ipsum dolor sit amet consectetur adipisicing elit. Illum rem itaque error vel perferendis aliquam numquam dignissimos, expedita perspiciatis consectetur! </p> <a href="#">Learn extra</a> </article> </part> </fundamental> <footer> <h2>Be part of our Publication</h2> <enter sort="e-mail" /> </footer> </physique> </html>“/assets/views/present.blade.php“:
<!DOCTYPE html> <html lang="{{ str_replace('_', '-', app()->getLocale()) }}"> <head> <meta charset="utf-8" /> <meta identify="viewport" content material="width=device-width, initial-scale=1" /> <title>Kinsta Weblog</title> </head> <physique> <fundamental> <article> <div> <img src="https://kinsta.com/photographs/kinsta-logo.png" alt="Article thumbnail" /> </div> <h1>Title for the weblog</h1> <p>Article content material goes right here</p> </article> </fundamental> <footer> <h2>Be part of our Publication</h2> <enter sort="e-mail" /> </footer> </physique> </html> - MySQL native database named
kinsta_blogrelated to our mission:“.env“:
DB_CONNECTION=mysql DB_HOST=127.0.0.1 DB_PORT=3306 DB_DATABASE=kinsta_blog DB_USERNAME=root DB_PASSWORD= - Article mannequin, migrations, and factories:
“app/Fashions/Article.php“:
<?php namespace AppModels; use IlluminateDatabaseEloquentFactoriesHasFactory; use IlluminateDatabaseEloquentModel; class Article extends Mannequin { use HasFactory; protected $fillable = ['title', 'excerpt', 'body']; }“database/migrations/create_articles_table.php“:
<?php use IlluminateDatabaseMigrationsMigration; use IlluminateDatabaseSchemaBlueprint; use IlluminateSupportFacadesSchema; return new class extends Migration { public perform up() { Schema::create('articles', perform (Blueprint $desk) { $table->id(); $table->string('title'); $table->textual content('excerpt'); $table->textual content('physique'); $table->timestamps(); }); } public perform down() { Schema::dropIfExists('articles'); } };“database/factories/ArticleFactory.php“:
<?php

namespace DatabaseFactories;

use IlluminateDatabaseEloquentFactoriesFactory;

class ArticleFactory extends Manufacturing facility
{

    public perform definition()
    {
        return [
            'title' => $this->faker->sentence(6),
            'excerpt' => $this->faker->paragraph(4),
            'body' => $this->faker->paragraph(15),
        ];
    }
}
That’s all we have to get began! Now let’s get all the way down to enterprise and introduce Inertia.js to our mission.
Step 2: Set up Inertia
The Inertia set up course of is split into two main phases: server-side (Laravel) and client-side (VueJs).
The official set up information within the Inertia documentation is a bit old-fashioned as a result of Laravel 9 now makes use of Vite by default, however we’ll undergo that as effectively.
1. Server-Facet
Very first thing we have to do is to put in Inertia server-side adapters with the beneath terminal command through Composer.
composer require inertiajs/inertia-laravelNow we’ll arrange our root template, which will likely be a single blade file that will likely be used to load your CSS and JS information, in addition to an Inertia root that will likely be used to launch our JavaScript software.
As a result of we’re utilizing the latest model Laravel 9 v9.3.1, we should additionally allow Vite to work its magic by together with it inside our tags in /assets/views/app.blade.php :
<!DOCTYPE html>
<html lang="{{ str_replace('_', '-', app()->getLocale()) }}">
  <head>
    <meta charset="utf-8" />
    <meta identify="viewport" content material="width=device-width, initial-scale=1" />

    <!-- Fetch mission identify dynamically -->
    <title inertia>{{ config('app.identify', 'Laravel') }}</title>

    <!-- Scripts -->
    @vite('assets/js/app.js') @inertiaHead
  </head>

  <physique class="font-sans antialiased">
    @inertia
  </physique>
</html>
Discover how we’re capable of fetch the mission title dynamically by including the Inertia attribute to the <title> tags.
We additionally added the @vite directive to the top with a view to let Vite know the trail of our JavaScript fundamental file the place we created our app and imported our CSS. Vite is a software that helps with JavaScript and CSS growth by permitting builders to view frontend modifications with out having to refresh the web page throughout native growth.
Our subsequent transfer will likely be creating HandleInertiaRequests middleware and publishing it to our mission. We will do this by firing the beneath terminal command throughout the root listing of our mission:
php artisan inertia:middlewareAs soon as that is full, head to “App/Http/Kernel” and register HandleInertiaRequests because the final merchandise in your net middlewares:
'net' => [
    // ...
    AppHttpMiddlewareHandleInertiaRequests::class,
],
2. Consumer-Facet
Subsequent, we’ve to put in our frontend Vue.js 3 dependencies in the identical approach as on the server-side:
npm set up @inertiajs/inertia @inertiajs/inertia-vue3
// or
yarn add @inertiajs/inertia @inertiajs/inertia-vue3
Subsequent, it’s good to pull in Vue.js 3:
npm set up [email protected]Then replace your major JavaScript file to initialize Inertia.js with Vue.js 3, Vite, and Laravel:
“assets/js/app.js“:
import "./bootstrap";
import "../css/app.css";

import { createApp, h } from "vue";
import { createInertiaApp } from "@inertiajs/inertia-vue3";
import { resolvePageComponent } from "laravel-vite-plugin/inertia-helpers";

createInertiaApp({
  title: (title) => `${title} - ${appName}`,
  resolve: (identify) =>
    resolvePageComponent(
      `./Pages/${identify}.vue`,
      import.meta.glob("./Pages/**/*.vue")
    ),
  setup({ el, app, props, plugin }) {
    return createApp({ render: () => h(app, props) })
      .use(plugin)
      .mount(el);
  },
});
Within the above code snippet, we use Laravel’s plugin resolvePageComponent, and we inform it to resolve our parts from the listing ./Pages/$identify.vue. It is because we’ll save our Inertia parts on this listing later in our mission, and this plugin will help us in mechanically loading these parts from the proper listing.
All what’s left is to put in vitejs/plugin-vue:
npm i @vitejs/plugin-vueAnd replace vite.config.js file:
import { defineConfig } from "vite";
import laravel from "laravel-vite-plugin";
import vue from "@vitejs/plugin-vue";

export default defineConfig({
  plugins: [
    laravel({
      input: ["resources/css/app.css", "resources/js/app.js"],
      refresh: true,
    }),
    vue({
      template: {
        transformAssetUrls: {
          base: null,
          includeAbsolute: false,
        },
      },
    }),
  ],
});
Last step is to put in our dependencies and compile our information:
npm set up

npm run dev
And voilà! You’ve received your self a working Laravel 9 software with Vue.js 3 and Vite. Now we have to see one thing taking place in motion!
Creating Inertia Pages
Do you bear in mind these two blade information (index and present) for viewing our homepage and a single article?
The one blade file we’ll want whereas utilizing Inertia is app.blade.php, which we used as soon as already once we had been putting in Inertia. So what occurs to these information now?
We’ll remodel these information from blade parts into Inertia.js parts.
Every web page in your software has its personal controller and JavaScript part with Inertia. This allows you to receive solely the information required for that web page, with out utilizing an API. Inertia pages are nothing greater than JavaScript parts, in our case, they’re Vue.js parts. They don’t have something significantly noteworthy about them. So what we will likely be doing is wrapping all HTML content material between <template> tags and something associated to JavaScript will likely be wrapped with <script> tags.
Create a folder referred to as “Pages” and transfer your information there. So we’ll have “index.blade.php” and “present.blade.php” in “./assets/js/Pages“. Then we’ll alter the file format to “.vue” as an alternative of “.blade.php” whereas making the primary letter of their names uppercase and switch its content material into an ordinary Vue.js part. We’ll exclude the <html>, <head>, and <physique> tags as a result of they’re already included in the principle root blade part.
“assets/js/Pages/Index.vue“:
<script setup>
  //
</script>

<template>
  <header>
    <h1>Kinsta Weblog</h1>
  </header>

  <fundamental>
    <h2>Learn our newest articles</h2>

    <part>
      <article>
        <div>
          <img src="https://kinsta.com/photographs/kinsta-logo.png" alt="Article thumbnail" />
        </div>

        <h3>Title for the weblog</h3>
        <p>
          Lorem, ipsum dolor sit amet consectetur adipisicing elit. Illum rem
          itaque error vel perferendis aliquam numquam dignissimos, expedita
          perspiciatis consectetur!
        </p>

        <a href="#">Learn extra</a>
      </article>
    </part>
  </fundamental>

  <footer>
    <h2>Be part of our Publication</h2>

    <enter sort="e-mail" />
  </footer>
</template>“assets/js/Pages/Present.vue“:
<script setup>
  //
</script>

<template>
  <header>
    <h1>Welcome to Kinsta Weblog</h1>
  </header>

  <fundamental>
    <article>
      <h1>Title for the weblog</h1>

      <p>Article content material goes right here</p>
    </article>
  </fundamental>

  <footer>
    <h2>Be part of our Publication</h2>

    <enter sort="e-mail" />
  </footer>
</template>
There’s something actually bothering me! We maintain copying and pasting our header and footer in every part which isn’t an excellent apply. Let’s create an Inertia primary Structure to retailer our persistent parts.
Create a folder referred to as “Layouts” in “/assets/js” and inside that folder create a file named “KinstaLayout.vue”. This file may have our header and footer and the fundamental with a <slot /> to permit all parts wrapped with this structure to be embedded inside it. This file ought to seem like this :
“assets/js/Layouts/KinstaLayout.vue“:
<script setup></script>

<template>
    <header>
    <h1>Kinsta Weblog</h1>
  </header>

  <fundamental>
        <slot />
  </fundamental>

  <footer>
    <h2>Be part of our Publication</h2>

    <enter sort="e-mail" />
  </footer>

</template>
Then we’re going to import this new structure in our pages and wrap all of the HTML content material with it. Our parts ought to seem like this:
Index.vue:
<script setup>
import KinstaLayout from "../Layouts/KinstaLayout.vue";
</script>

<template>
  <KinstaLayout>
    <part>
      <h2>Learn our newest articles</h2>
      <article>
        <div>
          <img src="https://kinsta.com/photographs/kinsta-logo.png" alt="Article thumbnail" />
        </div>

        <h3>Title for the weblog</h3>
        <p>
          Lorem, ipsum dolor sit amet consectetur adipisicing elit. Illum rem
          itaque error vel perferendis aliquam numquam dignissimos, expedita
          perspiciatis consectetur!
        </p>

        <a href="#">Learn extra</a>
      </article>
    </part>
  </KinstaLayout>
</template>Present.vue:
<script setup>
 import KinstaLayout from "../Layouts/KinstaLayout.vue";
</script>

<template>
  <KinstaLayout>
    <article>
      <h1>Title for the weblog</h1>

      <p>Article content material goes right here</p>
    </article>
  </KinstaLayout>
</template>
Laravel Routes and Inertia Render
First let’s use the “ArticleFactory” file we’ve from our tutorial place to begin and seed some articles into our database.
“database/seeders/databaseSeeder.php“:
<?php

namespace DatabaseSeeders;

use AppModelsArticle;
use IlluminateDatabaseSeeder;

class DatabaseSeeder extends Seeder
{
    public perform run()
    {
        Article::manufacturing facility(10)->create();
    }
}
Then hit the beneath terminal command emigrate your tables and seed the pretend information from the factories:
php artisan migrate:contemporary --seedThis can create 10 pretend articles within the database, which we might want to cross to our view utilizing Laravel routing. Now that we’re utilizing Inertia to render views, the best way we used to write down our routes will barely change. Let’s create our first Laravel Inertia route in “routes/net.php” and return the homepage view from “/assets/js/Pages/Index.vue“.
“routes/net.php“:
<?php

use AppModelsArticle;
use IlluminateSupportFacadesRoute;
use InertiaInertia;

Route::get('/', perform () {
    return Inertia::render('Index', [
        'articles' => Article::latest()->get()
    ]);
})->identify('dwelling');
Discover that we imported Inertia and didn’t use the view() Laravel helper to return the view, however as an alternative used Inertia::render. Inertia will even by default search for the file identify we talked about in our route within the Pages folder at “assets/js”.
Head to the index file and set the retrieved information as a prop and loop over them with v-for to indicate the outcomes. Between the script tags, outline the handed information as a prop. All Inertia must know is what sort of knowledge you’re anticipating, which in our case is an ‘Article’ object containing an array of articles.
“assets/js/Pages/Index.vue“:
<script setup>
import KinstaLayout from "../Layouts/KinstaLayout.vue";

  defineProps({
    Articles: Object,
  });
</script>
Observe that it’s sufficient to solely outline it as a prop with out returning it as a result of we’re utilizing the setup format for Vue.js 3 composition API. If we’re utilizing choices API then we would want to return it.
Let’s make the loop:
<template>
<KinstaLayout>
<h2>Learn our newest articles</h2>
<part>
// Looping over articles
<article v-for="article in articles":key="article.id">
<div>
<img src="https://kinsta.com/photographs/kinsta-logo.png" alt="Article thumbnail" />
</div>
<h3>{{article.title}}</h3>
<p>{{article.excerpt}}</p>
<a href="#">Learn extra</a>
</article>
</part>
</KinstaLayout>
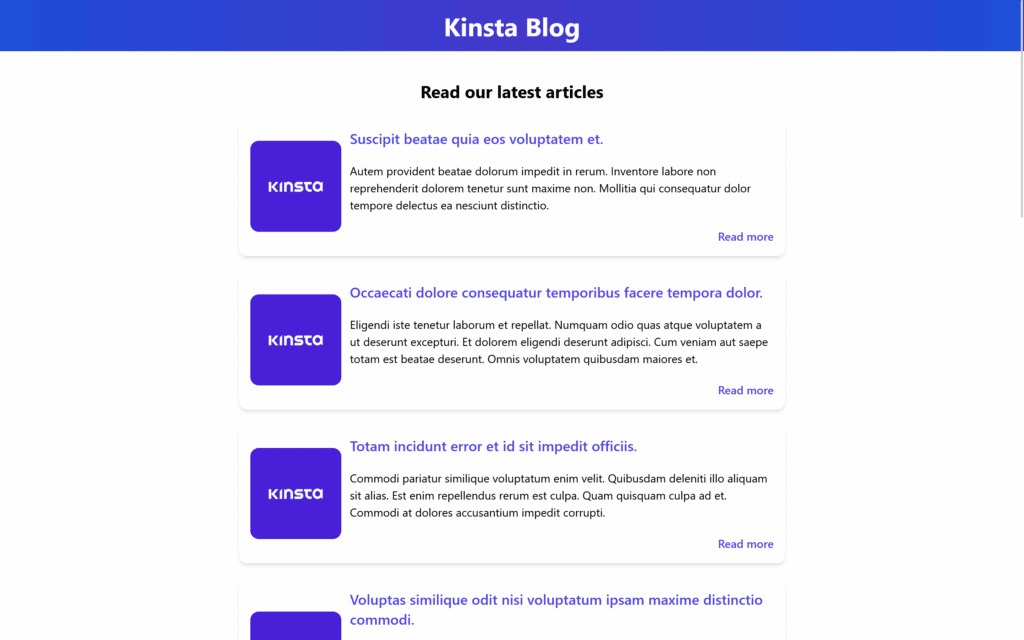
</template>npm run dev (depart it working as a result of we’re utilizing Vite) and php artisan serve to start out the laravel growth server and entry our web site, we’ll see the anticipated web page displaying all ten articles within the database.
Now, we’re utilizing Google Chrome’s Vue DevTools extension, which permits us to debug my software. Let’s present you the way our information is being handed to the part.
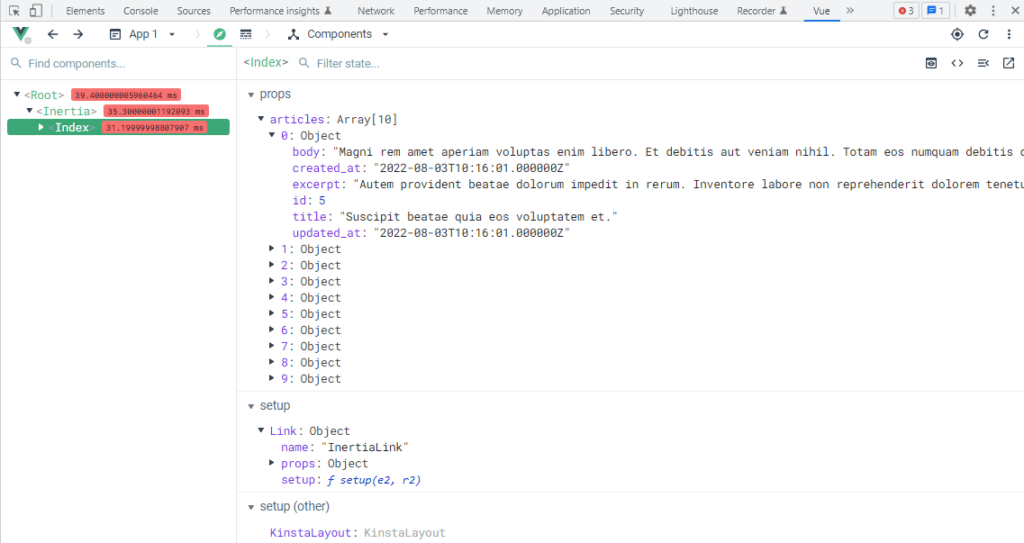
“Articles” is handed to the part as a prop object containing an array of articles; every article within the array can also be an object with properties that correspond to the information it acquired from the database. Which means any information we switch from Laravel to Inertia will likely be handled as a prop.
Utilizing Tailwind CSS With Inertia.js
Since Tailwind is already put in in our mission at the place to begin, all we have to do is inform it to learn our Inertia parts. This can be completed by enhancing “tailwind.config.js” as follows:
/** @sort {import('tailwindcss').Config} */
module.exports = {
  content material: [
    "./storage/framework/views/*.php",
    "./resources/views/**/*.blade.php",
    "./resources/js/**/*.vue",
  ],
  theme: {
    prolong: {},
  },
  plugins: [],
};
Then be sure that we’ve imported our CSS file in “assets/js/app.js“:
import "../css/app.css";And now we’re able to model our parts.
“assets/js/Pages/Index.vue“:
<script setup>
import KinstaLayout from "../Layouts/KinstaLayout.vue";

  defineProps({
    articles: Object,
  });
</script>

<template>
 <KinstaLayout>
    <h2 class="text-2xl font-bold py-10">Learn our newest articles</h2>

    <part class="space-y-5 border-b-2 pb-10">
      <article
        v-for="article in articles"
        :key="article.id"
        class="flex justify-center items-center shadow-md bg-white rounded-xl p-4 mx-auto max-w-3xl"
      >

         <img
            src="https://kinsta.com/photographs/kinsta-logo.png"
            class="w-32 h-32 rounded-xl object-cover"
            alt=""
         />

        <div class="flex flex-col text-left justify-between pl-3 space-y-5">
          <h3
            class="text-xl font-semibold text-indigo-600 hover:text-indigo-800"
          >
            <a href="#">{{ article.title }}</a>
          </h3>
          <p>
           {{ article.excerpt }}
          </p>
          <a
            href="#"
            class="text-indigo-600 hover:text-indigo-800 w-fit self-end font-semibold"
            >Learn extra</a
          >
        </div>
      </article>
    </part>
 </KinstaLayout>
</template>“assets/js/Layouts/KinstaLayout.vue“:
<script setup></script>
<template>
<Header
class="bg-gradient-to-r from-blue-700 via-indigo-700 to-blue-700 w-full text-center py-4"
>
<h1 class="text-white font-bold text-4xl">Kinsta Weblog</h1>
</Header>
<fundamental class="container mx-auto text-center">
<slot />
</fundamental>
<footer
class="bg-gradient-to-b from-transparent to-gray-300 w-full text-center mt-5 py-10 mx-auto"
>
<h2 class="font-bold text-xl pb-5">Be part of our Publication</h2>
<enter
class="rounded-xl w-80 h-12 px-3 py-2 shadow-md"
sort="e-mail"
placeholder="Write your e-mail.."
/>
</footer>
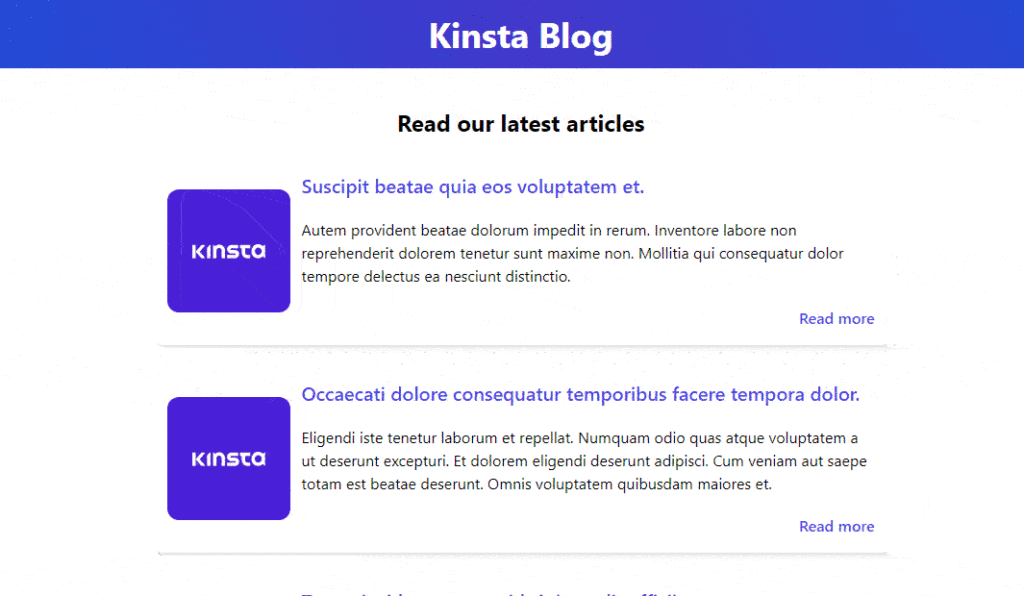
</template>Should you have a look at the browser, you’ll discover that Vite has already up to date the web page with Tailwind magic.
Inertia Hyperlinks
Now that we’ve a working homepage that may show all articles within the database, we have to create one other path to show particular person articles. Let’s create a brand new route and set the URL to an “id” wildcard:
“routes/net.php”
<?php

use AppModelsArticle;
use IlluminateSupportFacadesRoute;
use InertiaInertia;

Route::get('/', perform () {
    return Inertia::render('Index', [
        'articles' => Article::latest()->get()
    ]);
})->identify('dwelling');

Route::get('/posts/{article:id}', perform (Article $article) {
    return Inertia::render('Present', [
        'article' => $article
    ]);
})->identify('article.present');
We imported the “Article” mannequin and added a brand new path to return the Present.vue Inertia part. We additionally leveraged Laravel’s route mannequin binding, which permits Laravel to mechanically get the article we’re referring to.
All we’d like now’s a method to go to this route by clicking on a hyperlink from the homepage with out having to reload the whole web page. That is doable with Inertia’s magical software <Hyperlink>. We talked about within the introduction that Inertia makes use of <Hyperlink> as a wrapper for the standard anchor tag <a>, and that this wrapper is supposed to make web page visits as seamless as doable. In Inertia, the <Hyperlink> tag can behave as an anchor tag that performs <GET> requests, however it could actually additionally act as a <button> and a <type> on the similar time. Let’s see how we are able to apply it to our mission.
In our Index.vue, we’ll import <Hyperlink> from Inertia, and take away the anchor tags <a> and substitute it with Inertia <Hyperlink> tags. The href attribute will likely be set to the route URL that we beforehand made for viewing the article:
<script setup>
import KinstaLayout from "../Layouts/KinstaLayout.vue";
import { Hyperlink } from "@inertiajs/inertia-vue3";

defineProps({
    articles: Object,
});
</script>

<template>
    <KinstaLayout>
        <part class="space-y-5 border-b-2 pb-10">
            <h2 class="text-2xl font-bold pt-10 mx-auto text-center">
                Learn our newest articles
            </h2>

            <article
                v-for="article in articles"
                :key="article.id"
                class="flex justify-center items-center shadow-md bg-white rounded-xl p-4 mx-auto max-w-3xl"
            >
                <img
                    src="https://kinsta.com/photographs/kinsta-logo.png"
                    class="w-32 h-32 rounded-xl object-cover"
                    alt=""
                />

                <div
                    class="flex flex-col text-left justify-between pl-3 space-y-5"
                >
                    <h3
                        class="text-xl font-semibold text-indigo-600 hover:text-indigo-800"
                    >
                        <Hyperlink :href="'/posts/' + article.id">{{
                            article.title
                        }}</Hyperlink>
                    </h3>
                    <p>
                        {{ article.excerpt }}
                    </p>
                    <Hyperlink
                        :href="'/posts/' + article.id"
                        class="text-indigo-600 hover:text-indigo-800 w-fit self-end font-semibold"
                        >Learn extra
                    </Hyperlink>
                </div>
            </article>
        </part>
    </KinstaLayout>
</template>
Let’s model Present.vue with Tailwind to make it look a bit extra dressed up and prepared for our go to. And likewise we have to let it know that it ought to anticipate an “Article” object and set it as a prop:
<script setup>
import KinstaLayout from "../Layouts/KinstaLayout.vue";

defineProps({
    article: Object,
});
</script>

<template>
    <KinstaLayout>
        <article class="mx-auto mt-10 flex justify-center max-w-5xl border-b-2">
            <img
                src="https://kinsta.com/photographs/kinsta-logo.png"
                class="w-80 h-80 rounded-xl mx-auto py-5"
                alt=""
            />
            <div class="text-left flex flex-col pt-5 pb-10 px-10">
                <h1 class="text-xl font-semibold mb-10">{{ article.title }}</h1>
                <p>{{ article.physique }}</p>
            </div>
        </article>
    </KinstaLayout>
</template>
Now once we click on on the article title or “Learn extra”, we will likely be magically transported to Present.vue with out refreshing the web page.
In our case, we’re utilizing <Hyperlink> as an anchor tag that sends a GET request to the route and return again the brand new information, however we are able to use <Hyperlink> to additionally POST, PUT, PATCH and DELETE
“routes/net.php“:
<Hyperlink href="https://kinsta.com/logout" methodology="submit" as="button" sort="button">Logout</Hyperlink>Laravel Inertia Ideas and Tips You Ought to Know
We now have a working SPA constructed with Laravel, Inertia, and Tailwind CSS. However inertia will help us obtain a lot extra. It’s time to amass some Inertia strategies that can assist each builders and software guests.
Producing URLs
You could have seen we’ve been including names to our Laravel routes with out utilizing it. Inertia permits us to make use of our named routes inside our parts as an alternative of manually writing down the total route.
We will obtain this by putting in the Ziggy bundle in our mission:
composer require tightenco/ziggyThen head to “assets/js/app.js” and replace it like this:
import "./bootstrap";
import "../css/app.css";

import { createApp, h } from "vue";
import { createInertiaApp } from "@inertiajs/inertia-vue3";
import { resolvePageComponent } from "laravel-vite-plugin/inertia-helpers";
import { ZiggyVue } from "../../vendor/tightenco/ziggy/dist/vue.m";

createInertiaApp({
    title: (title) => `${title} - ${appName}`,
    resolve: (identify) =>
        resolvePageComponent(
            `./Pages/${identify}.vue`,
            import.meta.glob("./Pages/**/*.vue")
        ),
    setup({ el, app, props, plugin }) {
        return createApp({ render: () => h(app, props) })
            .use(plugin)
            .use(ZiggyVue, Ziggy)
            .mount(el);
    },
});
Head to “/assets/views/app.blade.php” and replace the top with @route directive:
<!DOCTYPE html>
<html lang="{{ str_replace('_', '-', app()->getLocale()) }}">

<head>
    <meta charset="utf-8">
    <meta identify="viewport" content material="width=device-width, initial-scale=1">

    <!-- Fetch mission identify dynamically -->
    <title inertia>{{ config('app.identify', 'Laravel') }}</title>

    <!-- Scripts -->
    @routes
    @vite('assets/js/app.js')
    @inertiaHead
</head>

<physique class="font-sans antialiased">
    @inertia
</physique>

</html>
…and refresh your NPM packages by hitting the beneath two terminal instructions:
npm set up && npm run devThis bundle permits us to make use of named routes inside our Inertia parts, so let’s head to Index.vue and take away the outdated guide route and substitute it with the route identify whereas passing the information usually as if we had been in our controller.
We’ll substitute this:
<Hyperlink :href="'/posts/' + article.id">
   {{ article.title }}
</Hyperlink>
…with this:
<Hyperlink :href="https://kinsta.com/weblog/laravel-inertia/route("article.present', article.id)">
   {{ article.title }}
</Hyperlink>
This can give us the very same habits we had nevertheless it’s extra developer pleasant and intensely useful when your route expects many parameters.
Progress Indicators
This is without doubt one of the nicest options of Inertia.js; as a result of SPA supplies an interactive person expertise, having fixed suggestions whether or not a request is loading could be a implausible addition to the appliance. This may be completed by a separate library Inertia is providing.
The “@inertiajs/progress” library is a wrapper round NProgress that conditionally exhibits the loading indicators based on Inertia occasions. You don’t actually need to understand how this works behind the scenes, so let’s simply get it working.
We will set up this library with the beneath terminal command:
npm set up @inertiajs/progressAs soon as it’s put in, we have to import it in “assets/js/app.js”
import "./bootstrap";
import "../css/app.css";

import { createApp, h } from "vue";
import { createInertiaApp } from "@inertiajs/inertia-vue3";
import { resolvePageComponent } from "laravel-vite-plugin/inertia-helpers";
import { ZiggyVue } from "../../vendor/tightenco/ziggy/dist/vue.m";
import { InertiaProgress } from "@inertiajs/progress";

createInertiaApp({
    title: (title) => `${title} - ${appName}`,
    resolve: (identify) =>
        resolvePageComponent(
            `./Pages/${identify}.vue`,
            import.meta.glob("./Pages/**/*.vue")
        ),
    setup({ el, app, props, plugin }) {
        return createApp({ render: () => h(app, props) })
            .use(plugin)
            .use(ZiggyVue, Ziggy)
            .mount(el);
    },
});

InertiaProgress.init({ colour: "#000000", showSpinner: true });
This can present a loading bar and a loading spinner in black colour, however we are able to change the colour together with different useful choices that may be discovered on Inertia.js progress indicator documentation.

Scroll Administration
In some instances, you could need to navigate to a brand new web page whereas sustaining the identical scroll place. Maybe you’ll want this in the event you enable customers to go away feedback; this can submit a type and cargo the brand new remark from the database into your part; you’ll need this to occur with out the person dropping scroll place. Inertia takes care of this for us.
In our case, let’s apply this to our <Hyperlink> tag in Index.vue. To protect scroll place whereas redirecting to a distinct web page with Inertia’s <Hyperlink>, all what we have to do is so as to add preserve-scroll attribute to the <Hyperlink>:
<Hyperlink :href="https://kinsta.com/weblog/laravel-inertia/route("article.present', article.id)" preserve-scroll>
  {{ article.title }}
</Hyperlink>
Website positioning Ideas
Because the beginning of SPAs, folks have been involved about SEO (Website positioning). It’s generally recognized that in the event you use the SPA strategy, search engines like google and yahoo may have a tough time crawling your net software as a result of all the things is client-side rendered, leading to your web site not displaying on the high of search outcomes; nonetheless, how come these fashionable platforms like Fb and Github at the moment are SPAs and nonetheless performing effectively in Website positioning?
Effectively, this isn’t a mission: unattainable anymore. Inertia is providing just a few options to assist your SPA grow to be Website positioning pleasant.
Inertia Vue SSR With Laravel and Vite
Search engines like google and yahoo are at all times on the lookout for HTML in your web site with a view to establish the content material; nonetheless, in the event you don’t have HTML in your URLs, this job will get tougher. When creating SPAs, all you might have in your web page is JavaScript and JSON. Inertia launched a Server-Facet Rendering (SSR) characteristic which you can add to your software. This enables your app to pre-render an preliminary web page go to on the server after which ship the rendered HTML to the browser. This lets customers see and work together along with your pages earlier than they absolutely load, and it additionally has different benefits, like shortening the time it takes search engines like google and yahoo to index your web site.
To summarize the way it works, Inertia will establish whether or not it’s working on a Node.js server and can render the part names, properties, URL, and property model to HTML. This can present the person and the search engine with virtually all the things your web page has to supply.
Nonetheless, as a result of we’re coping with Laravel, this makes little sense as a result of Laravel is a PHP framework and doesn’t run on a Node.js server. Due to this fact, we’ll ahead the request to a Node.js service, which can render the web page and return HTML. This can make our Laravel Vue software Website positioning pleasant by default.
First, we have to set up the Vue.js SSR npm bundle:
npm set up @vue/server-rendererOne other useful Inertia “NPM” bundle supplies a easy “HTTP” server. It’s strongly really helpful that you simply set up it:
npm set up @inertiajs/serverThen, in “assets/js/”, we’ll add a brand new file named ssr.js. This file will likely be similar to the app.js file we created when putting in Inertia, solely it’ll execute in Node.js slightly than the browser:
import { createSSRApp, h } from "vue";
import { renderToString } from "@vue/server-renderer";
import { createInertiaApp } from "@inertiajs/inertia-vue3";
import createServer from "@inertiajs/server";
import { resolvePageComponent } from "laravel-vite-plugin/inertia-helpers";
import { ZiggyVue } from "../../vendor/tightenco/ziggy/dist/vue.m";

const appName = "Laravel";

createServer((web page) =>
    createInertiaApp({
        web page,
        render: renderToString,
        title: (title) => `${title} - ${appName}`,
        resolve: (identify) =>
            resolvePageComponent(
                `./Pages/${identify}.vue`,
                import.meta.glob("./Pages/**/*.vue")
            ),
        setup({ app, props, plugin }) {
            return createSSRApp({ render: () => h(app, props) })
                .use(plugin)
                .use(ZiggyVue, {
                    ...web page.props.ziggy,
                    location: new URL(web page.props.ziggy.location),
                });
        },
    })
);
Ensure that to not embrace all the things within the ssr.js file because it is not going to be seen to guests; this file is just for search engines like google and yahoo and browsers to indicate the information inside your web page, so embrace solely what’s necessary to your information or solely what’s going to make your information out there.
“By default, Inertia’s SSR server will function on port 13714. Nonetheless, you’ll be able to change this by offering a second argument to the createServer methodology.” Inertia DOCss.
The Inertia.js DOCs aren’t explaining the best way to combine Inertia SSR with Vite, however we’ll undergo this now. Head to vite.config.js and paste the beneath:
import { defineConfig } from "vite";
import laravel from "laravel-vite-plugin";
import vue from "@vitejs/plugin-vue";

export default defineConfig({
    plugins: [
        laravel({
            input: "resources/js/app.js",
            ssr: "resources/js/ssr.js",
        }),
        vue({
            template: {
                transformAssetUrls: {
                    base: null,
                    includeAbsolute: false,
                },
            },
        }),
    ],
});
Subsequent, head to bundle.json and alter the construct script:
"construct": "vite construct && vite construct --ssr"Now if we run npm run construct, Vite will construct our SSR bundle for manufacturing. For extra details about this you will go to Inertia SSR DOCs and Vite SSR DOCs.
Title and Meta
As a result of JavaScript purposes are rendered throughout the doc’s <physique>, they can’t render markup to the doc’s <head> as a result of it’s exterior of their scope. Inertia has a <Head> part that could be used to set the web page <title>, <meta> tags, and different <head> parts.
So as to add <head> ingredient to your Web page, we should import <head> from Inertia similar as we did with <Hyperlink> part:
import { Head } from '@inertiajs/inertia-vue3'

<Head>
  <title>Kinsta Weblog</title>
  <meta identify="description" content material="Kinsta weblog for builders">
</Head>
We will additionally add a world title for all pages, this can add your software identify subsequent to the title on each web page. We already did that within the app.js file:
createInertiaApp({
    title: (title) => `${title} - ${appName}`,
    //
});
Which implies that if we add <head title="Homepage"> in our software’s homepage with a title, this will likely be rendered like this: <title>Residence - My App</title>.
Monitoring Your App
Pace is without doubt one of the most necessary components in optimizing Website positioning efficiency in your web site. Should you use WordPress in your web site, because of this, Kinsta APM will help you in monitoring and holding an in depth eye in your software in motion. It helps you establish WordPress efficiency points and is obtainable totally free on all Kinsta-hosted websites.
Abstract
Inertia.js is without doubt one of the most vital applied sciences out there; combine it with Laravel and you’ve got a contemporary Single-Web page software constructed with PHP and JavaScript. Taylor Otwell, the creator of Laravel, is so fascinated with Inertia that Laravel has launched its hottest starter kits, Laravel Breeze and Jetstream, with Inertia and SSR help.
See how one can get began utilizing Inertia.js and the best way to use it with Laravel, Vue.js, and Tailwind CSS to create a contemporary weblog net ap on this information 
Should you’re a Laravel fan or an expert developer, Inertia.js will undoubtedly catch your eye. On this tutorial, we made a really primary and easy weblog in just a few minutes. There’s nonetheless loads to find out about inertia, and this may occasionally solely be the primary of many articles and tutorials.
What else about Laravel would you want us to discover? Tell us within the feedback part beneath.
Get all of your purposes, databases and WordPress websites on-line and below one roof. Our feature-packed, high-performance cloud platform contains:
- Simple setup and administration within the MyKinsta dashboard
- 24/7 knowledgeable help
- The most effective Google Cloud Platform {hardware} and community, powered by Kubernetes for optimum scalability
- An enterprise-level Cloudflare integration for pace and safety
- International viewers attain with as much as 35 information facilities and 275+ PoPs worldwide
Take a look at it your self with $20 off your first month of Utility Internet hosting or Database Internet hosting. Discover our plans or speak to gross sales to search out your greatest match.
