
Making a multisite in WordPress means that you can handle updates and different administrative duties throughout a number of web sites. Moderately than dealing with many particular person websites, you’re capable of construct a centralized community on a single WordPress set up. Nonetheless, chances are you’ll be disillusioned by WordPress’s default choices for subsite domains.
Thankfully, you possibly can simply create a WordPress multisite with completely different domains. By merely including some code to your web site recordsdata, you possibly can flip your single-site set up right into a community. Then, you possibly can connect new web sites and make them distinctive with area mapping.
On this publish, we’ll clarify why you may think about using WordPress multisite. Then, we’ll present you tips on how to create customized domains for every subsite in your community. Let’s get began!
Why Create a WordPress Multisite With Completely different Domains?
With WordPress multisite, you possibly can create a community of internet sites in a single set up. These websites will share the identical core WordPress recordsdata and may comprise the identical plugins and themes.
Once you create a multisite, you possibly can routinely change into the brand new community administrator. Utilizing a central dashboard, you’ll be capable of handle all your websites in a single place. Any web site admins will now be capable of create new web sites and work on them independently when you management the final community.
This may be an environment friendly method for companies or colleges to deal with distinctive web sites for every of their places. For instance, the College of Mary Washington has a community that results in info for every particular person campus:

Once you activate WordPress multisite, you possibly can select to make use of subdomains or subdirectories. Right here’s an instance of how these would look:
- Subdomains: site1.kinsta.com
- Subdirectories: kinsta.com/site1
As you possibly can see, each of those choices could make hyperlinks longer and perceivably much less credible. Nonetheless, you possibly can implement area mapping to arrange a customized area construction. By pointing to an exterior area, like “kinsta.com,” guests will instantly know that every particular person web site is part of your community.
Though WordPress multisite can have many advantages, there are some downsides to contemplate. As an example, the entire websites in your community will use the identical sources, to allow them to face downtime each time your server is down.
Moreover, some plugins aren’t designed to work on multisites, which might result in software program conflicts or bugs. Nonetheless, when you uncover any critical points after you’ve established your multisite, you possibly can at all times revert to a single-site set up once more.
How To Create a WordPress Multisite With Completely different Domains (in 4 Steps)
Earlier than you begin transitioning your WordPress web site to a community, you’ll want to verify your net host can help this course of. At Kinsta, we offer WordPress multisite internet hosting that makes it straightforward to start out managing a number of domains:
With a built-in caching system, Kinsta may also help you optimize the efficiency of your WordPress multisite community. Due to international information facilities and highly effective infrastructure, you received’t have to fret about gradual web page pace or frequent downtime.
Everytime you’re able to improve your internet hosting, you possibly can migrate your web site to Kinsta at no cost! When you’re all set with a reliable net host, you’re prepared to start out making a WordPress multisite with completely different domains.
Step 1: Backup Your Web site
Should you’re creating a brand new web site from scratch, you possibly can activate multisite as you put in WordPress. Utilizing MyKinsta is extremely simple. Merely click on on Add web site in your dashboard. Then, make sure you choose Set up WordPress multisite:
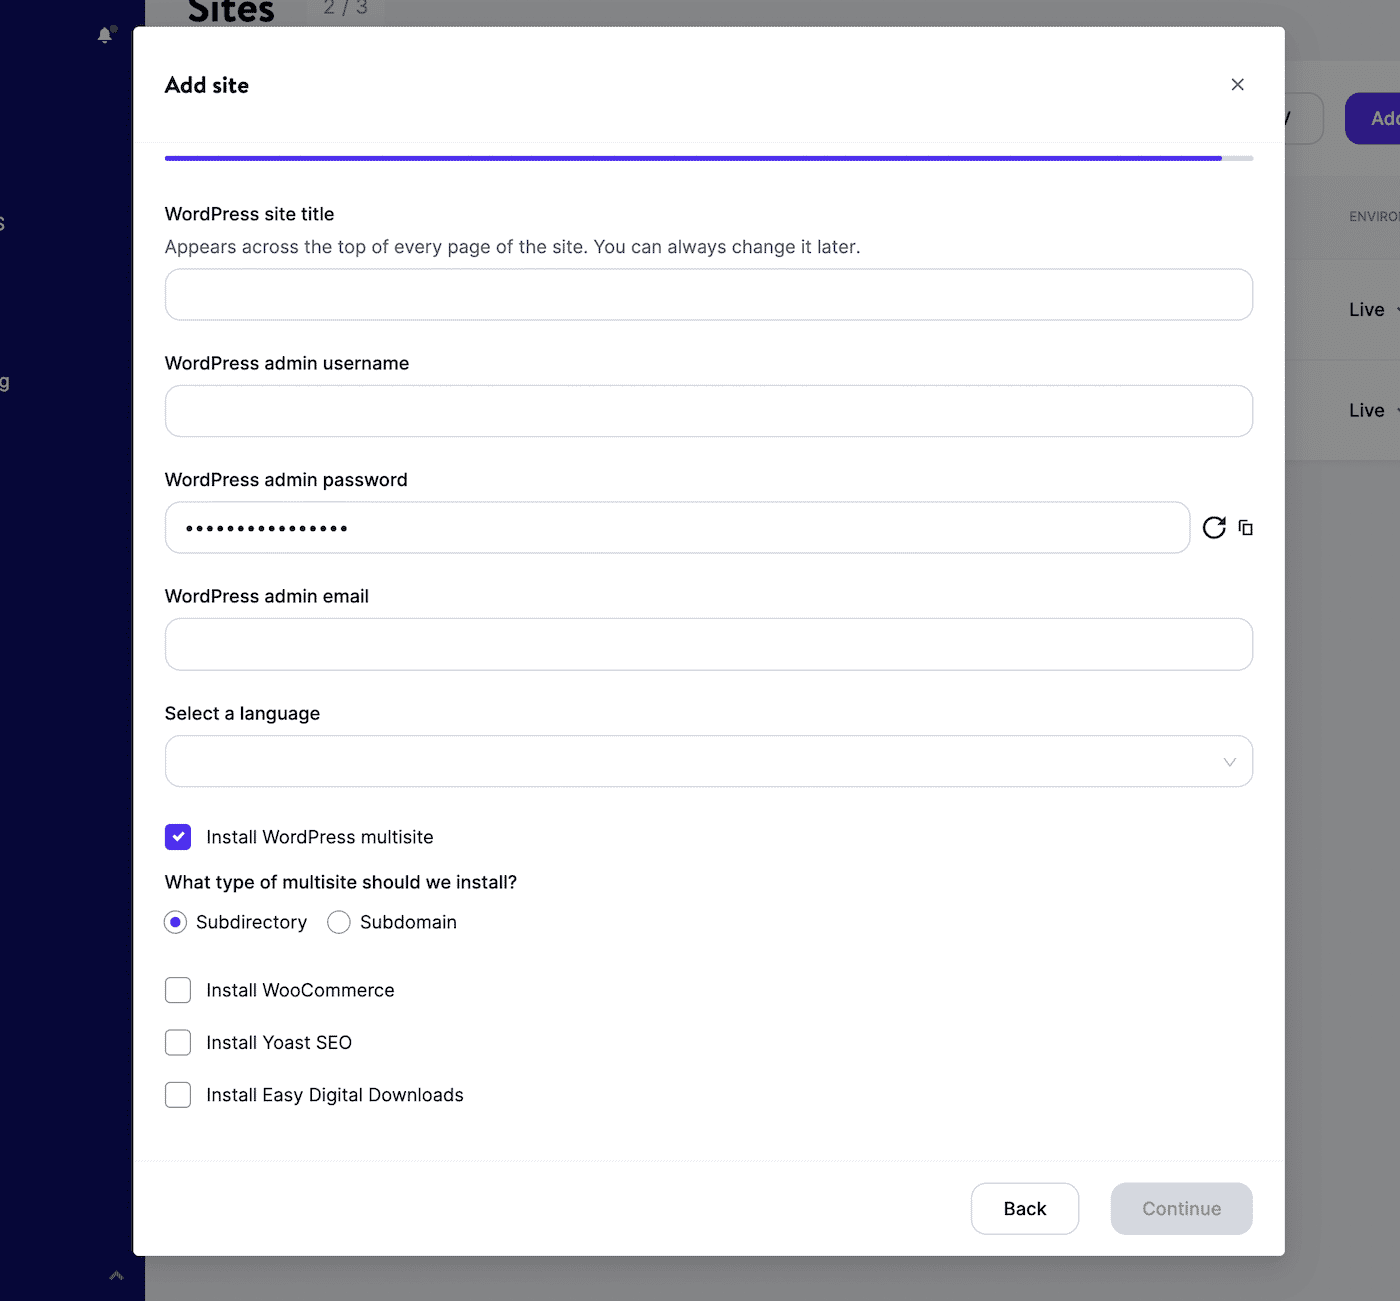
You’ll additionally want to decide on both a subdirectory or subdomain. After you click on on Proceed, you’ll be capable of log into your new WordPress multisite dashboard.
Nonetheless, chances are you’ll have already got an present web site. On this case, it’s finest to start out by backing up your web site. Because you’ll be modifying your core WordPress recordsdata, this is a vital step to keep away from shedding your hard-earned content material and any crucial information.
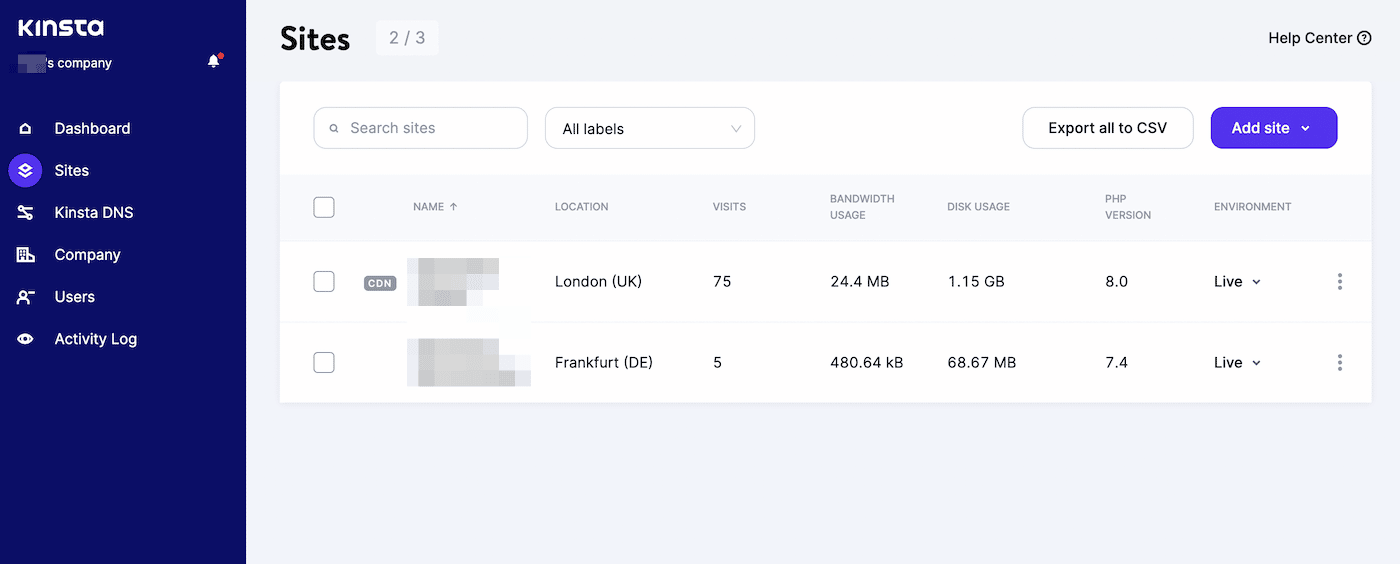
When you migrate your web site to Kinsta, check in to your MyKinsta dashboard. Then, navigate to Websites and choose your web site:
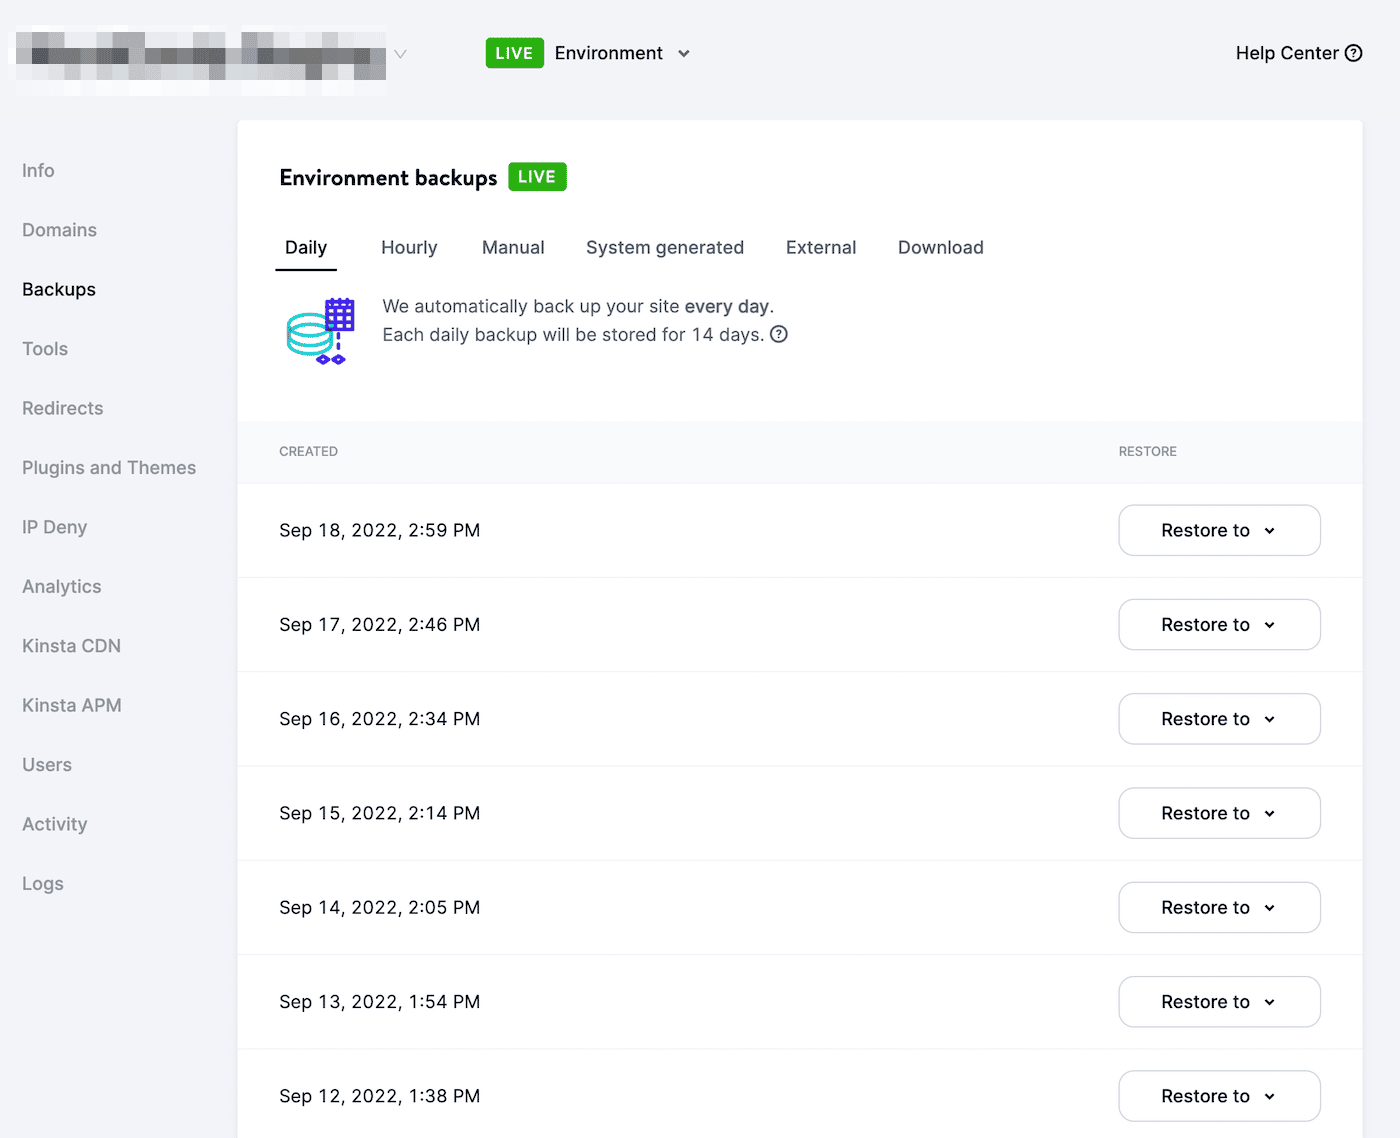
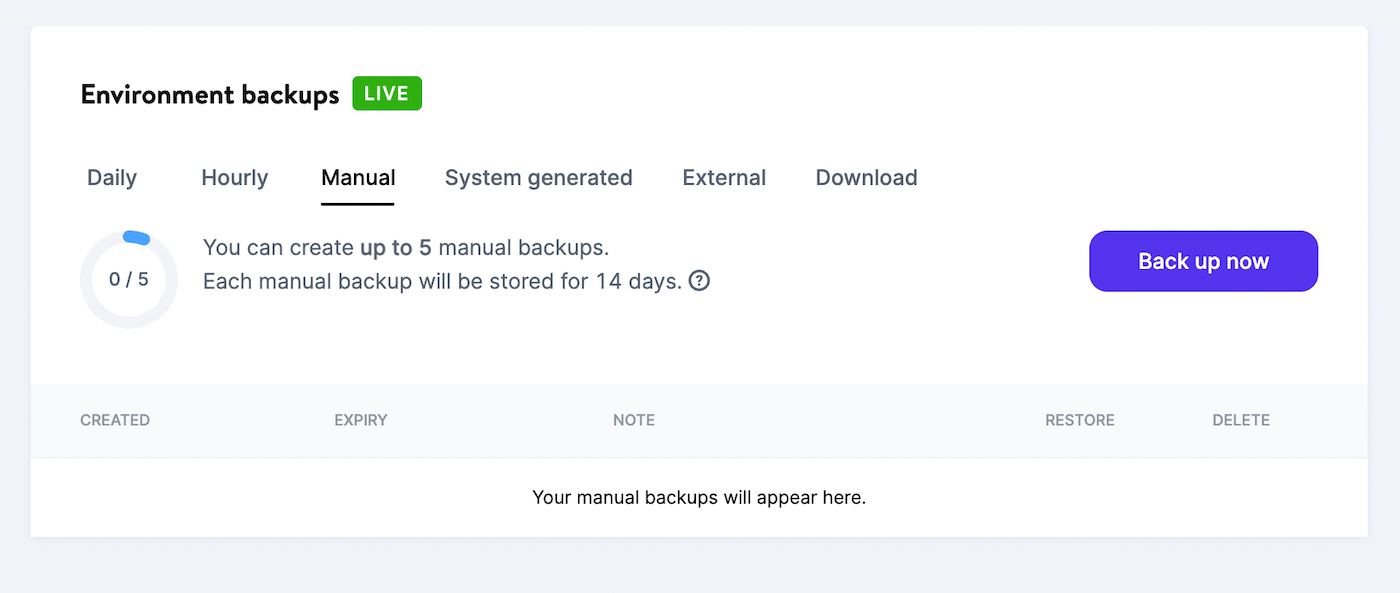
From the listing of tabs on the left, click on on Backups. Right here, you’ll see an inventory of each day automated backups that Kinsta has carried out:
Should you discover a latest backup, you possibly can proceed to the subsequent step. To carry out a handbook backup, nonetheless, choose the Handbook > Again up now choice:
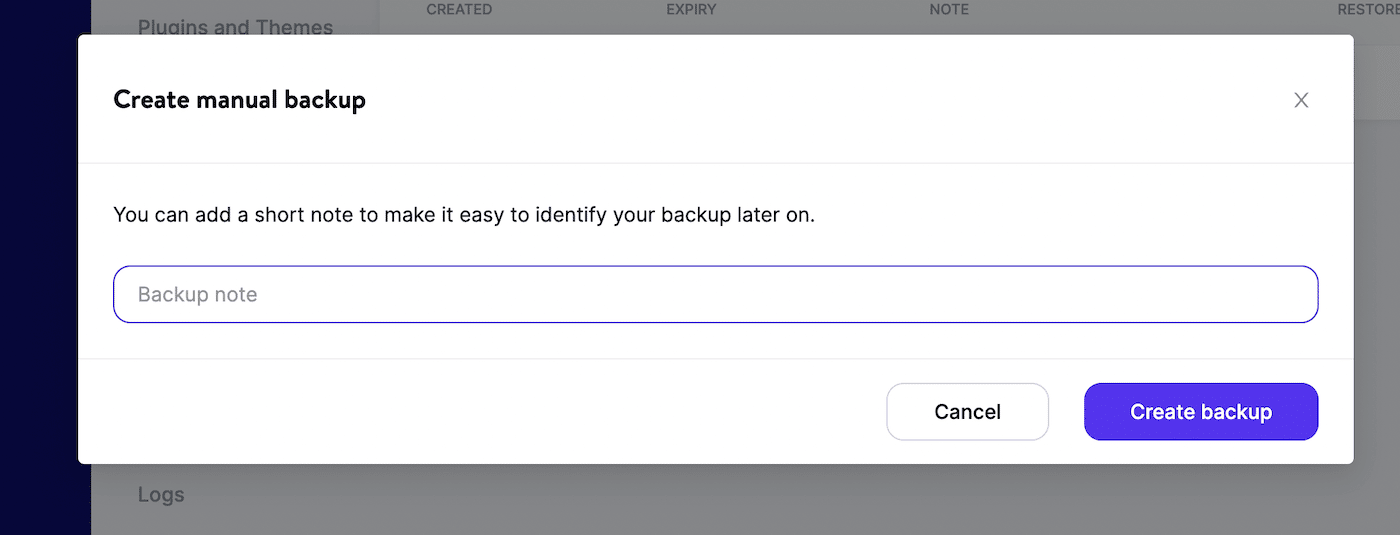
Earlier than you create the backup, you’ll be capable of add a brief be aware to establish it later. Lastly, click on on Create backup:
You possibly can simply restore this backup if something goes fallacious whereas organising multisite. This may revert any adjustments to your authentic web site.
Step 2: Set Up Multisite
Now it’s time to transition your single-site WordPress set up right into a multisite community! To do that, you’ll must edit your wp-config.php and .htaccess recordsdata. First, use a code editor to open your web site’s wp-config.php file. Right here, discover this line:
/* That is all, cease modifying! Glad running a blog. */Proper above this, paste the next code:
outline( 'WP_ALLOW_MULTISITE', true );Lastly, save the file. Subsequent, open your WordPress dashboard and go to Instruments > Community Setup:
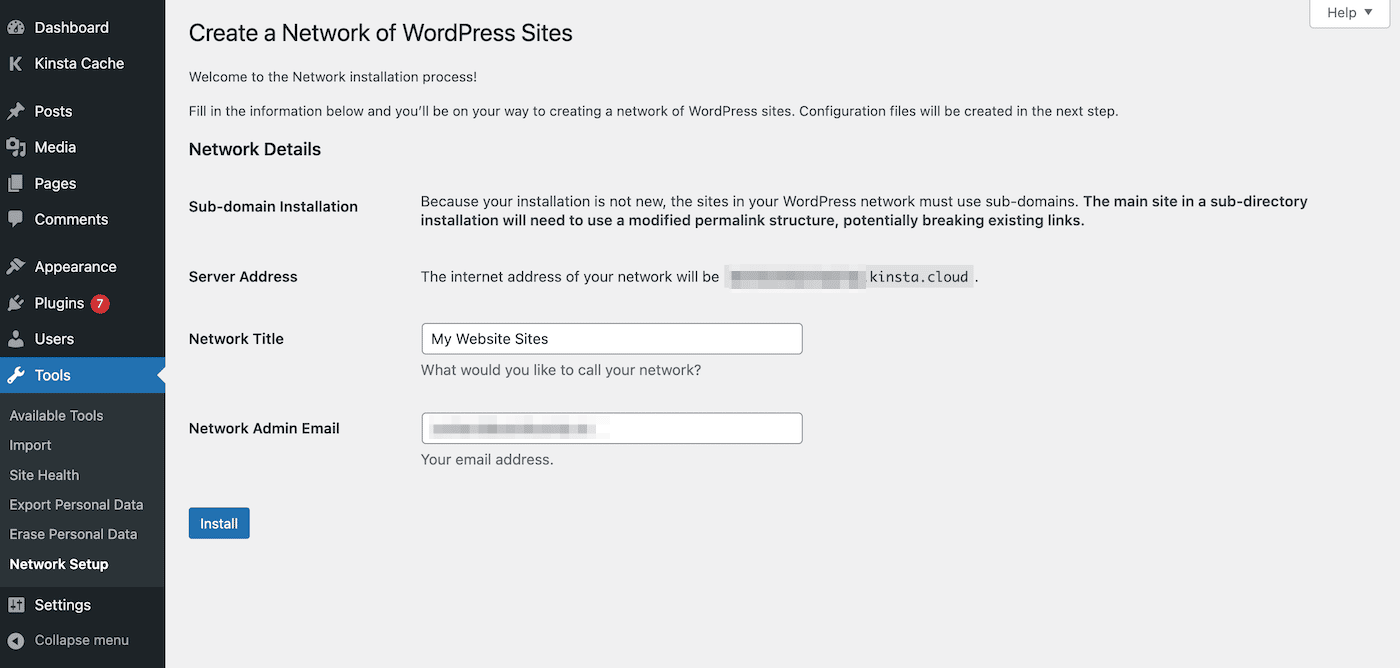
On this web page, you’ll be capable of select whether or not to make use of subdomains or subdirectories in your community. Nonetheless, older WordPress installations will solely be capable of use subdomains. Then, enter a title and admin electronic mail for the community.
After you hit Set up, you’ll be taken to a configuration web page. This offers you directions on tips on how to replace your core recordsdata to help multisite:
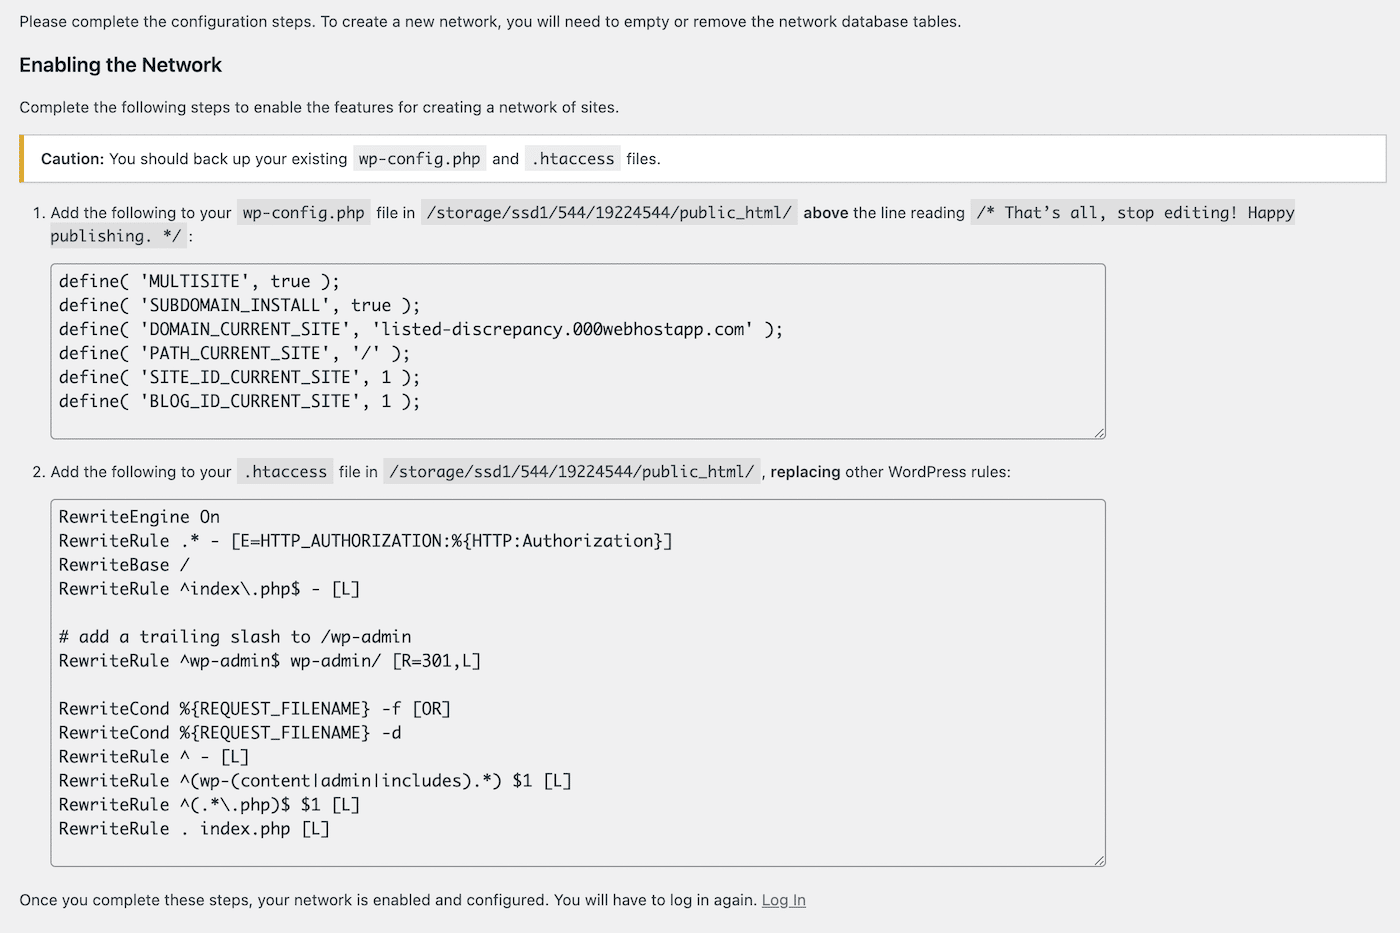
When you add the proper coding to your wp-config.php and .htaccess recordsdata, you’ll must signal into your WordPress dashboard once more. If finished appropriately, this could now take you to your new multisite dashboard.
Step 3: Add Websites to the Multisite Community
To start out constructing your community, you possibly can create a brand new web site. First, navigate to Websites > Add New:
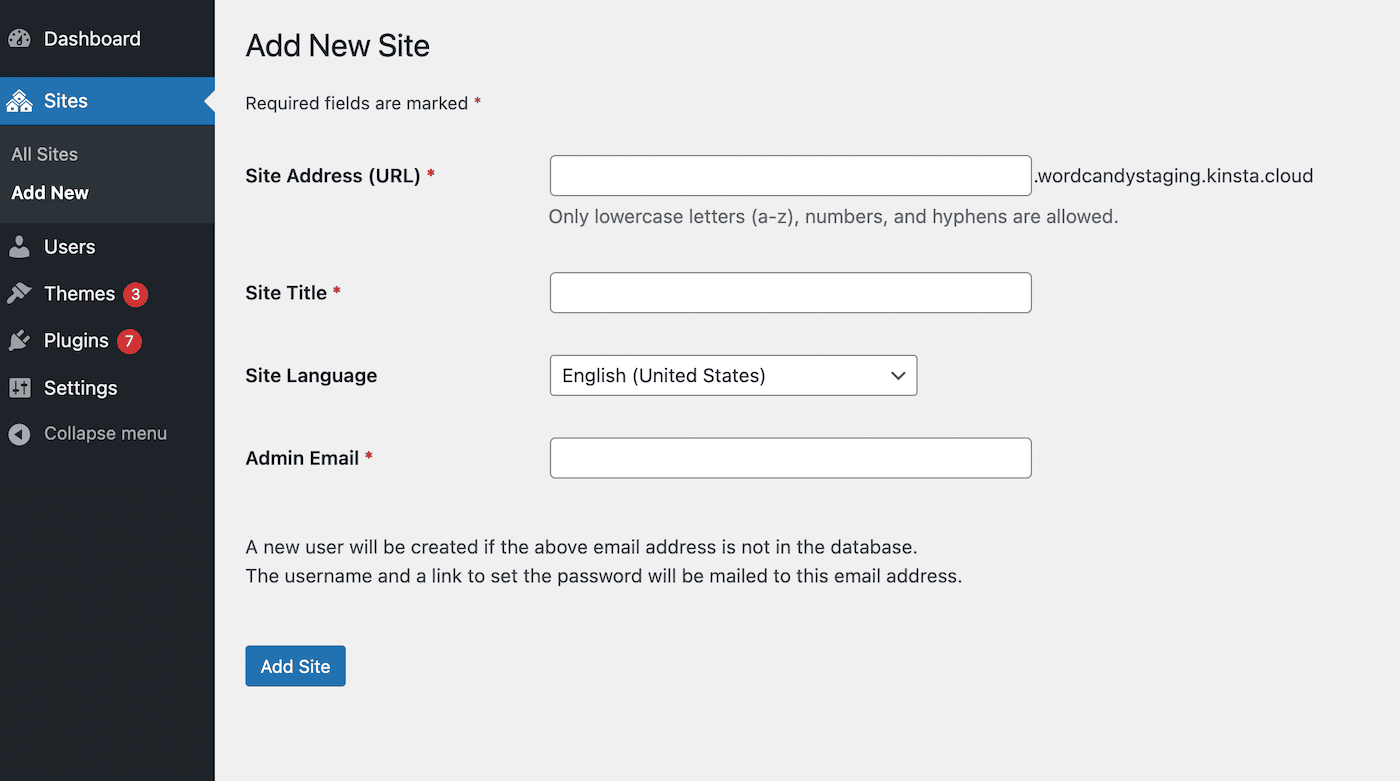
On this configuration web page, you’ll be capable of customise your new web site. You can begin by getting into the Website Handle, which might be the URL for the web site.
For this setting, it’s going to at present solely enable values which are subdomains of the principle web site. Nonetheless, we’ll be altering this to a customized area within the following step.
Subsequent, select a title, essential language, and admin electronic mail. To complete creating the web site, click on on Add Website. After this, you possibly can proceed so as to add as many web sites to the community as you want.
Step 4: Map a Area for Every Website
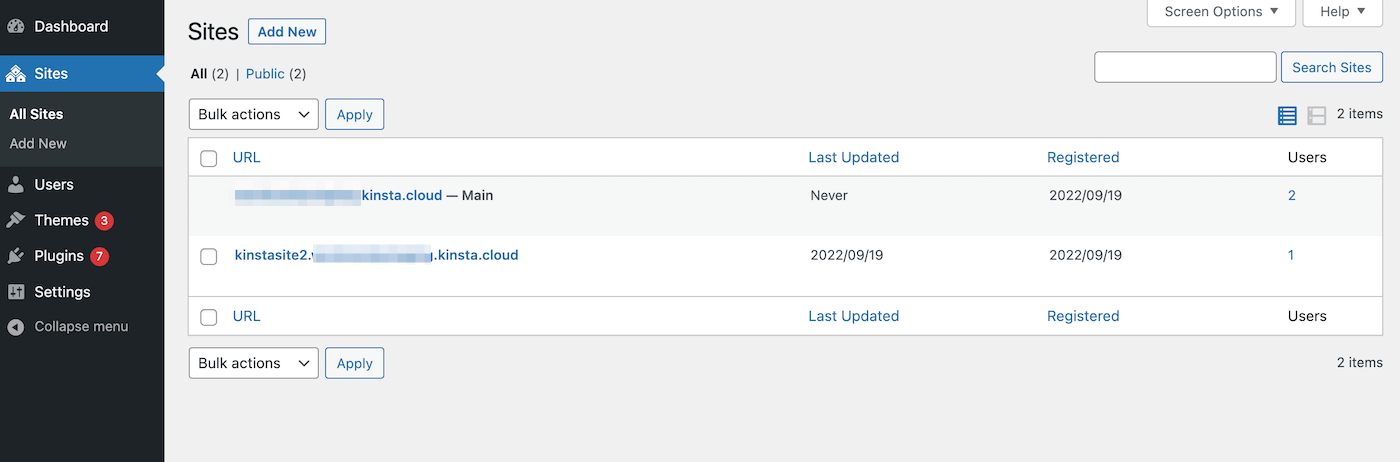
For the ultimate step, you possibly can map your subdomains or subfolders to a customized area. Moderately than having prolonged, complicated URLs, you possibly can create distinctive addresses in your web sites. To do that, navigate to Websites > All Websites in your multisite dashboard:
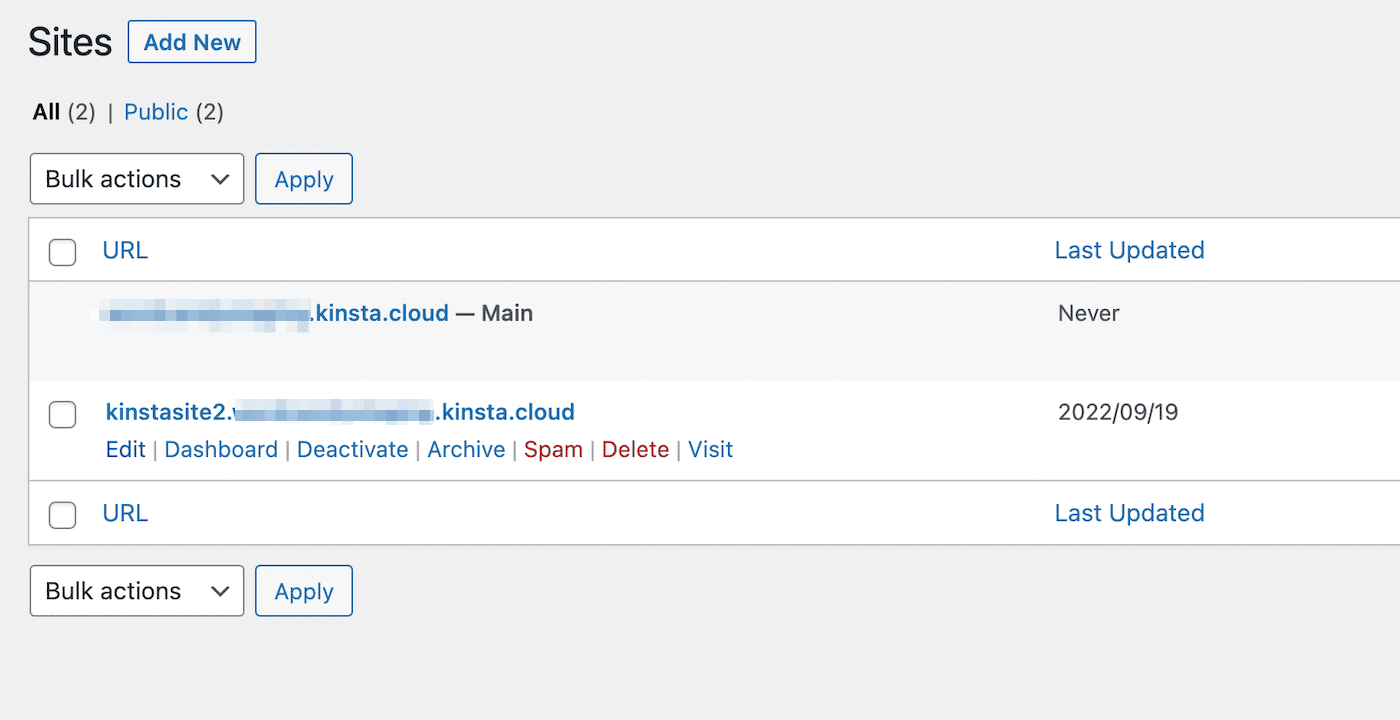
Hover over the brand new web site to view its configuration choices. Then, click on on Edit:
Right here, you’ll see the present Website Handle, which incorporates the subdomain. Take away this and change it with a customized area:
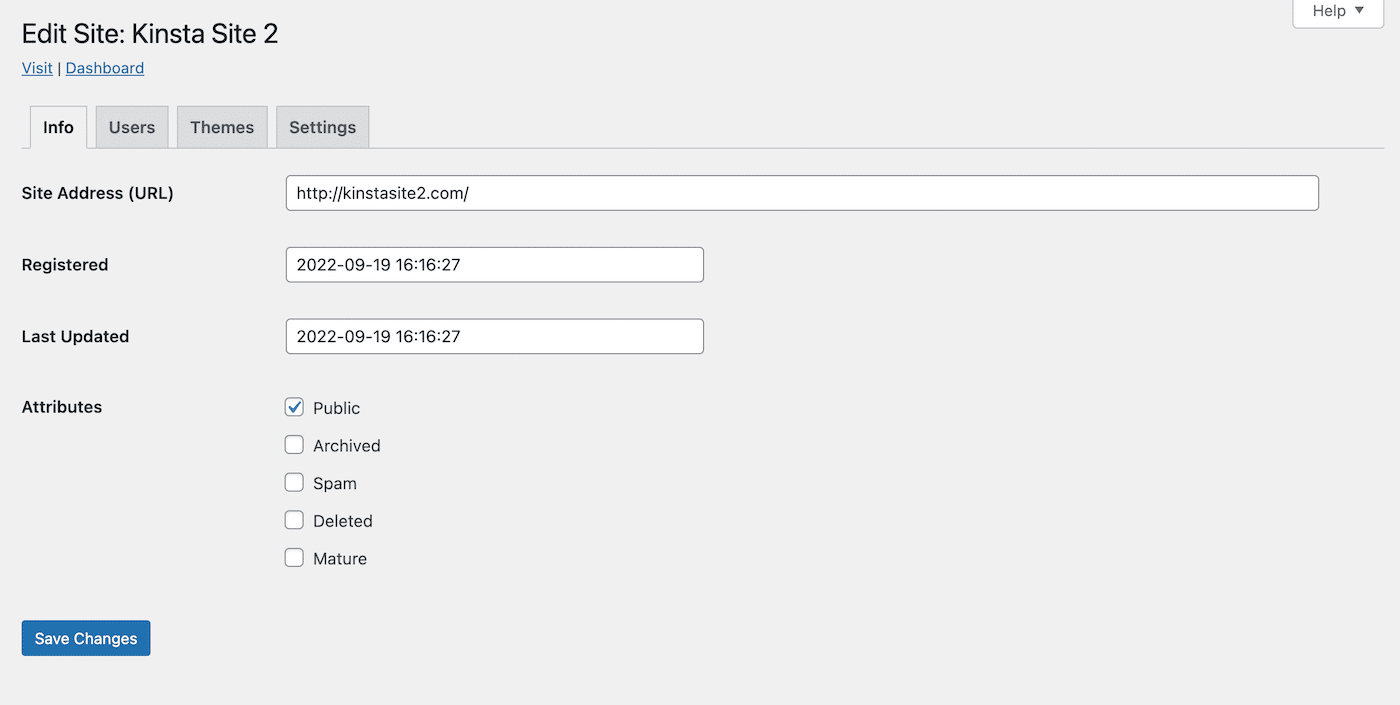
Then, save your adjustments. You should definitely repeat this course of for every subsite in your community.
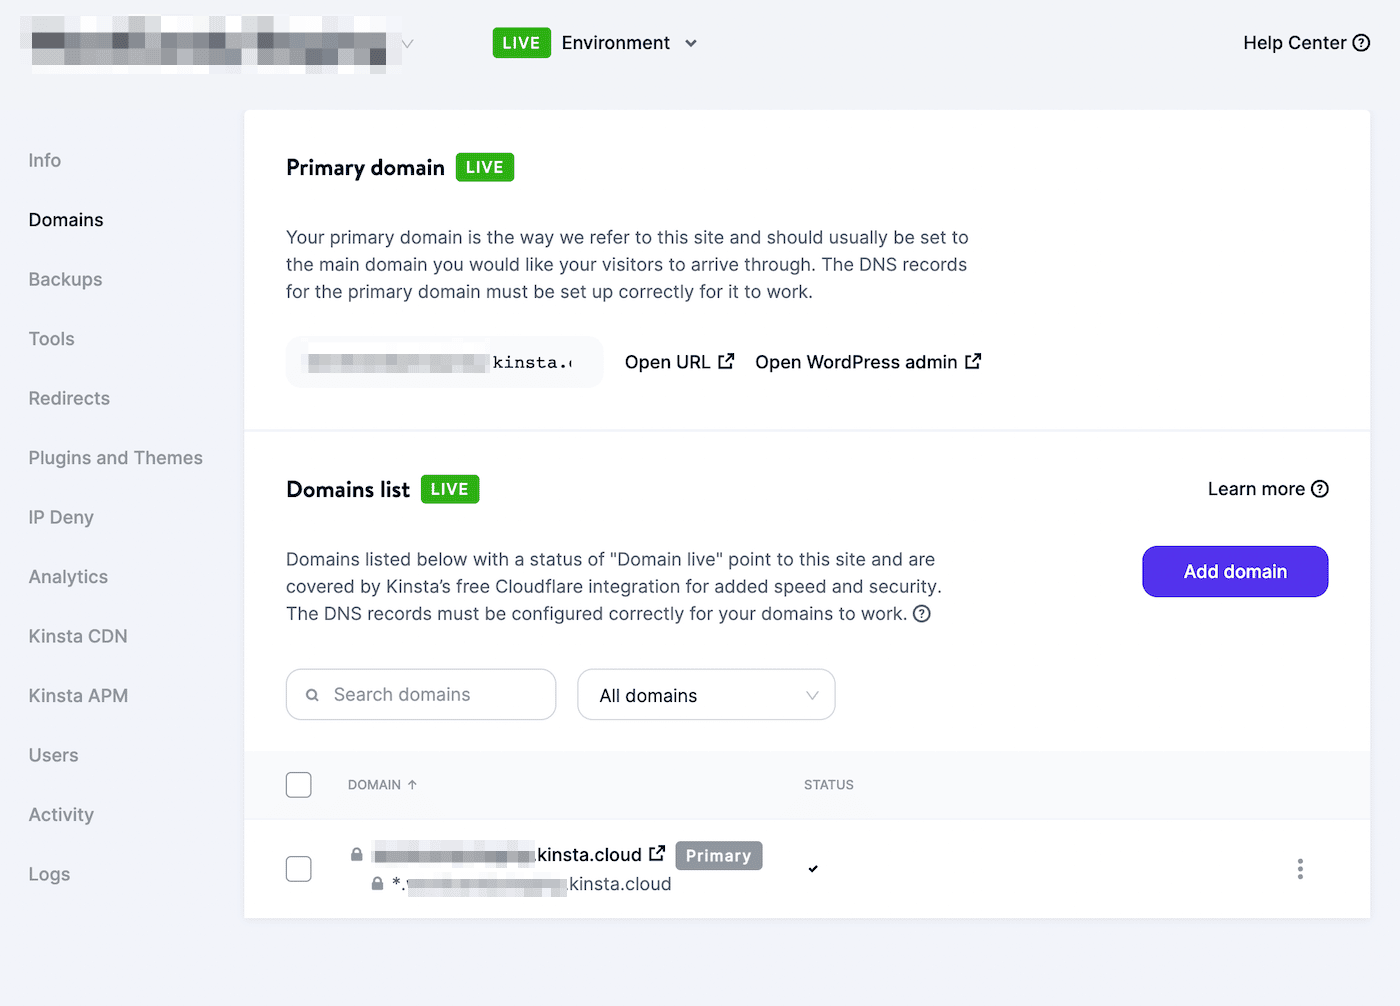
Subsequent, you’ll want so as to add these extra subsite domains to your internet hosting account. In your MyKinsta dashboard, open the Domains web page and click on on Add Area:
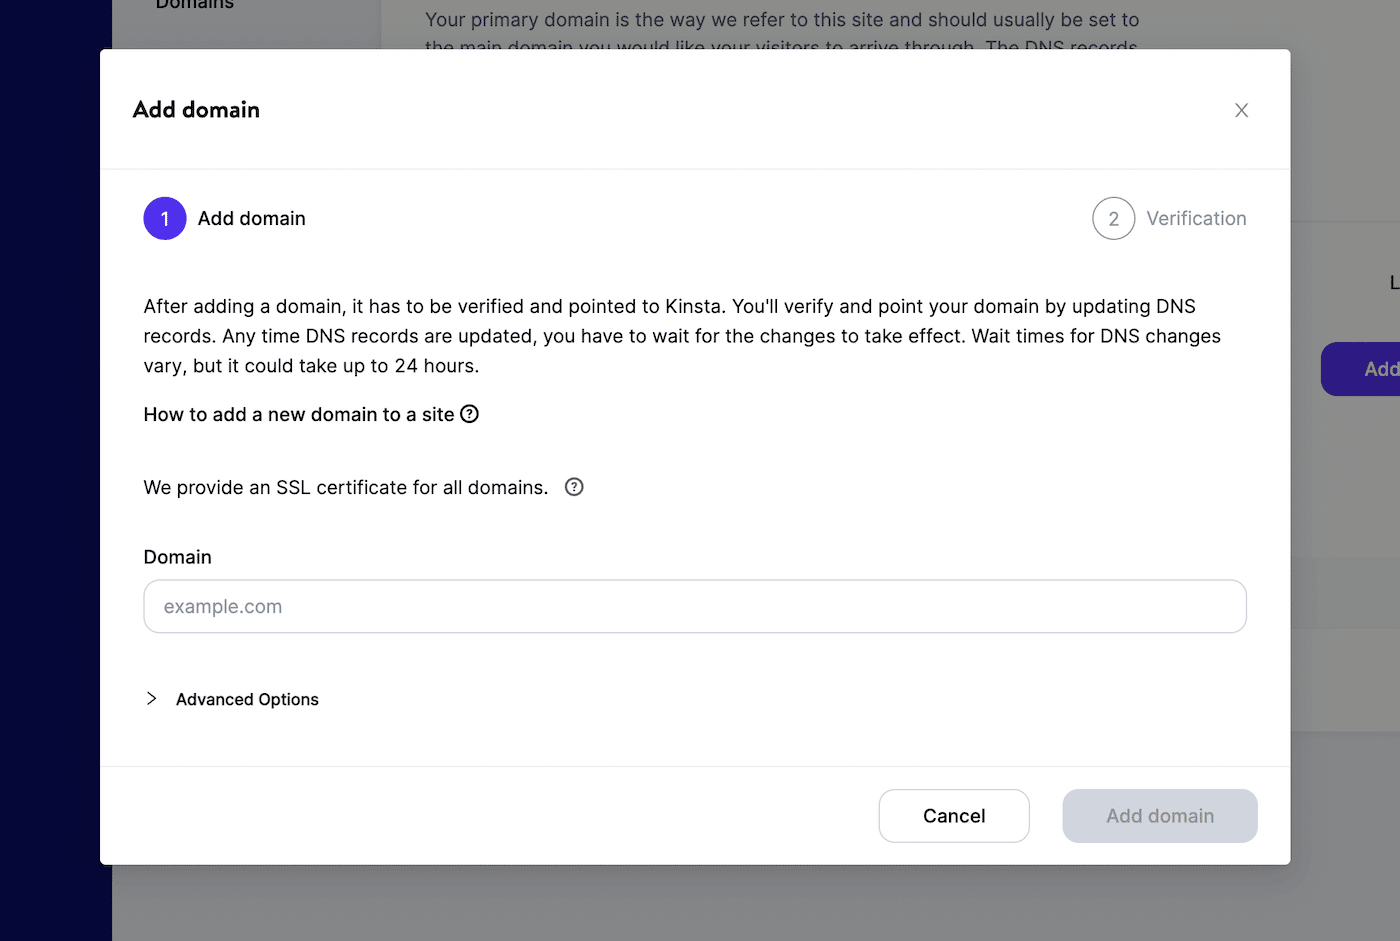
Within the pop-up window, listing the entire new subsite domains and separate them with commas. When you’re completed, choose Add area:
Now you’re free to start out utilizing your WordPress multisite with completely different domains! You can begin putting in multisite plugins and performing different vital administrative duties in your community.
Abstract
Making a WordPress multisite can typically be an efficient option to construction web sites that want a number of subsites. This lets you construct an easy-to-manage community with centralized themes, plugins, and updates. Though this may occasionally contain a extra difficult setup course of than a single set up, it may be extra environment friendly in the long run.
When constructing a WordPress multisite, you possibly can arrange particular person web sites as subdomains or subdirectories. Nonetheless, you’re additionally capable of create customized domains for every subsite. This may also help retain your model identification and keep away from producing lengthy and unreadable URLs.
Once you’re prepared to start out transitioning to a multisite, you’ll want an internet host to help you alongside the way in which. Take a look at our multisite internet hosting plans to begin managing as much as 150 WordPress websites at this time!
Save time, prices and maximize web site efficiency with:
- Prompt assist from WordPress internet hosting specialists, 24/7.
- Cloudflare Enterprise integration.
- International viewers attain with 35 information facilities worldwide.
- Optimization with our built-in Software Efficiency Monitoring.
All of that and far more, in a single plan with no long-term contracts, assisted migrations, and a 30-day-money-back-guarantee. Take a look at our plans or discuss to gross sales to seek out the plan that’s best for you.


