
Mailchimp is likely one of the greatest electronic mail advertising automation instruments on your web site. Its companies can effectively set up your subscribers and ship them content material they’re all for. Nevertheless, Mailchimp contact types won’t align together with your web site’s branding.
To unravel this downside, you’ll be able to combine Elementor and Mailchimp. With Elementor, you’ll be able to simply design a {custom} subscription type and embed it into your web site. Then, you’ll be able to handle registration data immediately from Mailchimp.
On this put up, we’ll focus on why you may wish to combine Elementor and Mailchimp. Then, we’ll present you the way to do that in simply 5 steps. We’ve additionally included an inventory of add-ons to entry additional options and performance. Let’s get began!
The Advantages of Integrating Elementor and Mailchimp
Whether or not you’re working a web based enterprise or weblog, you’ll doubtless want a method to persistently contact your viewers. With Mailchimp, you are able to do simply that.
Mailchimp is an electronic mail advertising service that may construct subscriber lists and design emails:
Utilizing Mailchimp, you’ll be able to create electronic mail lists together with your subscribers’ contact data. Utilizing pre-made electronic mail templates and the Content material Optimizer, you’ll be able to ship partaking, informative updates to your viewers members.
Should you’re new to Mailchimp, you’ll be able to create an account free of charge. You may entry its easy-to-use options with out paying so long as you’ve gotten beneath 2,000 subscribers.
If you’re attempting to develop your electronic mail checklist, it’s a good suggestion to embed some subscribe types in your web site. They will help you generate leads out of your natural site visitors. Though Mailchimp has this characteristic, its embed types are sometimes generic and certain received’t match your branding.
That is the place Elementor is available in. Elementor is an easy-to-use WordPress web page builder that you need to use to design your web site with out coding. Its drag-and-drop editor makes it easy to create the options and performance your web site wants:
Moreover, Elementor can simply combine with Mailchimp. In contrast with different web page builders, Elementor is likely one of the greatest choices for creating and managing opt-in types.
With Elementor, you’ll be able to add a contact type anyplace in your web site and hyperlink Mailchimp in its settings. When your on-line guests enroll, they are going to robotically be added to your Mailchimp checklist. Utilizing each instruments lets you’ve gotten well-designed types with out shedding out on subscriber analytics.
How To Combine Elementor and Mailchimp (in 5 Steps)
Now that you understand how Elementor and Mailchimp can profit your web site, let’s focus on easy methods to begin this integration course of!
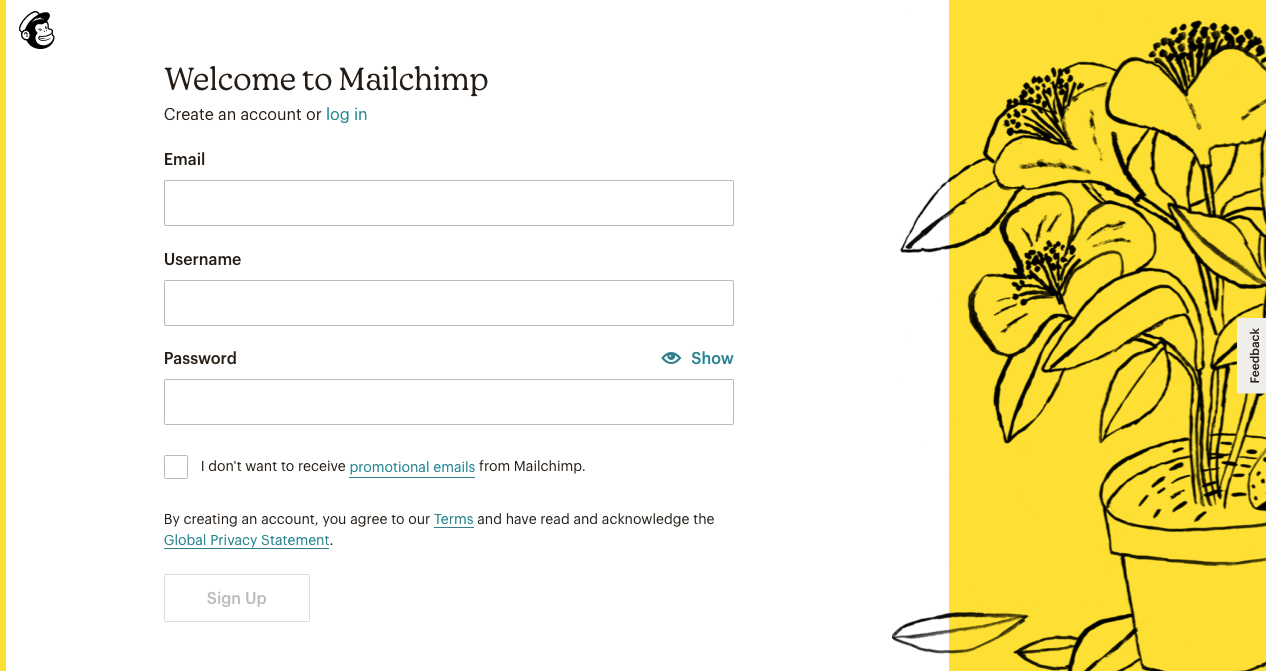
Step 1: Signal Up for a Mailchimp Account
First, you’ll have to go to the Mailchimp web site and enroll for an account. You are able to do this free of charge by merely coming into your electronic mail deal with, username, and password:
Then, Mailchimp will ship you an electronic mail with an activation hyperlink. By clicking on this, you’ll see a web page with totally different plan choices:
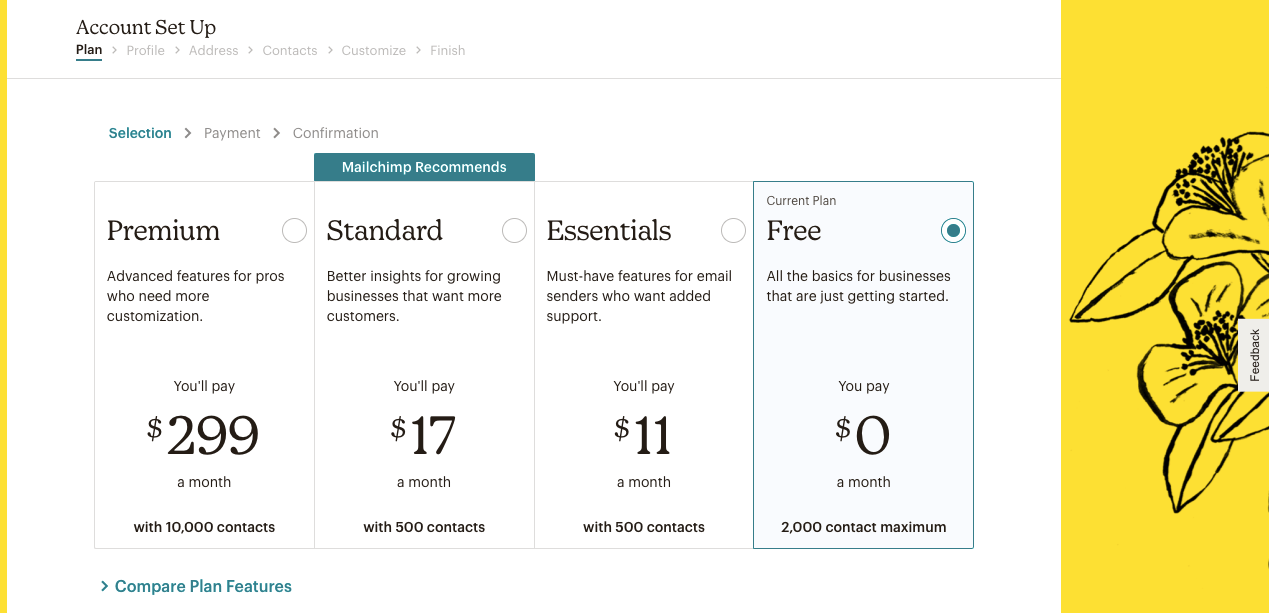
Should you’re not sure which plan is best for you, choose Evaluate Plan Options. Right here, you’ll be able to view every thing that is available in every tier:
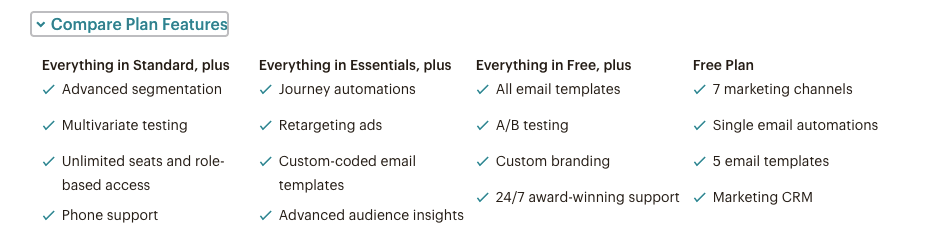
On this tutorial, we’re selecting the Free Plan, which might help 2,000 contacts and 10,000 electronic mail sends. Will probably be sufficient for a primary electronic mail advertising plan. Nevertheless, you received’t be capable to entry retargeting adverts, custom-coded electronic mail templates, or {custom} branding.
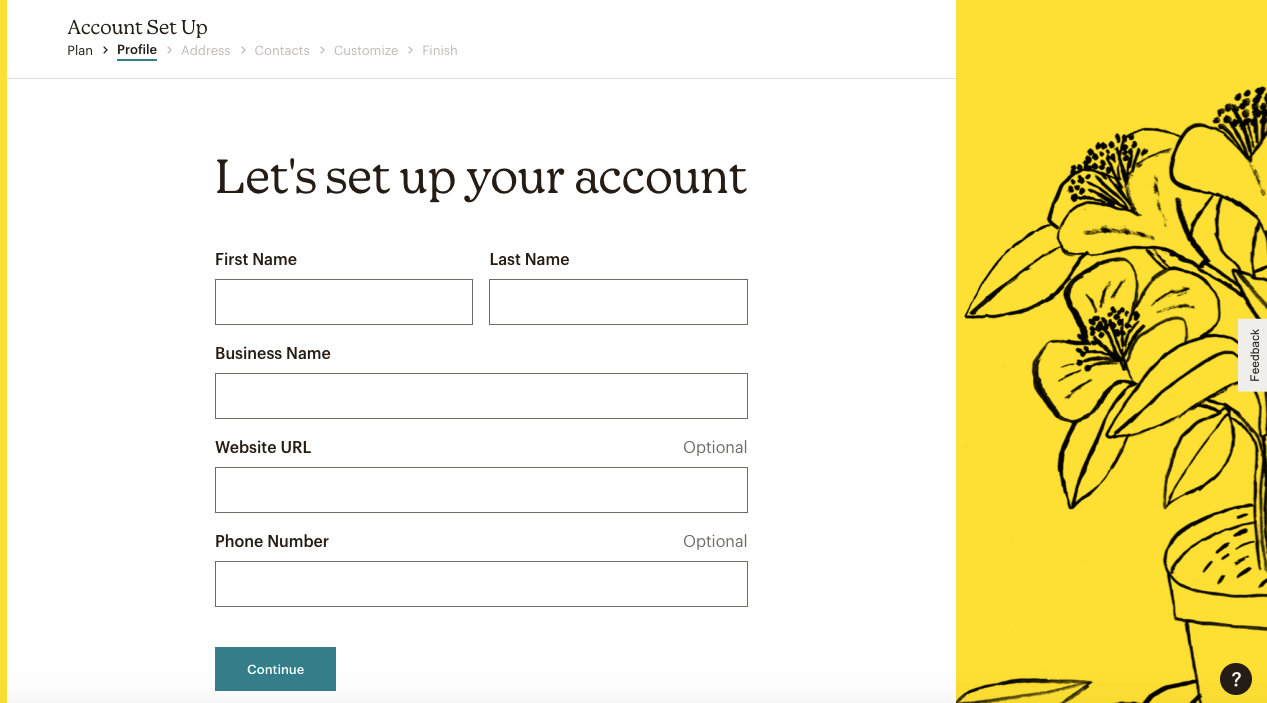
To begin the sign-up course of, fill out your identify and enterprise data. Though it’s optionally available, you may as well enter your web site’s URL and import your content material:
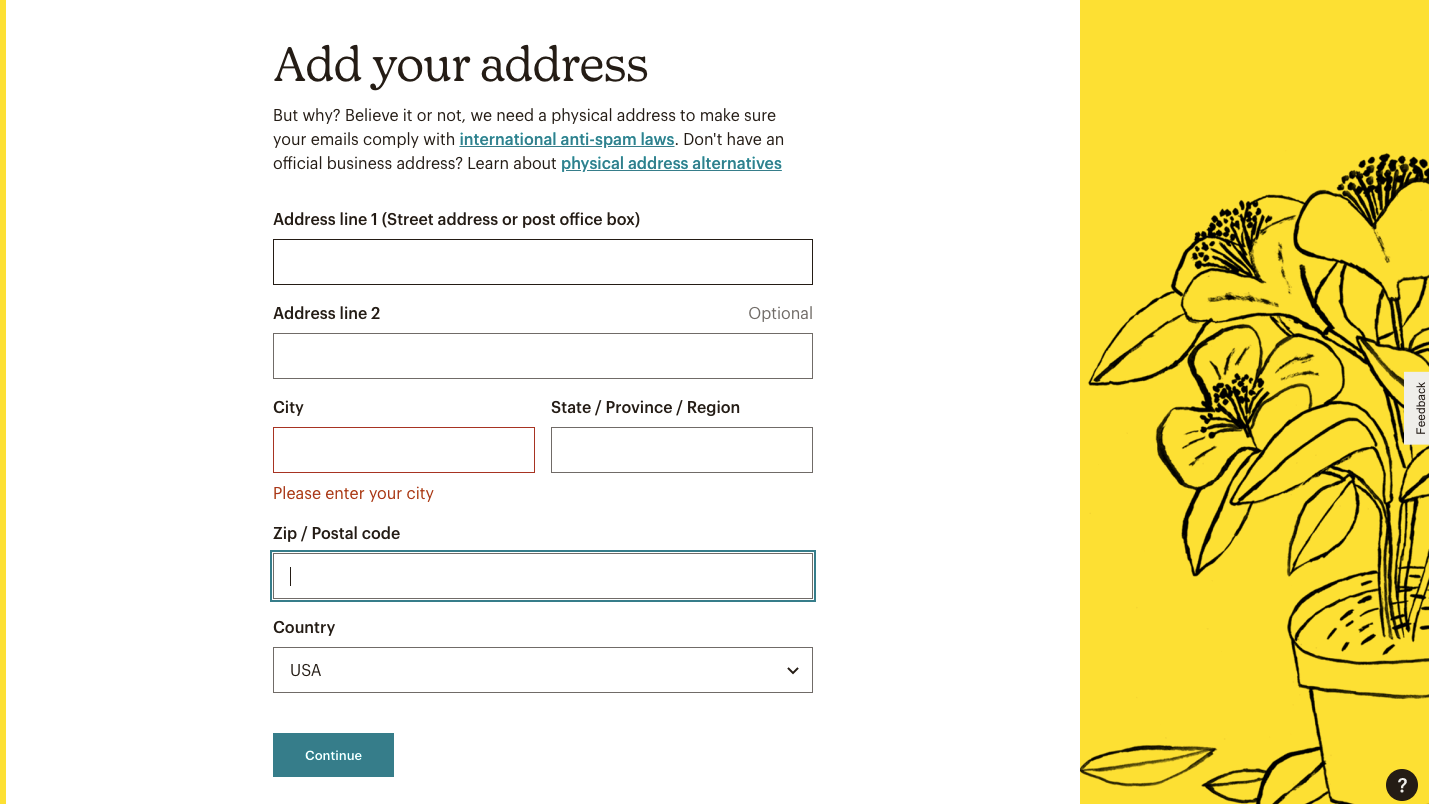
Subsequent, fill out your deal with data. This step ensures that your emails aren’t contributing to spam:
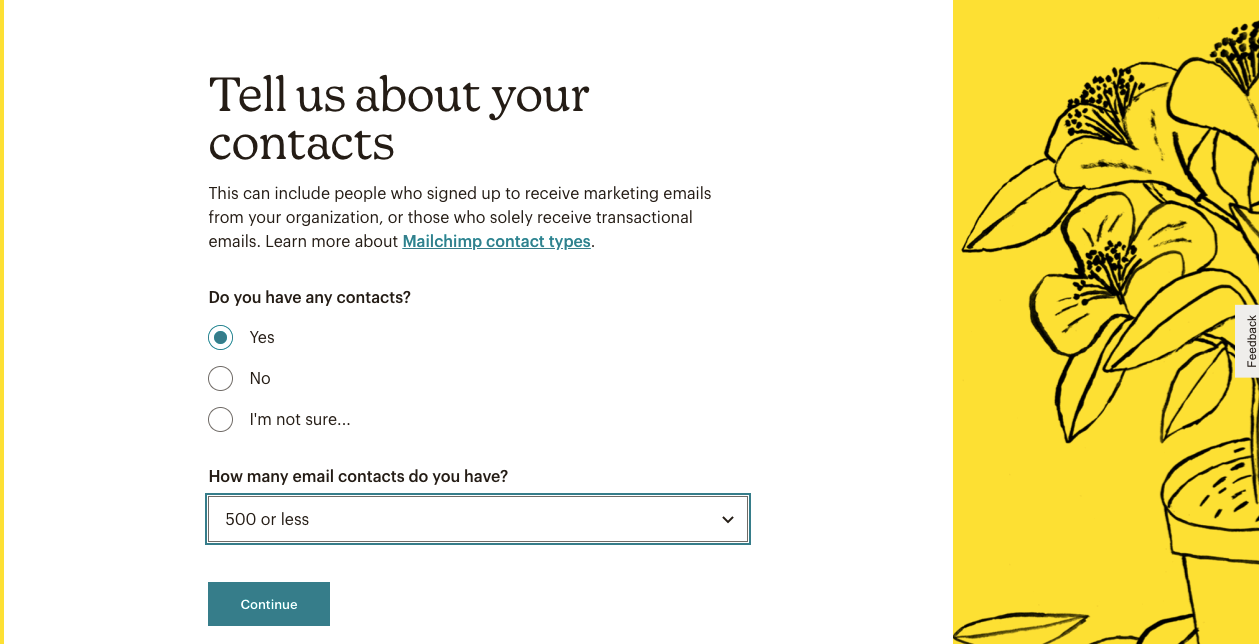
Mailchimp will then ask if you have already got any subscribers. In that case, choose Sure and fill out what number of you’ve gotten:
To assist Mailchimp perceive your online business, point out whether or not you promote services or products. To bypass this query, you’ll be able to click on on Skip:

After you end this sign-up course of, you’ll be capable to entry your Mailchimp account!
Step 2: Create an Viewers and API Key
To begin organizing your subscribers in Mailchimp, you’ll have to create an viewers. Remember the fact that a free account solely helps one viewers, however any superior plan can embrace three or extra.
Though you may really feel tempted to create a number of audiences, Mailchimp recommends beginning with one. This setup will help you perceive your subscribers as a complete. It might additionally simplify your emailing course of and keep your contacts as your organization grows.
Even with only one viewers, you’ll be able to create tags and segments to arrange contacts into totally different subsets. Nevertheless, making a number of audiences can have sure advantages.
For instance, if you happen to ship emails to each distributors and patrons, you might have to ship separate messages to those teams.
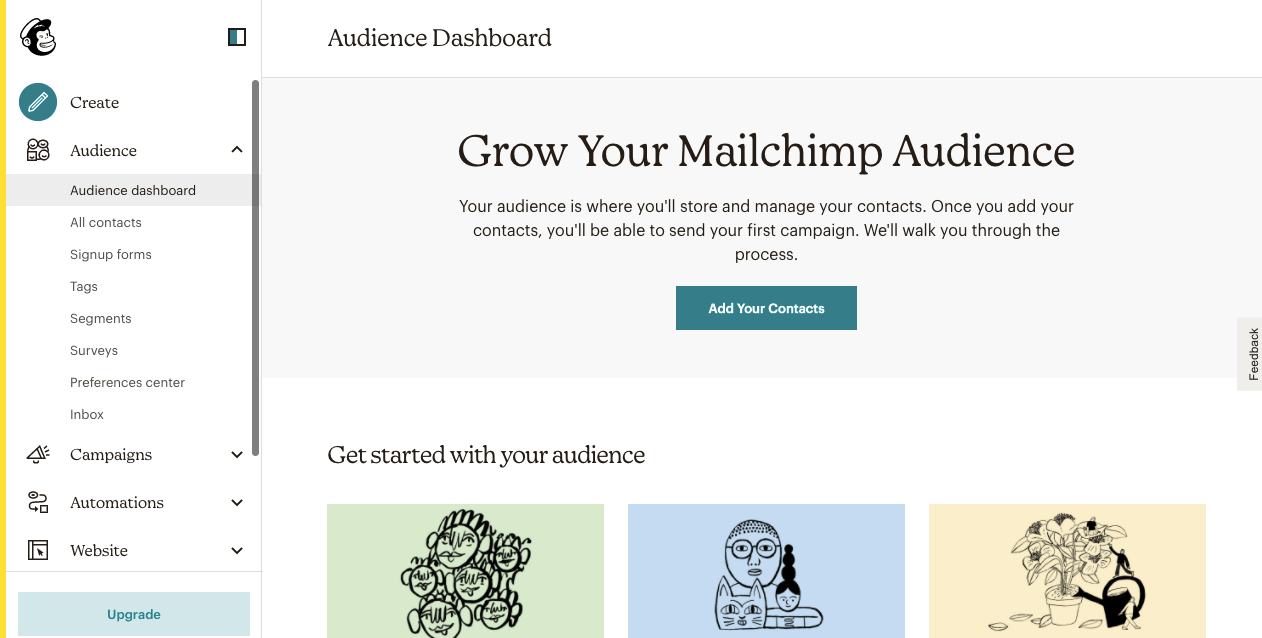
In your Mailchimp dashboard, go to Viewers > Viewers Dashboard. Then, click on on Add Your Contacts:
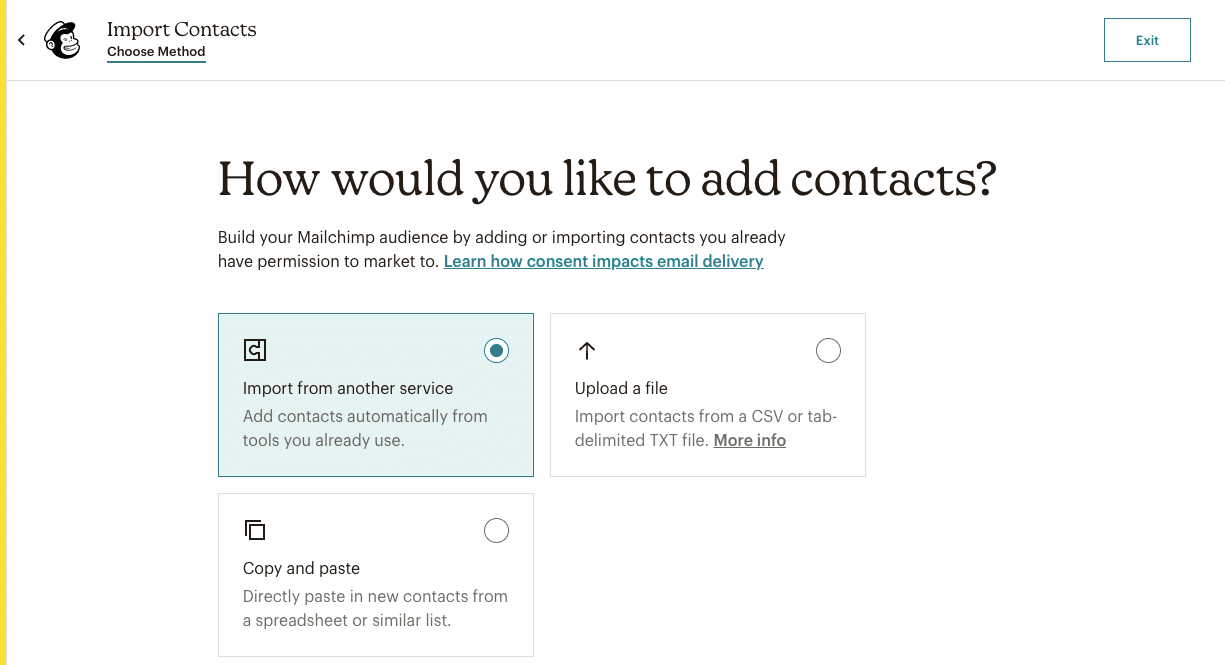
This may take you to a web page to import your subscribers’ contact data. Merely copy and paste their names and electronic mail addresses right into a textual content field. Alternatively, you’ll be able to import knowledge from a third-party service or add a CSV or TXT file:
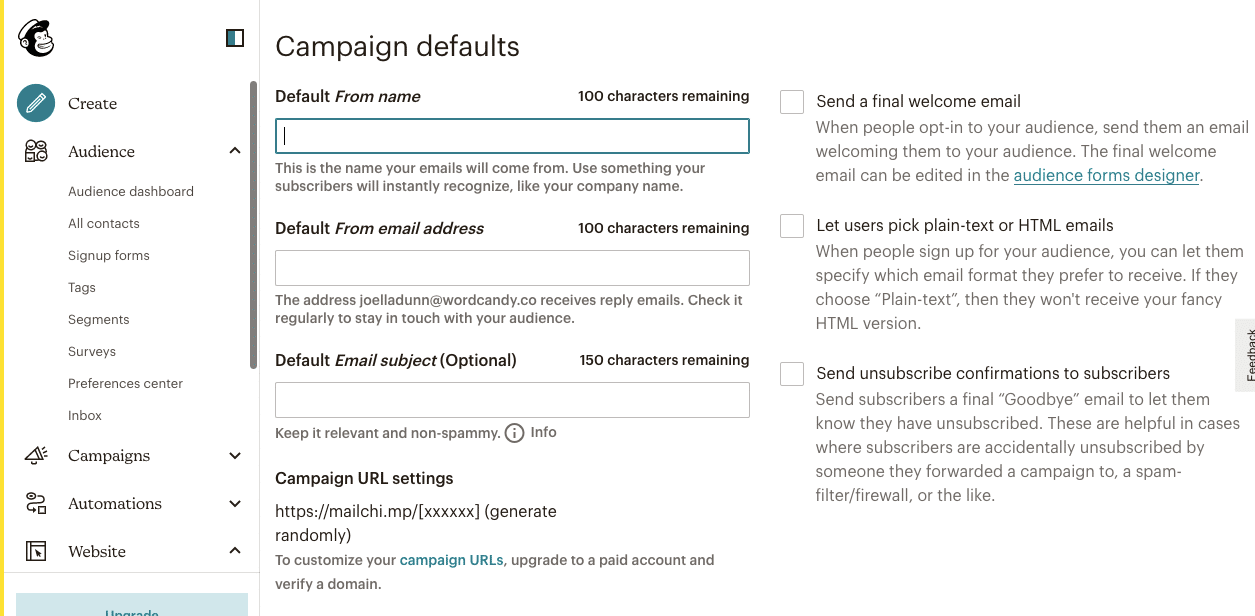
When you’ve achieved this, go to your Viewers Dashboard and discover Handle Viewers > Settings. Right here, you’ll be able to change the identify and default settings:
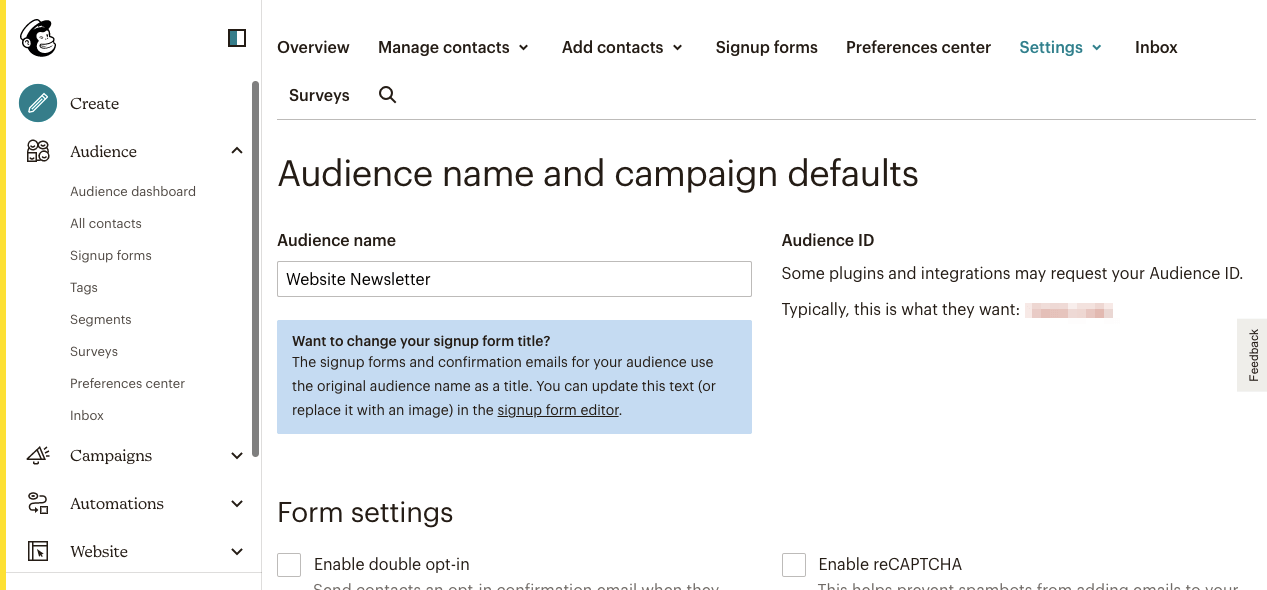
Be sure you set a From identify and From electronic mail deal with. You can too allow a double opt-in to ship subscribers a affirmation electronic mail after they enroll:
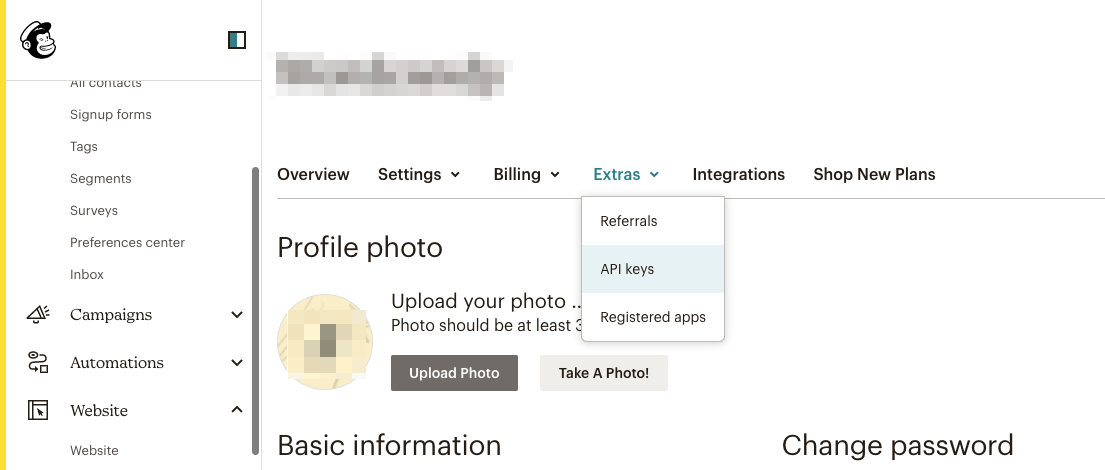
After you’re completed creating and organising an account, go to your Profile. Then click on on Extras > API keys:
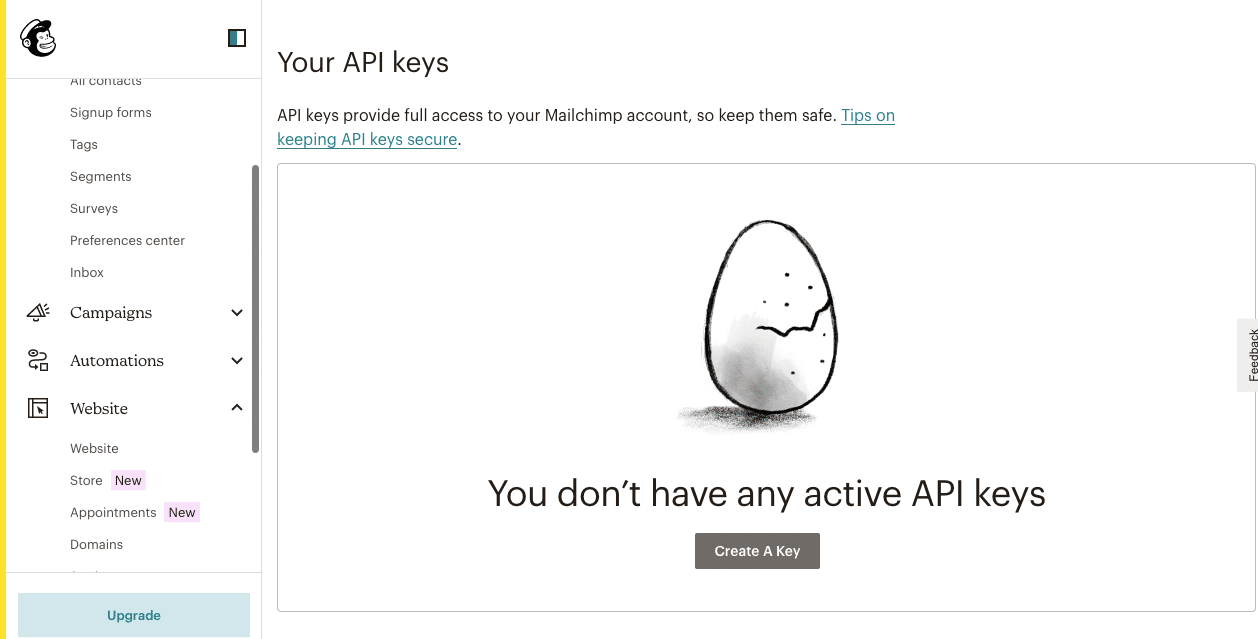
Should you don’t have an API key, you’ll have to click on on Create A Key. Mailchimp will robotically add one for you:
As soon as your API key is energetic, copy it. Since this data grants entry to your Mailchimp account, by no means share this code publicly.
Step 3: Design a Mailchimp Signup Kind With Elementor
Subsequent, you’ll have to obtain and set up Elementor Professional. It features a WordPress Kind Builder, which you need to use to design {custom} types and gather suggestions out of your viewers.
After you activate Elementor Professional, go to Elementor > Settings > Integrations. Scroll all the way down to the Mailchimp part and paste the API key:
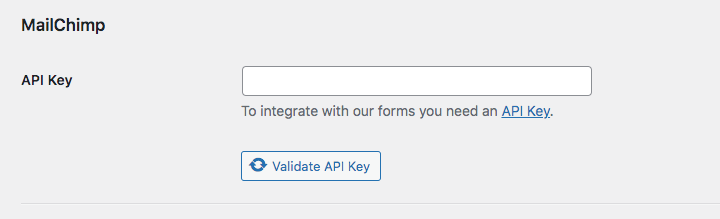
Click on on Validate API Key. If the mixing is profitable, you’ll see a inexperienced checkmark subsequent to this button. After this, save your adjustments.
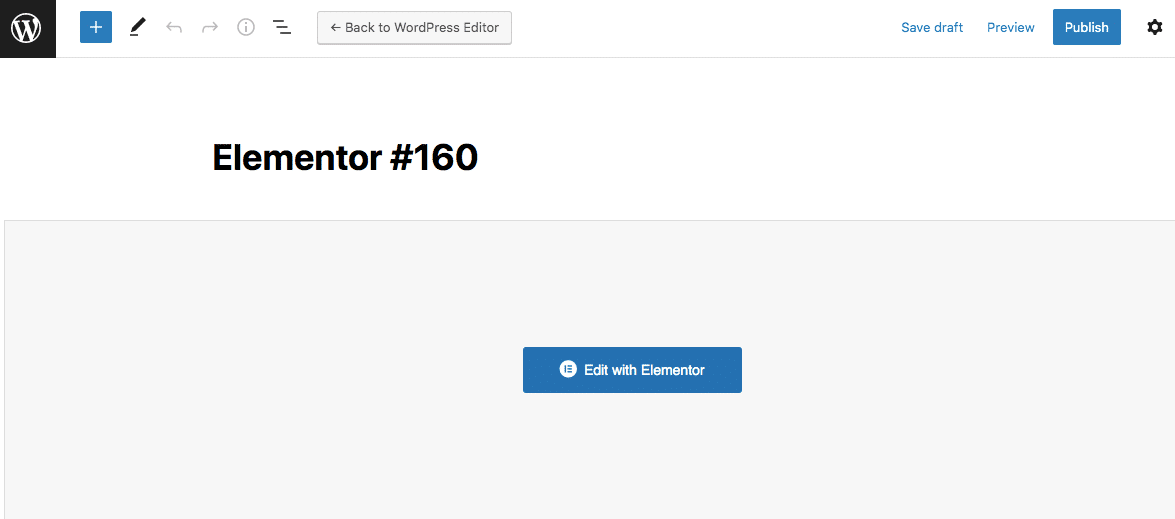
Now you can begin designing your signup type. First, add a brand new put up or web page and choose Edit with Elementor:
Within the Elementor editor, scroll all the way down to the Professional widgets. Right here, you’ll see an possibility for Kinds. Drag and drop this widget onto the web page:
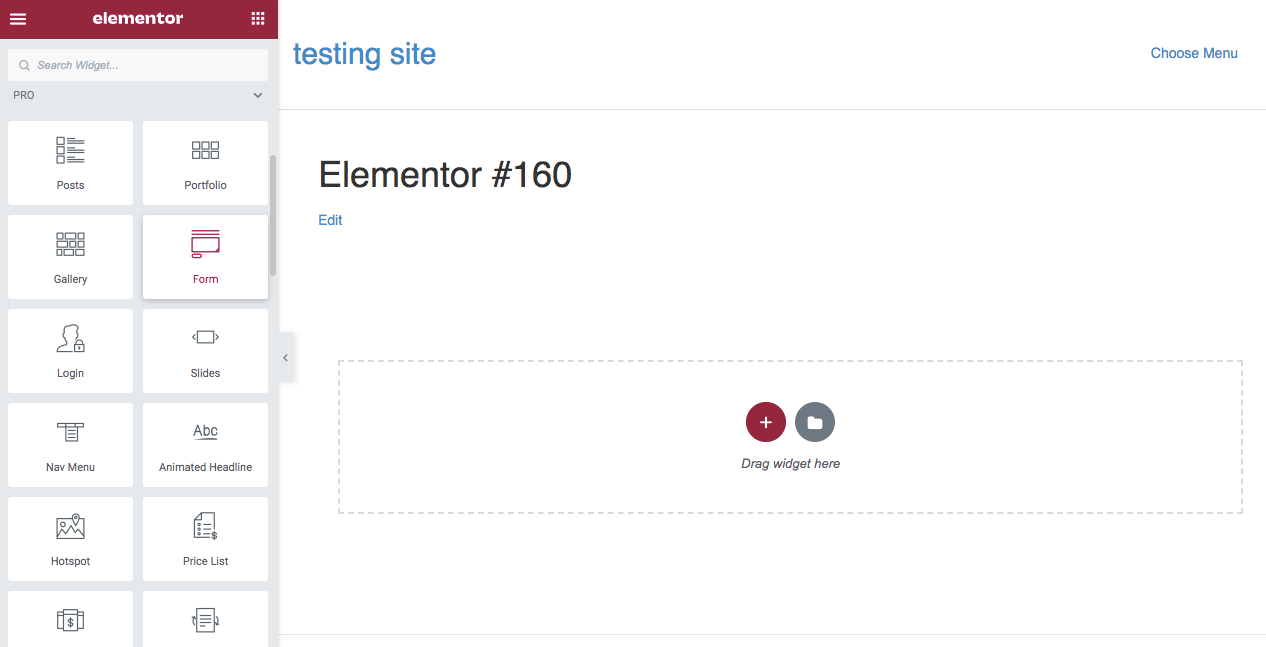
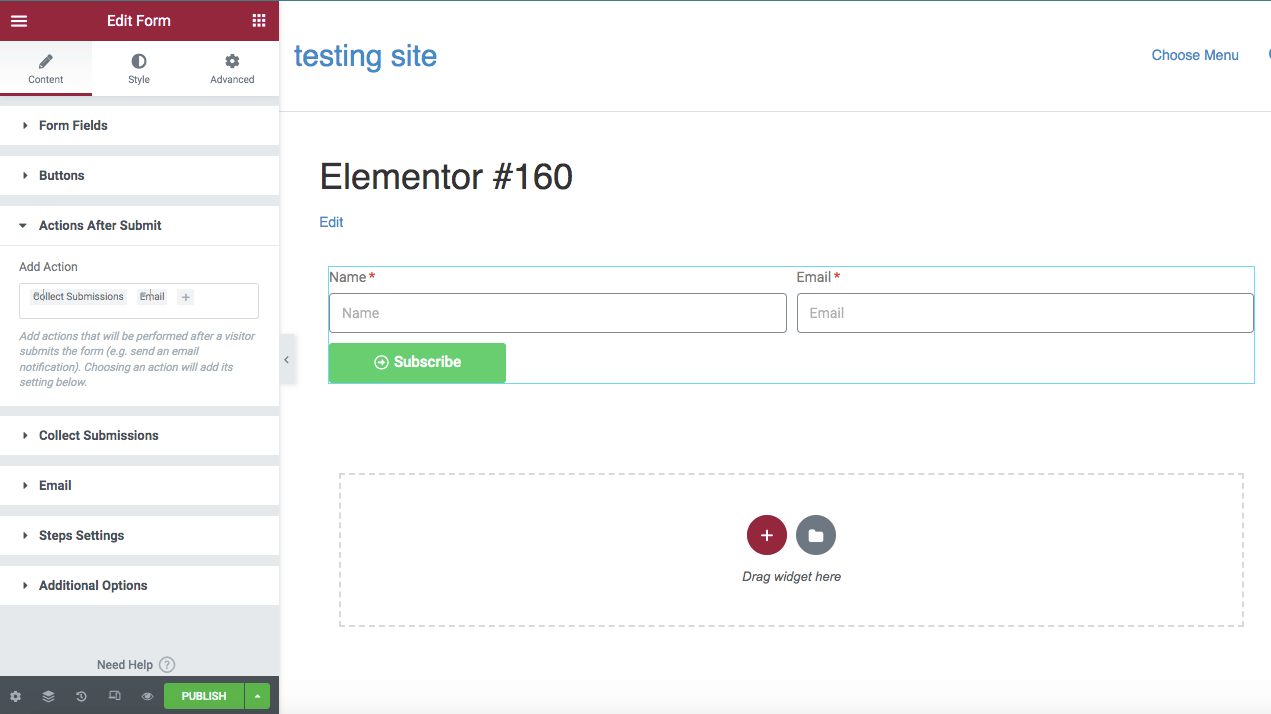
Elementor will robotically create a primary type that features identify, electronic mail deal with, and message fields. Nevertheless, you’ll be able to proceed to customise the shape till it meets your wants:
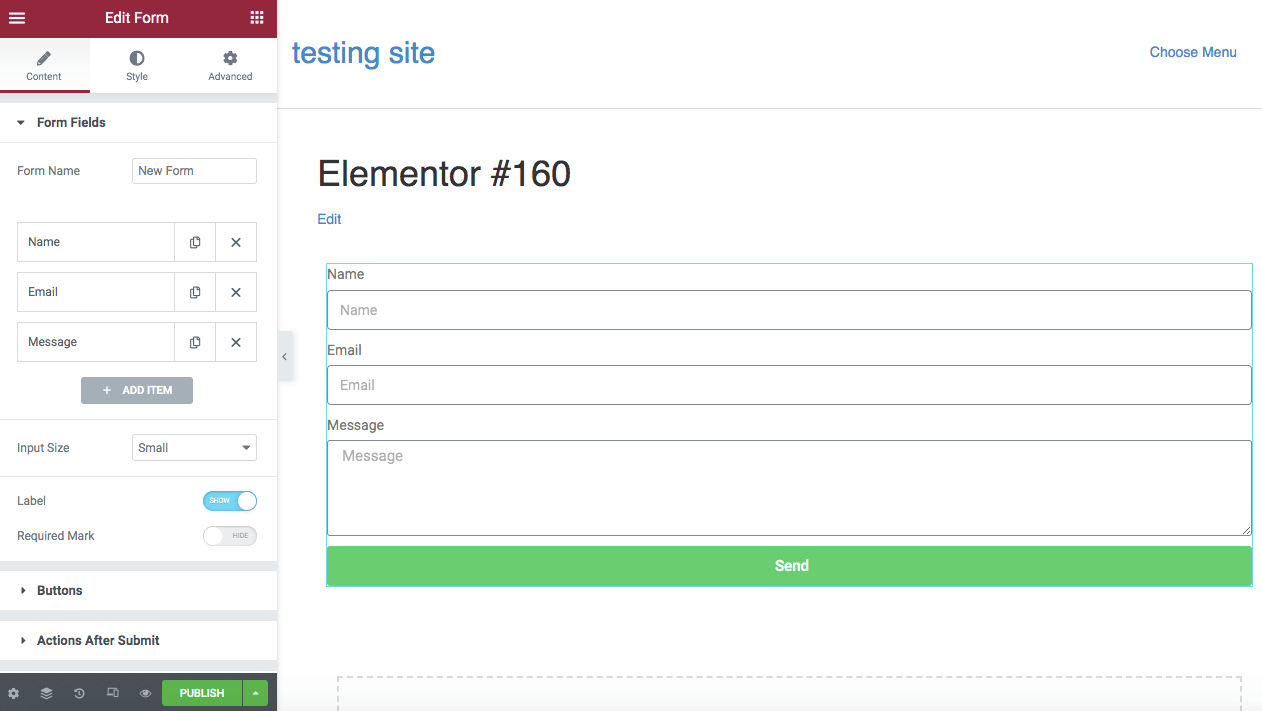
For instance, if you wish to add a subscribe type, it sometimes received’t want message fields. You may merely click on on the X subsequent to this merchandise.
To generate leads, you’ll have to require guests to fill out each their names and emails. You are able to do this by clicking on every discipline and choosing Sure subsequent to Required:
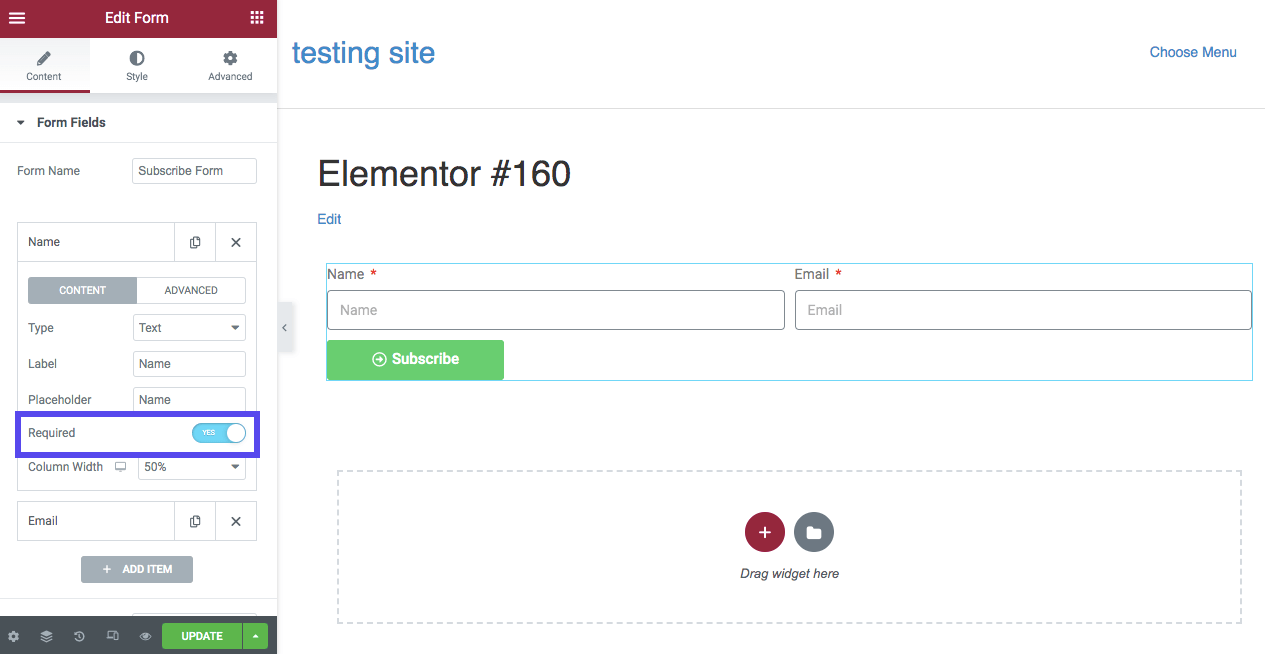
Then, go to the Buttons part to edit the motion button. Though the default textual content is “Ship,” think about altering it to “Subscribe” or “Signal Up:”
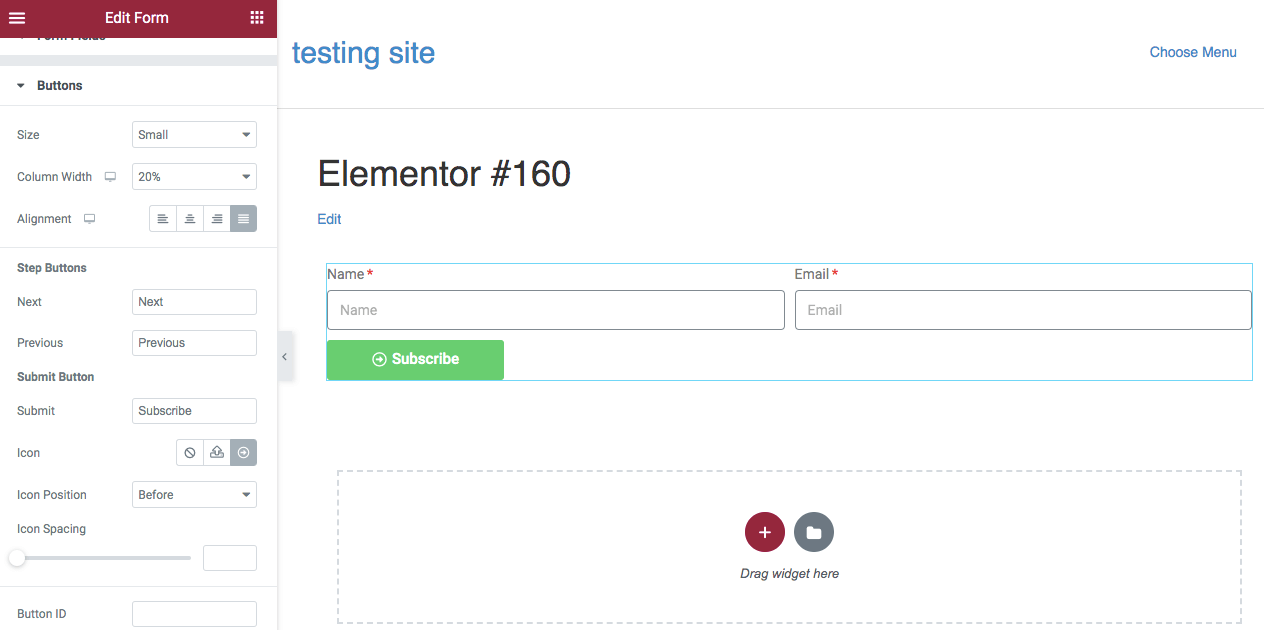
You may proceed to alter the button’s measurement and column width as wanted. Should you favor, you’ll be able to add an icon as nicely.
Step 4: Join Mailchimp
After you customise your type to your liking, it’s time to attach your Mailchimp account. To do that, discover the Actions After Submit part:
Then, click on on the + icon and select Mailchimp from the dropdown menu:
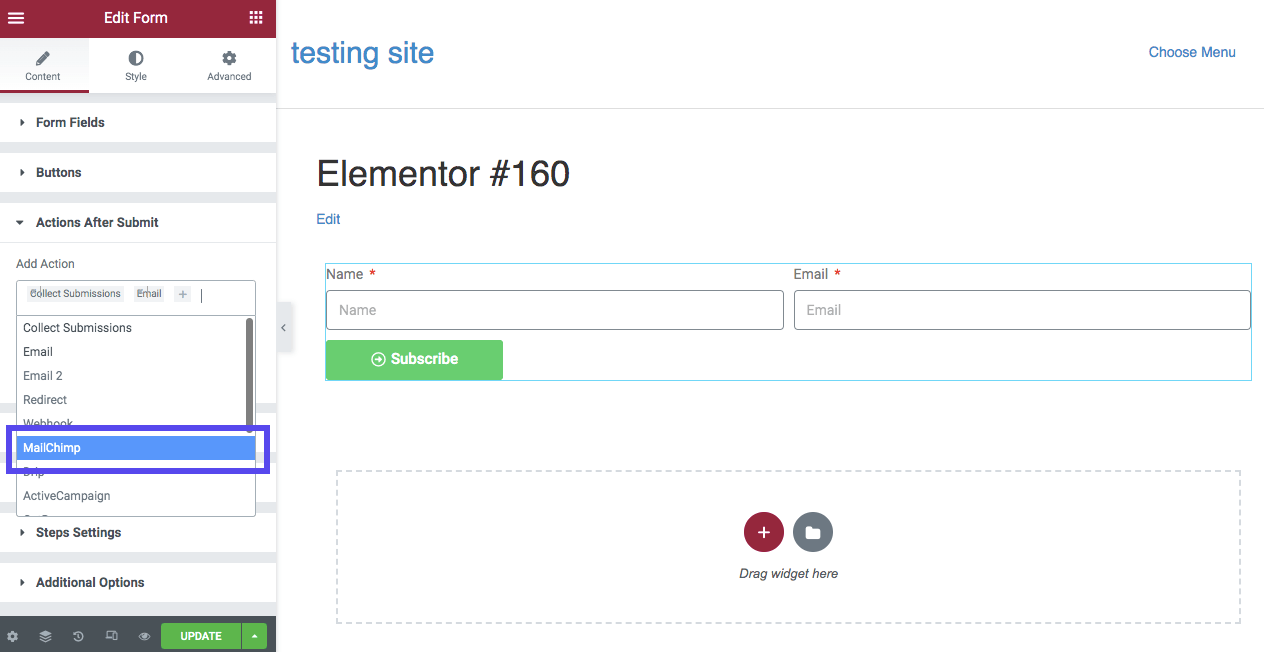
This may create a brand new part beneath titled Mailchimp. If you click on on this, you’ll see choices for setting an API key and viewers:
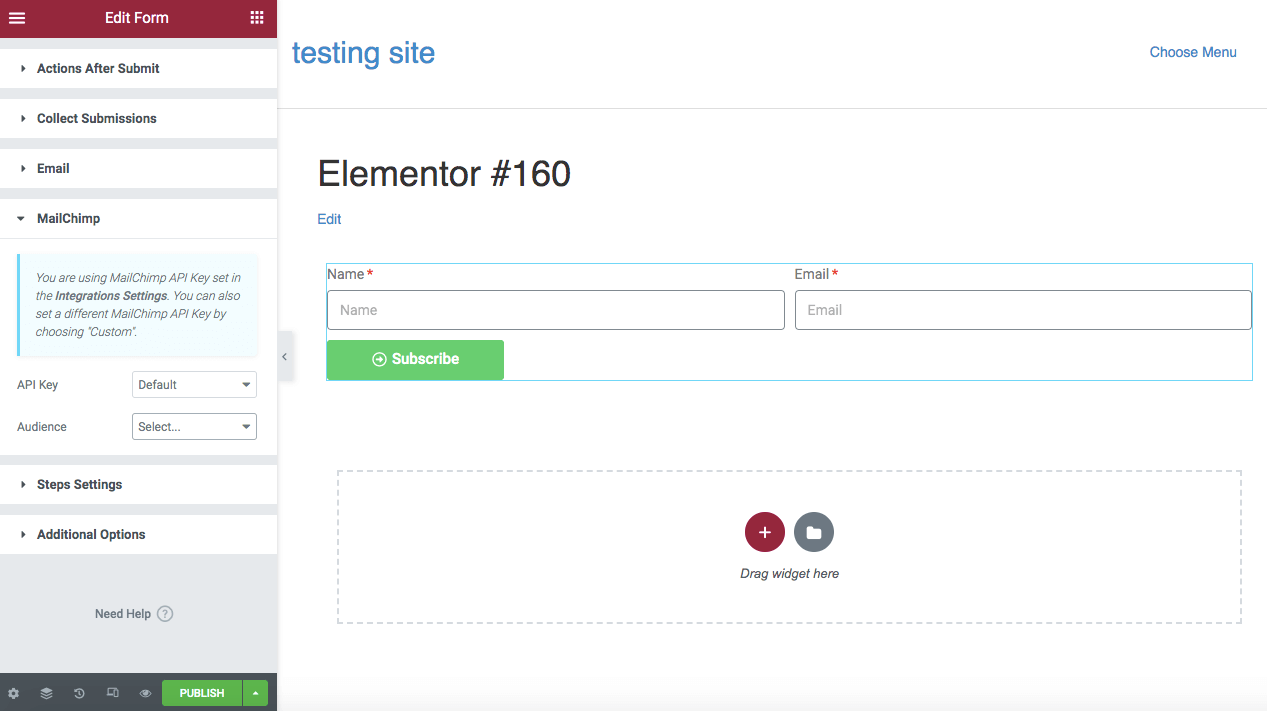
Should you’ve entered your API key within the integration settings, you’ll be able to go away the API Key part as Default. Then, choose the Viewers you wish to hyperlink to this subscription type:
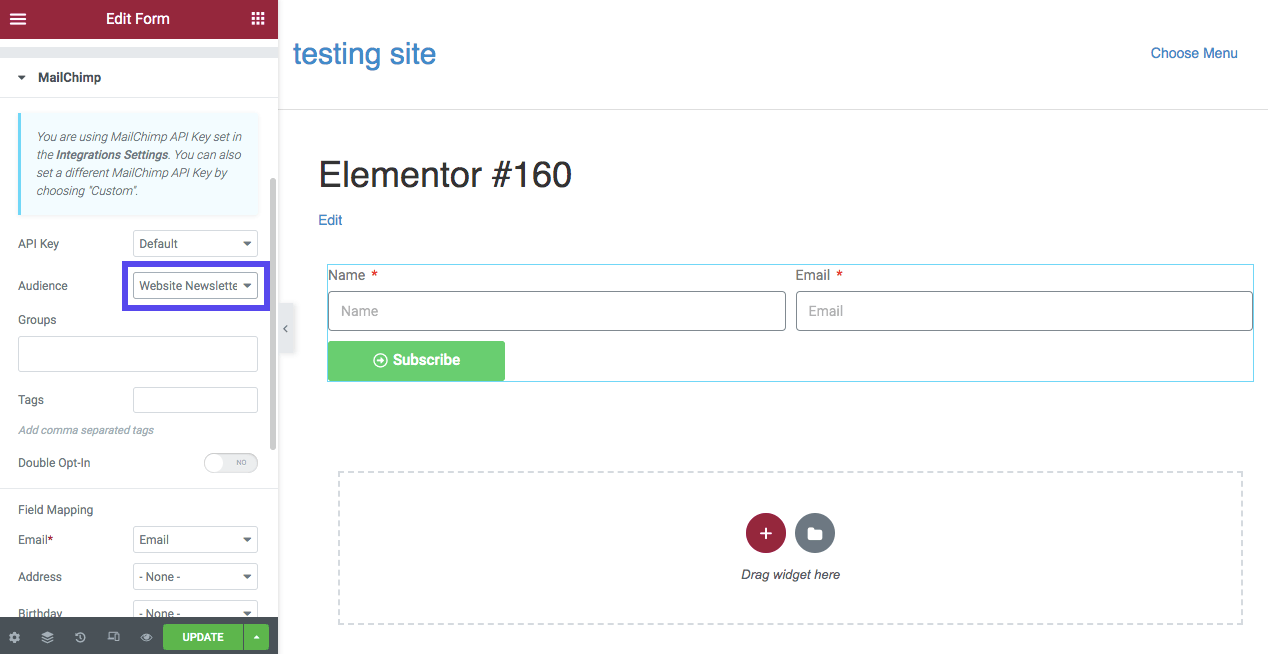
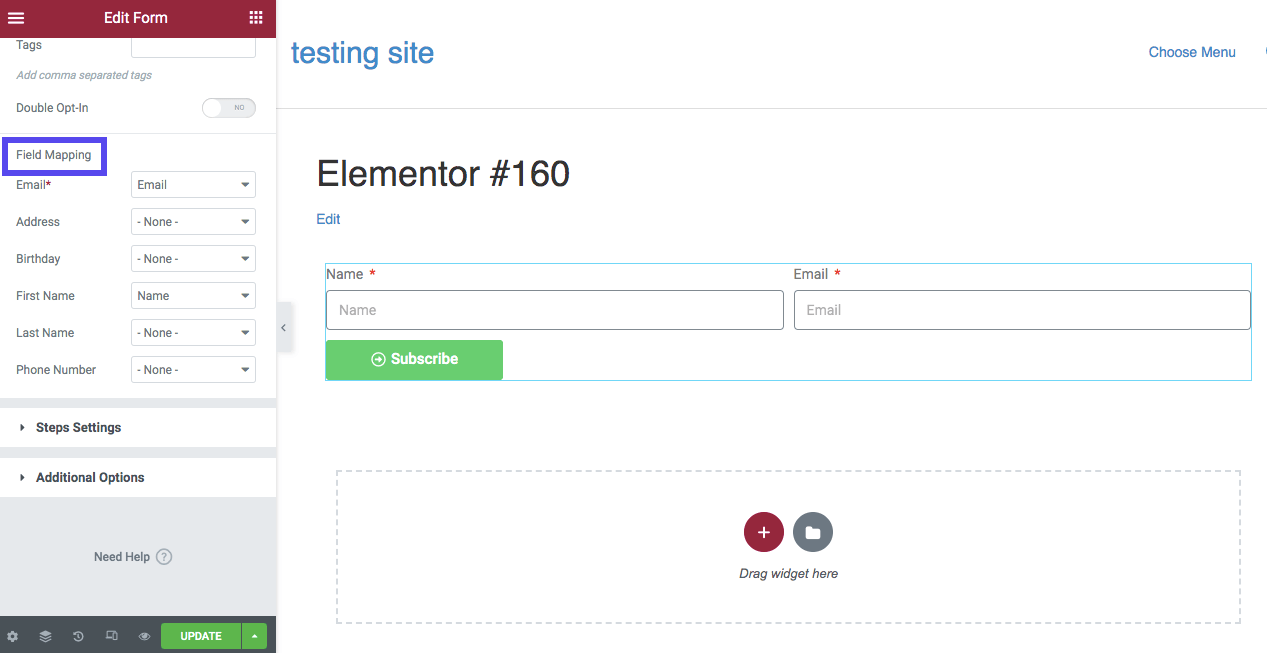
You can too select any teams or tags that you simply created in Mailchimp. Lastly, customise the Subject Mapping settings primarily based on the fields you supplied within the type. This may inform Mailchimp which data to catalog in its system.
For this instance, our subscribe type solely incorporates a reputation and electronic mail discipline. Which means that we’ll solely embrace this data within the Subject Mapping part:
Lastly, navigate to Further Choices and discover Customized Messages. Flip this on to supply successful message after somebody completes the shape:
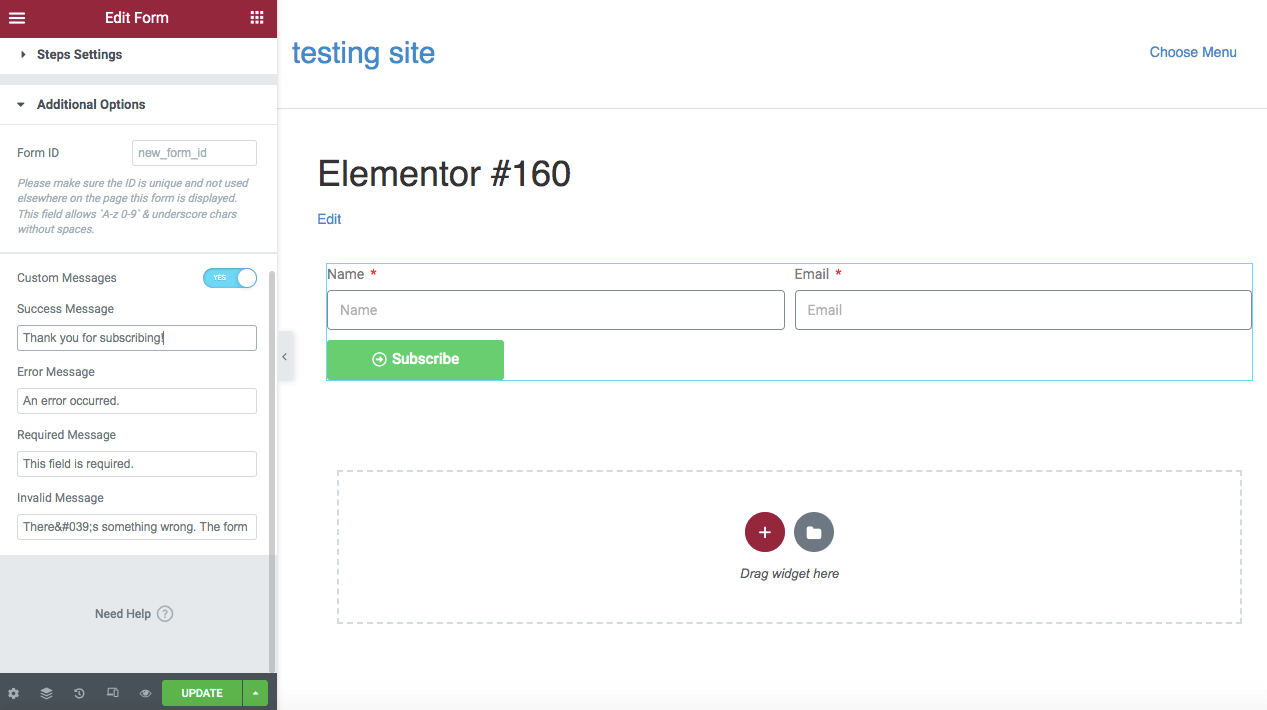
The default message can be “This type was despatched efficiently.” You may think about altering this to one thing like “Thanks for subscribing.” You can too add {custom} messages for errors and required fields.
Step 5: Add the Kind to Your Web site
After you’re completed customizing the shape, choose Publish. Think about using the signup type your self to examine that it’s functioning appropriately. Then, you’ll be able to see whether or not the brand new electronic mail deal with is recorded in your Mailchimp account.
You may also wish to add this new type to a number of areas of your web site. It can save you it as a World Widget to make this course of simpler.
First, discover the Edit Kind icon on the right-hand facet of the shape. Proper-click on it and choose Save as a World:
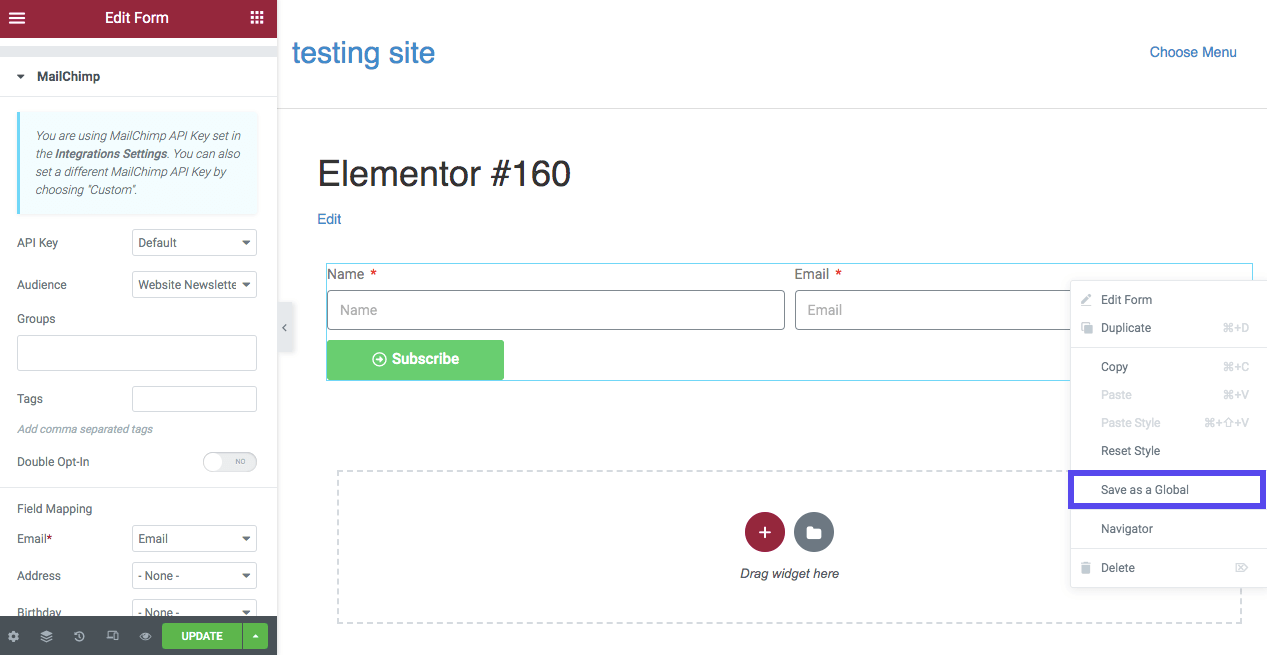
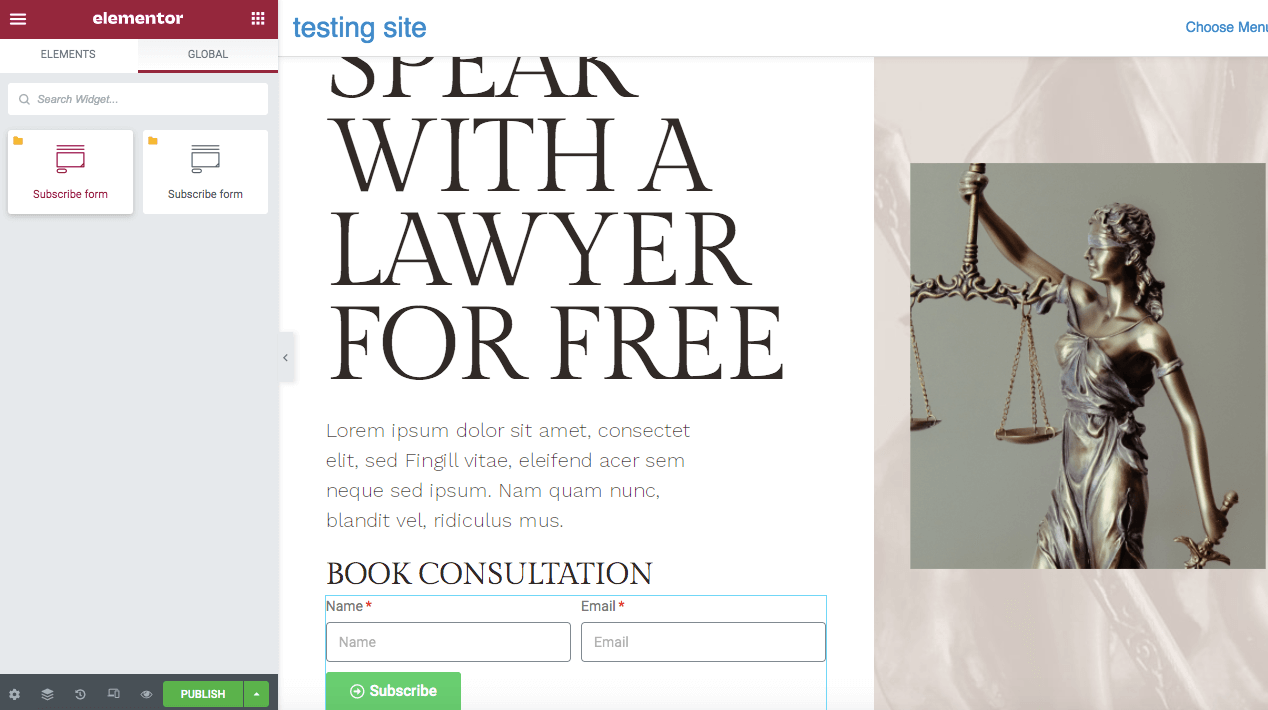
This may add the subscribe type to your World Settings. If you add a brand new web page or put up, you’ll be able to merely go to GLOBAL, discover the pre-designed type, and drag and drop it anyplace you’d like:
When contemplating the place to position your subscribe types in your web site, you may like to consider visibility. You may probably gather extra leads on a well-designed touchdown web page, which guests can see once they enter your web site. Nevertheless, customers won’t be all for subscribing this early.
Typically, a greater possibility is to incorporate contact types inside your content material or a sidebar. Though this has barely much less visibility than a touchdown web page, this placement can allow guests to subscribe as they’re interacting together with your web site.
Including the shape to a footer may also be a sensible possibility. Customers who scroll to the underside of your web site are sometimes inquisitive about your content material, which means they’re extra prone to subscribe. Nevertheless, this placement is just not as seen as different choices.
High Add-Ons for Your Elementor/Mailchimp Integration
With the greatest WordPress plugins, you’ll be able to create a tailor-made web site on your viewers. Elementor Professional offers you loads of choices for designing types and integrating third-party companies like Mailchimp.
Nonetheless, you may want extra superior options. With some add-ons, you’ll be able to have extra management over the looks and performance of your types.
1. Important Addons
Utilizing Important Addons is an effective way to increase the core Elementor options. With this software, you’ll be able to entry extra inventive components. These embrace interactive options equivalent to a Woo Product Grid, Countdown, and Filterable Gallery:

Options:
- Superior content material widgets so as to add occasion calendars, data bins, testimonials, and extra
- WooCommerce components equivalent to product galleries, grids, and carousels
- Integration with third-party platforms like Mailchimp and Ninja Kinds
If you set up Important Addons in your WordPress web site, you’ll be able to combine Mailchimp utilizing its Kind Styler Components. Right here, you’ll be able to merely enter your Mailchimp API key, which is able to add an EA Mailchimp widget to the Elementor editor. Then, you’ll be able to drag and drop the widget onto a web page and proceed customizing as wanted.
Value: Subscription plans for Important Addons begin at $39.97 for one web site. It consists of over 70 widgets and 7 extensions.
2. Comfortable Addons
With Comfortable Addons, you’ll be able to select from over 400 pre-designed blocks and widgets to import into the Elementor editor. To hurry up the creation course of, you’ll be able to set design presets.
Comfortable Addons additionally makes it potential to repeat components from one web site and paste them right into a web site with a unique area:

Options:
- Part nesting
- Cross-domain copy-paste
- 400+ pre-made design units
After coming into your Mailchimp API key beneath Credentials within the Comfortable Addons settings, you need to use Elementor to tug and drop a Mailchimp Kind Widget onto a web page.
Then, you’ll be able to edit the software’s superior settings to customise the shape margins, colours, and typography. You can too redesign the fields and buttons to have a novel background, shadow, font measurement, and spacing.
Value: Comfortable Addons offers annual subscription plans beginning at $39 for one web site.
3. ElementsKit
Like the opposite choices on this checklist, ElementsKit is an all-in-one plugin package deal with additional widgets and extensions for Elementor. It might supply extra customization when enhancing purposeful options equivalent to headers, footers, or menus.
Plus, ElementsKit features a {custom} widget builder if you happen to can’t discover an possibility that works for you:
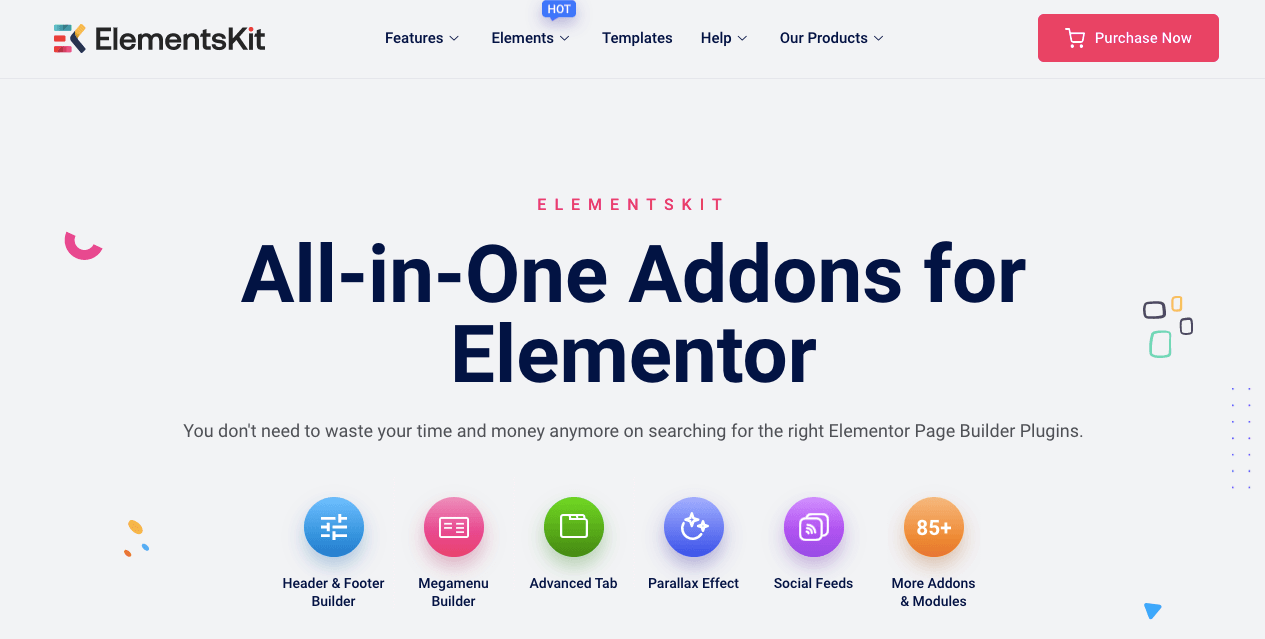
Options:
- Customized controls equivalent to Multi Widgets, AjaxSELECT2, and Picture-Picker
- 85+ widgets and extensions
- 500+ pre-designed internet blocks
You should utilize ElementsKit to combine Elementor and Mailchimp fully via the Elementor editor. You’ll simply want to tug and drop the Mailchimp widget onto a web page and outline the API key. Then, you’ll be able to add {custom} fields and icons to your type.
Value: Yearly plans for ElementsKit begin at $39 for one web site.
4. The Plus Addons
The Plus Addons advertises itself as an Elementor software constructed for everybody. With ready-made templates and in-depth YouTube tutorials, even freshmen can rapidly discover ways to design a purposeful web site.
Moreover, The Plus Addons can be full of in depth widgets that supply customizable options for designers:

Options:
- 96+ superior Elementor widgets
- Itemizing choices to show merchandise, weblog posts, and picture galleries
- Straightforward-to-use builder designed for {custom} put up varieties
The Plus Addons software provides one of many best methods to combine Elementor and Mailchimp. Out of your Mailchimp account, copy the API key and Checklist ID of your viewers. Then, go to the API Connection Settings and paste this data. After this, you’ll be able to drag and drop a Mailchimp Subscription Widget and edit its structure and construction.
Value: The Plus Addons has a free model. Nevertheless, its collection of plans incorporates extra widgets and extensions. These packages begin at $31 per yr.
Abstract
Though combining Mailchimp and Elementor can appear daunting, anybody can combine these two instruments. By doing so, you’ll be able to create {custom} subscription types that meet your expectations for look and performance.
To assessment, listed below are the 5 easy steps to combine Elementor and Mailchimp in your web site:
- Join a Mailchimp account.
- Create an viewers and an API key.
- Design a Mailchimp signup type with Elementor.
- Join Mailchimp.
- Add your type to your web site.
E mail advertising and design are important on your web site’s success. You’ll additionally wish to associate with a devoted WordPress internet hosting supplier. At Kinsta, our internet hosting plans can take your web site’s efficiency to the subsequent degree. Contact us to seek out out extra!
Do you’ve gotten any questions on integrating Elementor and Mailchimp? Ask us within the feedback part beneath!
Save time, prices and maximize web site efficiency with:
- Instantaneous assist from WordPress internet hosting specialists, 24/7.
- Cloudflare Enterprise integration.
- World viewers attain with 34 knowledge facilities worldwide.
- Optimization with our built-in Utility Efficiency Monitoring.
All of that and way more, in a single plan with no long-term contracts, assisted migrations, and a 30-day-money-back-guarantee. Take a look at our plans or discuss to gross sales to seek out the plan that’s best for you.
