In iOS 16, SwiftUI introduces a brand new view known as Gauge for displaying progress. You possibly can really use it to indicate values inside a spread. On this tutorial, let’s see the best way to use the Gauge view and work with completely different gauge types.
A gauge is a view that reveals a present degree of a worth in relation to a specified finite capability, very very similar to a gasoline gauge in an car. Gauge shows are configurable; they will present any mixture of the gauge’s present worth, the vary the gauge can show, and a label describing the aim of the gauge itself.
– Apple’s official documentation
The best approach to make use of Gauge is like this:
|
struct ContentView: View { @State non-public var progress = 0.5
var physique: some View { Gauge(worth: progress) { Textual content(“Add Standing”) } } } |
In probably the most fundamental kind, a gauge has a default vary from 0 to 1. If we set the worth parameter to 0.5, SwiftUI renders a progress bar indicating the duty is 50% full.

Optionally, you possibly can present labels for the present, minimal, and most values:
|
Gauge(worth: progress) { Textual content(“Add Standing”) } currentValueLabel: { Textual content(progress.formatted(.p.c)) } minimumValueLabel: { Textual content(0.formatted(.p.c)) } maximumValueLabel: { Textual content(100.formatted(.p.c)) } |
Utilizing Customized Vary
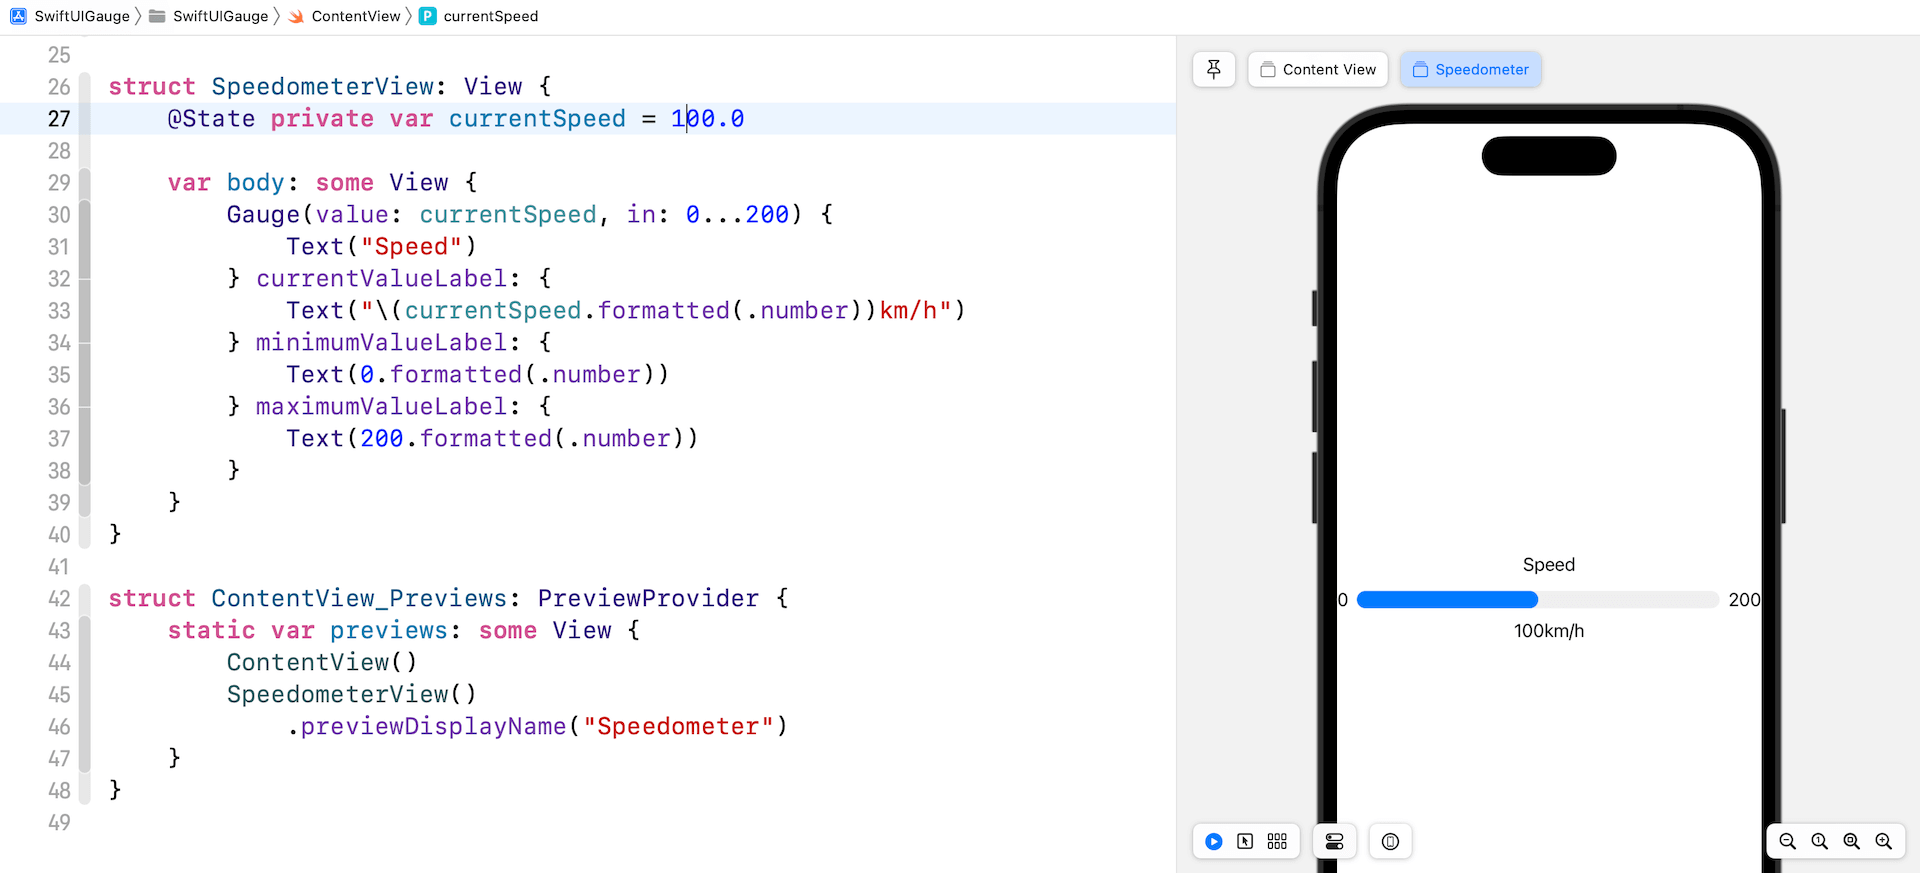
The default vary is about to 0 and 1. That stated, you possibly can present your customized vary. For instance, you’re constructing a speedometer with the utmost pace of 200km/h. You possibly can specify the vary within the in parameter:
|
struct SpeedometerView: View { @State non-public var currentSpeed = 100.0
var physique: some View { Gauge(worth: currentSpeed, in: 0...200) { Textual content(“Velocity”) } currentValueLabel: { Textual content(“(currentSpeed.formatted(.quantity))km/h”) } minimumValueLabel: { Textual content(0.formatted(.quantity)) } maximumValueLabel: { Textual content(200.formatted(.quantity)) } } } |
Within the code above, we set the vary to 0...200. In case you already add the SpeedometerView within the preview struct. Your preview ought to fill half of the progress bar as we set the present pace to 100km/h.
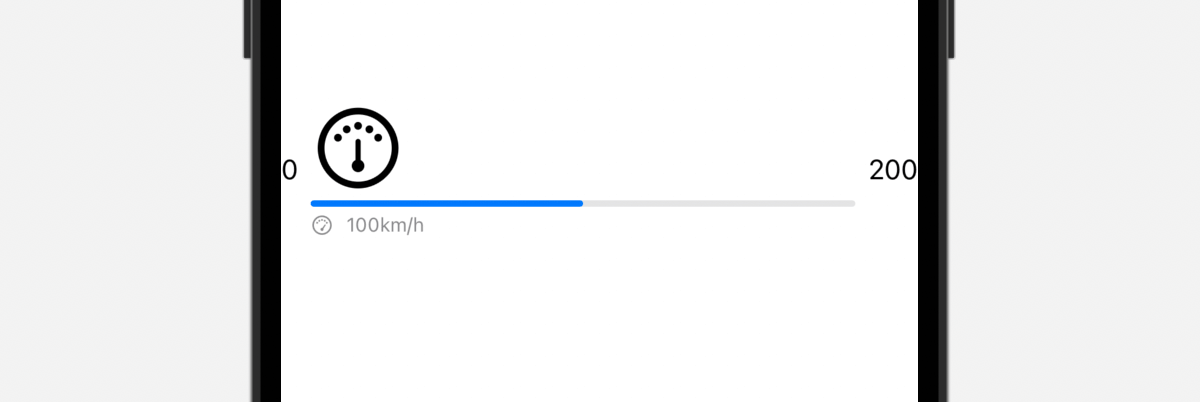
Utilizing Picture Labels
You aren’t restricted to make use of textual content labels for displaying ranges and present worth. Right here is an instance:
|
Gauge(worth: currentSpeed, in: 0...200) { Picture(systemName: “gauge.medium”) .font(.system(measurement: 50.0)) } currentValueLabel: { HStack { Picture(systemName: “gauge.excessive”) Textual content(“(currentSpeed.formatted(.quantity))km/h”) } } minimumValueLabel: { Textual content(0.formatted(.quantity)) } maximumValueLabel: { Textual content(200.formatted(.quantity)) } |
We alter the textual content label of the gauge to a system picture. And, for the present worth label, we create a stack to rearrange the picture and textual content. Your preview ought to show the gauge like that proven in determine 3.

Customizing the Gauge Type

The default shade of the Gauge view is blue. To customise its shade, connect the tint modifier and set the worth to your most well-liked shade like this:
|
Gauge(worth: currentSpeed, in: 0...200) { Picture(systemName: “gauge.medium”) .font(.system(measurement: 50.0)) } currentValueLabel: { HStack { Picture(systemName: “gauge.excessive”) Textual content(“(currentSpeed.formatted(.quantity))km/h”) } } minimumValueLabel: { Textual content(0.formatted(.quantity)) } maximumValueLabel: { Textual content(200.formatted(.quantity)) } .tint(.purple) |
The look & really feel of the Gauge view is similar to that of ProgressView. Optionally, you possibly can customise the Gauge view utilizing the gaugeStyle modifier. The modifier helps a number of built-in types.
linearCapacity
That is the default type that shows a bar that fills from resulting in trailing edges. Determine 4 reveals a pattern gauge on this type.
accessoryLinear
This type shows a bar with some extent marker to point the present worth.

accessoryLinearCapacity
For this type, the gauge continues to be displayed as a progress bar nevertheless it’s extra compact.
accessoryCircular
As an alternative of displaying a bar, this type shows an open ring with some extent marker to point the present worth.

accessoryCircularCapacity
This type shows a closed ring that’s partially stuffed in to point the gauge’s present worth. The present worth can also be displayed on the heart of the gauge.

Making a Customized Gauge Type

The built-in gauge types are restricted however SwiftUI means that you can create your personal gauge type. Let me present you a fast demo to construct a gauge type just like the one displayed in determine 9.
To create a customized gauge type, you need to undertake the GaugeStyle protocol and supply your personal implementation. Right here is our implementation of the customized type:
|
1 2 3 4 5 6 7 8 9 10 11 12 13 14 15 16 17 18 19 20 21 22 23 24 25 26 27 28 29 30 31 32 33 34 35 |
struct SpeedometerGaugeStyle: GaugeStyle { non-public var purpleGradient = LinearGradient(gradient: Gradient(colours: [ Color(red: 207/255, green: 150/255, blue: 207/255), Color(red: 107/255, green: 116/255, blue: 179/255) ]), startPoint: .trailing, endPoint: .main)
func makeBody(configuration: Configuration) –> some View { ZStack {
Circle() .foregroundColor(Colour(.systemGray6))
Circle() .trim(from: 0, to: 0.75 * configuration.worth) .stroke(purpleGradient, lineWidth: 20) .rotationEffect(.levels(135))
Circle() .trim(from: 0, to: 0.75) .stroke(Colour.black, type: StrokeStyle(lineWidth: 10, lineCap: .butt, lineJoin: .spherical, sprint: [1, 34], dashPhase: 0.0)) .rotationEffect(.levels(135))
VStack { configuration.currentValueLabel .font(.system(measurement: 80, weight: .daring, design: .rounded)) .foregroundColor(.grey) Textual content(“KM/H”) .font(.system(.physique, design: .rounded)) .daring() .foregroundColor(.grey) }
} .body(width: 300, top: 300)
}
} |
To be able to conform the protocol, we’ve to implement the makeBody technique to current our personal gauge type. The configuration bundles the present worth and worth label of the gauge. Within the code above, we use these two values to show the present pace and compute the arc size.
As soon as we implement our customized gauge type, we are able to apply it by attaching the gaugeStyle modifier like this:
|
struct CustomGaugeView: View {
@State non-public var currentSpeed = 140.0
var physique: some View { Gauge(worth: currentSpeed, in: 0...200) { Picture(systemName: “gauge.medium”) .font(.system(measurement: 50.0)) } currentValueLabel: { Textual content(“(currentSpeed.formatted(.quantity))”)
} .gaugeStyle(SpeedometerGaugeStyle())
} } |
I created a separate view for the demo. To preview the CustomGaugeView, you’ll want to replace the ContentView_Previews struct to incorporate the CustomGaugeView:
|
struct ContentView_Previews: PreviewProvider { static var previews: some View { ContentView() SpeedometerView() .previewDisplayName(“Speedometer”)
CustomGaugeView() .previewDisplayName(“CustomGaugeView”) } } |
That’s it. In case you’ve made the modifications, your preview ought to present a customized gauge.

