
Study to create customized graphics utilizing Jetpack Compose in Android with the handy Canvas composable and the Paint object.
Android has quite a lot of graphics-based objects to put on the app’s display. A few of these graphics objects embrace textual content, buttons and checkboxes. What for those who wished to attract customized graphics? Like rectangles, traces, triangles and different shapes? Video video games, portray apps or chart drawing packages want customized graphics. If you desire a good avatar in your subsequent sport, customized graphics with Jetpack Compose would be the option to create it.
You draw customized graphics on a particular view known as a Canvas with a Paint interface. When working with Jetpack Compose, you employ the Graphics API. The Graphics API makes use of an method known as the declarative programming paradigm. On this tutorial, you’ll be taught this less complicated approach to make use of the Graphics API on Canvas.
On this tutorial, you’ll use Jetpack Compose to:
- Draw primitive shapes with customized graphics.
- Create advanced customized graphics by combining graphics objects.
- Show textual content utilizing Paint.
- Remodel objects.
Getting Began
Begin through the use of the Obtain Supplies button on the prime or backside of this tutorial to obtain the mission.
Open the mission in Android Studio Bumblebee or later and get aware of the information. You’ll discover a starter mission and a remaining mission. Open and run the starter mission. The app – Pacman – comprises a clean, white display.
Humble beginnings thus far, proper? In case you’re questioning in regards to the finish results of the mission, open and run the ultimate mission. You’ll see the Pacman display:

Hopefully, seeing the ultimate app will get you fired as much as begin drawing some superior Pacman graphics. So with that, waka, waka, chomp, chomp. Time to get to it!
Creating Jetpack Compose Customized Graphics
You draw graphics like buttons, textual content fields and pickers by putting them on a view. “Graphics” on this tutorial refers to customized drawings like rectangles, triangles and features. The graphics right here, known as primitives, aren’t like refined shapes like buttons. You can create graphics utilizing bitmap or SVG, however the Graphics API in Android offers you another option to do it. As a substitute of drawing graphics utilizing instruments like Adobe Illustrator and importing them as bitmap or SVG, you possibly can create uncooked graphics instantly via code.
Utilizing solely code, you continue to create a bitmap with pixels and can see the identical photographs on the Android display. Your code makes use of Canvas to attract objects utilizing a bitmap. As a substitute of placing sure colours in particular x and y areas, you employ helper strategies to attract frequent shapes like traces, rectangles and circles. Lastly, to alter the bitmap’s fashion and colours, you employ the Paint interface.
Utilizing Declarative Graphics API
The Graphics API has been within the Android SDK since its inception, API stage 1, in 2008. What’s new is a declarative approach to make use of this API: It makes managing Canvas and Paint a simple job. You don’t must set methodology or different configurations on the Paint object. As a substitute, all of the configuration and execution occur in a single place: the composable operate. Earlier than Jetpack Compose, working with the Paint API required meticulous element since code group choices might trigger noticeable efficiency inefficiencies. Moreover, working with Canvas may be complicated. However with Compose, it’s a breeze to create graphics.
Understanding Canvas
What’s Canvas?
To attract an object on the Android display, first you want a Drawable to carry your drawing. Drawings are composed of pixels. In case you’ve labored in Android very lengthy, you’ll find out about Drawable. You employ this class if you wish to show a picture. Canvas holds the strategies to attract shapes. So, with Drawable, you override the draw methodology. The draw methodology accepts Canvas because the argument. This connection lets you draw shapes utilizing code in Drawable to place them on the Canvas.
What are you able to do with Canvas?
Canvas lets you draw many primitive shapes, from circles to clipping the shapes. You can say that Canvas is an abstraction of Drawable. You load up a picture with Drawable by inflating SVG or PNG information. Inflating doesn’t want Canvas. However for those who wished to attract a primitive form dynamically, you’d use Canvas.
Consider Canvas as a layer on prime of Drawable the place you might draw quite a lot of shapes.
Making a Canvas
Making a Canvas is simple. Within the starter mission, open MainActivity.kt and take a look at CanvasApp:
  Canvas(modifier = Modifier
    .fillMaxHeight()
    .fillMaxWidth()
  ) {
...
  }
Canvas accepts a modifier that permits you to modify the Canvas’s dimension, for instance. On this instance, you set the dimensions to the utmost dimension of the mother or father.
If you ran the starter mission, you didn’t see something, nevertheless it’s time to alter that. Take a look at the primary two traces contained in the Canvas block:
    val canvasWidth = dimension.width
    val canvasHeight = dimension.peak
Contained in the Canvas block, you might question the dimensions of Canvas from dimension. Keep in mind the modifier above that extends to the utmost width and peak? That’s the dimensions of Canvas.
Drawing on a Canvas With Jetpack Compose
Following the primary two traces is a name to drawBlackScreen:
drawBlackScreen(scope = this, canvasWidth, canvasHeight)
Go inside drawBlackScreen. It’s empty proper now. Put the next code inside it:
scope.drawRect(Coloration.Black,
    dimension=Measurement(canvasWidth, canvasHeight))
As its title suggests, drawRect attracts a rectangle. It’s value noting that considerate methodology names are an amazing assist in code growth. You realize what drawRect does by its title: It attracts a rectangle. However what are its parameters? The primary is the colour of the rectangle and the second parameter is the dimensions of the rectangle.
By calling Measurement, Android Studio assists you in including the required import, androidx.compose.ui.geometry.Measurement.
Construct and run the app. You’ll see a black rectangle over the total display:

In your utilization, you omitted the Paint object argument, however you might provide one to alter the fashion of the drawn rectangle. You’ll see how you can assemble Paint later. You additionally omitted the place argument. This implies you used the default worth for the place, which is 0 for x and y coordinates. Different parameters outline shade and dimension, that are frequent to all objects. Different object strategies require completely different parameters in keeping with the article form. drawCircle wants an argument for radius, however the line object doesn’t.
Utilizing Modifier
You’ve seen Modifier within the Canvas operate. However you might have different arsenals as effectively. Suppose you need to add some padding. Change the Modifier inside Canvas to:
  Canvas(modifier = Modifier
    .fillMaxHeight()
    .fillMaxWidth()
    .padding(50.dp)
  ) {
Don’t neglect to import padding. Every methodology on the modifier returns an up to date Modifier occasion. So by chaining the tactic calls, you’re progressively constructing the Canvas. The order by which you name the strategies matter.
Rebuild the mission and run it. You’ll see the black display now has white padding:
Now that you just’ve seen how padding works for customized graphics in Jetpack Compose, you possibly can take away that code.
Creating Objects With Jetpack Compose
It’s lastly time to strive to attract some shapes! You’ll see that every of those shapes has its personal traits.
Drawing Traces
Now that you just’ve created a rectangle, it’s time to create different shapes. You’ll begin by drawing a part of the Pacman maze. Go inside drawBlueLines. You discover that there’s an annotation on prime of this methodology, @OptIn(ExperimentalGraphicsApi::class). It’s wanted since you use Coloration.hsv, which is experimental. So what is that this methodology? It will get a shade that you just’ll use to attract on Canvas. HSV (hue, saturation, worth) is likely one of the shade areas in addition to RGB (crimson, inexperienced, blue). You’ll be able to learn extra about HSV in Picture Processing in iOS Half 1: Uncooked Bitmap Modification. Coloration.hsv accepts three arguments: hue, saturation and worth. The saturation and worth ranges from 0 to 1. It’s a float which represents the share worth.
On this methodology, you might want to draw 4 traces. You’ve already acquired the positions outlined for you.
Add the next code at // 2. Use the drawLine methodology:
    scope.drawLine(
      blue, // 1
      Offset(0f, line), // 2
      Offset(canvasWidth, line), // 2
      strokeWidth = 8.dp.worth // 3
    )
Right here’s what is going on:
-
blueis the colour you bought fromColoration.hsv. - These outline the dot positions that make a line when related. Every dot wants an
Offset. Mainly, it’s an object that accepts two values, the x and y positions. - This units the width of the stroke. The upper the worth, the thicker your line turns into. You outline a line by two factors. That’s why the tactic to attract a line wants two
Offsetarguments. It’s completely different from the tactic for drawing a rectangle.
Rebuild the mission and run the app. You’ll see 4 blue traces:

Discover that you just’ve drawn traces after drawing a rectangle — the order issues. In case you draw traces first, then draw a rectangle, the massive rectangle will cowl your traces.
Drawing Circles
Subsequent, you’ll draw an influence pellet. The circle represents an object that, if eaten by Pacman, makes him proof against ghosts for a sure time frame. Go to // 3. Use the drawCircle methodology, and add the next:
  scope.drawCircle(purple, // 1
    heart = Offset(pacmanOffset.x + 600.dp.worth, dotYPos), // 2
    radius = radius) // 3
Right here’s what this code does:
- This specifies the colour of the circle.
- The
heartargument refers back to the place of the middle of the circle in Canvas. - The
radiusrefers to how huge your circle is.
As you possibly can see, each strategies — whether or not drawing a rectangle, line or circle — settle for a shade argument. Nonetheless, they differ in different arguments as a result of each form is a bit completely different. All of the strategies settle for an non-compulsory Paint object.
Construct the mission and run the app. You’ll see a purple circle:
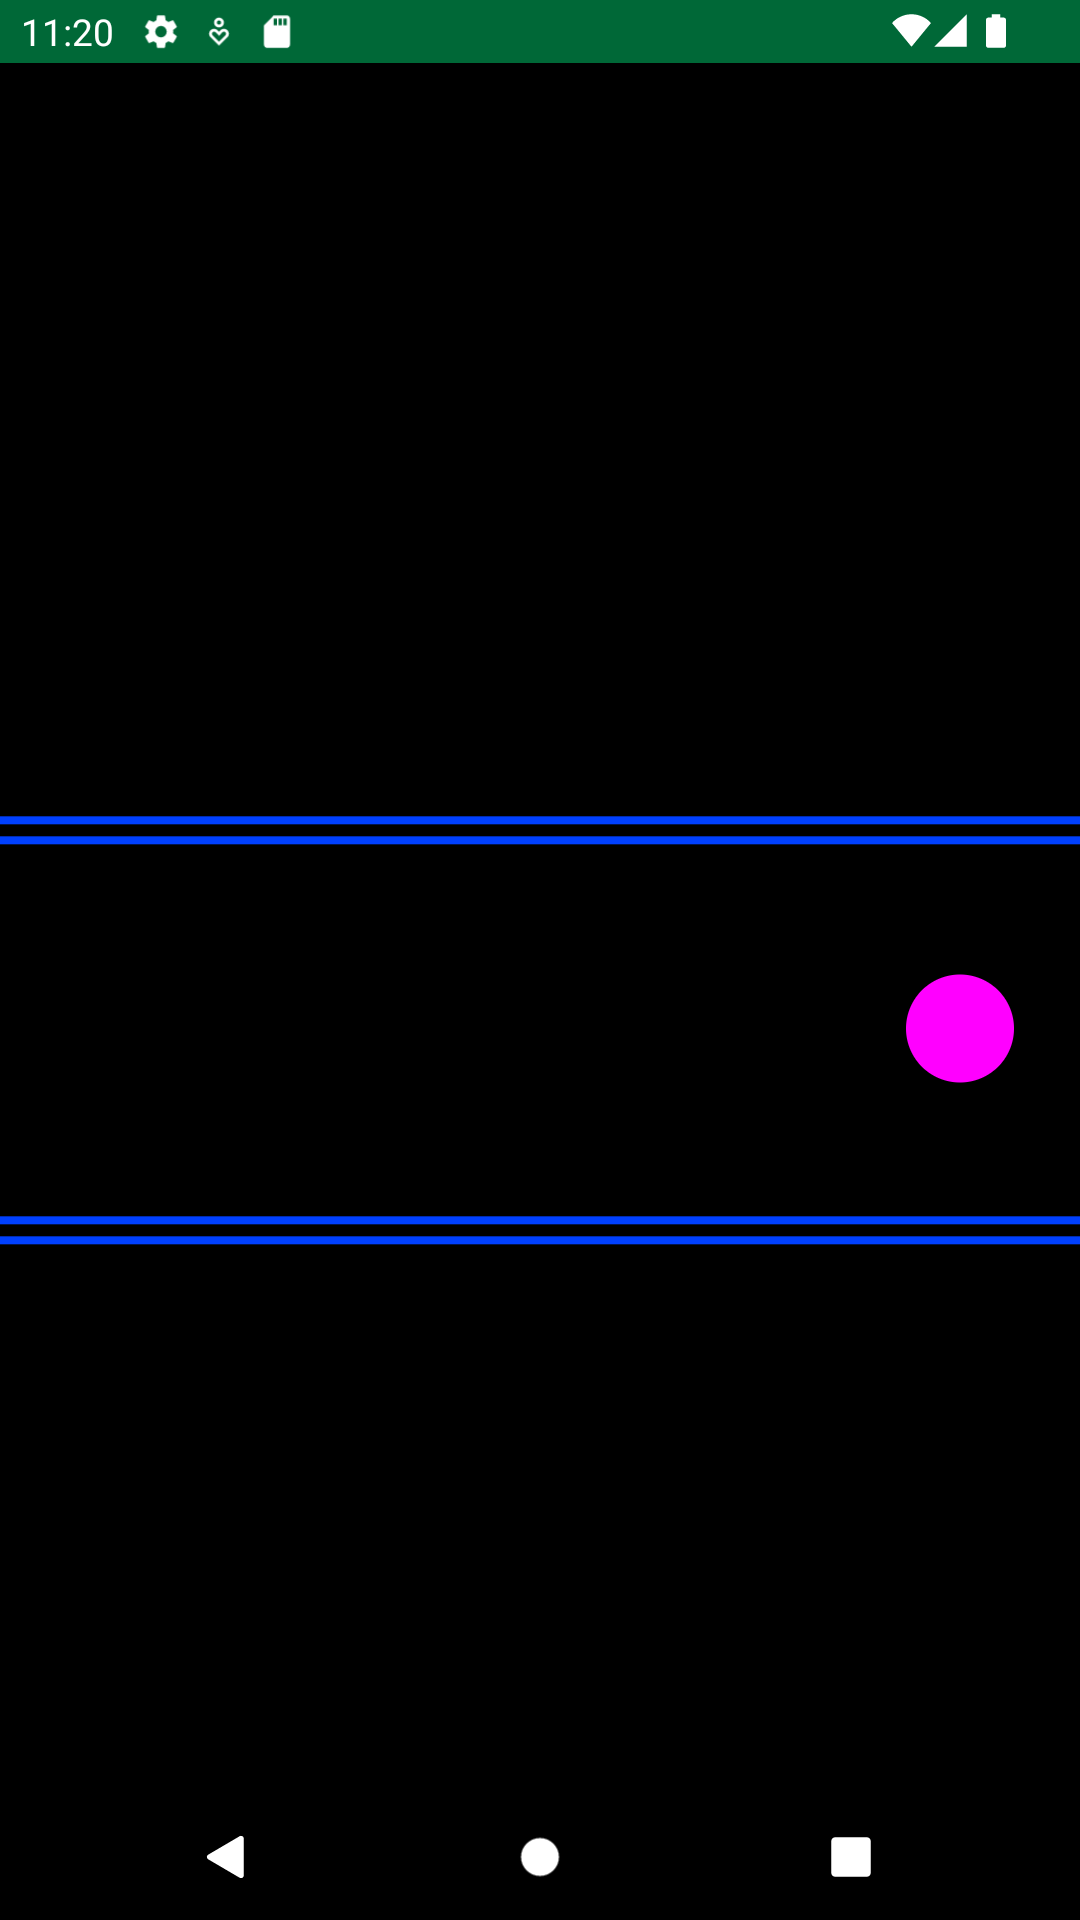
With that, your energy pellet is able to give ol’ Blinky — spoiler — a run for his cash! :]
Drawing Level Traces
Within the Pacman video video games, this line of factors confer with the dots that Pacman must eat to complete the sport. You’ll be able to create all of the factors one after the other, however you might additionally use a technique to create a line consisting of factors. Discover // 4. Use the drawPoints methodology, and add the next:
  scope.drawPoints(factors, // 1
    PointMode.Factors, // 2
    purple, // 3
    strokeWidth = 16.dp.worth) // 4
This code defines:
- The checklist of
Offsets the place you outlined the place of factors. - The mode or fashion of the purpose. Right here, you render small squares. There are different
PointModechoices. Strive them out earlier than shifting on. Press Ctrl (or CMD on a Mac) + Area in your keyboard to see the opposite choices. - Coloration.
- Line thickness.
Construct the mission and run the app. You’ll see a line of factors:

Drawing Arcs
Now, right here comes probably the most thrilling a part of the tutorial: drawing Pacman himself! Pacman is a not-quite-full circle. You name this form a sector. You name 1 / 4 of a circle an arc. Pacman appears to be like like a circle with an arc taken out!
Under // 5. Use the drawArc methodology inside drawPacman, add the next code:
  scope.drawArc(
    Coloration.Yellow, // 1
    45f, // 2
    270f, // 3
    true, // 4
    pacmanOffset,
    Measurement(200.dp.worth, 200.dp.worth)
  )
This code specifies:
-
Yellowbecause the arc’s shade. - Begin angle, which refers back to the backside a part of Pacman’s mouth.
- Sweep angle. Sum the beginning angle and the sweep angle, and also you’ll get the place of the highest a part of the mouth. Zero levels begins on the proper aspect of the circle. In case you consider the highest as north and backside as south, then zero levels is within the west path. You can change the beginning angle to zero and redraw Pacman to see the situation of zero levels.
- Whether or not you draw a line between the beginning angle and the top angle utilizing the middle. If not, you draw a direct line between the beginning and finish angles. In your case, you need to use the middle since you create a mouth by making a line from the beginning angle to the middle after which from the middle to the top angle.
Construct the mission and run the app. You’ll see Pacman:

You’ll be able to see the distinction between utilizing the middle or not in drawing an arc within the image beneath:

Drawing Complicated Shapes: Blinky the Ghost
The ghosts that chase your Pacman have a posh form, and Jetpack Compose doesn’t have any “ghost” shapes in its customized graphics. :] So, you’ll draw a customized ghost form. To do that, you might want to divide a ghost into just a few easy shapes and draw them every utilizing the strategies you’ve discovered.
You’ll be able to separate a ghost into completely different primitive shapes:

Drawing the Ghost’s Ft
Breaking down the ghost customized graphic, separate the toes. What do you see? Three arcs or half-circles lined up horizontally.
Go inside drawGhost and add the next code:
    val ghostXPos = canvasWidth / 4
    val ghostYPos = canvasHeight / 2
    val threeBumpsPath = Path().let {
      it.arcTo( // 1
        Rect(Offset(ghostXPos - 50.dp.worth, ghostYPos + 175.dp.worth),
          Measurement(50.dp.worth, 50.dp.worth)),
        startAngleDegrees = 0f,
        sweepAngleDegrees = 180f,
        forceMoveTo = true
      )
      it.arcTo( // 2
        Rect(Offset(ghostXPos - 100.dp.worth, ghostYPos + 175.dp.worth),
          Measurement(50.dp.worth, 50.dp.worth)),
        startAngleDegrees = 0f,
        sweepAngleDegrees = 180f,
        forceMoveTo = true
      )
      it.arcTo( // 3
        Rect(Offset(ghostXPos - 150.dp.worth, ghostYPos + 175.dp.worth),
          Measurement(50.dp.worth, 50.dp.worth)),
        startAngleDegrees = 0f,
        sweepAngleDegrees = 180f,
        forceMoveTo = true
      )
      it.shut()
      it
    }
    scope.drawPath( // 4
      path = threeBumpsPath,
      Coloration.Crimson,
      fashion = Fill
    )
By calling Rect, Android Studio assists you in including the required import, androidx.compose.ui.geometry.Rect.
-
arcTois much likedrawArcabove: thestartAngleDegreesandsweepAngleDegreesarguments are like begin and sweep angles the place the first argument is the rectangle that defines or bounds the dimensions of the arc. The final argument strikes thePathlevel to the top of the trail earlier than drawing one other arc. In any other case, you’d all the time draw different arcs from the identical beginning place or starting of the primary arc. - You probably did precisely the identical as above, solely you’re beginning on the finish of the primary one.
- For the final leg, you begin on the finish of the second leg.
-
pathargument is the trail you’ve created, and the second argument is the colour of your path. The third argument,fill, is whether or not it is best to fill the trail with the chosen shade.
Rebuild the mission and run the app. You’ll see the ghost’s toes:

Be aware: As a substitute of utilizing drawPath, you might use drawArc 3 times. Experiment with drawArc and see which one is extra handy for you.
Drawing the Ghost’s Physique
Now, you’ll draw a rectangle as the primary a part of the ghost’s physique. You already know how you can construct a rectangle, so add the next code on the backside of drawGhost:
    scope.drawRect(
      Coloration.Crimson,
      Offset(ghostXPos - 150.dp.worth, ghostYPos + 120.dp.worth),
      Measurement(150.dp.worth, 82.dp.worth)
    )
Rebuild the mission and launch the app. You’ll see the ghost’s physique:

A ghost with a physique? Solely in Pacman. :]
Drawing the Ghost’s Head
The ghost’s head is a half-circle arc, however greater and in the other way of the ghost’s toes. Add the next code on the backside of drawGhost:
    scope.drawArc(
      Coloration.Crimson,
      startAngle = 180f,
      sweepAngle = 180f,
      useCenter = false,
      topLeft = Offset(ghostXPos - 150.dp.worth, ghostYPos + 50.dp.worth),
      dimension = Measurement(150.dp.worth, 150.dp.worth)
    )
Beginning on the prime left nook of the ghost’s physique, you draw an arc 180 levels to the suitable. Rebuild the mission and run the app. You’ll see the ghost’s head:

Drawing the Ghost’s Eyes
Wow, all you’re lacking now are the eyes! The ghost has two eyes, with every eye composed of a white outer circle and a black internal circle for the iris. So now, you’ll draw 4 circles identical to you’ve already executed with the ability pellet. Add the next code on the backside of drawGhost:
    scope.drawCircle(
      Coloration.White,
      heart = Offset(ghostXPos - 100.dp.worth, ghostYPos + 100.dp.worth),
      radius = 20f
    )
    scope.drawCircle(
      Coloration.Black,
      heart = Offset(ghostXPos - 90.dp.worth, ghostYPos + 100.dp.worth),
      radius = 10f
    )
Rebuild the mission and run the app. You’ll see a one-eyed ghost:

Now, strive to attract the ghost’s left eye. Gotta have two eyes to catch Pacman. :]
Drawing Textual content With Jetpack Compose
To attract textual content, you might want to entry the native Canvas object as a result of you possibly can’t draw textual content on prime of Jetpack Compose’s Canvas. Inside drawScore, you’ll see that you’ve got textPaint:
  val textPaint = Paint().asFrameworkPaint().apply {
    isAntiAlias = true
    textSize = 80.sp.worth
    shade = android.graphics.Coloration.WHITE
    typeface = Typeface.create(Typeface.MONOSPACE, Typeface.BOLD)
    textAlign = android.graphics.Paint.Align.CENTER
  }
Textual content is drawn as a customized graphic utilizing Jetpack Compose with Paint. You alter the color and style of the textual content via this interface. Usually with Canvas, you employ the bottom Paint object, however since you’re utilizing the native Canvas object, you want the framework Paint methodology known as asFrameworkPaint. Contained in the asFrameworkPaint.apply block above, you configure the Paint object’s textual content for font, fashion, dimension and shade.
Moreover, there’s no drawText contained in the DrawingScope for the conventional Canvas object. You could name into the nativeCanvas interface to entry its drawText methodology. To attract textual content on the native Canvas, add the next code beneath // 7. Draw a textual content:
  scope.drawIntoCanvas {
    it.nativeCanvas.drawText( // 1
      "HIGH SCORE", // 2
      canvasWidth / 2, // 3
      canvasHeight / 3, // 3
      textPaint // 4
    )
    it.nativeCanvas.drawText( // 1
      "360", // 2
      canvasWidth / 2, // 3
      canvasHeight / 3 + 100.dp.worth, // 3
      textPaint // 4
    )
  }
Right here’s what’s occurring:
- Just like the Path in
arcToearlier,itis the Canvas object contained in thedrawIntoCanvasblock. You reference the native Canvas object after which usedrawTextto attract the textual content. - That is the textual content you need to write.
- These are the x and y coordinates for textual content placement.
- That is the framework Paint object representing the textual content’s shade, dimension and font.
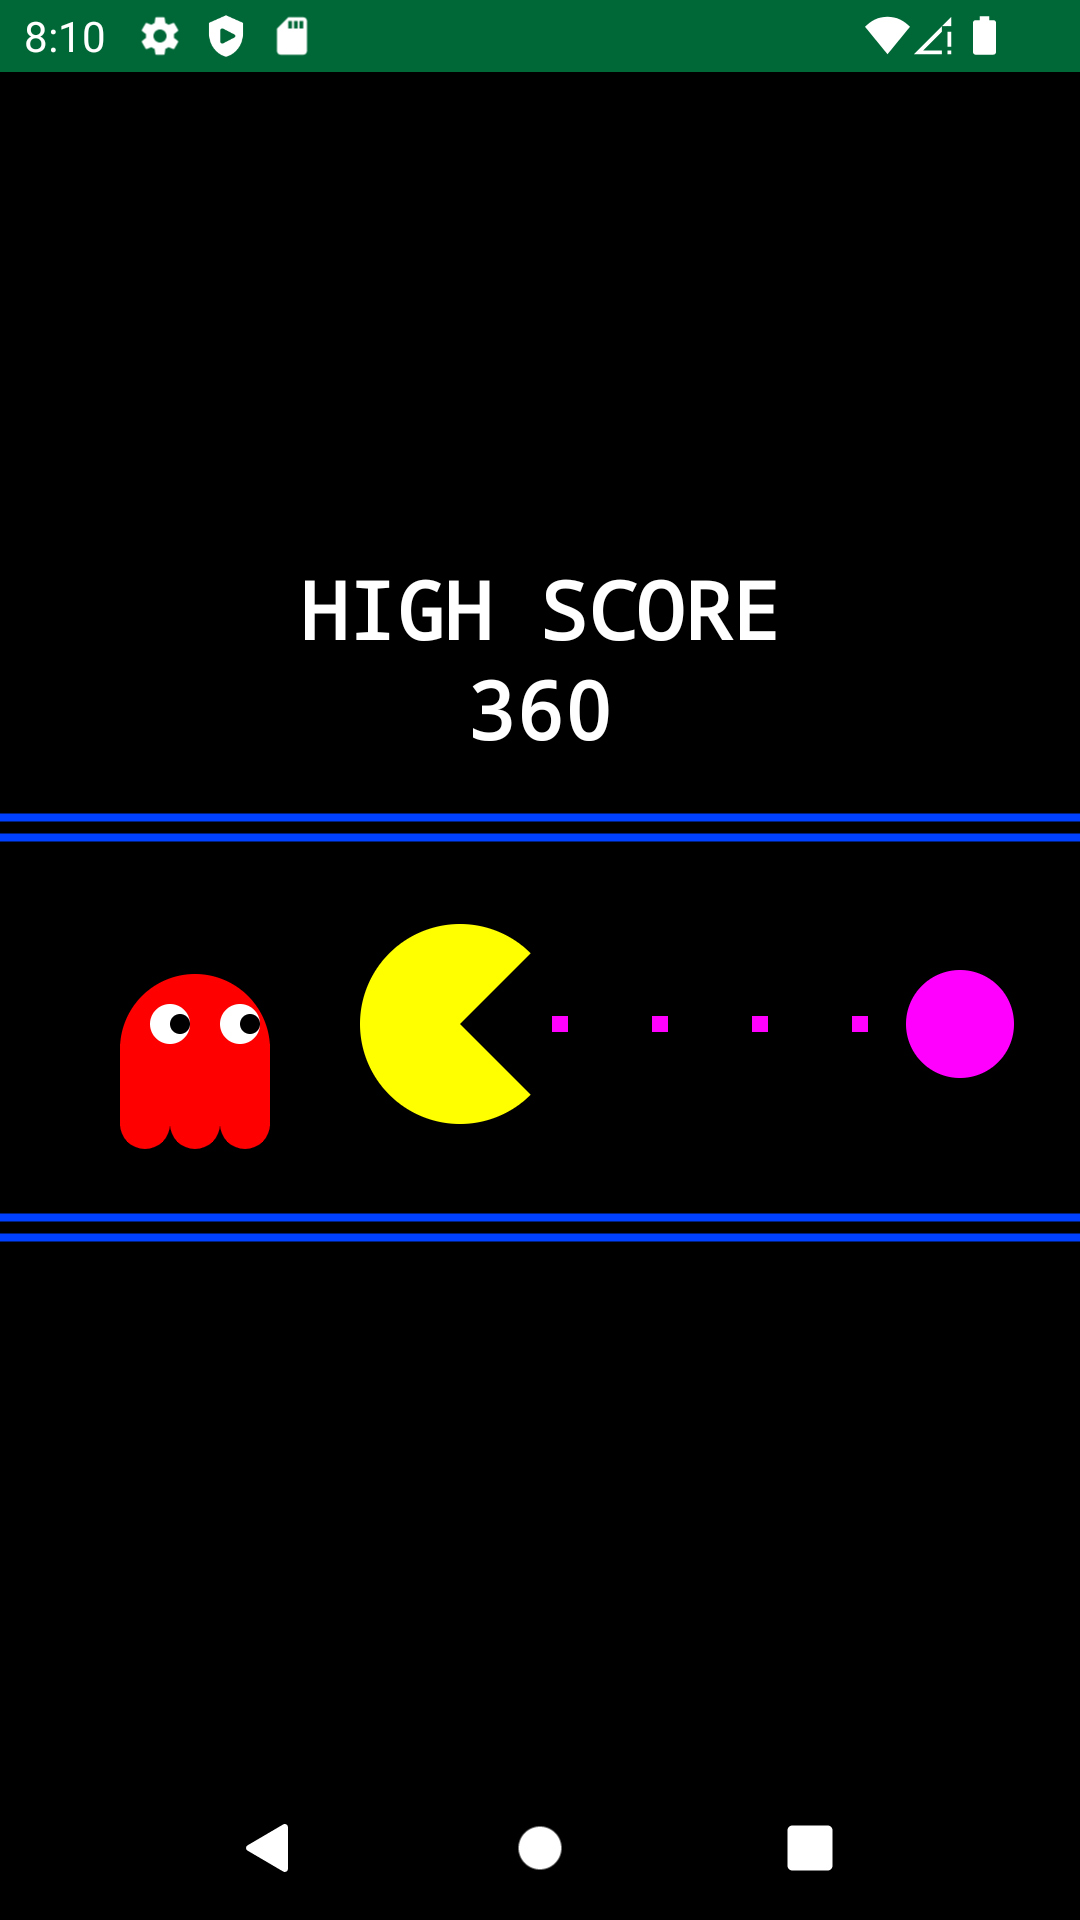
Construct the mission and run the app. You’ll see the next textual content on the display:
Scaling, Translating and Rotating Objects With Jetpack Compose
You’ve executed lots of drawing! Typically, after drawing objects, you may want to remodel them. For instance, you may need to make them greater or change their place or path. You might also must rotate Pacman as he strikes via the maze: When he strikes north, his mouth ought to level north.
Scaling and Translating Objects
Take a look at the ghost, and also you’ll see he’s smaller than Pacman. Additionally, the ghost’s place is barely decrease than Pacman’s. You’ll be able to repair this by reworking the ghost, which you’ll do now.
DrawingScope has the withTransform methodology. Inside this methodology, add the scale and translate modifiers. Inside drawGhost wrap each code there with the next snippet beneath:
  scope.withTransform({ // 1
    scale(1.2f) // 2
    translate(prime=-50.dp.worth, left=50.dp.worth) // 3
  }) {
    ...
  }
Right here’s what this code does:
- A
scopeblock makes use of the tacticwithTransform. Contained in the block,withTransformmakes use of two strategies, or modifiers, to remodel the article. -
scaleadjustments the dimensions of the article. The argument1.2fmeans the article can be 20% greater. -
translatehas two arguments,primeandleft.primeadjustments the vertical place of the article. The detrimental worth,-50.dp.worth, means the article rises upward. A optimistic worth pushes the article downward. The horizontal place of the article adjustments with theleftargument. The detrimental worth,-50.dp.worth, means object strikes to the left. A optimistic worth would transfer the article to the suitable.
Construct the mission and run the app. You’ll see the ghost has moved barely up and change into greater:

Effectively, take a look at that! A Blinky reproduction. Blinky can be proud. Waka do you assume? :]
Rotating Objects
The Pacman sport has a lives indicator, and including one will make this whole. The indicator is the Pacman form itself. So, if the indicator has three Pacman shapes, it means you might have three lives. You already understand how to attract Pacman. Now, you might want to duplicate him. However that’s not sufficient. You additionally want to maneuver the clones, make them smaller, after which rotate them.
Go into drawPacmanLives, and add the next code:
  scope.withTransform({
    scale(0.4f)
    translate(prime=1200.dp.worth, left=-1050.dp.worth)
    rotate(180f)
  }) {
    drawArc(
      Coloration.Yellow,
      45f,
      270f,
      true,
      pacmanOffset,
      Measurement(200.dp.worth, 200.dp.worth)
    )
  }
You’ve seen the drawArc code earlier than. It’s the code you used if you drew the unique Pacman. withTransform will scale, translate, and at last, rotate Pacman. rotate accepts the angle argument in levels.
Construct the mission and run the app. You’ll see one other Pacman however smaller and in a distinct place:

Now, strive to attract one other Pacman beside this clone to point that you’ve got two lives left within the sport.
The place to Go From Right here?
Obtain the ultimate mission by clicking Obtain Supplies on the prime or backside of this tutorial.
You’ve discovered in regards to the Graphics API in Jetpack Compose. You discovered how you can arrange Canvas and modify it utilizing a modifier. You’ve drawn many shapes and reworked them. You additionally used the native Canvas to attract textual content on it.
However there are extra stuff you haven’t explored, corresponding to animation. You can transfer Pacman and make his mouth open to simulate consuming the dots. After all, you might give life to the ghost, make it flash blue, and have it chase Pacman.
Be happy to checkout this glorious Getting Began with Jetpack Compose Animations tutorial adopted by the extra superior Jetpack Compose Animations tutorial.
We hope you loved this tutorial! When you’ve got any feedback or questions, please be part of the discussion board dialogue beneath.
