
With the widespread adoption of internet frameworks and libraries comparable to React and Vue, the event of internet purposes has shifted from having a single HTML file per web page to having small reusable elements that render a particular a part of the applying.
Equally, testing practices have additionally expanded from having solely end-to-end (E2E) exams for pages to having a number of unit exams, alongside testing the frontend elements individually.
If in case you have been utilizing Playwright to implement E2E exams on your utility, it’s possible you’ll remember that Playwright now gives the flexibility to check your frontend elements individually.
This tutorial will stroll you thru the method of writing unit exams on your Svelte, Vue, and React elements utilizing Playwright’s lately launched, at the moment experimental element testing characteristic. We’ll cowl:
If you wish to leap straight into the completed check instances, the code is obtainable throughout the playwright-ct department of the playwright-frontend-e2e-tests repository on GitHub.
Stipulations
This tutorial accommodates hands-on steps that can information you thru the method of utilizing Playwright to check elements constructed with React, Vue, and Svelte. You’ll clone a boilerplate challenge containing React, Vue, and Svelte elements in a single Yarn workspace.
To comply with together with these steps, you have to the next:
- Node.js v16 put in in your laptop
- The Git CLI put in in your laptop
- A fundamental familiarity with the React, Vue, or Svelte frameworks
What’s Playwright?
Playwright is an open supply testing instrument with major assist for internet purposes and extra experimental assist for cellular purposes.
Fairly than testing the interface on your purposes manually, Playwright gives you with the flexibility to automate your exams utilizing executable scripts written in both JavaScript or TypeScript, Java, .NET, and Python.
Introduction to Playwright’s element testing characteristic
The experimental Playwright Take a look at element testing characteristic permits you to create check instances inside which to import and check your frontend elements somewhat than having to programmatically navigate to the whole web page.
Beforehand, builders who had been already utilizing Playwright for E2E exams might have nonetheless wanted unit exams. These builders needed to undertake different testing libraries comparable to Jest to check their elements instantly.
Playwright eliminated this limitation following its v1.22.0 launch in Could 2022 with the element testing characteristic.
Presently, the element check characteristic solely helps React, Vue, and Svelte. Playwright gives a further package deal that wraps the @playwright/check package deal to supply different strategies comparable to mount for mounting particular person elements.
As you think about using Playwright on your frontend unit exams, remember the fact that the element testing characteristic remains to be in an experimental stage. Therefore, there may be future adjustments to the API.
Testing your elements utilizing Playwright
To allow you to deal with working with Playwright, this tutorial makes use of an current monorepo challenge that accommodates smaller React, Vue, and Svelte purposes.
The monorepo is managed utilizing Yarn workspaces, and the React, Vue, and Svelte purposes will render the identical web page displaying JSON knowledge fetched from the Rick and Morty API, which has info from the TV present Rick and Morty.
To get began, launch your terminal and clone the prebuilt frontend challenge from the GitHub repository utilizing the Git CLI:
Extra nice articles from LogRocket:
>git clone https://github.com/vickywane/playwright-frontend-e2e-tests.git
Use the subsequent command under to vary the listing into the cloned challenge, set up the challenge dependencies, and run the frontend purposes. The challenge makes use of the concurrently package deal beneath to run the React, Vue, and Svelte purposes from a single terminal.
# change listing
cd playwright-frontend-e2e-tests

# set up dependencies
yarn set up

# begin all purposes
yarn begin:all
It’s best to then see one thing just like the under:
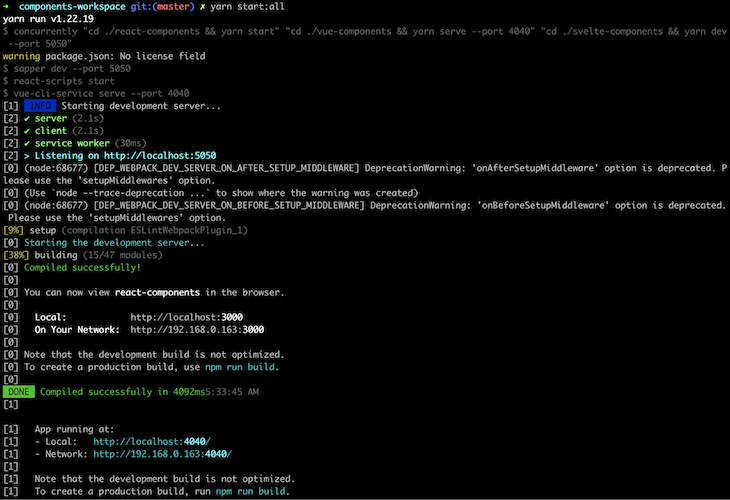
By way of the usage of Yarn workspaces for the monorepo, you solely want to put in the challenge dependencies as soon as on the root folder and Yarn will mechanically hyperlink them to different tasks. Study extra about Yarn workspaces and monorepos.
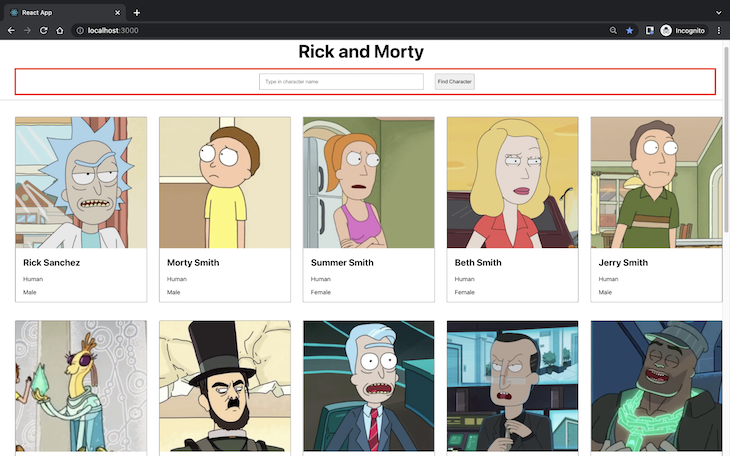
Every frontend utility throughout the challenge shows 20 characters fetched from the Rick and Morty API throughout three little one elements imported in the primary element. Throughout the subsequent sections, you’ll write element exams for every of the kid elements.
With the challenge setup, let’s stroll by the method of organising and writing E2E exams within the particular person purposes utilizing Playwright.
Organising Playwright element testing for React elements
Utilizing your browser, navigate to http://localhost:3000 to view the React utility earlier than you start writing the E2E exams. You’ll write element exams for the SearchField element highlighted within the picture under:
Execute the subsequent command to vary your terminal listing into the react-components folder and launch the interactive Playwright CLI:
cd react-components

yarn create playwright --ct
The extra --ct flag within the command above will direct the Playwright CLI to arrange the check, particularly for testing elements.
Throughout the setup course of, choose JavaScript because the programming language for writing the E2E exams, and React because the frontend framework possibility.
All configurations generated by Playwright shall be saved in a playwright-ct.config.js file, which is adjustable if you wish to change the default configurations.
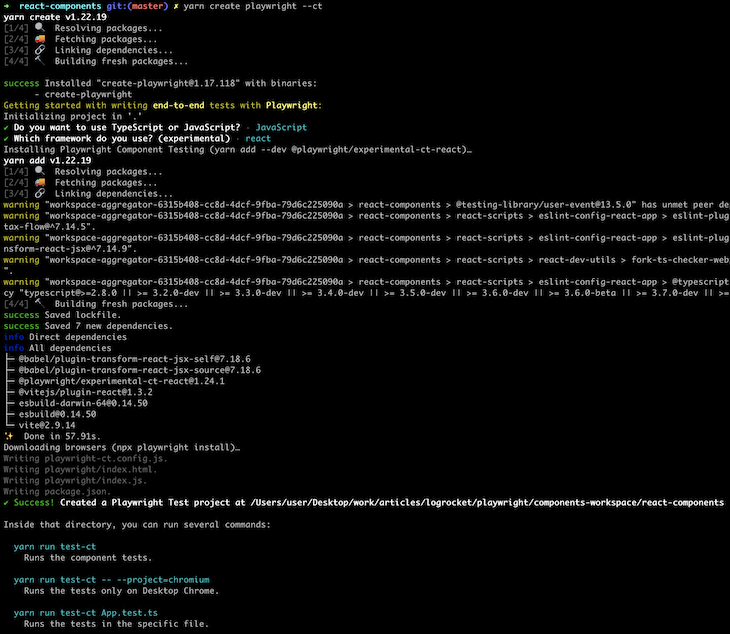
As part of the setup course of, Playwright will mechanically set up the @playwright/experimental-ct-react package deal for utilizing the element testing characteristic.
At this level, Playwright has been arrange within the react-components utility.
Open the whole playwright-frontend-e2e-tests challenge utilizing your code editor, as you’ll start creating your first check instances within the following part.
Writing Playwright element exams for React
Utilizing your code editor, create a listing named exams throughout the react-components/src listing. The exams folder will include all of the check information that you’ll create for Playwright.
Subsequent, create a SearchField.spec.jsx file throughout the exams listing. The file will include the element exams for the SearchField element, that are used to seek for a personality.
Playwright acknowledges information with .spec prefixed to the filename extension as check information.
Add the content material of the subsequent code block under into the SearchField.spec.jsx file to say that the enter subject throughout the SearchField element accepts textual content values.
The check case under makes use of the locator methodology to seek out the HTML ingredient with a search-field id attribute, fills it with the textual content Rick, and asserts that the worth of the enter ingredient is “Rick”.
import { check, count on } from '@playwright/experimental-ct-react';
import App, { SearchField } from '../App';

check('SearchField accepts textual content enter', async ({ mount }) => {
    const searchComponent = await mount(<SearchField /> );
    const searchField = searchComponent.locator('#search-field')

    await searchField.fill('Rick')

    await count on(searchField).toHaveValue('Rick')
});
Subsequent, add the code under into the SearchField.spec.jsx file to say that the executeSearch prop is executed when the button throughout the element is clicked:
check('Click on on `Discover Character` button executes executeSearch prop', async ({ mount }) => {
    let isCalled = false
    const searchComponent = await mount(
        <SearchField
            executeSearch={() => isCalled = true}
        />
    );

    await searchComponent.locator('#search-field').fill('check character')
    await searchComponent.locator('#discover').click on()

    count on(isCalled).toBeTruthy()
});
As part of a superb person expertise, the button inside a type must be disabled till the necessary enter fields throughout the type have been crammed.
Add code under to say that the element’s button is disabled when the enter subject is empty:
check('Enter subject textual content size controls `Discover Character` button disabled state', async ({ mount }) => {
    const searchComponent = await mount( <SearchField /> );

    const btn = await searchComponent.locator('#discover').isDisabled()
    count on(btn).toBeTruthy()

    await searchComponent.locator('#search-field').fill('check character')
      await count on(searchComponent.locator('#discover')).toBeEnabled();
});
This check case is important to make sure that search is barely triggered when a person enters a textual content.
With the addition of the code above, you now have three check instances throughout the SearchField.spec.jsx file. Let’s proceed to execute them!
Execute the check instances you could have created for the SearchField element utilizing the command under:
yarn test-ct
It’s best to then see one thing just like the picture under:
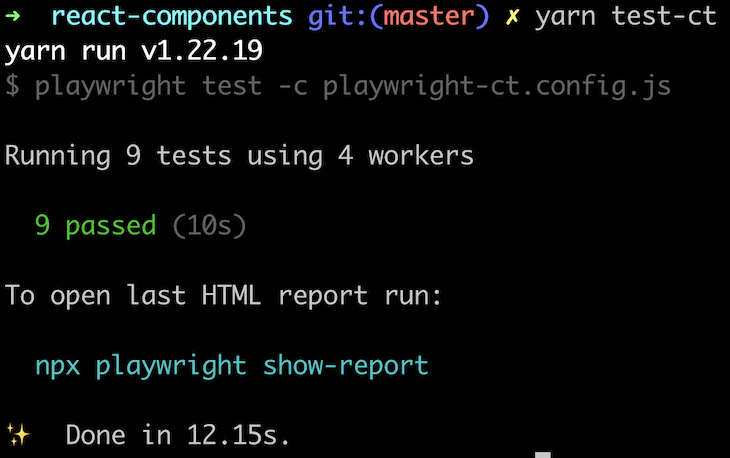
By default, the element exams shall be executed in a headless mode with out opening the Chromium, Webkit, and Firefox browsers. Add the --headless flag to the yarn test-ct command to launch the three browsers and examine your elements being examined.
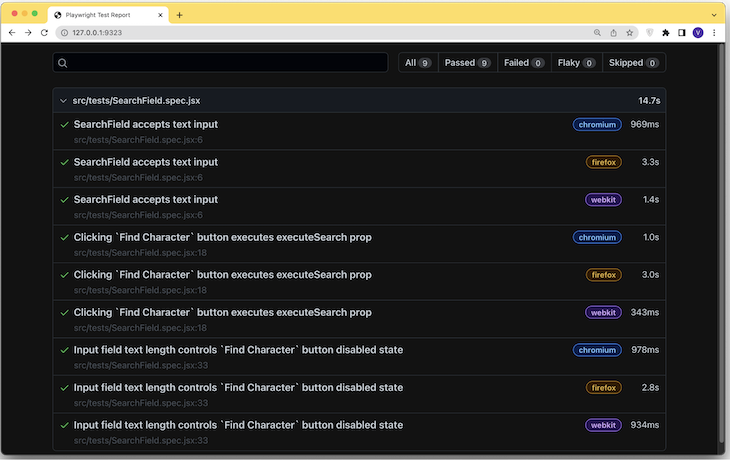
Playwright has a built-in characteristic to generate and serve an HTML report for each check run. The HTML report accommodates the check title, execution standing, and period for each check case.
Generate an HTML report on your exams utilizing the show-report command from the Playwright:
npx playwright show-report
Playwright will spin up an area server on port 9323 for the HTML report. Utilizing your browser, navigate to http://localhost:9323 to view the HTML report:
At this level, you could have seen how elements constructed utilizing React are examined instantly utilizing Playwright. Let’s proceed additional to arrange Playwright for the vue-components utility throughout the challenge.
Organising Playwright element testing for Vue elements
Within the earlier part, you used Playwright within the react-components utility to check the SearchField element.
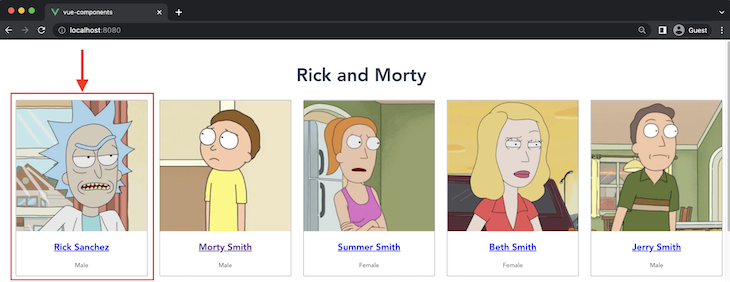
Inside this part, you’ll use Playwright within the vue-components utility in the same method to check the Character element that shows particulars a few single character from the Rick and Morty API.
Execute the subsequent command to vary your terminal listing into the vue-components listing and run the Playwright installer:
cd ../vue-components

yarn create playwright --ct
For the setup prompts, make sure that to pick out Vue because the frontend framework. Selecting Vue will trigger the Playwright CLI to mechanically set up the @playwright/experimental-ct-vue package deal for writing element exams.
Within the subsequent step, you’ll write two exams for the Character element throughout the vue-components utility. The Character element is rendered in a grid listing that shows a picture and a few particulars for a Rick and Morty character utilizing props obtained from the father or mother element.
The highlighted field throughout the picture under exhibits an instance of the Character element:
Writing Playwright element exams for Vue
Create a listing known as exams throughout the vue-components/src listing. As you probably did with the react-components utility, the check information for the vue-components may even be saved within the exams listing.
Create a Character.spec.js file throughout the exams listing to retailer the check instances for the Character element.
Add the content material of the code block under into the Character.spec.js file to say that the Character element shows the props handed into the element as the main points of a personality.
import { check, count on } from '@playwright/experimental-ct-vue';
import Character from '../elements/Character.vue'

const SAMPLE_CHARACTER = {
    "title": "Poisonous Rick",
    "gender": "Male",
    "specie": "Humanoid",
    "kind": "Rick's Poisonous Facet",
    "hyperlink": "https://rickandmortyapi.com/api/location/64",
    "picture": "https://rickandmortyapi.com/api/character/avatar/361.jpeg"
}

check('Element shows character particulars from props', async ({ mount }) => {
    const characterComponent = await mount(Character, {
        props: { ...SAMPLE_CHARACTER }
    });


       await count on(characterComponent.locator('#character-name')).toHaveText(SAMPLE_CHARACTER.title);

   await count on(characterComponent.locator('#character-gender')).toHaveText(SAMPLE_CHARACTER.gender);

   await count on(characterComponent.locator('#character-type')).toHaveText(SAMPLE_CHARACTER.kind);

   await count on(characterComponent.locator('#character-specie')).toHaveText(SAMPLE_CHARACTER.specie);

});
The code above accommodates an object with pattern fields of a personality much like what would have been retrieved from an precise request to the Rick and Morty API.
Subsequent, add the second check case under to say that the Character element shows the character’s title with an anchor ingredient having the href attribute.
check('Character title renders anchor hyperlink to character', async ({ mount }) => {
    const characterComponent = await mount(Character, {
        props: { ...SAMPLE_CHARACTER }
    });


   await count on(characterComponent.locator('#character-name > a') ).toHaveAttribute("href")

});
Now, execute the test-ct command to run the 2 Playwright check instances you could have created utilizing the 2 code blocks above:
yarn test-ct
As within the earlier part, it’s best to then be capable to see your check outcomes and generate an HTML report on your exams.
Organising Playwright element testing for Svelte elements
Having used Playwright with React and Vue purposes within the earlier sections of this text, you at the moment are utilizing Playwright with a Svelte utility.
First, execute the next command to vary your terminal listing into the svelte-components listing and run the Playwright installer.
cd ../svelte-components

yarn create playwright --ct
As you undergo the setup prompts, make sure that to pick out Svelte because the frontend framework. Selecting Svelte will trigger Playwright to mechanically set up the @playwright/experimental-ct-svelte package deal.
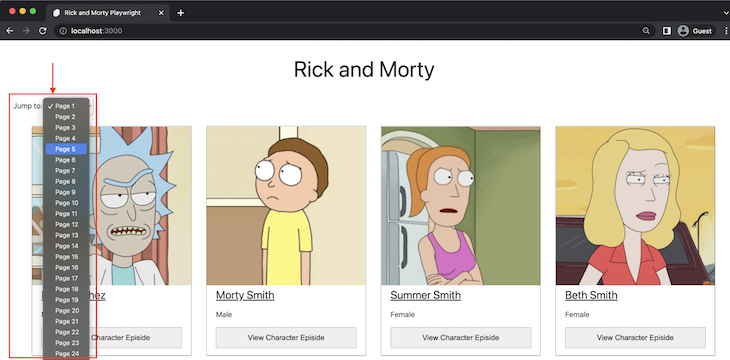
Within the subsequent half, you’ll write two check instances for the Paginator element, which renders a dropdown of web page numbers. When customers click on on a web page listed within the Paginator element, they are going to be taken to view the characters listed on that web page, as proven within the picture under:
Writing Playwright element exams for Svelte
Create a listing known as exams throughout the svelte-components/src listing to retailer the information containing your Playwright check instances.
Subsequent, create a Paginator.spec.js file throughout the exams listing to retailer the check instances for the Paginator element.
Add the content material of the code block under into the Paginator.spec.js file. This code will create a check case that asserts that the Paginator element will show the choices ingredient primarily based on the quantity handed by the pagesCount prop.
import { check, count on } from '@playwright/experimental-ct-svelte'
import Paginator from '../src/elements/Paginator.svelte'

check('Shows pages possibility primarily based on pagesCount prop', async ({ mount }) => {
    const element = await mount(Paginator, {
        props: {
            pagesCount: 42
        }
    })

   count on(await element.locator('#pages-option > possibility').depend()).toBe(42)})
})
Add the second check case under to say that the handlePageSelect prop for the Paginator element returns a quantity when an possibility is clicked to paginate the Rick and Morty characters by the quantity:
check('`handlePageSelect` prop returns the pages quantity when clicked', async ({ mount }) => {
    let pageClicked;
    const element = await mount(Paginator, {
        props: {
            handlePageSelect: quantity => pageClicked = quantity,
            pagesCount: 10,
        }
    })

    await element.locator('#pages-option > possibility').first().click on()
    count on(pageClicked).toBe(1)
})
Lastly, run the test-ct two check instances for the Paginator element.
yarn test-ct
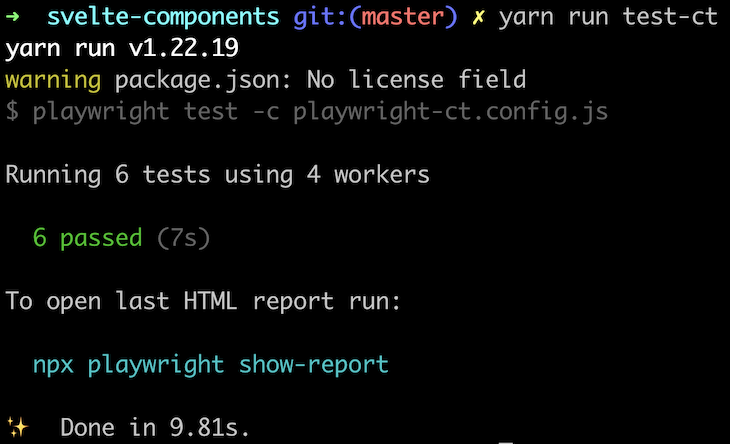
That’s it!
After passing these final Playwright element exams for the Svelte utility, you could have efficiently used the element check characteristic from Playwright to check the React, Vue, and Svelte purposes inside this instance challenge.
Closing ideas on Playwright element testing
Firstly of this tutorial, you got down to find out how your frontend elements might be examined utilizing Playwright.
The tutorial defined what the Playwright element testing characteristic is and took you thru a hands-on element testing expertise utilizing a monorepo challenge containing React, Vue, and Svelte elements.
As talked about earlier, it is very important remember the fact that the element testing characteristic from Playwright is comparatively new and nonetheless thought of experimental. It has no assist for Angular but, and compared to different testing instruments which were round for years, you would possibly uncover that some assertions are usually not accessible for Playwright.
If you happen to run into any points whereas making an attempt out the Playwright element testing characteristic, elevate an acceptable challenge throughout the GitHub repository or chat with the Playwright group on Slack.
Expertise your Vue apps precisely how a person does
Debugging Vue.js purposes might be troublesome, particularly when there are dozens, if not a whole lot of mutations throughout a person session. If you happen to’re eager about monitoring and monitoring Vue mutations for your entire customers in manufacturing, attempt LogRocket. 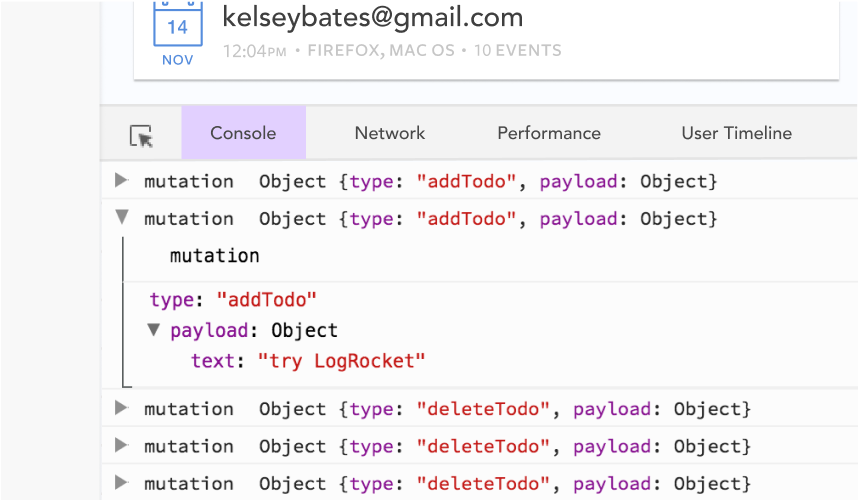 https://logrocket.com/signup/
LogRocket is sort of a DVR for internet and cellular apps, recording actually every thing that occurs in your Vue apps together with community requests, JavaScript errors, efficiency issues, and rather more. As an alternative of guessing why issues occur, you may combination and report on what state your utility was in when a problem occurred.
The LogRocket Vuex plugin logs Vuex mutations to the LogRocket console, supplying you with context round what led to an error, and what state the applying was in when a problem occurred.
Modernize the way you debug your Vue apps – Begin monitoring at no cost.
