Constructing 3D graphics in an internet browser has by no means been extra simple. Be part of me on this journey as we present you how one can create a primary scene utilizing Babylon.js.
Purpose
This text goals to information you on how one can:
- Create a Vue element
- Create a Babylon class
- Render a scene on a canvas
- Create a 3D mesh
Conditions
This text is a beginner-friendly tutorial as little trouble as attainable. I’d, nevertheless, recommend that you’ve a powerful understanding of JavaScript to do that.
Installations
Putting in Vue
To start, we are going to want Vue3 in our workspace. To take action, we sort within the command under in our terminal:
npm set up -g @vue/cli
(Be aware: you might be required to have Node.js put in as you’ll need the node bundle supervisor as we transfer ahead)
Inside the terminal, we use the command under to create a brand new venture with the folder identify bb101:
vue create bb101
After creating the venture folder, we’re prompted with a number of decisions to select from. Do the next:
- First, we need to choose the options we wish manually, so we begin by deciding on that
- Then, we add TypeScript to the already current record of options we wish
- Subsequent, we choose 3x (Vue 3) because the model of Vue.js to make use of within the venture
- We choose No because the response for the next two choices by typing “n”
- We’ll go along with the “ESLint with error prevention solely” and “lint on save” as our further lint characteristic for our linter
- To position the config for ESLint, we choose the choice “in devoted config file” and choose No for saving the preset for future tasks
Now, we watch for a number of moments to have these processes put in. Subsequent, we modify the listing in our terminal to that of the venture we’re engaged on utilizing the command cd bb101, and we use npm run serve to run our Vue software. As soon as it compiles, we may have a localhost server to open in our browser.
Putting in Babylon.js
We have to set up the Babylon bundle into our venture. We’ll make the most of a number of Babylon packages throughout this venture, however for now, let’s begin with the core bundle of Babylon. To do that, we use the next command in our terminal:
npm set up @babylonjs/core
The command above will set up babylon.js into the node module folder of our venture. After the set up, we are able to proceed to the subsequent step.
Getting began
Creating the Vue element (BabylonOne.vue)
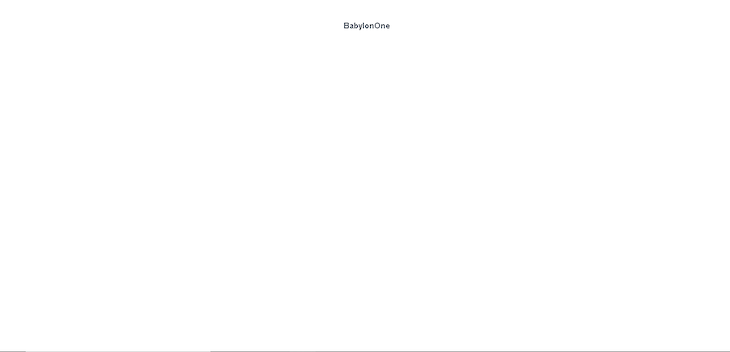
We start by modifying the default helloworld.vue file within the element folder. We need to reuse the element however with the identify BabylonOne reasonably than HelloWorld.
In our newly named BabylonOne.vue file, we are going to filter out the default content material in our HTML part (every little thing inside the beginning and shutting div) and make a bit of change to the each the HTML part and script tag’s part by changing them with the next:
<template>
<div>
 <h3>BabylonOne</h3>
 <canvas></canvas>
</div>
</template>
<script lang="ts">
import { defineComponent } from 'vue';
export default defineComponent({
identify: 'BabylonOne',
mounted(){ //lifecycle hook
const canvas = doc.querySelector("canvas")
 }
});
</script>
Altering the preliminary file identify will set off a warning as HelloWorld was the identify used within the App.vue file. Within the App.vue file, we are going to clear the content material within the template tag and alter the earlier element identify to BabylonOne (do that in each line HelloWorld is in). After we run the App in our terminal utilizing npm run serve and inside our browser, the end result ought to be as under:
Creating the Babylon class
On this part, we need to create a TypeScript class for Babylon. To do that, we are going to create a subfolder within the src folder known as BabylonOne.
On this folder, we are going to create a brand new TypeScript file known as BabylonScene. Inside this file, we are going to import Scene and Engine from our Babylon core bundle, and we are going to create a category known as BabylonScene.
Inside this class, we are going to create a scene and engine variable and a constructor that we robotically name when creating an occasion of the category. We want the constructor to seize the canvas aspect created in our Vue element.
In our scene variable, we specify the kind as Scene and engine variable of the kind as Engine. Subsequent, we add the engine variable to our constructor and set anti-aliasing to True.
We’ll create a separate technique exterior the constructor and assign it to the scene variable for the Scene variable. Lastly, we need to render our scene concurrently because the engine runs. Thus, we are going to use runRenderLoop to do that. Under is an implementation of the above:
import { Scene, Engine } from "@babylonjs/core"
export class BabylonScene {
  scene: Scene;
  engine: Engine;
  constructor(non-public canvas: HTMLCanvasElement) {
    this.engine = new Engine(this.canvas, true);
    this.scene = this.CreateScene();
    this.engine.runRenderLoop(() => {
      this.scene.render();
    });
  }
  CreateScene(): Scene {
    const scene = new Scene(this.engine);
    return scene;
  }
}
Rendering the scene in Vue
To do that, we head again to the BabylonOne file and import the BabylonScene class from BabylonScene.ts file. Inside the mounted, we name the BabylonScene class with the parameter “canvas”. Right here is how the script tag seems to be for the time being:
<script lang="ts">
import { defineComponent } from 'vue';
import { BabylonScene } from '@/BabylonOne/BabylonScene';
export default defineComponent({
 identify: 'BabylonOne',
 mounted(){ //lifecycle hook
  const canvas = doc.querySelector("canvas")!;
  new BabylonScene(canvas)
 }
});
</script>
(Be aware: Add a single exclamation behind the closing bracket within the canvas variable)
As soon as accomplished, we are going to check it in our terminal, and our result’s as under:
Modifying the CSS and including a digicam and hemispheric lighting
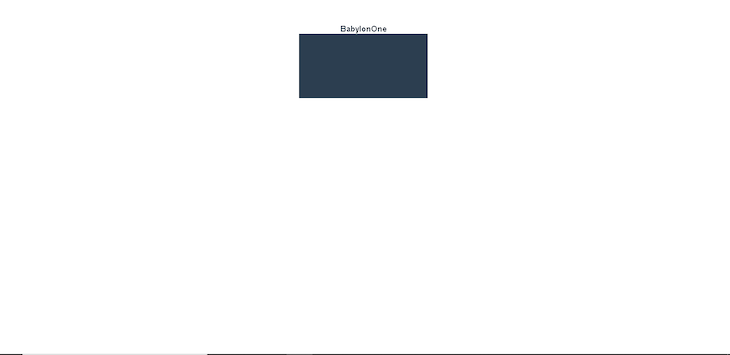
We would like the canvas measurement to be about 70–80 p.c of the display screen measurement. We need to create a canvas CSS with a width and top of 70 p.c. As soon as we implement the above, our canvas will probably be as under:
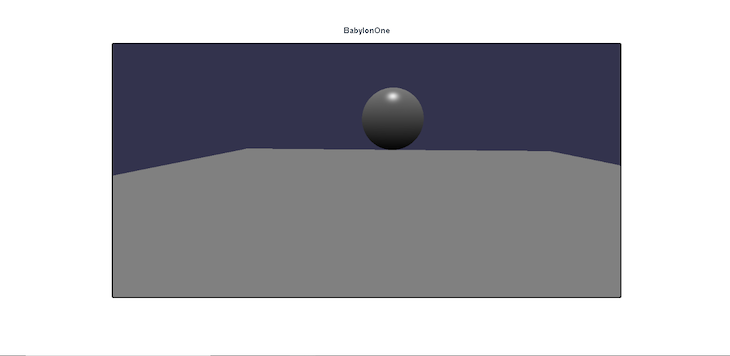
Now, we need to see issues in our canvas — thus, we are going to add a digicam, a light-weight, and a few 3D objects (a floor and a sphere ball). To do that, we add the code under to our CreateScene Methodology within the BabylonScene.ts file:
const Digicam = new FreeCamera("digicam", new Vector3(0,1,-5), this.scene);
Digicam.attachControl();
const mild = new HemisphericLight("mild", new Vector3(0,1,0), this.scene);
mild.depth = 0.5;
//3D Object
const floor = MeshBuilder.CreateGround("floor", {width: 10, top:10}, this.scene);
const sphereball = MeshBuilder.CreateSphere("sphereball", {diameter:1}, this.scene);
sphereball.place = new Vector3(0,1,0)
Explaining the code snippet
When making a digicam variable, we assign its worth as FreeCamera and outline its identify, beginning place, and scene as digicam, new Vector3(0,1,-5), this.scene, respectively. To manage the digicam with our mouse, we use the attachControl technique.
For the digicam to work, we have to add mild to see the item in the environment. To realize this, we are going to create a light-weight variable and assign its worth as HemisphericLight. We’ll add a reputation, beginning place, and scene much like the digicam variable.
Lastly, we are going to add the depth to regulate the brightness of the HemisphericLight (be aware that by default, the depth is about to at least one, making the setting too vibrant).
For the 3D object, we are going to create a floor and a sphere to symbolize a 3D object in the environment. To create a floor, we create a floor variable and assign the worth MeshBuilder.CreateGround whereas setting the identify, width and top, and scene.
We additionally use the Meshbuilder technique to create a spherical ball whereas setting the identify, diameter, and scene. To switch the ball’s place, we are going to use the place technique and assign it to a beginning place.
After implementing the code above, we must always have the end result as under:
Conclusion
Babylon.js is a flexible 3D JavaScript library able to doing something conceivable with 3D.
Babylon.js is an ideal 3D library with its solely vital disadvantage being its bundle measurement.
On this tutorial, we’ve proven you how one can create a Vue element, a Babylon class, render a scene on a canvas and create a 3D mesh
Thanks for studying and joyful coding!
Expertise your Vue apps precisely how a consumer does
Debugging Vue.js functions may be troublesome, particularly when there are dozens, if not lots of of mutations throughout a consumer session. In case you’re fascinated by monitoring and monitoring Vue mutations for your whole customers in manufacturing, strive LogRocket. 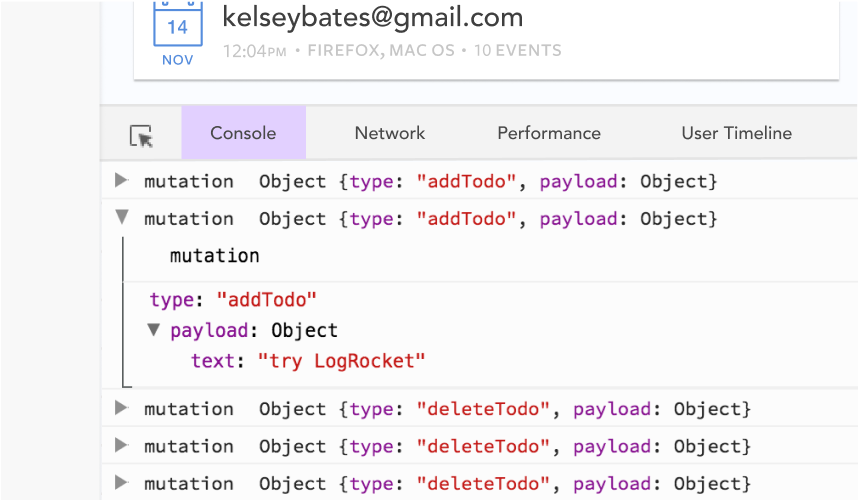 https://logrocket.com/signup/
LogRocket is sort of a DVR for internet and cellular apps, recording actually every little thing that occurs in your Vue apps together with community requests, JavaScript errors, efficiency issues, and way more. As a substitute of guessing why issues occur, you may mixture and report on what state your software was in when a problem occurred.
The LogRocket Vuex plugin logs Vuex mutations to the LogRocket console, providing you with context round what led to an error, and what state the applying was in when a problem occurred.
Modernize the way you debug your Vue apps – Begin monitoring without cost.
