
As recreation builders, we typically need our video games to appear and feel good. We will use just a few tips to offer our recreation a bit of shine. Considered one of these tips is post-processing.
When you’ve performed any video games, you’re in all probability conscious of post-processing, even should you didn’t know what it’s known as. Publish-processing performs a large half in making video games as a result of it helps enhance your recreation’s visuals, thereby making it extra enjoyable to play.
Not solely that, however post-processing additionally solves the issues of shade correction, results, and extra. The Unity recreation engine has its Publish Processing Stack in-built. On this tutorial, we’ll take a look at how one can use post-processing in Unity and how one can use it, together with:
First, let’s take a fast take a look at what post-processing is.
What’s post-processing?
Publish-processing describes the picture results that we will apply to our recreation scene. A scene accommodates your recreation’s environments and menus.
A technique you possibly can consider recreation scene design is by contemplating every scene’s file to be like a separate stage. You place your environments, obstacles, and decorations in every scene, primarily designing and constructing your recreation in items.
You may apply post-processing results as ending touches to your recreation’s visuals. Typically, you possibly can even use post-processing to create a completely completely different search for your recreation.
For instance, you can flip a darkish scene right into a shiny one through the use of auto-exposure and the Bloom impact to depict daylight. You can additionally flip a shiny day into a chilly and cloudy one utilizing the White Steadiness impact.
A variety of what we understand in our video games as nearly polished is usually achieved by what we name post-processing results. Publish-processing consists of full-screen filters and results carried out on a digital camera’s picture buffer earlier than displaying the picture on the display screen.
Publish-processing is usually used so as to add cinematic qualities to our scenes by simulating sure qualities explicit to movie cameras, similar to a movement blur. Unity makes use of the next examples to point out what a recreation scene might appear like each with and with out post-processing:
With out (earlier than) post-processing:
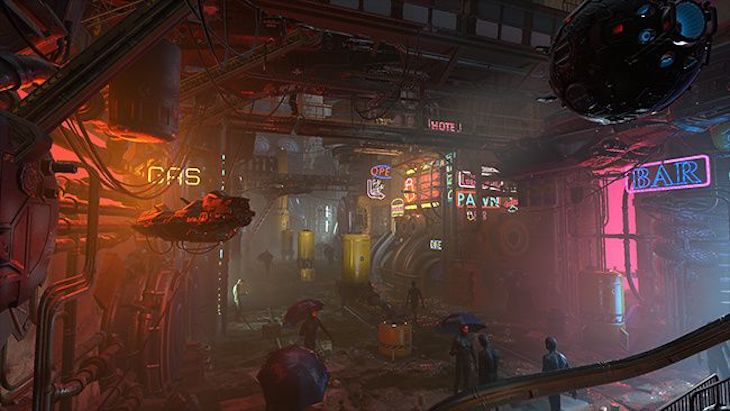
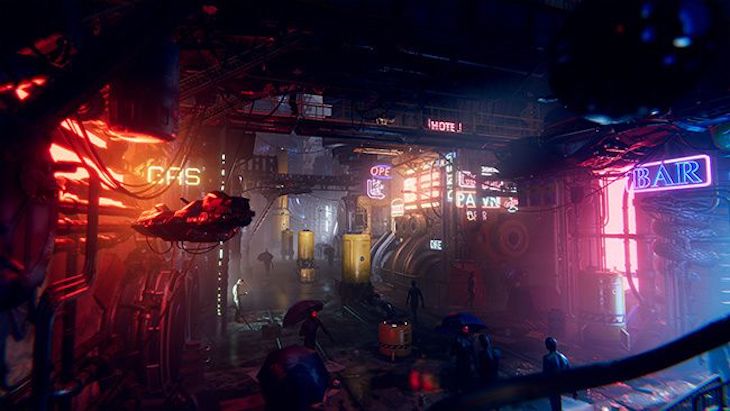
Finding out each pictures, we will see the change in colours in addition to a brighter glow in some components of the picture scene. This implies results like tonemapper and the bloom impact have been utilized to the scene, though there may very well be extra.
The pictures above present how essential post-processing is in altering the graphics of our recreation to be displayed on the display screen.
Publish-processing improves the sport’s visible points and makes the photographs extra lifelike and vivid. It additionally fine-tunes the sport’s renders, making the graphics extra genuine. You may even use post-processing results to vary a scene’s temper.
Extra nice articles from LogRocket:
Let’s now transfer on to debate post-processing in Unity.
Publish-processing in Unity
The Unity recreation engine helps post-processing by offering a number of results that may considerably enhance your recreation’s look very quickly. We will use these results to offer stunning graphics and enhance our recreation.
It is very important observe that the best way Unity’s post-processing package deal is offered to you relies on your Unity venture’s render pipeline. There are 3 ways we will use post-processing: the Constructed-in Render Pipeline, the Common Render Pipeline, and the Excessive-Definition Render Pipeline.
The Constructed-in Render Pipeline is a render pipeline that doesn’t include the post-processing package deal by default. We’ll have to put in it utilizing the package deal supervisor.
The Common Render Pipeline (URP) is a render pipeline that has its post-processing answer put in in Unity by default whenever you create a venture utilizing the URP Template.
The Excessive Definition Render Pipeline (HDRP), just like the URP, additionally has its post-processing answer put in by Unity by default whenever you create a venture utilizing the HDRP template.
Though post-processing is barely completely different when working with both URP or HDRP, their workflows are just about the identical — although the HDRP presents some extra superior results. This text will deal with probably the most generally used URP, which also needs to apply to the HDRP.
The best way to use post-processing in Unity
First, we’ll take a look at how we will use post-processing within the built-in pipeline. Afterwards, we’ll take a look at organising post-processing within the URP or HDRP.
Utilizing post-processing in Unity’s built-in pipeline
For the reason that built-in pipeline doesn’t have post-processing in-built by default, we’ll have to put in it by deciding on window> Package deal Supervisor.
It ought to open a brand new pop-up window; if it doesn’t, test that you just set your package deal supervisor to Unity Registry.
On this pop-up window, seek for and set up your required package deal — on this case, Publish Processing. You’ll see the window as proven beneath:
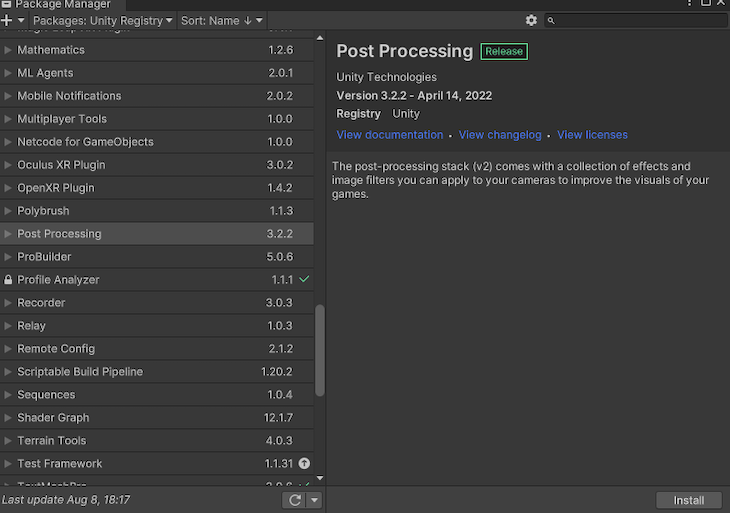
Click on on the “Set up” button on the backside proper nook of the window.
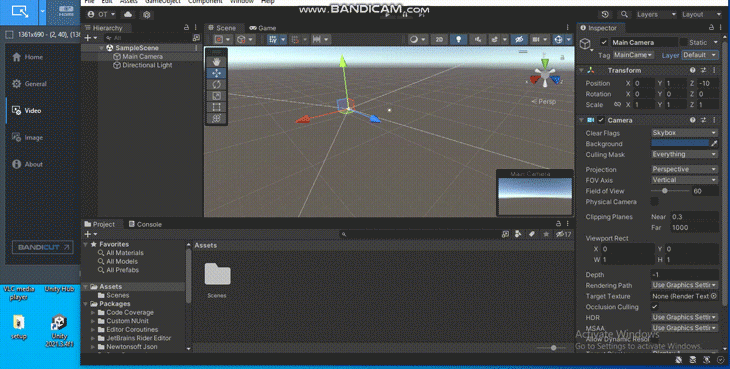
Now that now we have that put in the Publish Processing package deal, we have to configure our recreation and scene to reap the benefits of the package deal. To perform this, we would require a Publish-processing Quantity part to find out the realm wherein we are going to apply our results. So let’s construct one.
Choose your major digital camera. Within the default tab, we should create a brand new layer, title it post-process layer, and assign it as our default layer, like so:
Subsequent, scroll down, click on the “Add Part” button, seek for the post-process layer we created within the earlier step, and choose it. This may permit each impact we add to to be seen.
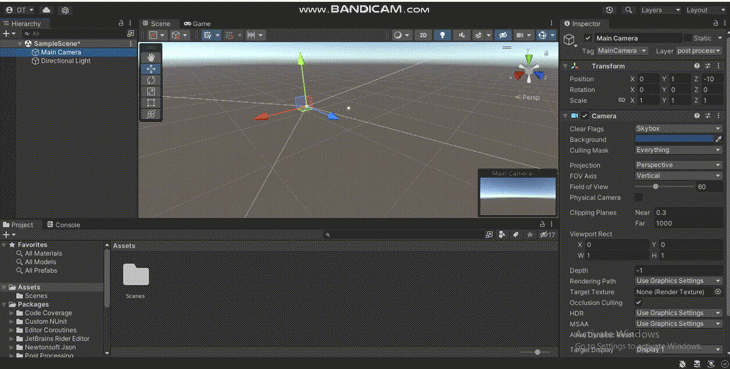
As soon as we’ve finished that, we’ll click on the “Add Part” button once more and create a Publish-process Quantity part.
Tick the “Is International” field to set this part to world; this may make the consequences utilized to our scene seen on your complete display screen.
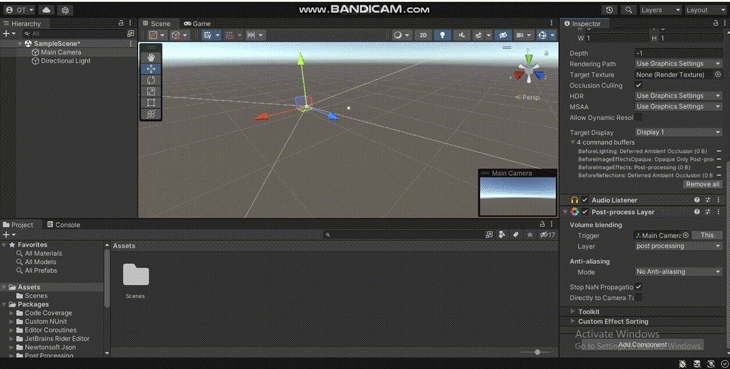
After we’ve ticked this field, let’s now create a brand new profile by clicking the new button. We will then transfer on so as to add the consequences we we would like.
Establishing post-processing in URP and HDRP
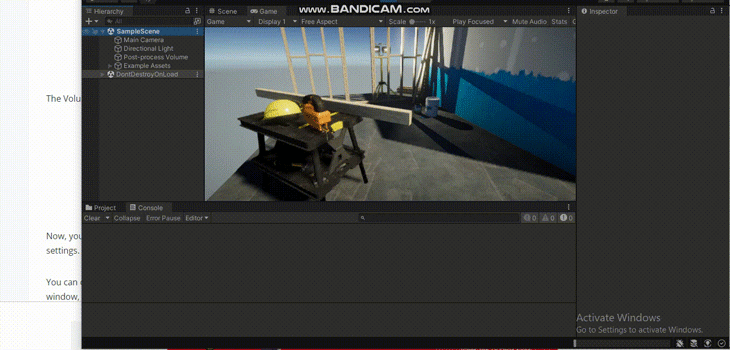
Since URP and HDRP have comparable workflows, we’ll solely take a look at how one can arrange post-processing in URP for this. I’ll be making a 3D URP pattern scene so we will use it to clarify the post-processing impact instruments within the subsequent part.
First, let’s create a GameObject with a Quantity part. There are completely different choices for our Quantity.
The International Quantity applies results to your complete display screen, whereas the Field, Sphere, and Mesh Volumes outline a boundary of their respective shapes and apply post-processing results when the digital camera enters the boundary.
After we’ve created that, our inspector tab ought to appear like this for our Quantity:
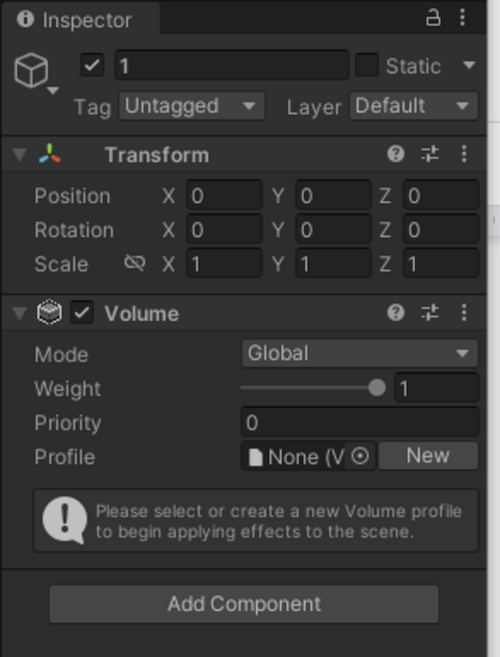
We then must create a Quantity profile, which is sort of a container for holding your post-processing results and their settings. As you possibly can see within the picture above, you want this Quantity profile with a view to begin making use of scene results.
In our inspector tab underneath our quantity profile, click on the “New” button. As soon as now we have added a Quantity profile, we’ll click on the “Add Override” button.
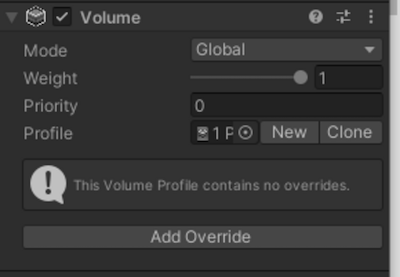
Choose “Publish-processing,” and we must always see a listing of results. Let’s see how they work within the subsequent part.
Publish-processing impact instruments in Unity
On this part, we are going to discover numerous post-processing impact instruments in Unity and the way they’ll have an effect on your pictures.
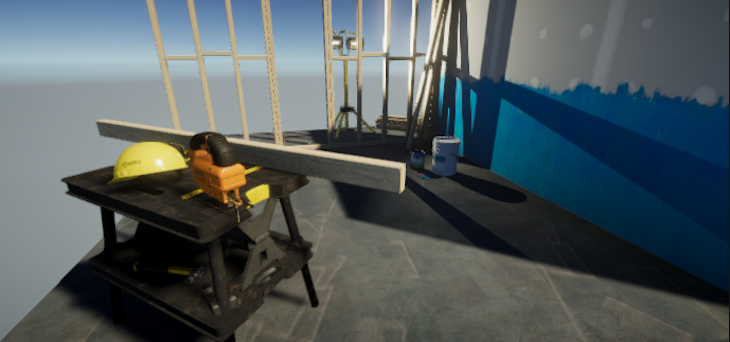
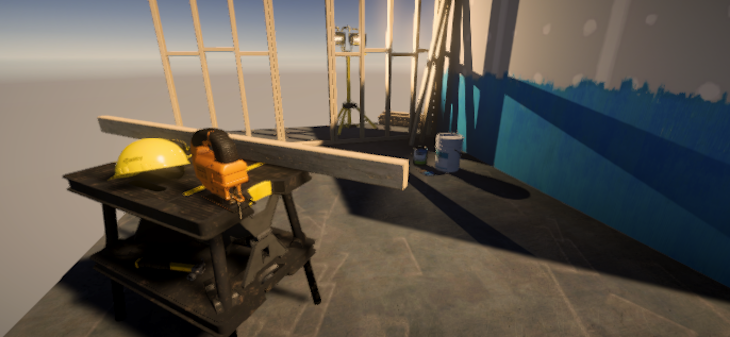
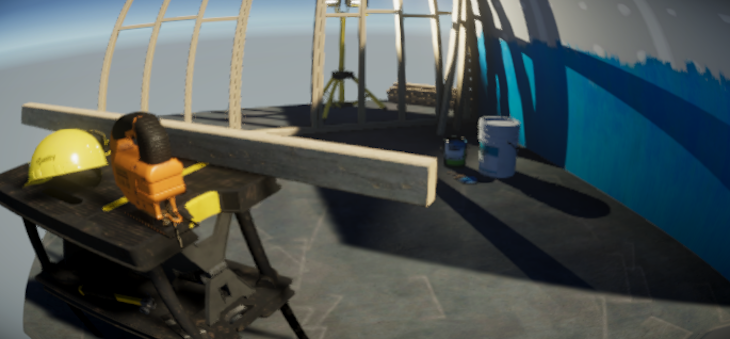
Earlier than we proceed, right here’s what our pattern picture scene appears like with out post-processing:
Let’s now add some post-processing results to this pattern picture scene. For every impact, you possibly can modify the assorted properties to realize the precise appear and feel you need.
Bloom impact
In relation to making objects glow or look brighter, the Bloom impact turns out to be useful. It makes areas in our objects extra seen or stand out uniquely by including extra gentle to our picture. If we add the bloom impact, like so:
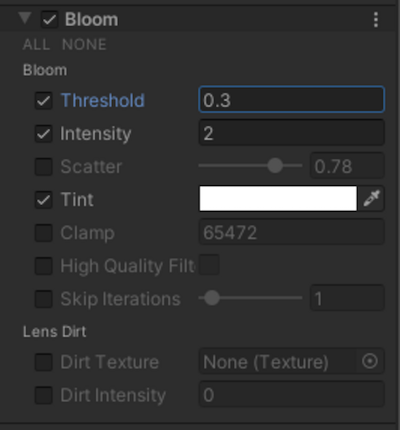
We are going to get the consequence beneath:
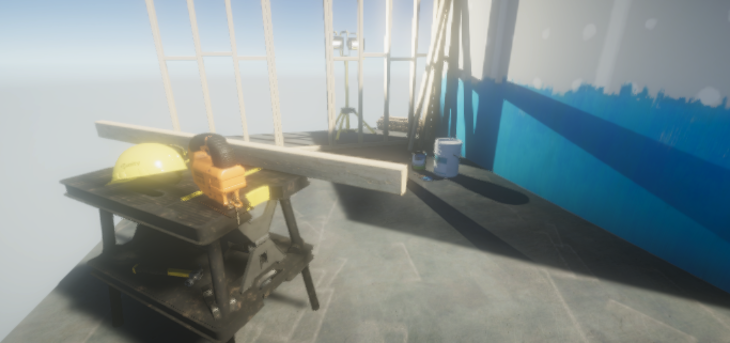
You can use the Bloom impact to offer the impression of a shiny, sunny day, or maybe for a recreation with fantasy or otherworldly themes.
Vignette impact
Vignette is a post-processing impact property that provides a darkish border across the display screen the place our picture is displayed. That is typically seen in pictures shot with low-quality digital camera lenses, however is now typically used deliberately so as to add a dramatic impact. If we add a vignette to our picture, like so:
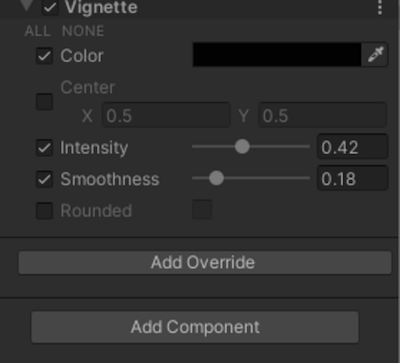
We are going to get the next consequence:
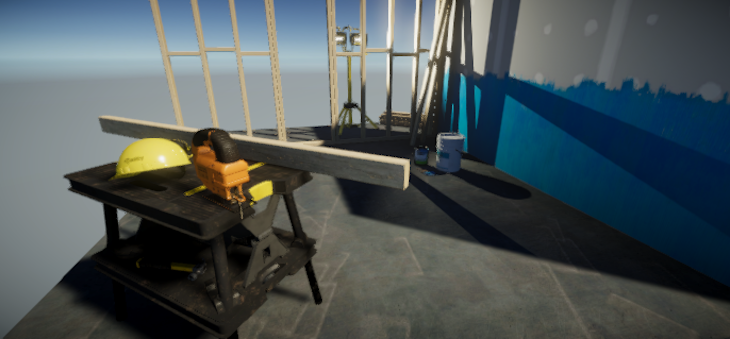
As you possibly can see, the Vignette impact provides extra depth to the scene, which may very well be utilized in a horror scene because it provides a way of creepiness.
Chromatic Aberration impact
Once we need our scene to seem as if it have been recorded by a lens that’s unable to converge gentle on the edges, we use the Chromatic Aberration impact. If we add chromatic aberration to our picture, like so:
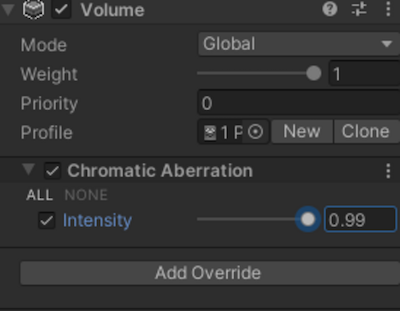
Our consequence will appear like the beneath:
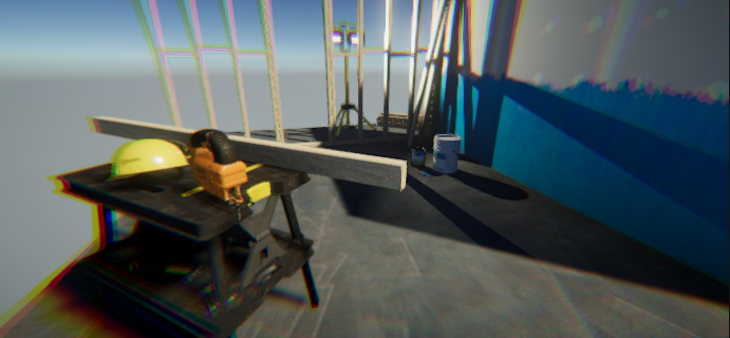
You might have seen an analogous impact utilized in video games the place the character you’re taking part in will get injured or damage.
Depth Of Area impact
The Depth Of Area impact blurs something past a specified distance to maintain the deal with sure issues within the scene. It is without doubt one of the generally used post-processing results and might make your recreation scene appear like it has extra depth. An instance of when If we add this to our picture, like so:
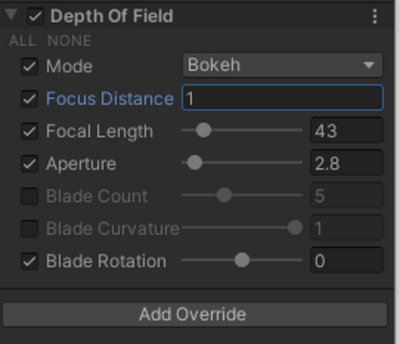
We are going to get the consequence beneath:
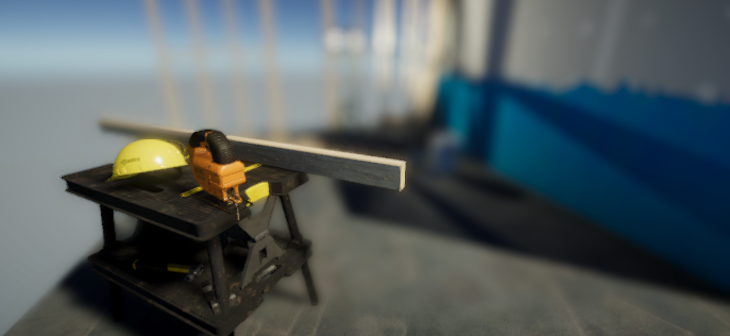
An instance of when you can use this impact is to offer the impression of a highly regarded day that causes issues within the distance to seem hazy and blurry.
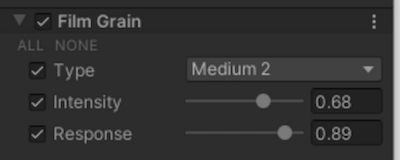
Movie Grain impact
The Movie Grain impact is used so as to add a particle-like grittiness to our picture or scene, making it appear like an old-school movie. If we add the Movie Grain impact to our picture, like so:
We are going to get the next consequence:
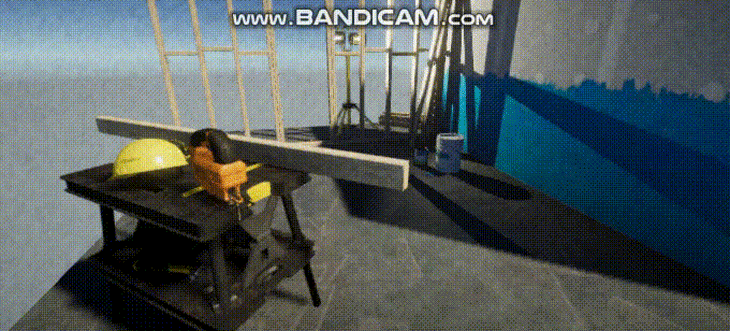
An instance of after we might use the Movie Grain impact is that if we needed a scene to appear like a classical movie.
Tonemapping impact
The Tonemapping impact remaps the Excessive Definition Vary (HDR) shade values, giving the looks {that a} scene with a decrease dynamic vary has a wider vary of colours.
In different phrases, this impact broadens the colour vary with a view to improve distinction and make the scene seem extra practical.
If we add tone mapping to our picture, like so:
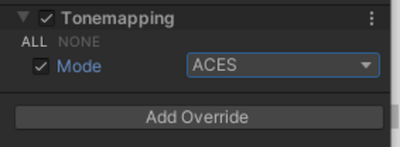
Our consequence will appear like the beneath:

There are two Tonemapping modes we will select from in Unity. Impartial tone mapping has minimal influence on the colours, which is a superb begin whenever you need higher color-correcting management. ACES tone mapping, which we used above, is an business commonplace for reaching a extra cinematic look.
White Steadiness impact
The White Steadiness impact modifications the general tone of the scene by shifting the temperature or the tint whereas sustaining the white areas. If we add it to our picture, like so:
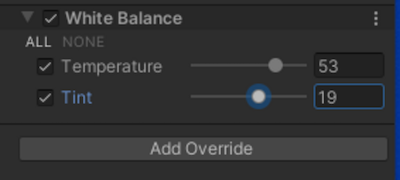
We are going to get the consequence beneath:
On this case, we shifted the temperature larger, making the picture seem hotter. When you needed to make the picture seem cooler, you’ll shift the temperature decrease.
Lens Distortion impact
The Lens Distortion impact simulates the distortion brought on by a digital camera lens in actual life. A wider discipline of view is feasible with the correct values. If we add it to our picture, like so:
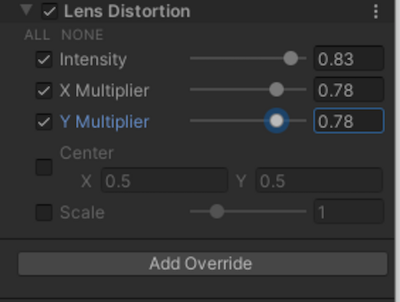
Our consequence will appear like the beneath:
The Lens Distortion impact is nice for issues like underwater scenes, scenes that happen from a fish’s standpoint, or sniper view scene.
Combining post-processing results in Unity
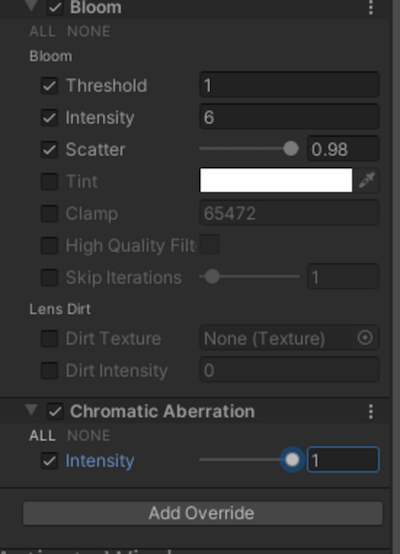
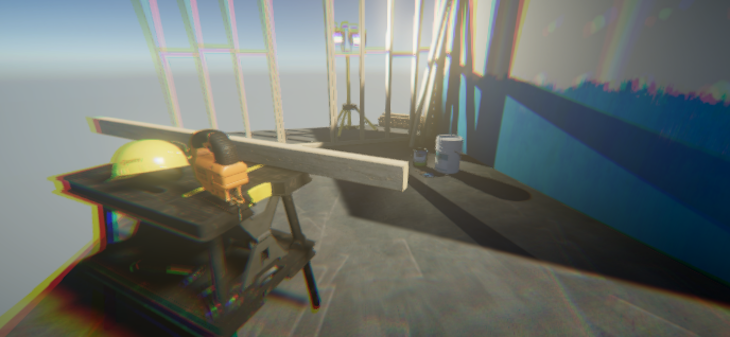
We will additionally mix two or extra results. Let’s see how to do this by combining a Bloom impact alongside a Chromatic Aberration impact, as proven beneath:
Our consequence will appear like the next:
Different post-processing results in Unity
The post-processing results we reviewed above can be found in all Unity render pipelines. There are different post-processing impact instruments we didn’t evaluate above. Relying on the render pipeline you decide, the variety of post-processing results out there and their behaviors could differ.
You may try Unity’s official post-processing overview to get a listing of the post-processing results that may be out there. You can even learn up on optimizing your Unity venture and different helpful articles to assist improve the video games you make with this recreation engine.
Conclusion
This text talked about post-processing and the way essential it’s in our recreation. We additionally checked out how post-processing works in Unity, demonstrating examples of varied results on an instance picture. Please share should you discovered this useful.
