
Node.js and Git are stipulations for this tutorial.
Software program improvement doesn’t solely contain writing supply code but additionally ensuring that the supply code we’re engaged on could be effectively managed and versioned.
By means of correct versioning, we will plot our supply code’s historical past; simply travel and level out modifications that led to the rise of sure issues; repair them; collaborate with others; department out and pursue one other parallel path a undertaking can go; and so forth.
With all these prospects that come up with model management methods, there reaches some extent the place managing repositories effectively turns into necessary, since it is rather straightforward for options to provide rise to new issues when not correctly managed, particularly when initiatives scale up.
Think about a easy JavaScript undertaking that grows as extra options are added into it. Its dependencies improve over time. Likewise, the variety of its scripts improve along with their unbiased dependencies, having improvement, previewing, testing, formatting, linting, constructing and sure steady integration being integrated.
One could be managing numerous these multi-repos, which might simply turn into unmanageable, and so you could determine to go the monorepo route. This won’t be the most effective answer should you don’t correctly handle such a repo.
All these challenges give the rise to a necessity for instruments that may assist us correctly handle supply code repositories past what common bundle managers provide.
moon is one such instrument that helps in managing supply code repositories effectively with ample automation. Let’s study extra about it:
What’s moon?
moon is a repository administration, group, orchestration, and notification instrument for JavaScript-based initiatives — or in easier phrases, a construct system for the JavaScript ecosystem, written in Rust.
Lots of the ideas inside moon are closely impressed from Bazel and different fashionable construct methods however tailor-made for the JavaScript ecosystem.
Because of being written in Rust, moon solely helps targets which can be explicitly compiled for, which presently are:
- Linux 64-bit GNU (x86_64-unknown-linux-gnu)
- Linux 64-bit musl (x86_64-unknown-linux-musl)
- macOS 64-bit Intel (x86_64-apple-darwin)
- macOS 64-bit Silicon (aarch64-apple-darwin)
- Home windows 64-bit (x86_64-pc-windows-msvc)
moon’s important options
Like different construct methods, moon gives a lot of options that make it environment friendly in dealing with repositories over common bundle managers. Here’s a gist of those options:
Managing a repo with moon
We have to see moon at work — i.e., managing a repository — to totally perceive the options mentioned above. I’ll reveal these options by managing a monorepo repository containing a frontend consumer and a backend server. I’ve chosen to go along with a monorepo since by way of it, we will leverage moon’s most potential and canopy extra options than we may in a multi-repo setup.
Organising moon for repository administration
We will set moon as much as handle a brand new undertaking or migrate present repos to a monorepo setup. For the reason that earlier is a straightforward setup, we’ll concentrate on the latter.
The next directions are going to indicate us how we will migrate an ecommerce retailer which is presently managed within the following multi-repo setup:
As you possibly can see, each these repositories usually are not the ultimate undertaking. The consumer is a naked Vue 3 scaffold and the server is an express-prisma REST API instance. I’ve performed this deliberately in order that we will see how we will migrate our initiatives to a monorepo setup whereas holding our Git histories intact. Afterward, we’ll see how we will proceed to work on each initiatives within the monorepo.
To make use of moon to handle our monorepo, we have to first arrange a brand new monorepo repository.
git init estore && cd estore
Inside our repo listing, add a bundle.json file by operating the next script.
Extra nice articles from LogRocket:
# npm
npm init

#pnpm
pnpm init
Then, add a .gitignore file, stage the prevailing information, and make a primary commit.
git commit -m "First commit"
Migrating present repositories with their histories
Inside our repo, we’re going to place our two initiatives, the estore-client and estore-server, below an apps/ listing.
So, we’ll initially create that folder inside our monorepo with mkdir apps. And, since now we have named our monorepo listing estore, we’ll take away the estore prefix from our initiatives and stay with consumer and server.
To take care of the histories of the presently two initiatives, server and consumer, we’ll do the next for each their repositories whereas including them to our estore repo.
Beginning with the consumer, first, set a git distant inside our repo of the app being migrated.
git distant add consumer [email protected]:xinnks/estore-client
N.B., earlier than continuing, to keep away from any points, be sure you merge any open PRs in these distant repositories.
Then, we’ll get the code from the distant by fetching it with out testing the department.
git fetch consumer
Afterward, we’ll run the next script to repeat the distant’s grasp department Git historical past to the apps/consumer listing with the assistance of the --prefix flag.
git read-tree --prefix=apps/consumer -u consumer/grasp
Previewing the standing of our estore repo with git standing, we get the next log.
On department grasp
Adjustments to be dedicated:
  (use "git restore --staged <file>..." to unstage)
        new file:   apps/consumer/.eslintrc.js
        new file:   apps/consumer/.gitignore
        new file:   apps/consumer/.prettierignore
        new file:   apps/consumer/.prettietrc.json
        new file:   apps/consumer/.vscode/extensions.json
        new file:   apps/consumer/LICENSE
        new file:   apps/consumer/README.md
        new file:   apps/consumer/index.html
        new file:   apps/consumer/bundle.json
        new file:   apps/consumer/pnpm-lock.yaml
        new file:   apps/consumer/undertaking.yml
        new file:   apps/consumer/public/vite.svg
        new file:   apps/consumer/src/App.vue
        new file:   apps/consumer/src/property/vue.svg
        new file:   apps/consumer/src/elements/HelloWorld.vue
        new file:   apps/consumer/src/primary.js
        new file:   apps/consumer/src/fashion.css
        new file:   apps/consumer/vite.config.js
We’ll finalize this step by staging the modifications.
# Stage modifications
git commit -m "feat: Add consumer app" apps/consumer
Previewing our repo’s historical past, we’ll see that every one the commits that have been beforehand made to consumer are a part of the historical past of estore.
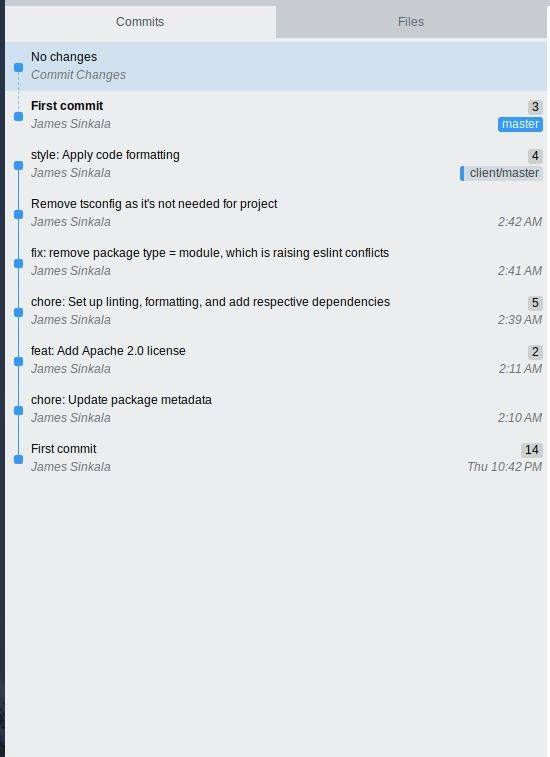
On this particular instance, we will see that estore-client’s historical past precedes the monorepo’s First commit as a result of the latter was created and dedicated after the previous.
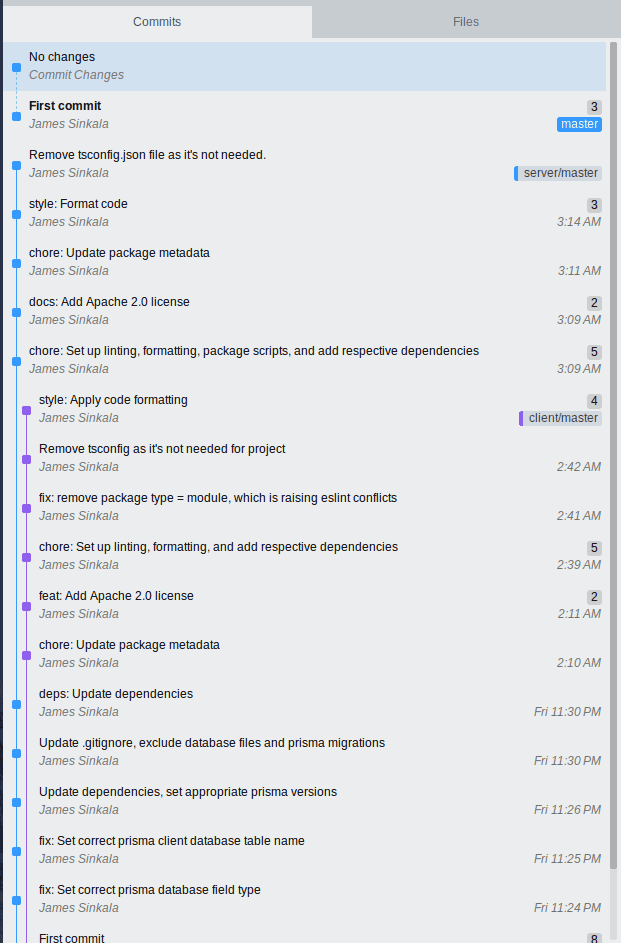
Repeat these steps for the estore-server repository, naming its distant server.
On completion, we’ll find yourself with one thing like this.
Now, we’re able to initialize moon inside estore.
Putting in the moon CLI
moon’s CLI is shipped inside a single binary inside the @moonrepo/cli npm bundle. It’s suggested to put in the CLI globally to simplify operating its instructions from any listing as an alternative of counting on bundle.json scripts solely.
Whatever the bundle supervisor that you’re utilizing, the worldwide set up ought to all the time be performed utilizing npm.
npm set up -g @moonrepo/cli
Subsequent, add the CLI in your repo as follows.
# yarn
yarn add --dev @moonrepo/cli

# npm
npm set up --save-dev @moonrepo/cli

# pnpm
pnpm add -D @moonrepo/cli -w
When utilizing the worldwide binary, moon ensures that the identical model is used as is outlined in a repo’s dependencies part in bundle.json.
For eventualities equivalent to CI (steady integration), moon could be run by way of the next bundle.json script.
{
  "scripts": {
    // ...
    "moon": "moon",
    // Yarn 2+
    "moon": "$(yarn bin moon)"
  }
}
However such a setup comes with an overhead price of launching Node.js and the bundle supervisor to execute the Rust binary. In such a case, the worldwide binary setup is suggested.
Additionally, this setup doesn’t work with bundle workspaces until the script is run from the repository root.
Having put in the moon CLI, we will now initialize moon in our repo with this script.
moon init
A immediate will seem asking in regards to the listing we’re initializing moon and in regards to the
bundle supervisor we’re utilizing.
Workspaces
A workspace is a listing that incorporates initiatives, manages a toolchain, runs duties, and is coupled with a VCS repository. moon has first-class help for workspaces. Although not a requirement, setting them up aligns with moon’s philosophy.
The foundation of a workspace is denoted by a .moon listing and a bundle.json file.
To make the most of workspaces in our undertaking, we have to allow them per the required configuration relying on the bundle supervisor we’re utilizing. Listed here are numerous configurations.
For Yarn/npm (bundle.json)
{
  "workspaces": ["apps/"]
}
For pnpm (pnpm-workspace.yaml)
packages:
  - 'apps/'
Configuring workspaces in moon
We will configure our workspace by enhancing the workspaces.yml file that’s contained inside the newly created .moon listing, which was created after we ran the moon init command.
The next is a listing of settings we will arrange on this file.
We’ll configure it per our undertaking’s structure.
Node.js
Below the node part of the .moon/workspace.yml file, we will outline the Node.js model for use whereas operating moon instructions. That is important because it enforces consistency amongst potential completely different improvement groups which can be engaged on the completely different initiatives inside the identical workspace repository.
node:
  model: '16.16.0'
N.B., the node.model setting requires an specific semantic model. It doesn’t help model ranges. moon additionally advises to make use of an Energetic LTS Node.js model.
Bundle supervisor
moon makes use of npm because the default bundle supervisor. To vary that and set the bundle supervisor to certainly one of our selection, we have to replace node.packageManager in workspace.yml. We will set this worth to npm, yarn, or pnpm.
node:
  model: '16.16.0'
  packageManager: 'pnpm'
Usually, moon installs the most recent model of a bundle supervisor, nevertheless it’s by no means up to date persistently. That’s why it’s suggested to outline an specific semantic model for it, simply as we had with the Node.js model.
This ensures consistency in our toolchain. It must also be performed even whenever you go for npm as your bundle supervisor.
  node:
    model: '16.16.0'
    packageManager: 'pnpm'
    pnpm:
      model: '7.8.0'
After organising the node and bundle supervisor variations, run the next script to confirm that each are put in.
moon --log debug setup
This command will obtain and set up the wanted instruments for our toolchain as configured.
Model management system
moon requires a model management system to be current for diffing, hashing, and revision comparability. By default, Git is used, and thus this setting could be skipped.
However for consistency, set this up too. We will do that by way of the vcs setting.
  vcs:
    supervisor: 'git'
    defaultBranch: 'grasp'
N.B., SVN is presently experimental, thus might not work correctly.
Tasks in moon
A undertaking could be something from an software, library, or instrument. Every has its personal construct layer, particular person duties, and customized configuration.
With our workspace configured, we will home as many initiatives below it as potential.
At this level, now we have the consumer and server initiatives contained in the apps listing, however they can’t be accessible from moon till we map them within the initiatives setting discovered within the workspaces file.
The initiatives setting is a map of all initiatives (or file system globs) discovered inside our workspace. We listing our initiatives in a key: worth format, the place the hot button is a singular ID for a undertaking, and the worth is the file path to the undertaking relative to the workspace root.
Presently, within the workspaces.yml you’ll discover an instance undertaking instance: 'apps/instance. Take away this and add consumer and server initiatives with their respective file paths to replicate our two initiatives as follows.
  initiatives:
    server: 'apps/server'
    consumer: 'apps/consumer'
Working moon undertaking <project-key> logs the undertaking’s configuration as set in each the general public and native moon configurations. If we get an error, meaning now we have not mapped our initiatives accurately.
Right here is the anticipated output after we run moon undertaking consumer on our repo.
  CLIENT

ID: consumer
Supply: apps/consumer
Root: ~/Tasks/estore/apps/consumer
Language: JavaScript
Kind: Utility
Identify: consumer
Description: Estore front-end consumer software
Proprietor: @estore/consumer
Maintainers:
 - <consumer.undertaking.maintainer>
Channel: #moon

 TASKS

construct: vite construct
dev: vite --port 3000
format: prettier --write .
set up: pnpm set up
lint: eslint --ext .js,.vue --ignore-path .gitignore --fix src

 FILE GROUPS

property:
 - src/property/*
 - **/*.{scss,css}
 - **/*.mdx
configs:
 - *.{js,json}
sources:
 - src/**/*
 - varieties/**/*
exams:
 - exams/**/*.take a look at.*
 - **/__tests__/**/*
Configuring initiatives in moon
Tasks in moon could be configured by way of the .moon/undertaking.yml or the moon.yml config information on the root of every undertaking’s listing.
The .moon/undertaking.yml file is beneficial in configuring the teams and duties which can be inherited by all initiatives inside the workspace. That is the place we will place frequent duties equivalent to linting, type-checking, and formatting.
The undertaking particular moon.yml file is beneficial in definition and configuration of file teams, duties, and dependencies distinctive to the undertaking.
These two configuration information are optionally available and might both be used individually or collectively. In our case, we’re going to use the each of them.
Beginning with the worldwide configuration file inside .moon, add our two initiatives, giving them the IDs consumer and server.
initiatives:
  consumer: 'apps/consumer'
  server: 'apps/server'
Replace the Node.js, bundle supervisor and VCS settings.
node:
  model: '16.16.0'
  # Any of "npm" (default), "pnpm", or "yarn".
  packageManager: 'pnpm'
  # The model of the bundle supervisor (above) to make use of.
  pnpm:
    model: '7.8.0'
vcs:
  # The supervisor/binary to make use of when managing the repository.
  # Accepts "git", or "svn". Defaults to "git".
  supervisor: 'git'
Configuring duties
As with the 2 configuration information defined above, we will place world duties contained in the .moon/workspace.yml. In our initiatives, simply as in lots of others, scripts that could possibly be positioned right here as duties are scripts equivalent to linting and formatting, since these are possible synonymous to most initiatives.
So, we’ll replace this file by including these duties.
duties:
  # Identify of the duty.
  format:
    # The identify of the binary/command in your system.
    command: 'prettier'
    # Listing of arguments to cross on the command line when executing the duty.
    args: '--write .'
    # The kind of command to run, and the place to find it.
    # Accepts "node" (default) or "system".
    sort: 'node'
  lint:
    command: 'eslint'
    args:
      - --ignore-path
      - .gitignore
      - --fix
      - src
    sort: 'node'
From the above configuration, we will see that duties have a reputation, arguments (args), and a sort. We’ll see extra choices later, and for full listing of duties choices, you possibly can see them in moon’s docs.
As talked about in moon’s options, right here, we’re launched to the granular configuration of duties.
We’re additionally going to transform the person undertaking scripts to moon duties.
Beginning with the server undertaking.
# apps/server/moon.yml

---
sort: "software"
language: javascript
undertaking:
  identify: "server"
  description: "Estore's back-end server software"
  channel: "#moon"
  proprietor: "@estore/server"
  maintainers: ["server.project.leader"]
duties:
  lint:
    command: "eslint"
    args:
      - --ext
      - .js
    sort: "node"
    choices:
      mergeArgs: "prepend"
  seed:
    command: node
    args:
      - prisma/seed
    deps:
      - "~:init"
    sort: node
  init:
    command: pnpm
    args:
      - dlx
      - prisma
      - migrate
      - dev
      - "--name"
      - init
    sort: node
  dev:
    command: nodemon
    deps:
      - "~:seed"
      - "~:lint"
      - "~:format"
    choices:
      outputStyle: "stream"
    sort: node
  serve:
    command: node
    args:
      - "src/index.js"
      - "NODE_ENV=manufacturing"
    deps:
      - "~:init"
    sort: node
On this configuration file, we will see extra of the duty choices.
Right here, the choices.outputStyle, which is ready to "stream", allows the streaming of the output log from the duty being run on to the console as the duty is operating.
The deps setting permits us to make use of one job or extra as a dependencies of one other job.
The choices.mergeArgs, which is ready to "prepend", provides the arguments on this job as a prefix to its counterpart inside the worldwide undertaking configuration .moon/undertaking.yml. So, the complete script of the "lint" job when run on this particular undertaking can be as follows.
lint:
    # The identify of the binary/command in your system.
    command: 'prettier'
    # Listing of arguments to cross on the command line when executing the duty.
    args:
      - --ext
      - .js
      - --ignore-path
      - .gitignore
      - --fix
      - src
    # The kind of command to run, and the place to find it.
    # Accepts "node" (default) or "system".
    sort: 'node'
That is very helpful for such instances the place an equivalent job, on this case "lint", may want to use to completely different file varieties relying on the undertaking it’s being run in.
This configuration file additionally offers us a layer of organising the initiatives metadata as seen within the following instance by way of the undertaking setting.
Finalize the consumer undertaking configuration with the next settings.
sort: "software"
undertaking:
  identify: "consumer"
  description: "Estore's front-end consumer software"
  channel: "#moon"
  proprietor: "@estore/consumer"
  maintainers: ["client.project.lead"]
language: javascript
duties:
  lint:
    command: 'eslint'
    args:
      - --ext
      - .js,.vue
    sort: 'node'
    choices:
      mergeArgs: 'prepend'
  dev:
    command: vite
    args: "--port 3000"
    deps:
      - "~:lint"
      - "~:format"
    choices:
      runInCI: false
      outputStyle: "stream"
    sort: node
  construct:
    command: vite
    args:
      - construct
    deps:
      - "~:lint"
      - "~:format"
    sort: node
  preview:
    command: vite
    args:
      - preview
    sort: node
Observing the above configuration, we will see the modifications being utilized to the "lint" job for the consumer undertaking.
As now we have seen in estore, there are dependencies that exist in each initiatives, and a few which can be unique to a undertaking. We will replace the bundle.json information, including the worldwide dependencies to the workspace root’s bundle.json and eradicating them from the undertaking particular bundle.json information.
We will now run npm set up to put in dependencies. And, if we’ve configured our workspace accurately, dependencies can be put in of their acceptable areas: the worldwide dependencies on the workspace root, and undertaking particular dependencies inside the respective undertaking roots.
We will then proceed to modifying our initiatives to viable ranges of consumption. The entire supply code could be discovered on estore’s GitHub repository.
Afterward, stage and commit the modifications. Select a way of commit submission that simplifies the identification of Git histories of the separate initiatives however which on the identical time reveals a coherent circulation within the repository as an entire. (Or, you possibly can simply use the code from estore‘s repository)
When all the things is ready, we will execute the configured duties with the moon run command.
Duties could be executed in two methods:
a. Throughout the scope of a undertaking with moon run <project-id>:<task-name>
From our repository, we will use this format of the command to run the construct job inside apps/consumer as follows.
moon run consumer:construct
b. We will additionally run duties globally to be executed inside all initiatives in a monorepo with this moon command: moon run :<task-name>. From our instance, we will run the lint and format duties on this manner in order that each initiatives are formatted and linted
moon run :format
To see dependency duties in motion, strive operating moon run consumer:dev on our workspace. Since this command is dependent upon the lint and format instructions, you will notice that these two duties are additionally run in connection to the dev job.
Regardless of moon being comparatively new, it does a terrific job in terms of managing repos. As we will see within the instance above, moon has a clean studying curve. Observing its improvement and seeing the options from its lively improvement workforce, it reveals a lot promise going ahead.
Ensure to go to moon’s changelog to see new options being integrated into the undertaking. Presently, new options are being added on a biweekly schedule.
Abstract
On this complete introduction to moon’s options and ideas, utilizing an actual life instance (on this case, the event of an ecommerce internet app), now we have coated the next:
- What moon is and its important options
- How one can arrange a monorepo from a multi-repo setup and handle it with moon
- How one can configure workspaces in moon and handle a number of initiatives in a monorepo setup
- How create moon duties and work with their numerous choices to attain environment friendly outcomes
With options equivalent to job caching and operating solely on effected code, moon, like many different construct methods, could be deemed helpful for all sorts of initiatives (each multi-repo and monorepo), as a result of such options present effectivity that isn’t present in common instruments equivalent to bundle managers.
We acknowledge that monorepo setups introduce modifications to group and the way we take into consideration code, because it’s greater than code and instruments. In flip, we receive advantages equivalent to including consistency, chopping down on the overhead concerned in creating new initiatives, performing giant scale refactorings, facilitating code sharing and collaboration, and so forth. Total, they promote environment friendly work in in any other case advanced initiatives.
And on this particular level, moon, regardless of being comparatively in infancy, gives the next instruments that different construct methods don’t presently provide:
- An built-in toolchain that ensures identical variations of Node.js, bundle managers (npm, yarn, pnpm), and different instruments are used throughout all machines, making certain constant and reproducible builds
- Simple job declaration and inheritance throughout the workspace. World duties could be outlined to run on all initiatives inside a workspace, and could be additional modified per the wants of particular person initiatives. We have now seen an indication of this in our estore instance
- Automation of frequent JavaScript issues equivalent to
bundle.jsondependencies andtsconfig.jsonundertaking references - First-class help for steady integration (CI)
A comparability of moon to different mainstream construct methods could be discovered right here.
To take a deep dive and examine extra about moon, its ideas, what it gives, and extra examples, you possibly can go to moon’s official docs.
LogRocket: Debug JavaScript errors extra simply by understanding the context
Debugging code is all the time a tedious job. However the extra you perceive your errors the better it’s to repair them.
LogRocket lets you perceive these errors in new and distinctive methods. Our frontend monitoring answer tracks consumer engagement together with your JavaScript frontends to provide the potential to seek out out precisely what the consumer did that led to an error.

LogRocket information console logs, web page load instances, stacktraces, gradual community requests/responses with headers + our bodies, browser metadata, and customized logs. Understanding the influence of your JavaScript code won’t ever be simpler!
LogRocket: Full visibility into manufacturing Rust apps
Debugging Rust functions could be tough, particularly when customers expertise points which can be tough to breed. If you happen to’re thinking about monitoring and monitoring efficiency of your Rust apps, robotically surfacing errors, and monitoring gradual community requests and cargo time, strive LogRocket. 
LogRocket is sort of a DVR for internet and cell apps, recording actually all the things that occurs in your Rust app. As an alternative of guessing why issues occur, you possibly can combination and report on what state your software was in when a difficulty occurred. LogRocket additionally screens your app’s efficiency, reporting metrics like consumer CPU load, consumer reminiscence utilization, and extra.
Modernize the way you debug your Rust apps — begin monitoring without spending a dime.
