
Preserving your software performant is essential for efficient operational targets. Caching and memoization enable you keep away from redundant computations, maintaining your functions operating easily. Cloud-centric architectural patterns emphasize fault tolerance and retailer state in distributed caching companies, like Redis and Memcached.
This tutorial will have a look at enhance Node.js software efficiency utilizing TypeDI and the technique sample. Extra particularly, we’ll construct an API service to help switching between Redis and Memcached and use the technique sample to maintain the service supplier design versatile. We may even use dependency injection and depend on the TypeDI package deal to supply an Inversion of Management (IoC) container. You’ll be able to learn the whole code within the GitHub repository.
Soar forward:
What’s the technique sample?
The technique sample is a software program design sample that teams associated implementations (methods) collectively and permits different modules to work together utilizing a central class referred to as the Context. Utilizing this sample, we will help a number of fee and messaging suppliers inside a single software.
Dependency injection and unfastened coupling
Dependency injection is a software program design sample that permits a technique to obtain a dependency as a parameter. Dependency injection is essential for avoiding tightly coupled software program design and helps you forestall poor architectural selections when designing software program.
Why use TypeDI as a dependency injection container in Node.js?
Dependency decision is required for correct IoC. The dependency decision course of fashions dependencies as a graph with nodes and connecting edges. It’s essential to get this proper to forestall inadvertently introducing cyclical dependencies.
TypeDI is a superb instrument for accurately executing the dependency decision course of, permitting us to inject values into class properties by way of their constructors. TypeDI allows us to outline unchanging singleton companies and transient companies, which is useful when constructing software program that makes use of the request-response mannequin.
Making a proof of idea API with TypeDI and the technique sample
On this article, we’ll create an Specific.js-powered Node.js software to retailer and browse transaction data, much like these inside a finance software.
We’ll write and browse transaction data from extremely performant caches that use the RAM obtainable on the machine somewhat than the sluggish and non-deterministic sequential I/O sometimes encountered when fetching disk knowledge.
To permit overrides from environmental variables, we’ll set the default cache supplier to Redis and provides help for Redis and Memcached as our high-performance caches.
Setup and set up
Our software has the next exterior dependencies:
I desire to run Memcached and Redis as Docker containers. To put in these straight in your machine, execute the next instructions:
mkdir simple-wallet
cd simple-wallet
npm init -y
npm i typescript concurrently @varieties/dotenv @varieties/memcached @varieties/categorical @varieties/node nodemon --save-dev
npm i redis memcached memcache-plus typedi categorical body-parser dotenv --save
Subsequent, we have to begin a TypeScript mission inside our working listing. If in case you have TypeScript put in globally, run the next:
tsc --init
If you happen to want to preserve TypeScript as a neighborhood set up, run the next:
./node_modules/.bin/tsc --init
Then, edit tsconfig.json and permit the TypeScript options similar to decorators and emitting decorator metadata:
{
  "compilerOptions": {
    "outDir": "./dist",
    "baseUrl": "./",
    "experimentalDecorators": true,
    "emitDecoratorMetadata": true,
    "skipLibCheck": true,
    "strict": true,
    "esModuleInterop": true,
    "strictPropertyInitialization": true
  }
}
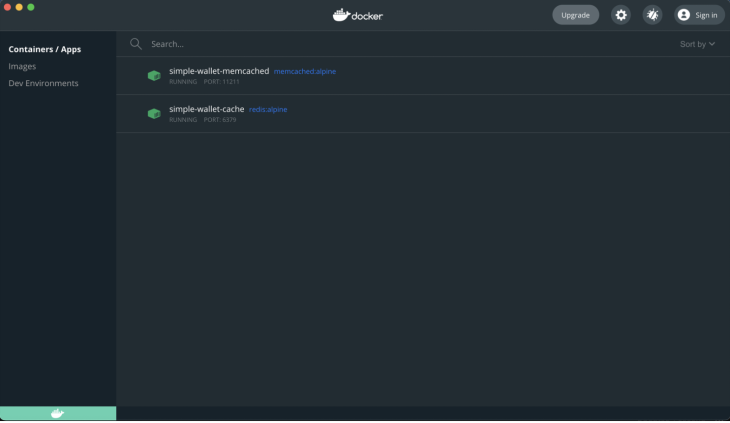
Now, we’ll arrange the Docker containers for Redis and Memcached. I desire to make use of the minimal alpine photos under:
# We have to create an remoted bridge community to permit us to connect with our situations
docker create community simple-wallet-network --driver bridge
docker pull redis:alpine memcached:alpine
docker run --name simple-wallet-redis -d -p 6379:6379 redis:alpine
docker run --name simple-wallet-memcached -d -p 11211:11211 memcached:alpine
With our Redis and Memcached situations operating, hook up with them with the code under:
npx redis-cli -p 6379
npx memcached-cli localhost:11211
Then, add a declarations.d.ts file to declare varieties for third-party packages and enter the next to .env:
PORT=3050
CACHE_PROVIDER=redis
REDIS_PORT=6379
MEMCACHED_PORT=11211
Configuring our Specific.js software
We have to create a config singleton object to export values utilized in different modules. Create src/config.ts and paste the next code:
import dotenv from "dotenv";
dotenv.config();

perform getEnvVariable(identify: string, fallback: string = ""): string {
  const envVariable = course of.env[name];
  const fallbackProvided = fallback.size;
  if (!envVariable && !fallbackProvided) {
    throw new Error(`Setting variable ${identify} has not been set.`);
  }
  return envVariable || fallback;
}

const config = {
  server: {
    port: getEnvVariable("PORT"),
  },
  cache: {
    supplier: getEnvVariable("CACHE_PROVIDER", "redis"),
  },
  redis: {
    port: getEnvVariable("REDIS_PORT"),
  },
  memcached: {
    port: getEnvVariable("MEMCACHED_PORT"),
  },
};

export default config;
Then, we have to set up persistent TCP connections to our Redis and Memcached companies within the software startup and expose these connections to the remainder of our software.
We’ll use memcache-plus as a wrapper on the bottom memcache package deal as a result of memcache-plus gives us with syntactic sugar, like async/await, as a substitute of callbacks. Add these to src/connections:
import MemcachePlus from "memcache-plus";
import { createClient } from "redis";
import { RedisClientType } from "@redis/consumer";
let redisClient;
// The Redis consumer have to be created in an async closure
(async () => {
redisClient = createClient();
redisClient.on("error", (err) =>
console.log(" [Redis] Redis Shopper Error: ", err)
);
await redisClient.join();
console.log("[Redis]: Efficiently linked to the Redis server");
})();
const createMemcachedClient = (location: string) => {
const handleNetworkError = perform () {
console.error(
`
[Redis] Redis Shopper Error: ", err)
);
await redisClient.join();
console.log("[Redis]: Efficiently linked to the Redis server");
})();
const createMemcachedClient = (location: string) => {
const handleNetworkError = perform () {
console.error(
` [Memcached]: Unable to connect with server because of community error`
);
};
const memcache = new MemcachePlus({
hosts: [location],
onNetError: handleNetworkError,
});
console.log("[Memcached]: Efficiently linked to the Memcached server");
return memcache;
};
export default {
redis: redisClient,
memcached: createMemcachedClient("localhost:11211"),
};
[Memcached]: Unable to connect with server because of community error`
);
};
const memcache = new MemcachePlus({
hosts: [location],
onNetError: handleNetworkError,
});
console.log("[Memcached]: Efficiently linked to the Memcached server");
return memcache;
};
export default {
redis: redisClient,
memcached: createMemcachedClient("localhost:11211"),
};
Bootstrapping our software
Subsequent, we’ll bootstrap our Specific software in src/index.ts. As a result of TypeDI makes use of the experimental TypeScript Reflection API, we’ll import reflect-metadata first. To do that, add the code under to src/index.ts:
import "reflect-metadata";
import categorical, { Specific, Request, Response } from "categorical";
import config from "./config";
import transactionsRouter from "./modules/transaction/transaction.routes";
import bodyParser from "body-parser";

const app: Specific = categorical();
const { server } = config;

app.use(bodyParser.json());
app.use("/transactions", transactionsRouter);

app.get("https://weblog.logrocket.com/", (_req: Request, res: Response) => {
  res.ship("Hiya! Welcome to the easy pockets app");
});

app.pay attention(server.port, () => {
  console.log(` Server is operating at http://localhost:${server.port}`);
});
Server is operating at http://localhost:${server.port}`);
});
With our bootstrapping completed, we have to arrange the transactions module. Earlier than doing this, we should construct an abstraction for caching to outline the caching suppliers as methods to modify between.
Constructing the cache supplier
To construct the cache supplier, outline the primary class as Context. You’ll be able to consider Context because the mind of the cache supplier, when utilizing the technique sample, it identifies all obtainable methods and exposes strategies for customers to modify between them.
We’ll outline the Technique class interface and kinds used inside the cache supplier at src/suppliers/cache/cache.definitions.ts:
export interface Technique {
  get(key: string): Promise<string>;
  has(key: string): Promise<boolean>;
  set(key: string, worth: string): void;
}

export sort strategiesList = {
  [key: string]: Technique;
};
Subsequent, we have to outline an inventory of methods that Context can select from, and we’ll make concrete implementation courses for the Redis and Memcached methods.
Edit src/suppliers/cache/cache.context.ts and add:
import { Service } from "typedi";
import connections from "../../connections";
import config from "../../config";
import { Technique, strategiesList } from "./cache.definitions";
import RedisStrategy from "./methods/redis.technique";
import MemcachedStrategy from "./methods/memcached.technique";
import { RedisClientType } from "@redis/consumer";
Our technique class implementations will obtain a connection occasion to maintain our methods as versatile as potential:
const methods: strategiesList = {
  redis: new RedisStrategy(connections.redis as RedisClientType),
  memcached: new MemcachedStrategy(connections.memcached),
};
In CacheContext, inject the default cache supplier worth from the atmosphere into the constructor, and carry out technique delegation or proxying.
Though we manually delegate to the chosen technique class, this can be achieved dynamically by utilizing ES6 proxies. We add the remainder of CacheContext inside the block under:
@Service()
class CacheContext {
  non-public selectedStrategy: Technique;
  non-public strategyKey: keyof strategiesList;

  constructor(strategyKey: keyof strategiesList = config.cache.supplier) {
    this.strategyKey = strategyKey;
    this.selectedStrategy = methods[strategyKey];
  }

  public setSelectedStrategy(technique: keyof strategiesList) {
    this.selectedStrategy = methods[strategy];
  }

  public async has(key: string) {
    const hasKey = await this.selectedStrategy.has(key);
    return hasKey
  }

  public async get(key: string) {
    console.log(`Request for cache key: ${key} was served by ${this.strategyKey}`);
    const worth = await this.selectedStrategy.get(key);
    return worth;
  }

  public async set(key: string, worth: string) {
    await this.selectedStrategy.set(key, worth);
  }
}

export default CacheContext;
Subsequent, we’ll create a minimal implementation for RedisStrategy by including the code under to src/suppliers/cache/methods/redis.technique.ts:
import { RedisClientType } from "@redis/consumer";
import { Technique } from "../cache.definitions";

class RedisStrategy implements Technique {
  non-public connection;

  constructor(connection: RedisClientType) {
    this.connection = connection;
  }

  public async get(key: string): Promise<string | null> {
    const outcome = await this.connection.get(key);
    return outcome;
  }

  public async has(key: string): Promise<boolean> {
    const outcome = await this.connection.get(key);
    return outcome !== undefined && outcome !== null;
  }

  public async set(key: string, worth: string) {
    await this.connection.set(key, worth);
  }
}

export default RedisStrategy;
As a result of MemcachedStrategy is much like RedisStrategy, we’ll skip overlaying its implementation. You’ll be able to view the implementation right here if you wish to evaluate the MemcachedStrategy.
Organising the transactions module with TypeDI
The API endpoints must be uncovered to save lots of and retrieve transactions. To do that, import TransactionController and Container from TypeDI.
As a result of we’re dynamically injecting TransactionService inside TransactionController, we have now to get a TransactionController occasion from the TypeDI container.
Create src/modules/transactions/transaction.routes.ts and add the code under:
import { Request, Response, NextFunction, Router } from "categorical";
import Container from "typedi";
import TransactionController from "./transaction.controller";

const transactionsRouter = Router();
const transactionController = Container.get(TransactionController);

transactionsRouter.put up(
  "https://weblog.logrocket.com/",
  (req: Request, res: Response, subsequent: NextFunction) =>
    transactionController.saveTransaction(req, res, subsequent)
);

transactionsRouter.get("https://weblog.logrocket.com/", (req: Request, res: Response, subsequent: NextFunction) =>
  transactionController.getRecentTransactions(req, res, subsequent)
);

export default transactionsRouter;
Subsequent, we have now to outline TransactionController. After we inject TransactionService into the constructor, the dependency is routinely resolved. To attain this, we should annotate the category as a typedi service with the Service decorator.
Create src/modules/transactions/transaction.service.ts and add the code under:
import { NextFunction, Request, Response } from "categorical";
import { Service } from "typedi";
import TransactionService from "./transaction.service";

@Service()
class TransactionController {
  constructor(non-public readonly transactionService: TransactionService) {}

  async getRecentTransactions(
    _req: Request,
    res: Response,
    subsequent: NextFunction
  ) {
    strive {
      const outcomes = await this.transactionService.getTransactions();
      return res
        .standing(200)
        .json({ message: `Discovered ${outcomes.size} transaction(s)`, outcomes });
    } catch (e) {
      subsequent(e);
    }
  }

  async saveTransaction(req: Request, res: Response, subsequent: NextFunction) {
    strive {
      const transaction = req.physique;
      await this.transactionService.saveTransaction(transaction);
      return res.ship("Transaction was saved efficiently");
    } catch (e) {
      subsequent(e);
    }
  }
}

export default TransactionController;
Lastly, we have to create the TransactionService and inject the CacheProvider.
Then, within the saveTransaction technique, deserialize any present transaction data from the cache, replace the listing of transactions, and serialize the up to date listing.
Create /src/modules/transaction/transaction.service.ts and add the code under:
import { Service } from "typedi";
import CacheProvider from "../../suppliers/cache";
import Transaction from "./transaction.mannequin";

@Service()
class TransactionService {
  constructor(non-public readonly cacheProvider: CacheProvider) {}

  async saveTransaction(transaction: Transaction[]) {
    let cachedTransactions = await this.cacheProvider.get("transactions");
    let updatedTransactions: Transaction[] = [];

    if (cachedTransactions && cachedTransactions.size > 0) {
      updatedTransactions = [...JSON.parse(cachedTransactions), transaction];
    }

    await this.cacheProvider.set(
      "transactions",
      JSON.stringify(updatedTransactions)
    );
  }

  async getTransactions(): Promise<Transaction[]> {
    const cachedTransactions = await this.cacheProvider.get("transactions");
    if (!cachedTransactions) return [];
    return JSON.parse(cachedTransactions);
  }
Manually testing the appliance
Now, we’re prepared to check the appliance manually. Go forward and fireplace up the terminal and execute some HTTP requests with curl:
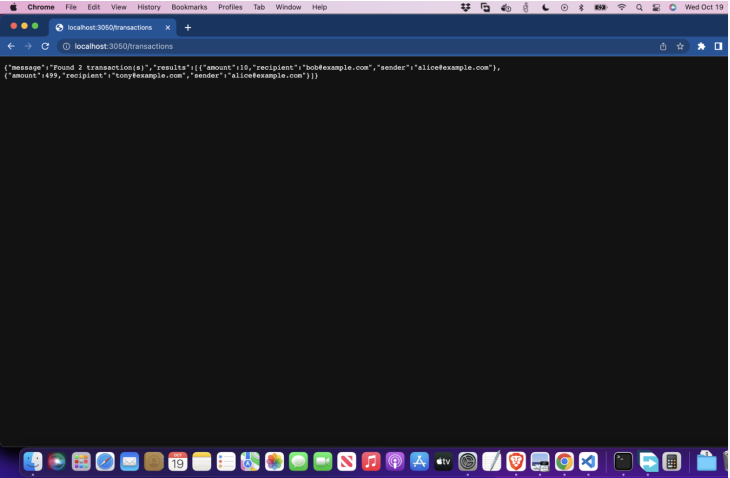
curl -X "POST" --data '{"quantity":10,"recipient":"[email protected]","sender":"[email protected]"}' http://localhost:3050/transactions
Then, add a second transaction:
curl -X "POST" --data '{"quantity":499,"recipient":"[email protected]","sender":"[email protected]"}' http://localhost:3050/transactions
If we go to localhost:3050/transactions within the browser, we should always see the response under:
Conclusion
Design patterns, just like the technique sample, are useful instruments for fixing issues that require a number of implementations. Dependency injection is a useful approach to assist preserve modules maintainable over time, and distributed caches with fallbacks assist enhance efficiency when constructing cloud functions.
I extremely advocate exploring different practical design patterns just like the Proxy and Adapter patterns. Be happy to clone the mission from this tutorial and provides it a spin.
200’s solely  Monitor failed and sluggish community requests in manufacturing
Deploying a Node-based net app or web site is the simple half. Ensuring your Node occasion continues to serve sources to your app is the place issues get more durable. If you happen to’re inquisitive about guaranteeing requests to the backend or third social gathering companies are profitable, strive LogRocket.  https://logrocket.com/signup/
LogRocket is sort of a DVR for net and cell apps, recording actually every little thing that occurs whereas a consumer interacts together with your app. As a substitute of guessing why issues occur, you may combination and report on problematic community requests to shortly perceive the basis trigger.
LogRocket devices your app to file baseline efficiency timings similar to web page load time, time to first byte, sluggish community requests, and in addition logs Redux, NgRx, and Vuex actions/state. Begin monitoring without spending a dime.
