Do you need to create a customized password-protected web page in your web site?
You may conceal content material and limit entry to sure pages utilizing WordPress password safety. Nonetheless, the default login and password-entry format is apparent and never interesting.
On this article, we’ll present you easy methods to customise password-protected pages in WordPress.
Why Customise Password Protected Pages in WordPress?
If you wish to create a web page or a put up in your WordPress weblog that ought to solely be seen to chose purchasers or members, then you should utilize the password safety function to lock the content material.
Equally, if you happen to’re creating a brand new WordPress web site and don’t need everybody to view it, then utilizing a password-protected web page is sensible.
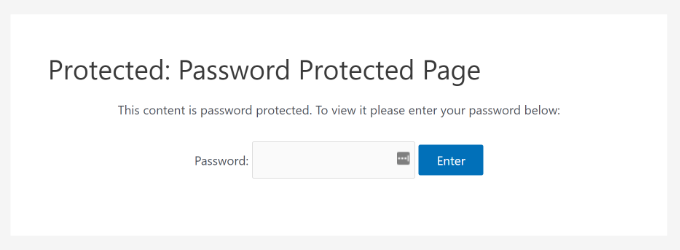
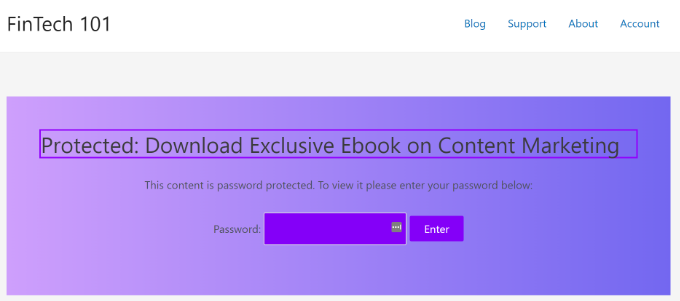
Nonetheless, the default password-protected web page design may be very fundamental and never enticing. Right here’s a preview of what it appears like:
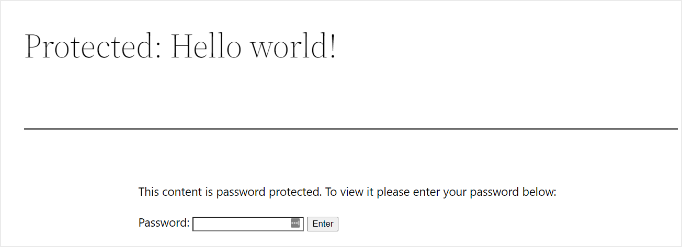
Customizing the password-protected web page means that you can change its design and format the best way you need. It helps make your web page extra participating, and you’ll match it to your model for a extra skilled look and higher person expertise.
That mentioned, we’ll present you easy methods to allow password safety in WordPress and alternative ways to customise a selected web page, your total website, and totally different sections.
You may click on the hyperlinks under to leap forward to your most well-liked part:
- Easy methods to Password Shield a Web page in WordPress
- Customise Default Password Protected Design Utilizing CSS Hero
- Customise a Particular Password Protected Web page Utilizing SeedProd
- Create Customized Password Protected Web page for Whole Web site
- Create Password Protected Sections in WordPress (Good for Programs & Premium Content material)
Easy methods to Password Shield a Web page in WordPress
Earlier than we present you easy methods to customise a WordPress web page, you need to know that WordPress comes with built-in settings to password-protect your pages and posts.
All you must do is edit a web page or add a brand new one. When you’re within the WordPress content material editor, go forward and click on the ‘Public’ possibility below ‘Standing & visibility’ within the settings panel in your proper.
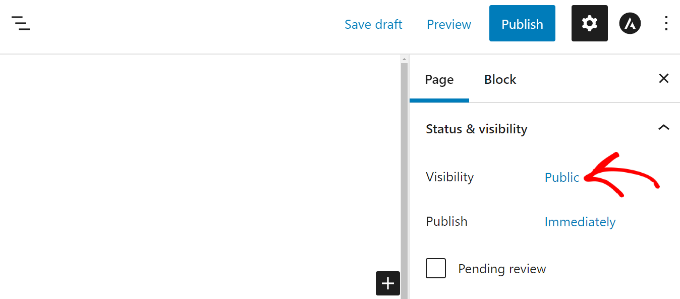
Subsequent, you’ll see totally different Publish Visibility choices.
Merely choose the ‘Password Protected’ possibility and enter a password in your web page.
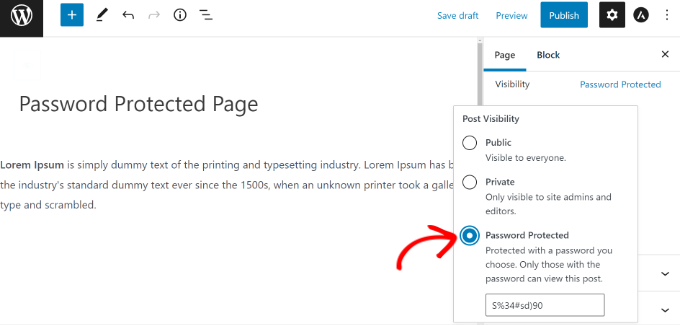
Now, go forward and click on ‘Replace’ or ‘Publish,’ and the stay web page can be protected by a password.
Now you can go to your web site and see the web page in motion.
Now, let’s see how one can customise your default password-protected web page.
Customise Default Password Protected Design Utilizing CSS Hero
While you allow password safety out of your WordPress content material editor, the web page makes use of your website’s theme for styling.
To customise the web page, you possibly can merely use a device like CSS Hero. It helps you to edit the design and format of your web page with out enhancing code.
First, you’ll want to put in and activate the CSS Hero plugin. For extra particulars, please see our information on easy methods to set up a WordPress plugin.
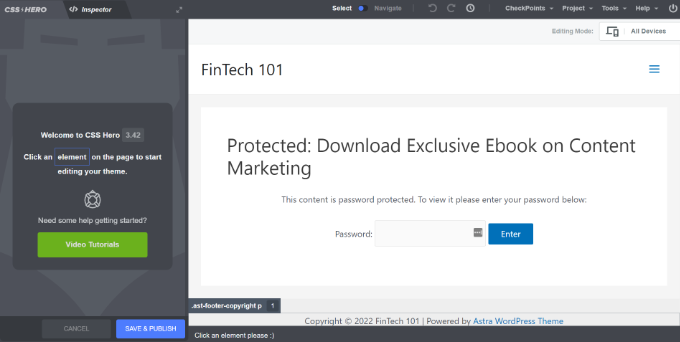
Upon activation, the CSS hero possibility can be added to the WordPress admin bar on the high. Go forward and click on the ‘Customise with CSS Hero’ possibility.

This can launch the CSS Hero visible builder, the place you possibly can edit and customise your web page.
To begin, merely click on on any component on the web page.
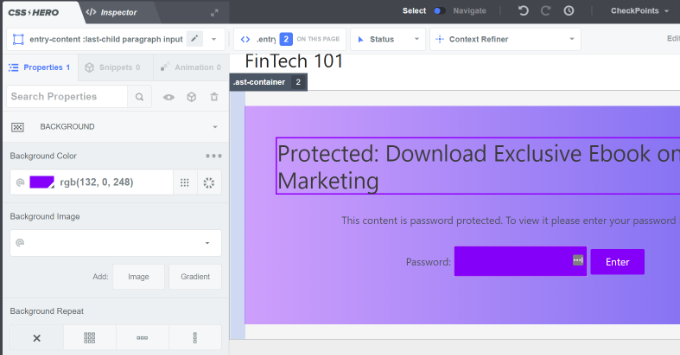
Subsequent, you possibly can change the background colours, add a background picture, use a distinct font, edit spacing, and extra from the panel in your left.
For instance, let’s add a background coloration with a gradient impact by going to the ‘Background’ tab. We’ll additionally change the colour of the field the place customers must sort within the password, in addition to the colour of the ‘Enter’ button.
In addition to that, you possibly can add a border round the principle heading on the web page by going to the Borders tab.
Merely select a border width, coloration, type, and some other adjustments you want.
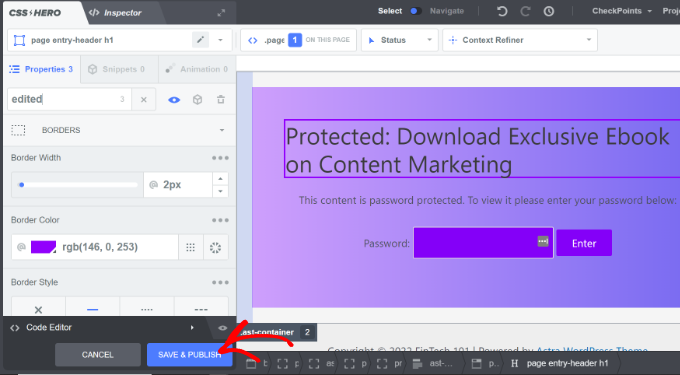
While you’ve made the change, don’t overlook to click on the ‘Save & Publish’ button on the backside.
Now you can go to your web site to see the personalized default password-protected web page.
The disadvantage of utilizing CSS Hero is that you simply don’t get the flexibleness and superior customization choices {that a} touchdown web page builder affords.
As an example, you possibly can’t add components like contact varieties, social media buttons, optin varieties, countdown timers, and extra utilizing CSS Hero.
That mentioned, let’s see how you should utilize a touchdown web page builder to customise particular pages in WordPress.
Customise a Particular Password Protected Web page Utilizing SeedProd
The simplest approach of customizing a selected password-protected web page is by utilizing SeedProd. It’s the most effective WordPress web site and web page builder.
For this tutorial, we’ll use the SeedProd Professional model as a result of it consists of premium templates and extra customization options. You may as well use the SeedProd Lite model free of charge and create a coming quickly web page.
First, you’ll want to put in and activate the SeedProd plugin. For those who need assistance, then please see our information on easy methods to set up a WordPress plugin.
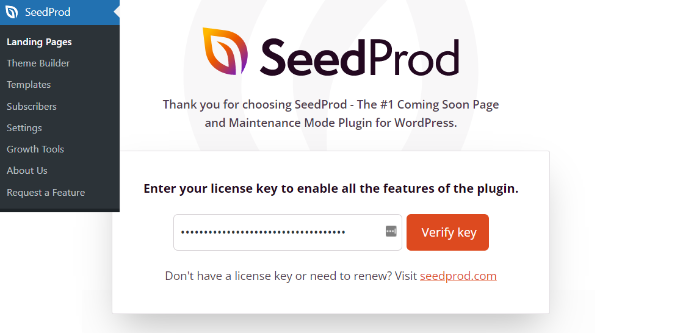
Upon activation, you’ll be taken to SeedProd’s welcome display screen in your WordPress dashboard. Subsequent, you’ll must enter the license key and click on the ‘Confirm Key’ button. Yow will discover the license key in your SeedProd account space.
After that, head to SeedProd » Touchdown Pages out of your WordPress dashboard and add a brand new customized password-protected touchdown web page.
Later on this article, we’ll present you ways to decide on which pages are password-protected. You may password-protect your total website or solely particular pages.
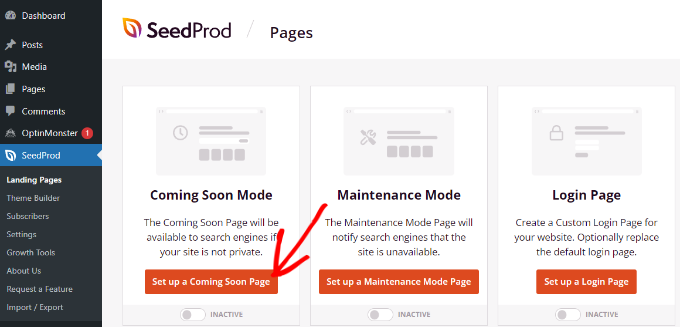
For this tutorial, we’ll create a coming quickly web page for an internet site launch with password safety. Nonetheless, you possibly can customise your design simply if you happen to solely use it to password-protect particular pages.
To begin, merely click on the ‘Arrange a Coming Quickly Web page’ button.
On the subsequent display screen, SeedProd will present you totally different web page templates, so you possibly can shortly customise them.
Go forward and hover over any template you need to use and click on the orange checkmark button.

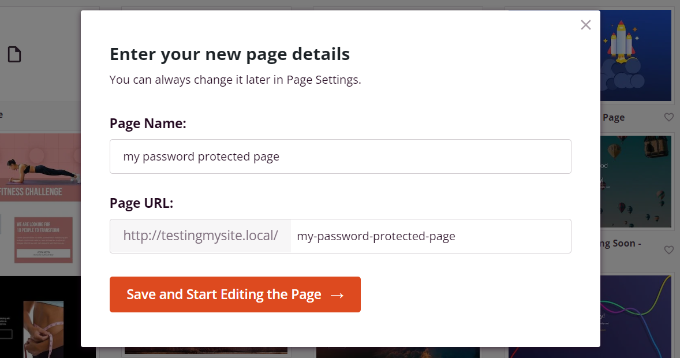
After deciding on a template, SeedProd will open a popup window titled ‘Enter your new web page particulars.’
You simply want to pick a web page title and URL slug, after which merely click on the ‘Save and Begin Enhancing the Web page’ button.
This can launch the SeedProd drag-and-drop web page builder.
Right here you possibly can customise your password-protected touchdown web page and add totally different components like textual content, photographs, buttons, and extra. SeedProd affords superior blocks like optin type, contact type, countdown timer, progress bar, social sharing choices, and extra.
So as to add a component, you possibly can merely drag any block from the menu in your left and drop it onto the template to the suitable. Then you possibly can customise the component just by clicking on it and adjusting the choices that seem.

That is additionally how SeedProd helps you to add a password type on the entrance finish of your web page to guard your content material.
First, you possibly can add a ‘Customized HTML’ block within the SeedProd builder. Merely drag and drop the Customized HTML block onto the template.
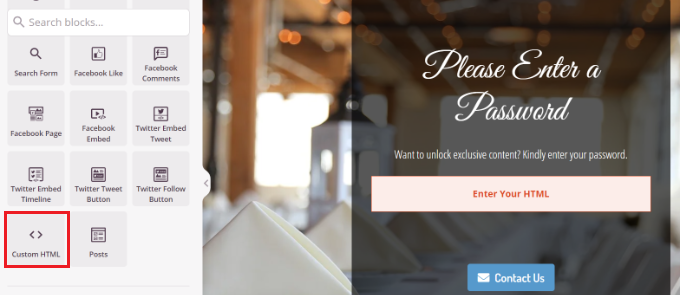
Subsequent, you possibly can click on on the Customized HTML block.
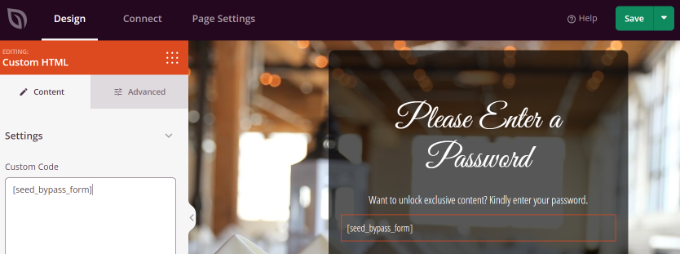
From right here, enter the [seed_bypass_form] shortcode within the ‘Customized Code’ discipline. That’s it! Don’t overlook to click on the ‘Save’ button whenever you’re completed.
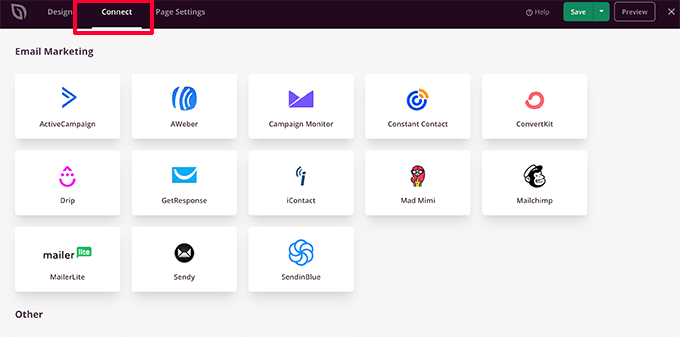
SeedProd additionally integrates with totally different e-mail advertising providers. You may add a contact type to your touchdown web page and join an e-mail advertising device to construct your e-mail checklist and keep in contact with customers.
Merely go to the ‘Join’ tab within the touchdown web page builder and choose your e-mail advertising service.
Setting Up Password Safety For Particular Pages in SeedProd
After making a customized coming quickly web page that makes use of [seed_bypass_form] shortcode, the subsequent step is to arrange password safety on particular pages utilizing SeedProd.
To begin, you’ll must go to the ‘Web page Settings’ tab within the SeedProd builder after which click on on ‘Entry Management’ settings.
After that, you possibly can enter a password within the ‘Bypass URL’ discipline that individuals can use to entry your restricted content material.
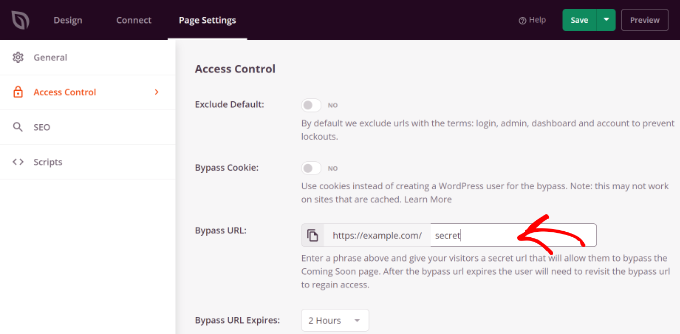
Do be aware that the textual content you write within the ‘Bypass URL’ discipline will act because the password and likewise a hyperlink that purchasers and crew members can use to detour the password safety and entry the web page.
SeedProd helps you to exclude particular URLs out of your websites like admin, login, dashboard, and account. This ensures that website homeowners don’t get locked out of their websites.
Now, you’ll want to decide on which URLs can be password-protected.
Merely scroll all the way down to the ‘Embody/Exclude URLs’ part below the ‘Entry Management’ settings. After that, choose the ‘Embody URLs’ possibility after which enter the particular pages you’d like to limit.
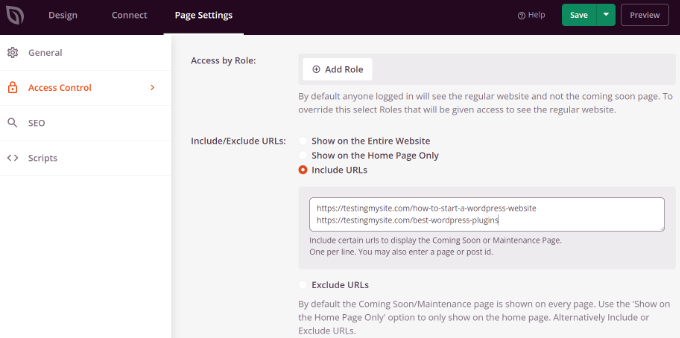
While you’re completed, merely click on the ‘Save’ button on the high.
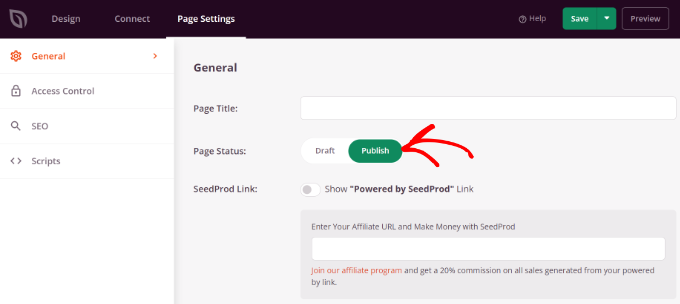
Subsequent, you possibly can go to the ‘Common’ settings below the ‘Web page Settings’ tab and alter the Web page Standing from ‘Draft’ to ‘Publish’.
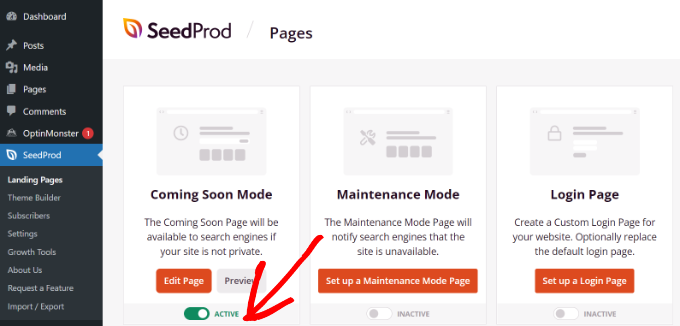
After that, you possibly can shut the touchdown web page builder and head to SeedProd » Touchdown Pages out of your WordPress admin panel.
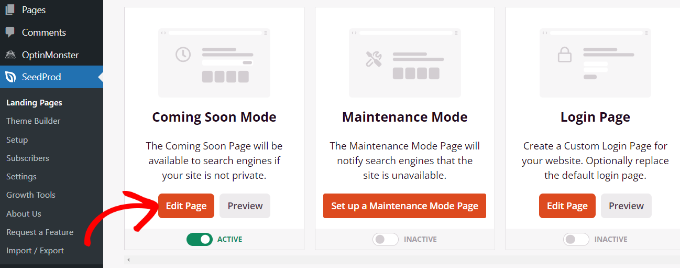
From right here, click on the toggle below ‘Coming Quickly Mode’ to activate your customized password-protected web page.
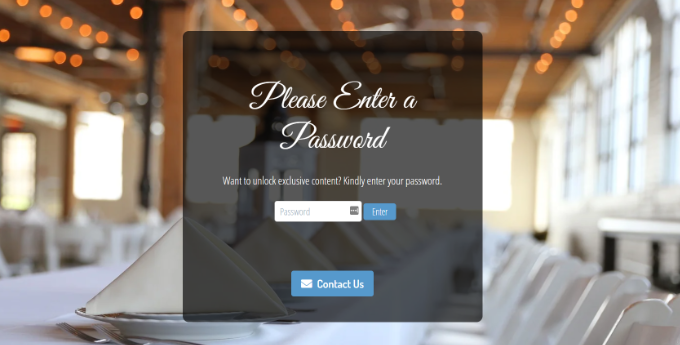
That’s all! You’ve efficiently created a customized password-protected touchdown web page that can solely seem on particular pages in WordPress.
Merely go to these pages in your web site to see the personalized password-protected web page in motion.
Create Customized Password Protected Web page for Whole Web site
Utilizing SeedProd, you may also show your password-protected web page on each web page of your web site. This fashion, customers might want to enter a password to achieve entry to any of your content material.
First, you possibly can go to SeedProd » Touchdown Pages out of your WordPress dashboard. Then, click on the ‘Edit Web page’ button within the ‘Coming Quickly Mode’ panel.
Subsequent, you possibly can head to the ‘Web page Settings’ tab on the high and go to ‘Entry Management’ settings.
After that, scroll all the way down to the ‘Embody/Exclude URLs’ part and choose the ‘Present on the Whole Web site’ possibility.
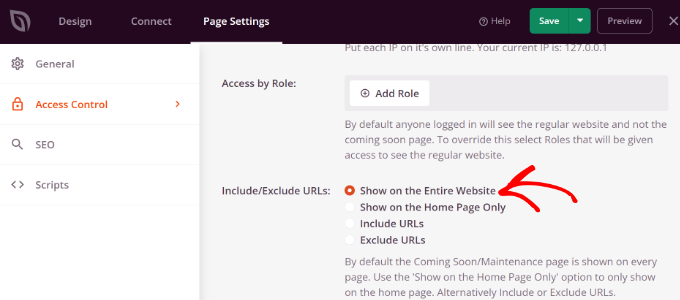
When you’ve made the adjustments, go forward and click on the ‘Save’ button on the high.
SeedProd will present the customized password-protected web page in your total web site.
Create Customized Password Protected Sections in WordPress
You may as well password-protect totally different web site sections in WordPress from totally different units of customers. That is helpful if you happen to’re operating a membership web site and need to management entry to your content material, plugins, apps, and different downloadable recordsdata.
One of the best ways to limit totally different elements of your web site is by utilizing MemberPress. It’s the most effective WordPress membership plugin that permits you to create a number of membership ranges to password-protect your content material.
You should utilize MemberPress to arrange totally different guidelines, so customers can solely entry content material based mostly on their membership degree. For extra particulars, please see our information on making a WordPress membership website.
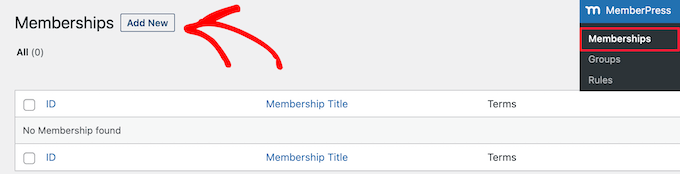
To begin, you’ll first want so as to add memberships to your web site. Merely go to MemberPress » Memberships out of your WordPress dashboard and click on the ‘Add New’ button.
After that, you possibly can enter a reputation in your membership degree, add an outline, and set a worth.
You may as well change the billing sort from one-time to recurring, in addition to edit the membership to be lifetime or expire after a sure time interval.
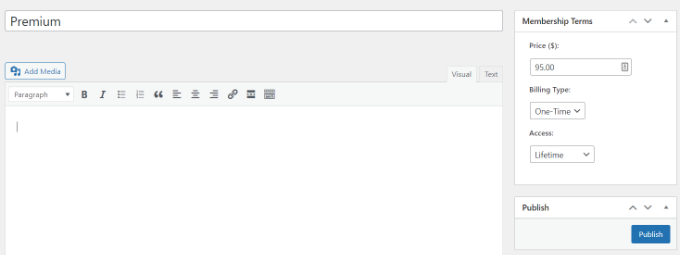
Don’t overlook to click on the ‘Publish’ button whenever you’re completed.
Subsequent, you possibly can go to MemberPress » Guidelines out of your WordPress dashboard and click on the ‘Add New’ button.
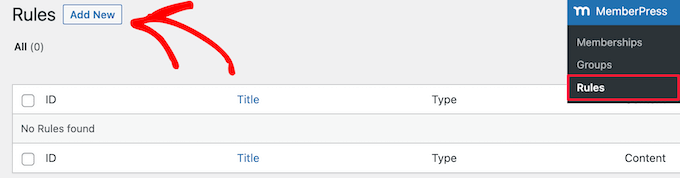
From right here, you possibly can click on the dropdown menu below the ‘Protected Content material’ possibility. MemberPress affords a lot of choices to guard your content material, whether or not that may be a single web page or your entire WordPress pages.
For this tutorial, we’ll password-protect a single web page. Merely select the ‘A Single Web page’ possibility from the dropdown menu and enter the title of the web page.
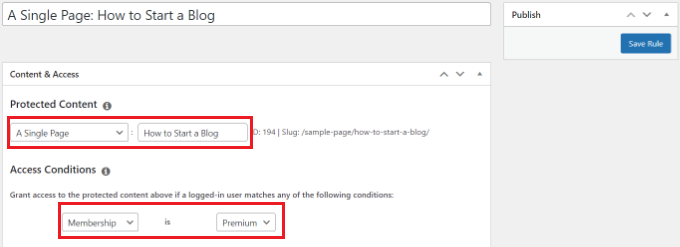
Subsequent, you’ll must arrange the Entry Circumstances and configure who can view the restricted web page. MemberPress helps you to defend content material based mostly on membership degree, WordPress person position, functionality, and particular person members.
Let’s set ‘Membership’ is ‘Premium’ from the dropdown menus for this tutorial. This fashion, solely premium members will be capable of entry the web page. You may add extra circumstances and permit greater than 1 membership degree to view the web page.
While you’re completed, don’t overlook to click on the ‘Save Rule’ button.
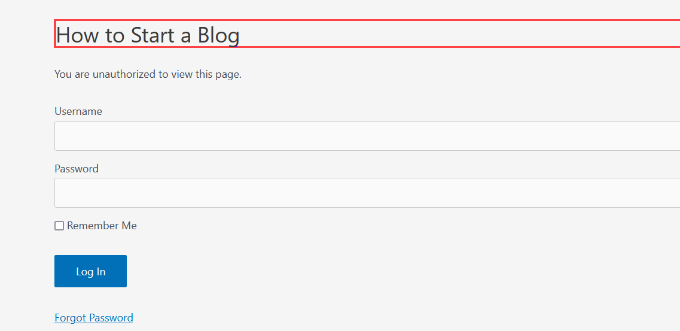
You may then go to your web site to see the password-protected web page in motion. Members should sign up to their account to view the contents of the web page.
You may arrange passwords in your movies, or you possibly can provide group memberships for company groups. Moreover, you possibly can create a password to offer subscribers entry to a paid e-newsletter and extra.
We even have a information on easy methods to password-protect your varieties in WordPress.
We hope this text helped you learn to customise a password-protected web page in WordPress. You may additionally need to see our information on easy methods to create a totally customized WordPress theme with out writing any code, or our comparability of the most effective WordPress web optimization plugins.
For those who preferred this text, then please subscribe to our YouTube Channel for WordPress video tutorials. You may as well discover us on Twitter and Fb.
The put up Easy methods to Customise a Password Protected Web page in WordPress first appeared on WPBeginner.
