
On this step-by-step tutorial, we’ll create a information feed software with minimal code utilizing React Native for iOS and Android. Our software will encompass two screens, the primary is the Dwelling display or the Feed display. The second Element display will deal with loading a single article, loading information for a particular class, or looking for information with a particular key phrase.
Yow will discover the entire supply code for this text on this repository. Let’s get began!
Organising a Information API account
To populate our software with information articles, we’ll use the Information API as our backend. The Information API supplies us with a REST API that we will use to get the most recent, breaking information headlines from all all over the world.
Earlier than you possibly can start utilizing the Information API, it’s essential to get an API token from the web site. Go to the Get began web page and click on on Get API Key. When you click on the button, you’ll be redirected to the registration web page. After filling in your particulars on the web page and registering efficiently, you will get your API token. Now, let’s take the API for a spin and check all the pieces it has to supply.
To check the API, we’ll use Postman, however you need to use the API platform of your selection. Alternately, you possibly can merely use curl in your terminal. You may both use the standalone Postman software in your OS, or just use the online app, which is what I choose.
For Feed, we’ll use the prime headlines endpoint, so let’s check it first:
We’re utilizing the next URL:
https://newsapi.org/v2/top-headlines?class=know-how&language=en
We’re passing two question parameters to the URL:
class=know-how: Will get all the highest headlines within the know-how classlanguage=en: Ensures we solely get information articles written in English
Every name to a Information API URL should comprise an apiKey, which is used to authenticate the consumer who’s sending the request and for analytics functions.
We will add our API key in an API name in one among two methods. For one, you possibly can immediately ship it as a question param within the URL itself:
https://newsapi.org/v2/top-headlines?class=know-how&language=en&apiKey=<YOUR_API_KEY>
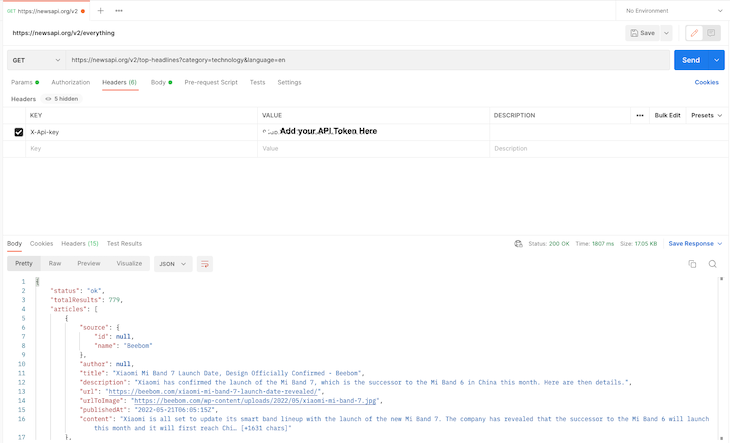
Nonetheless, this technique will not be safe, and due to this fact will not be advisable. However, you need to use it for testing. Alternately, we will strive sending API_KEY contained in the request header utilizing the X-Api-key. For those who’re utilizing curl, you may add a request header just like the one beneath:
 curl https://newsapi.org/v2/top-headlines?class=know-how&language=en
   -H "X-Api-key: <YOUR_API_KEY>"
For those who’re utilizing Postman, then merely go to the Headers tab of request and add a key and worth, like within the screenshot above.
Now that we now have a response object from our API, let’s analyze it and see what it supplies for us. The response has an articles key, which is an array of objects the place every object is a information article.
A pattern of a information object is given beneath:
{
    "supply": {
        "id": null,
        "title": "digitalspy.com"
    },
    "writer": "Joe Anderton",
    "title": "Strolling Useless's Norman Reedus reveals Loss of life Stranding 2 existence - Digital Spy",
    "description": "The Strolling Useless star Norman Reedus reveals Loss of life Stranding 2 existence.",
    "url": "https://www.digitalspy.com/tech/a40064850/walking-dead-norman-reedus-death-stranding-2/",
    "urlToImage": "https://hips.hearstapps.com/digitalspyuk.cdnds.internet/16/28/1468254183-screen-shot-2016-07-11-at-171152.jpg?crop=1xw:0.8929577464788733xh;heart,prime&resize=1200:*",
    "publishedAt": "2022-05-21T10:12:41Z",
    "content material": "The Strolling Useless star Norman Reedus has seemingly revealed the existence of Loss of life Stranding 2.rnThe actor performed main character Sam Porter Bridges within the PlayStation and PC sport from Steel Gear So… [+2088 chars]"
}
As you possibly can see, we get a variety of knowledge for a single information article, however we’ll use title, url, urlToImage, publishedAt, and content material. Now that our backend is all arrange, let’s begin engaged on the cellular app.
Utility preview
Earlier than we truly write the code for our app, let’s talk about the options we need to construct. First, we’ll want a house display or feed the place we’ll present all the most recent information articles. On the prime of the listing, there might be a horizontal listing of stories class tags, which, when chosen, will load information for that particular class.
We’ll want a search bar on the prime of the display that the consumer can use to look information utilizing a particular key phrase. We’ll additionally implement shared transition navigation. When the consumer clicks on any information articles, the NewsDetail display will seem.
We’ll use Redux to handle state in our software. We need to persist the info between software lifecycles, so we’ll use Redux Persist.
The app UI will assist each darkish and light-weight mode. The ultimate UI we’re constructing will appear like the next photos:
Creating a brand new React Native challenge
Let’s begin by creating a brand new React Native challenge as follows:
npx react-native init <App-Title-Right here> --template react-native-template-typescript
I’ll use TypeScript, however be at liberty to make use of JavaScript. If you’re going through any points making a TypeScript template challenge, you possibly can confer with the docs.
With our challenge arrange, let’s begin writing our code. First, take away all of the boilerplate code in App.tsx and add the code beneath:
import React from 'react';
import {Textual content} from 'react-native';

const App: React.FC = () => {
  return <Textual content>That is Feed Display</Textual content>;
};

export default App;
Let’s begin by including state-management to our app. We have to set up some libraries to include Redux into our challenge:
yarn add @reduxjs/toolkit react-redux redux
Or, if you happen to choose npm, use the next command:
npm i @reduxjs/toolkit react-redux redux
Within the step above, we’re putting in @reduxjs/toolkit, react-redux, and redux. In Redux v6, the createStore technique is deprecated, and we have to use Redux Toolkit’s configureStore technique as an alternative.
Now, let’s create a Redux retailer and hook up some actions and reducers to it. Create a brand new folder within the root of the challenge listing and title it src. We’ll hold all our software code right here. Add the redux folder inside it, then create three recordsdata inside it, actions.ts, reducers.ts, and retailer.ts.
The listing construction ought to now appear like the next:
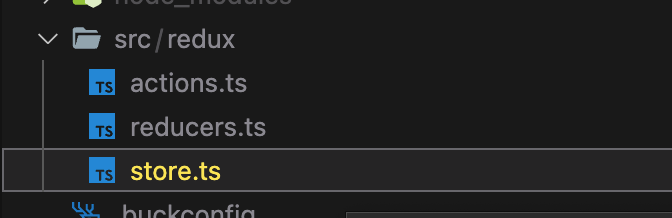
We’ll create an motion perform to get information articles from the API and retailer them in our retailer. For now, let’s simply return an empty array:
export const GET_NEWS_FEED = 'GET_NEWS_FEED';

export const getNewsFeed =
() => (dispatch) => {
      dispatch({
        sort: GET_NEWS_FEED,
        payload: [],
      });
};
Let’s create feedReducer for our newsFeed:
import {GET_NEWS_FEED} from './actions';

const initialState = {
  newsFeed: [],
};

const feedReducer = (
  state = initialState,
  motion: {sort: String; payload: any},
) => {
  swap (motion.sort) {
    case GET_NEWS_FEED:
      return {...state, newsFeed: motion.payload};
    default:
      return state;
  }
};
export default feedReducer;
Within the reducer, we now have the state variable newsFeed, which initially is an empty array. After we obtain the GET_NEWS_FEED motion, we set its worth to the payload handed in motion.
Now that we now have actions and reducers for our state, let’s create a Redux retailer and initialize it with the next values.
Create retailer.ts file and add the next code:
import {configureStore} from '@reduxjs/toolkit';
import {combineReducers} from 'redux';
import feedReducer from './reducers';

const rootReducer = combineReducers({
  feedReducer: feedReducer,
});

export const retailer = configureStore({
  reducer: rootReducer,
});
We’ve efficiently arrange the redux retailer, now, we simply have to go it into our software. Add the next code to your App.tsx file:
import React from 'react';
import {Textual content} from 'react-native';
import {Supplier} from 'react-redux';
import {retailer} from './src/redux/retailer';

const App: React.FC = () => {
  return (
    <Supplier retailer={retailer}>
      <Textual content>That is feed display</Textual content>
    </Supplier>
  );
};

export default App;
Fetching information from an API
Thus far, we now have a working Redux retailer. Let’s populate it with information articles. To implement community calls, we’ll use Axios, so let’s add it to the challenge:
yarn add axios
We have to create an axios occasion so we don’t have to deal with request headers each time we make an API name. Create a brand new folder named api in src and add a file named index.ts inside it:
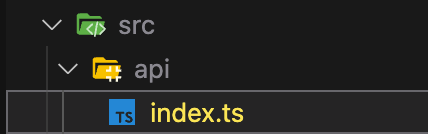
We’ll create an axios occasion contained in the index.ts file and export it as an apiClient variable:
import axios from 'axios';
const BASE_URL = 'https://newsapi.org/v2/';

export const apiClient = axios.create({
  baseURL: BASE_URL,
  timeout: 10000,
  headers: {
    'X-Api-key': '<Add-your-api-token-here>',
  },
});
Now, let’s make the most of this apiClient in our getNewsFeed motion. Make the next adjustments in your actions.ts file:
export const getNewsFeed = () => async (dispatch: Perform) => {
  strive {
    const res = await apiClient.get(
      'top-headlines?language=en&class=enterprise',
    );
    if (res.standing === 200) {
      dispatch({
        sort: GET_NEWS_FEED,
        payload: res?.knowledge?.articles,
      });
    } else {
      console.warn('One thing went flawed');
    }
  } catch (error) {
    console.error(error);
  }
};
Within the code above, we make an API name to get the highest headlines within the enterprise class. If we obtain a profitable response from the API, then we replace the newsFeed state with the brand new articles acquired.
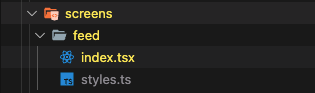
We have to name this motion when our App is rendered the primary time. We’ll additionally show a listing of article titles. Earlier than we populate our newsFeed, let’s create recordsdata for various screens in our software.
Create a screens folder inside src and create a brand new folder named Feed inside it. Then, add two recordsdata contained in the Feed folder named index.tsx and kinds.ts:
To deal with notches on an iPhone, we’ll use a helper library referred to as react-native-iphone-x-helper. Set up it utilizing the command beneath:
yarn add react-native-iphone-x-helper
Let’s add some kinds for our display. Make the next adjustments in your feed/kinds.ts:
import {StyleSheet} from 'react-native';
import {getStatusBarHeight, isIphoneX} from 'react-native-iphone-x-helper';

export default StyleSheet.create({
  container: {
    flex: 1,
    flexGrow: 1,
    paddingTop: isIphoneX() ? getStatusBarHeight() + 20 : 20,
  },
  listing: {
    flex: 1,
    flexGrow: 1,
    paddingVertical: 8,
  },
});
Then, add the code beneath in your feed/index.tsx file:
import React, {useEffect} from 'react';
import {Textual content, useColorScheme, View} from 'react-native';
import {useDispatch, useSelector} from 'react-redux';
import {getNewsFeed} from '../../redux/actions';
import kinds from './kinds';

export const Feed: React.FC = () => {
  const {newsFeed} = useSelector((state: any) => state.feedReducer);
  const dispatch: Perform = useDispatch();

  useEffect(() => {
    dispatch(getNewsFeed());
  }, [dispatch]);
  const backgroundColor = useColorScheme() === 'darkish' ? '#000' : '#fff';
  return (
    <View model={[styles.container, {backgroundColor}]}>
      {newsFeed?.map((merchandise: any) => (
        <Textual content>{merchandise.title}</Textual content>
      ))}
    </View>
  );
};
Now, we have to render the feed element in our App element. Make the adjustments beneath in your App.tsx file:
import React from 'react';
import {Supplier} from 'react-redux';
import {retailer} from './src/redux/retailer';
import {Feed} from './src/screens/feed';

const App: React.FC = () => {
  return (
    <Supplier retailer={retailer}>
      <Feed />
    </Supplier>
  );
};
export default App;
Now, your UI ought to appear like the next picture:
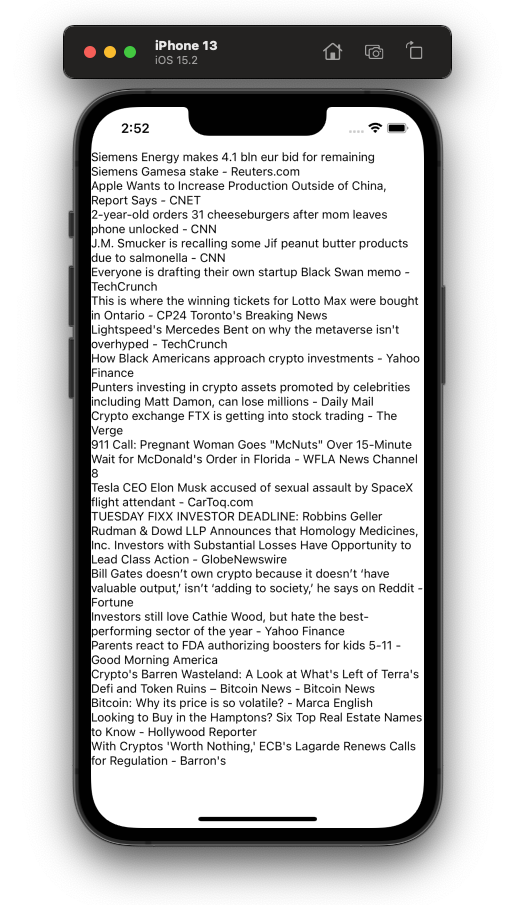
We at the moment are capable of fetch a listing of the most recent information from all over the world and show it on the display. Subsequent, we’ll add some UI design.
Designing the information article card
At the moment, we’re exhibiting the title of the information on the display. We have to replace it to indicate a picture of the article. Above it, we’ll show the title of the article. On the backside, we’ll present the timestamp of the actual information/article.
Let’s substitute our map perform in feed/index.tsx with a Flatlist. Earlier than you bounce into implementing the UI, you first want so as to add some libraries that we’ll use to design our UI:
yarn add react-native-uuid react-native-linear-gradient second
We‘ll use react-native-uuid to generate a singular key for each information article element and react-native-linear-gradient to create a semi-transparent to clear overlay over the picture on which we’ll show the title of the article.
Lastly, we use second to transform the timestamp acquired from API to a human-readable format. Make the next adjustments to feed/index.tsx:
import uuid from 'react-native-uuid';
....
return (
  <View model={[styles.container, {backgroundColor}]}>
    <FlatList
      keyExtractor={() => uuid.v4()}
      showsVerticalScrollIndicator={false}
      knowledge={newsFeed}
      renderItem={({merchandise, index}: any) => (
        <NewsArticle put up={merchandise} />
      )}
      model={kinds.listing}
    />
  </View>
);
Within the code above, you possibly can discover we’re assigning a singular key to every merchandise rendered by the Flatlist element. Subsequently, React treats every article in a different way, and there must be no overlap within the UI. If this doesn’t make sense now, it should later when our UI logic will get a bit of extra difficult.
The code above may even throw an error saying “NewsArticle will not be outlined”. Let’s repair that by creating a brand new element for our information article.
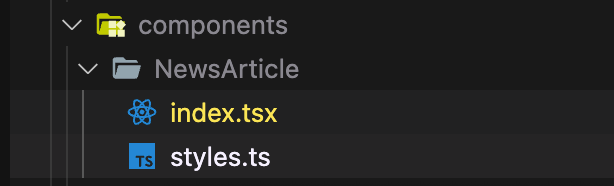
Within the src listing of your challenge, create a brand new folder named parts, which is able to comprise all of the UI parts we’ll use all through the appliance. Now, create a brand new folder referred to as NewsArticle and add two recordsdata inside it referred to as index.tsx and kinds.ts:
Add the next code to kinds.ts:
import {Platform, StyleSheet} from 'react-native';

const boxShadow: any = Platform.choose({
  ios: {
    shadowColor: '#000',
    shadowOffset: {
      width: 0,
      top: 0,
    },
    shadowOpacity: 0.4,
    shadowRadius: 4,
  },
  android: {elevation: 6},
});

export default StyleSheet.create({
  container: {
    top: 240,
    marginBottom: 18,
    backgroundColor: '#eee',
    borderRadius: 24,
    marginHorizontal: 16,
    ...boxShadow,
  },
  imageContainer: {flex: 1},
  picture: {
    flex: 1,
    borderRadius: 24,
    top: 300,
  },
  titleContainer: {
    place: 'absolute',
    backside: 0,
    width: '100%',
    borderBottomLeftRadius: 24,
    borderBottomRightRadius: 24,
    top: 160,
    paddingLeft: 16,
    paddingRight: 10,
    justifyContent: 'flex-end',
    alignItems: 'flex-start',
  },
  textual content: {
    fontSize: 18,
    fontWeight: '600',
    lineHeight: 24,
    coloration: '#fff',
    paddingBottom: 24,
  },
  timestamp: {
    place: 'absolute',
    coloration: '#eee',
    fontSize: 12,
    fontWeight: '300',
    proper: 16,
    backside: 8,
  },
});
These are just a few fundamental kinds that we’ll use to design our NewsArticle element. Add the next code to your index.tsx file:
import second from 'second';
import React from 'react';
import {Picture, Textual content, TouchableOpacity} from 'react-native';
import LinearGradient from 'react-native-linear-gradient';
import kinds from './kinds';

sort Publish = {
  title: string;
  urlToImage: string;
  publishedAt: string;
  url: string;
  writer: string;
};

export const NewsArticle: React.FC<{
  put up: Publish;
}> = ({put up}) => {
  return (
    <TouchableOpacity activeOpacity={1} model={kinds.container}>
      <Picture
        supply={{
          uri: put up?.urlToImage ?? 'https://picsum.photographs/800',
          cache: 'force-cache',
        }}
        resizeMode={'cowl'}
        model={kinds.picture}
      />
      <LinearGradient
        colours={['#0000', '#000A', '#000']}
        model={kinds.titleContainer}>
        <Textual content model={kinds.textual content}>{put up?.title}</Textual content>
        <Textual content model={kinds.timestamp}>
          {second(put up?.publishedAt).format('HH:MM DD, MMMM')}
        </Textual content>
      </LinearGradient>
    </TouchableOpacity>
  );
};
Within the code above, we’ve declared the NewsArticle element, which receives a put up prop, which is of sort Publish. The definition of Publish is given above the element.
For the UI, we wrapped the entire element inside TouchableOpacity, which we’ll use later within the tutorial to navigate the consumer to the NewsDetail display. Then, an Picture is displayed over the entire view. If we don’t get any urlToImage from API, then we present a random placeholder picture.
For the textual content, we now have the Textual content parts inside a LinearGradient element, which is positioned absolute over the Picture, making the textual content readable to the consumer and sustaining the distinction ratio within the textual content UI. We additionally use second to format the publishedAt property of the article and at last show the formatted worth.
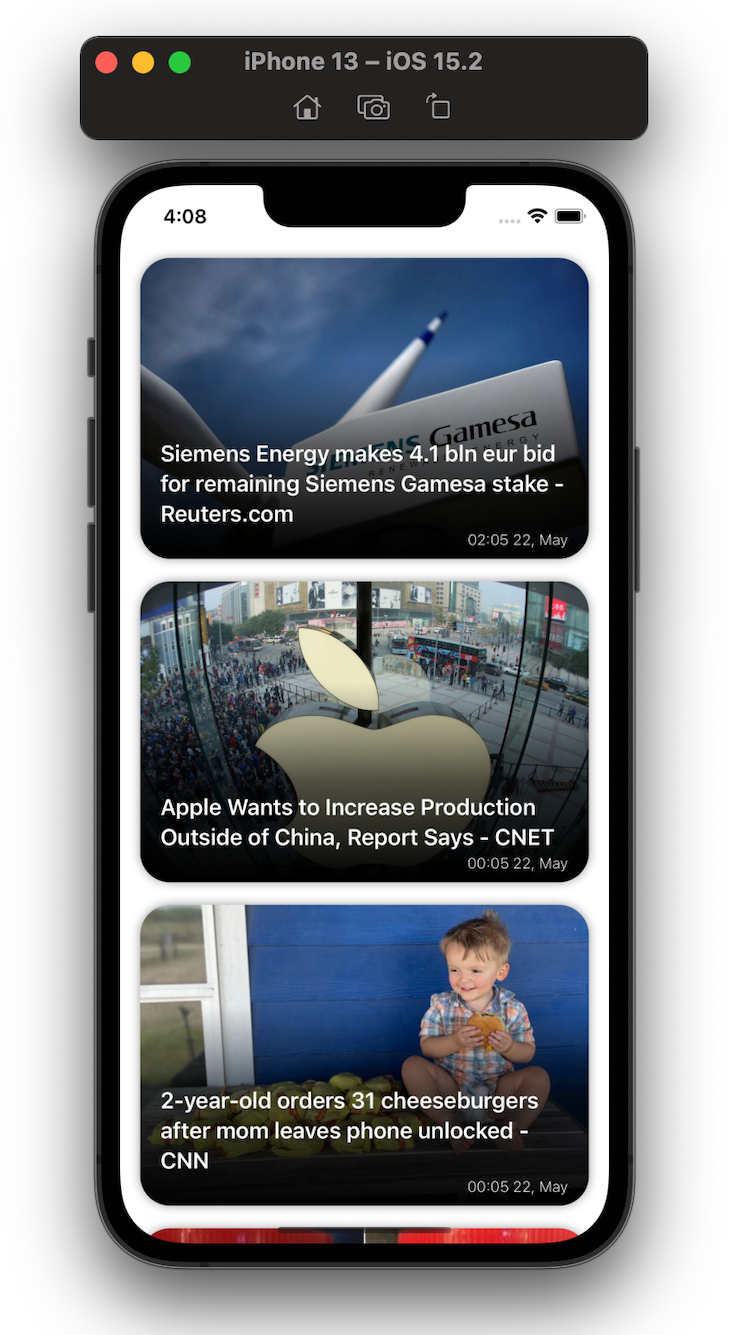
After implementing the adjustments above in your code, your software UI ought to appear like the next:
We now have a working, readable information feed. Let’s add performance to refresh the web page when the consumer pulls up on the display. Fortunately, this has a reasonably easy implementation. We simply want to make use of the RefreshControl prop of the Flatlist element.
Make the next adjustments in your feed/index.tsx:
import React, {useCallback, useEffect, useState} from 'react';
import {FlatList, RefreshControl, useColorScheme, View} from 'react-native';
import {useDispatch, useSelector} from 'react-redux';
import {NewsArticle} from '../../parts';
import {getNewsFeed} from '../../redux/actions';
import kinds from './kinds';
import uuid from 'react-native-uuid';

export const Feed: React.FC = () => {
  const {newsFeed} = useSelector((state: any) => state.feedReducer);
  const dispatch: Perform = useDispatch();
  const [isLoading, setIsLoading] = useState(false);

  useEffect(() => {
    dispatch(getNewsFeed(setIsLoading));
  }, [dispatch]);

  const handleRefresh = useCallback(() => {
    dispatch(getNewsFeed(setIsLoading));
  }, [dispatch]);
  const backgroundColor = useColorScheme() === 'darkish' ? '#000' : '#fff';
  return (
    <View model={[styles.container, {backgroundColor}]}>
      <FlatList
        keyExtractor={() => uuid.v4()?.toString()}
        showsVerticalScrollIndicator={false}
        knowledge={newsFeed}
        renderItem={({merchandise}: any) => <NewsArticle put up={merchandise} />}
        refreshControl={
          <RefreshControl refreshing={isLoading} onRefresh={handleRefresh} />
        }
        model={kinds.listing}
      />
    </View>
  );
};
Within the code above, we’ve added a state isLoading, which is true when information is being fetched by way of the getNewsFeed technique. Then, we added the RefreshControl element in Flatlist, which might be proven when isLoading is true and in addition when the consumer pulls the listing as much as refresh knowledge. Then, the handleRefresh technique might be triggered.
Discover that we’ve added a setIsLoading parameter contained in the getNewsFeed technique. However, we haven’t modified the strategy definition but. Let’s try this subsequent; add the next code in your actions.ts file:
export const getNewsFeed =
  (setIsLoading: Perform) => async (dispatch: Perform) => {
    strive {
      setIsLoading(true);
      const res = await apiClient.get(
        'top-headlines?language=en&class=enterprise',
      );
      setIsLoading(false);
      if (res.standing === 200) {
        dispatch({
          sort: GET_NEWS_FEED,
          payload: res?.knowledge?.articles,
        });
      } else {
        console.warn('One thing went flawed');
      }
    } catch (error) {
      console.error(error);
    }
};
The output might be one thing like the photographs beneath:
Persisting retailer knowledge
We now have a working information feed, however there’s a minor drawback. You would possibly discover that when the app is first loaded, the display is clean for a while. To resolve this drawback, we’ll use Redux Persist, which is a sort of a middleware for the Redux retailer that persists retailer knowledge, rehydrating and populating it.
After implementing Redux Persist, when the consumer closes and opens the app, they’ll see the earlier feed as an alternative of a clean display. If any new feed is offered, then that might be loaded.
First, add the dependencies to your challenge. To take action, execute the command beneath:
yarn add @react-native-community/async-storage redux-persist
We have to add Async Storage as a result of all of our retailer knowledge might be saved in it. When the app opens once more, the shop might be rehydrated utilizing the info inside it. Principally, Redux Persist makes use of AsyncStorage for storage in React Native.
As soon as the dependencies are added, we have to make some adjustments in our retailer.ts file:
import AsyncStorage from '@react-native-community/async-storage';
import {configureStore} from '@reduxjs/toolkit';
import {combineReducers} from 'redux';
import feedReducer from './reducers';
import {persistReducer, persistStore} from 'redux-persist';

const persistConfig = {
  key: 'root',
  storage: AsyncStorage,
  whitelist: ['newsFeed'],
};

const rootReducer = combineReducers({
  feedReducer: persistReducer(persistConfig, feedReducer),
});

export const retailer = configureStore({
  reducer: rootReducer,
  middleware: getDefaultMiddleware =>
    getDefaultMiddleware({
      serializableCheck: false,
    }),
});

export const persistor = persistStore(retailer);
Within the code above, we created a persistConfig object, which is answerable for the configuration of Redux Persist. Inside the article, there are two major key objects, storage and whitelist.
We’ll use storage as storage for our Redux retailer knowledge, and whitelist is an array of strings. These are the names of the reducers that we need to persist. If we go an empty array to whitelist, then all our reducers might be endured.
Subsequent, we create a endured reducer utilizing the persistReducer technique from Redux Persist and go the persistConfig as the primary argument. We then go the precise reducer we need to persist.
We’re passing serializableCheck: false within the middleware key of configureStore to suppress a warning that’s thrown after we use Redux Stick with Redux v6.
Ultimately, we create a endured copy of our retailer utilizing the persistStore technique and export it as persistor. We’ll use this in our subsequent step.
Lastly, to supply the endured knowledge to our software, we have to go it in our App.tsx file simply after the Redux retailer Supplier element.
Add the next code contained in the App.tsx file:
import React from 'react';
import {ActivityIndicator} from 'react-native';
import {Supplier} from 'react-redux';
import {PersistGate} from 'redux-persist/integration/react';
import {persistor, retailer} from './src/redux/retailer';
import {Feed} from './src/screens/feed';

const App: React.FC = () => {
  return (
    <Supplier retailer={retailer}>
      <PersistGate
        loading={<ActivityIndicator measurement={'giant'} coloration={'#000'} />}
        persistor={persistor}>
        <Feed />
      </PersistGate>
    </Supplier>
  );
};
export default App;
We’re passing endured retailer knowledge by way of the PersistGate element, and the endured retailer is coming from the persistor. There’s a loading prop within the PersistGate element that takes any JSX element as an argument, and that JSX element is proven till the shop is rehydrated.
With that, we’ve endured our retailer knowledge. Now, if you happen to shut the app and open it once more, you gained’t see the clean display.
Subsequent, we’ll implement class tags. Our app may have a horizontal listing of predefined classes of stories that customers can view. When the consumer faucets any class tag, then the information feed ought to replace and present information associated to that particular class solely.
Let’s begin by creating a knowledge supply for classes. Create a file named constants.ts within the src folder of your challenge, then add the next code to it:
interface NewsCategoryTypes {
  [key: string]: string;
}

export const NewsCategory: NewsCategoryTypes = {
  enterprise: 'enterprise',
  leisure: 'leisure',
  basic: 'basic',
  well being: 'well being',
  science: 'science',
  sports activities: 'sports activities',
  know-how: 'know-how',
};
Now, let’s show a listing of classes on the Feed display above the articles listing. Add the code beneath within the feed/index.tsx file:
import {NewsArticle, NewsTags} from '../../parts';
import {NewsCategory} from '../../constants';
....
export const Feed: React.FC = () => {
  const [isLoading, setIsLoading] = useState(false);
  const [selectedCategory, setSelectedCategory] = useState(
    NewsCategory.enterprise,
  );
  ....
  useEffect(() => {
    dispatch(getNewsFeed(setIsLoading, selectedCategory));
  }, [dispatch, selectedCategory]);

  const handleRefresh = useCallback(() => {
    dispatch(getNewsFeed(setIsLoading, selectedCategory));
  }, [dispatch, selectedCategory]);

  return (
    <View model={[styles.container, {backgroundColor}]}>
      <NewsTags
          selectedCategory={selectedCategory}
          setSelectedCategory={setSelectedCategory}
      />
      ....
    </View>
  );
};
Within the code above, we launched a brand new state referred to as selectedCategory and gave it an preliminary worth of NewsCategory.enterprise. We additionally at the moment are passing selectedCategory in our getNewsFeed motion, and at last, we’re rendering the NewsTags element, which we haven’t created but.
Let’s try this now. Create a brand new folder referred to as NewsTags and add two recordsdata inside it, kinds.ts and index.tsx:
Add the code beneath to the kinds.ts file:
import {StyleSheet} from 'react-native';
export default StyleSheet.create({
  listing: {
    maxHeight: 40,
  },
  contentContainer: {
    paddingHorizontal: 24,
    alignItems: 'heart',
    justifyContent: 'heart',
  },
});
To show a horizontal listing of classes, add the next code within the NewsTags/index.tsx file:
import React from 'react';
import {FlatList} from 'react-native';
import {NewsCategory} from '../../constants';
import {Tag} from '../Tag';
import kinds from './kinds';

export const NewsTags: React.FC<{
  selectedCategory: String;
  setSelectedCategory: Perform;
}> = ({selectedCategory, setSelectedCategory}) => {
  return (
    <FlatList
      horizontal
      showsHorizontalScrollIndicator={false}
      knowledge={Object.keys(NewsCategory)}
      keyExtractor={(merchandise: string) => merchandise}
      renderItem={({merchandise}: any) => (
        <Tag
          class={merchandise}
          selectedCategory={selectedCategory}
          setSelectedCategory={setSelectedCategory}
        />
      )}
      model={kinds.listing}
      contentContainerStyle={kinds.contentContainer}
    />
  );
};
Within the code above, we render over all of the keys in our NewsCategory object. Inside renderItem, we now have handed the Tag element, which we haven’t created but. Let’s create it now. Add a folder referred to as Tag in parts and create two recordsdata as seen within the beneath picture:
Paste the code beneath contained in the kinds.ts file:
import {StyleSheet} from 'react-native';
export default StyleSheet.create({
  container: {
    borderWidth: 1,
    borderColor: '#FFA500',
    borderRadius: 12,
    top: 28,
    paddingHorizontal: 14,
    justifyContent: 'heart',
    alignItems: 'heart',
    marginRight: 24,
    backgroundColor: '#FFA50066',
  },
  textual content: {
    fontSize: 14,
    fontWeight: '500',
  },
  chosen: {
    backgroundColor: '#FF8800',
    borderColor: '#FF6600',
  },
});
To truly render a Tag element, add the next code to the index.tsx file:
import React, {useCallback} from 'react';
import {Textual content, TouchableOpacity, useColorScheme} from 'react-native';
import kinds from './kinds';

export const Tag: React.FC<{
  class: String;
  selectedCategory: String;
  setSelectedCategory: Perform;
}> = ({class, selectedCategory, setSelectedCategory}) => {
  const textColor = useColorScheme() === 'darkish' ? '#fff' : '#000';
  const handlePress = useCallback(() => {
    setSelectedCategory(class);
  }, [category, setSelectedCategory]);
  return (
    <TouchableOpacity
      model={[
        styles.container,
        selectedCategory === category && styles.selected,
      ]}
      onPress={handlePress}>
      <Textual content model={[styles.text, {color: textColor}]}>{`${
        class.charAt(0).toUpperCase() + class.slice(1)
      }`}</Textual content>
    </TouchableOpacity>
  );
};
The code above is a straightforward view that renders a class title textual content. When pressed, it units the selectedCategory to that class.
Lastly, we’ll modify the getNewsFeed motion technique in order that it returns a information feed for a particular information class. Modify the getNewsFeed technique in actions.ts like beneath:
export const getNewsFeed =
  (setIsLoading: Perform, class: String = NewsCategory.enterprise) =>
  async (dispatch: Perform) => {
    strive {
      setIsLoading(true);
      const res = await apiClient.get(
        `top-headlines?language=en&class=${class}`,
      );
      setIsLoading(false);
      if (res.standing === 200) {
        dispatch({
          sort: GET_NEWS_FEED,
          payload: res?.knowledge?.articles,
        });
      } else {
        console.warn('One thing went flawed');
      }
    } catch (error) {
      console.error(error);
    }
};
Now, we will choose a particular information class for which we need to see the information. The output might be just like the picture beneath:
Looking out information with particular key phrases
The final characteristic we’ll implement in our software is looking for a bit of specific information utilizing a string search question. The logic could be very easy. We’ll have a TextInput on the prime of the display. When the consumer sorts one thing into the TextInput, we’ll question the NewsAPI search endpoint to get the search outcome, then present it on the feed.
First, let’s add the required redux actions . Add the next code to your actions.ts:
export const searchNews =
  (searchTerm: string = '', setIsLoading: Perform = () => {}) =>
  async (dispatch: Perform) => {
    strive {
      setIsLoading(true);
      const res = await apiClient.get(`all the pieces?q=${searchTerm}`);
      setIsLoading(false);
      if (res.standing === 200) {
        dispatch({
          sort: SEARCH_NEWS,
          payload: res?.knowledge?.articles,
        });
      } else {
        console.warn('One thing went flawed');
      }
    } catch (error) {
      console.error(error);
    }
};

export const resetSearchResults = () => (dispatch: Perform) => {
  dispatch({
    sort: RESET_SEARCH_RESULTS,
  });
};
We additionally want so as to add some further states to our reducers. Add the next code to your reducers.ts:
import {GET_NEWS_FEED, RESET_SEARCH_RESULTS, SEARCH_NEWS} from './actions';

const initialState = {
  newsFeed: [],
  searchResults: [],
};
const feedReducer = (
  state = initialState,
  motion: {sort: String; payload: any},
) => {
  swap (motion.sort) {
    case GET_NEWS_FEED:
      return {...state, newsFeed: motion.payload};
    case SEARCH_NEWS:
      return {...state, searchResults: motion.payload};
    case RESET_SEARCH_RESULTS:
      return {...state, searchResults: []};
    default:
      return state;
  }
};
export default feedReducer;
Now that our state is ready up, let’s implement the search perform. Add the code beneath in your feed/index.tsx:
import React, {useCallback, useEffect, useState} from 'react';
import {FlatList, RefreshControl, useColorScheme, View} from 'react-native';
import uuid from 'react-native-uuid';
import {useDispatch, useSelector} from 'react-redux';
import {NewsArticle, NewsTags, SearchInput} from '../../parts';
import {NewsCategory} from '../../constants';
import {getNewsFeed} from '../../redux/actions';
import kinds from './kinds';

export const Feed: React.FC = () => {
  const {newsFeed, searchResults} = useSelector(
    (state: any) => state.feedReducer,
  );
  const [isLoading, setIsLoading] = useState(false);
  const [selectedCategory, setSelectedCategory] = useState(
    NewsCategory.enterprise,
  );
  const [searchText, setSearchText] = useState('');
  const dispatch: Perform = useDispatch();
  useEffect(() => {
    dispatch(getNewsFeed(setIsLoading, selectedCategory));
  }, [dispatch, selectedCategory]);
  const handleRefresh = useCallback(() => {
    dispatch(getNewsFeed(setIsLoading, selectedCategory));
  }, [dispatch, selectedCategory]);
  const backgroundColor = useColorScheme() === 'darkish' ? '#000' : '#fff';
  return (
    <View model={[styles.container, {backgroundColor}]}>
      <SearchInput
        searchText={searchText}
        setSearchText={setSearchText}
        setIsLoading={setIsLoading}
      />
      {!searchText?.trim() && (
        <NewsTags
          selectedCategory={selectedCategory}
          setSelectedCategory={setSelectedCategory}
        />
      )}
      <FlatList
        keyExtractor={() => uuid.v4()?.toString()}
        showsVerticalScrollIndicator={false}
        knowledge={searchText?.trim() ? searchResults : newsFeed}
        renderItem={({merchandise, index}: any) => (
          <NewsArticle put up={merchandise} />
        )}
        refreshControl={
          <RefreshControl refreshing={isLoading} onRefresh={handleRefresh} />
        }
        model={kinds.listing}
      />
    </View>
  );
};
Discover that we’ve added a brand new element referred to as SearchInput. Let’s create it in our code. Contained in the parts folder, create a folder referred to as SearchInput and title the recordsdata inside it kinds.ts and index.tsx:
Add the beneath code to the kinds.ts file:
import {StyleSheet} from 'react-native';

export default StyleSheet.create({
  container: {
    top: 40,
    marginHorizontal: 24,
    marginBottom: 8,
    borderRadius: 20,
    paddingHorizontal: 24,
    fontWeight: '400',
  },
});
Earlier than writing the code for SearchInput, we first want to put in a library:
yarn add lodash
We’re utilizing lodash to implement the debounce technique on the searchInput’s onChangeText technique. Lastly, add the next code to the SearchInput/index.tsx file:
import React, {useCallback} from 'react';
import {TextInput, useColorScheme} from 'react-native';
import {useDispatch} from 'react-redux';
import {resetSearchResults, searchNews} from '../../redux/actions';
import kinds from './kinds';
import {debounce} from 'lodash';

export const SearchInput: React.FC<{
  searchText: string;
  setSearchText: Perform;
  setIsLoading: Perform;
}> = ({searchText, setSearchText, setIsLoading}) => {
  const backgroundColor = useColorScheme() === 'darkish' ? '#333' : '#ddd';
  const placeholderColor = useColorScheme() === 'darkish' ? '#eee' : '#111';
  const coloration = useColorScheme() === 'darkish' ? '#fff' : '#000';
  const dispatch: Perform = useDispatch();
  const searchForText = useCallback(
    debounce((textual content: string) => {
      if (textual content?.trim().size > 0) {
        dispatch(searchNews(textual content, setIsLoading));
      } else {
        dispatch(resetSearchResults());
      }
    }, 1000),
    [setSearchText, dispatch, setIsLoading],
  );
  return (
    <TextInput
      placeholder={'Search'}
      placeholderTextColor={placeholderColor}
      model={[styles.container, {backgroundColor, color}]}
      worth={searchText}
      onChangeText={(textual content: string) => {
        setSearchText(textual content);
        searchForText(textual content);
      }}
      maxLength={40}
      returnKeyType={'search'}
    />
  );
};
With that, we now have applied a search performance in our information feed software. The output will look one thing just like the gif beneath:

Including shared transition navigation
Our app is sort of full. We’re simply lacking one factor, the NewsDetail display.
As you will have seen within the output above, the shared transition impact is applied between two screens utilizing the react-navigation-shared-element.
First, let’s add all of the required dependencies to the challenge:
yarn add @react-navigation/native @react-navigation/stack react-native-safe-area-context react-native-screens
Now, implement the shared transition:
yarn add react-navigation-shared-element react-native-shared-element
To arrange navigation in our app, create a brand new file named navigation.tsx within the root of the challenge and add the next code to it:
import {NavigationContainer} from '@react-navigation/native';
import React from 'react';
import {createSharedElementStackNavigator} from 'react-navigation-shared-element';
import {Feed} from './src/screens/feed';
import {NewsDetails} from './src/screens/NewsDetails';

const Stack = createSharedElementStackNavigator();

export const RootNavigation = () => {
  return (
    <NavigationContainer>
      <Stack.Navigator
        initialRouteName="Feed"
        screenOptions={{headerShown: false}}>
        <Stack.Display title="Feed" element={Feed} />
        <Stack.Display
          title="NewsDetails"
          element={NewsDetails}
          choices={{
            cardStyleInterpolator: ({present: {progress}}) => {
              return {
                cardStyle: {
                  opacity: progress,
                },
              };
            },
          }}
        />
      </Stack.Navigator>
    </NavigationContainer>
  );
};
Discover that we’ve added two screens in our SharedElementsStackNavigator. The primary one is our default Feed display, and the opposite is the NewsDetails display, which we haven’t created but.
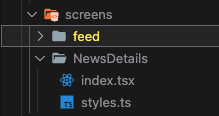
Let’s create the NewsDetails display and add shared components mapping to its parts. Create a brand new folder referred to as NewsDetails within the screens folder and add the next two recordsdata to it:
Add the next code to the kinds.ts file:
import {StyleSheet} from 'react-native';

export default StyleSheet.create({
  container: {
    flex: 1,
  },
  contentContainer: {
    paddingBottom: 120,
  },
  picture: {
    top: 500,
    width: '100%',
    borderBottomLeftRadius: 50,
    borderBottomRightRadius: 50,
  },
  crossContainer: {
    place: 'absolute',
    prime: 60,
    left: 30,
    zIndex: 9,
  },
  cross: {
    top: 34,
    width: 34,
  },
  title: {
    fontSize: 24,
    fontWeight: '600',
    lineHeight: 30,
    paddingHorizontal: 24,
    marginVertical: 18,
  },
  content material: {
    fontSize: 16,
    fontWeight: '400',
    lineHeight: 22,
    paddingHorizontal: 24,
  },
  readMoreContainer: {
    place: 'absolute',
    paddingTop: 14,
    paddingBottom: 28,
    paddingHorizontal: 24,
    backside: 0,
    width: '100%',
  },
  readMoreText: {
    fontSize: 13,
    fontWeight: '300',
    lineHeight: 22,
  },
  hyperlink: {
    coloration: '#00beff',
    textDecorationLine: 'underline',
    textDecorationStyle: 'stable',
    textDecorationColor: '#00beff',
  },
});
To show the information particulars on the display, paste the code beneath in index.tsx:
import {useNavigation} from '@react-navigation/native';
import React, {useCallback} from 'react';
import {
  Picture,
  Linking,
  ScrollView,
  Textual content,
  TouchableOpacity,
  useColorScheme,
  View,
} from 'react-native';
import {SharedElement} from 'react-navigation-shared-element';
import {Again} from '../../../belongings';
import kinds from './kinds';

interface Route {
  params: {
    article: {
      writer: string;
      title: string;
      urlToImage: string;
      publishedAt: string;
      url: string;
      content material: string;
    };
    articleIndex: quantity;
  };
}
export const NewsDetails: React.FC<{route: Route}> = ({route}) => {
  const {article, articleIndex} = route?.params;
  const navigation = useNavigation();
  const goBack = useCallback(() => {
    navigation.goBack();
  }, [navigation]);
  const backgroundColor = useColorScheme() === 'darkish' ? '#000' : '#fff';
  const coloration = useColorScheme() === 'darkish' ? '#fff' : '#000';
  const contentColor = useColorScheme() === 'darkish' ? '#bbb' : '#444';
  const readMoreBgColor = useColorScheme() === 'darkish' ? '#222' : '#ddd';
  const handleURLPress = useCallback(() => {
    Linking.openURL(article?.url);
  }, [article]);

  return (
    <>
      <TouchableOpacity model={kinds.crossContainer} onPress={goBack}>
        <Picture model={kinds.cross} supply={Again} />
      </TouchableOpacity>
      <ScrollView
        bounces={false}
        showsVerticalScrollIndicator={false}
        model={[styles.container, {backgroundColor}]}
        contentContainerStyle={kinds.contentContainer}>
        <SharedElement id={`article#${articleIndex}-Picture`}>
          <Picture
            model={kinds.picture}
            supply={{uri: article?.urlToImage ?? 'https://picsum.photographs/1000'}}
            resizeMode={'cowl'}
          />
        </SharedElement>
        <Textual content model={[styles.title, {color}]}>{article?.title}</Textual content>
        <Textual content model={[styles.content, {color: contentColor}]}>
          {article?.content material}
        </Textual content>
      </ScrollView>
      <View
        model={[styles.readMoreContainer, {backgroundColor: readMoreBgColor}]}>
        <Textual content model={[styles.readMoreText, {color}]} numberOfLines={2}>
          Learn extra at{' '}
          <Textual content model={kinds.hyperlink} onPress={handleURLPress}>
            {article?.url}
          </Textual content>
        </Textual content>
      </View>
    </>
  );
};

(NewsDetails as any).sharedElements = (route: any) => {
  const {articleIndex} = route.params;
  return [`article#${articleIndex}-Image`];
};
We simply have to go the proper shared component mapping from the feed display. However, earlier than that, we have to render navigation as an alternative of the Feed element within the App.tsx file. Add the next code to App.tsx:
import React from 'react';
import {ActivityIndicator} from 'react-native';
import {Supplier} from 'react-redux';
import {PersistGate} from 'redux-persist/integration/react';
import {RootNavigation} from './Navigation';
import {persistor, retailer} from './src/redux/retailer';

const App: React.FC = () => {
  return (
    <Supplier retailer={retailer}>
      <PersistGate
        loading={<ActivityIndicator measurement={'giant'} coloration={'#000'} />}
        persistor={persistor}>
        <RootNavigation />
      </PersistGate>
    </Supplier>
  );
};
export default App;
Now, let’s transfer on to the NewsArticle element. Make the next adjustments within the NewsArticle/index.tsx file:
import {useNavigation} from '@react-navigation/native';
import second from 'second';
import React, {useCallback} from 'react';
import {Picture, Textual content, TouchableOpacity} from 'react-native';
import LinearGradient from 'react-native-linear-gradient';
import {SharedElement} from 'react-navigation-shared-element';
import kinds from './kinds';

sort Publish = {
  title: string;
  urlToImage: string;
  publishedAt: string;
  url: string;
  writer: string;
};

export const NewsArticle: React.FC<{
  put up: Publish;
  index: quantity;
}> = ({put up, index}) => {
  const navigation: any = useNavigation();
  const handleNavigate = useCallback(() => {
    navigation.navigate('NewsDetails', {article: put up, articleIndex: index});
  }, [index, navigation, post]);
  return (
    <TouchableOpacity
      activeOpacity={1}
      model={kinds.container}
      onPress={handleNavigate}>
      <SharedElement
        model={kinds.imageContainer}
        id={`article#${index}-Picture`}>
        <Picture
          supply={{
            uri:
              put up?.urlToImage ??
              `https://picsum.photographs/${Math.flooring(Math.random() * 1000)}`,
            cache: 'force-cache',
          }}
          resizeMode={'cowl'}
          model={kinds.picture}
        />
      </SharedElement>
      <LinearGradient
        colours={['#0000', '#000A', '#000']}
        model={kinds.titleContainer}>
        <Textual content model={kinds.textual content}>{put up?.title}</Textual content>
        <Textual content model={kinds.timestamp}>
          {second(put up?.publishedAt).format('HH:MM DD, MMMM')}
        </Textual content>
      </LinearGradient>
    </TouchableOpacity>
  );
};
Within the code above, we wrapped the Picture in SharedElement and handed it an ID, which might be frequent throughout each screens. After implementing all of the respective adjustments, our app will appear like the next picture:
Conclusion
As you noticed from the tutorial, it’s pretty straightforward to create a information feed software utilizing React Native. This text was only a demo explaining how we will work together with REST API, however you possibly can go a lot additional, like utilizing WebSockets for real-time updates or utilizing the GraphQL API.
If you wish to make this app extra helpful, you possibly can add a webview to the app within the NewsDetail display, and when the consumer presses the hyperlink to learn extra concerning the article, you possibly can immediately open the hyperlink within the webview fairly than opening it in an exterior browser. I hope you loved this text, and pleased coding!
LogRocket: Immediately recreate points in your React Native apps.

LogRocket is a React Native monitoring answer that helps you reproduce points immediately, prioritize bugs, and perceive efficiency in your React Native apps.
LogRocket additionally helps you enhance conversion charges and product utilization by exhibiting you precisely how customers are interacting together with your app. LogRocket’s product analytics options floor the explanation why customers do not full a selected circulate or do not undertake a brand new characteristic.
Begin proactively monitoring your React Native apps — strive LogRocket totally free.
