
Photograph by krakenimages on Unsplash
Docker Content material Belief (DCT) is a mechanism to enhance the safety of Docker pictures. Since we’re working along with giant enterprises and governments we’re slowly however certainly pushed right into a course to implement each potential mechanism to strengthen safety for the Piral Feed Service.
Our entire infrastructure – from code repositories to construct processes to precise runtime surroundings – is in Azure. For us this has some advantages. Fortunately, one profit is that enabling DCT on Docker pictures printed to the Azure Container Registry (ACR) is kind of simple. One other profit is that these pictures will be printed slightly simply. Sadly, I didn’t discover superb sources for this – so I made a decision to write down up the steps that labored for me.
The last word aim of those steps is to alter an current Azure Pipeline for constructing and publishing a Docker picture from not utilizing DCT to utilizing it, i.e., publishing signed pictures.
Helpful References
The sources that I discovered helpful up to a point are:
Preparation
With out additional ado let’s begin by breaking down the method.
- (Azure) allow DCT on the goal ACR
- (Azure) assign the mandatory roles to the person account and repair principal
- (Native) create personal and public delegation keys
- (Native) initialize the (ACR) repository with the personal key
- (Azure) add the personal key to the pipeline secrets and techniques
- (CI/CD) change the Azure Pipeline to make use of DCT when publishing
Steps 1-5 are all preparation steps. The actual work is completed in step 6.
Allow DCT on ACR
The primary – and presumably simplest – step is to allow Docker Content material Belief within the ACR blade of the Azure Portal. Choose your ACR and set the “Content material Belief” to “Enabled”.

Word that this feature is simply relevant for premium registries. When you have a primary SKU then you definitely’ll not see this feature.
Apart from turning on the DCT you will additionally must assign a sure function to service principals and customers that ought to be capable to use this characteristic.
Assign Roles
A key level on this part is to determine which service principal(s) you have to give the particular function to permit signing pictures. Right here, you have to discover out what service principal(s) have been created once you established the service connection to the ACR in your Azure Pipelines mission.
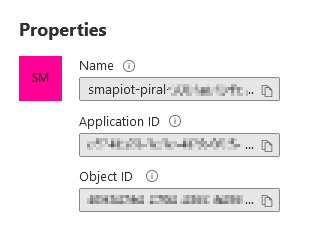
Every created service principal consists of a number of IDs. Those which might be proven immediately within the Azure Portal are:
- the consumer (or software) ID
- the thing ID
The latter is what we have to determine. The connection to Azure Pipelines is normally seen by way of the identify. It ought to comprise the Azure DevOps group and mission identify. As well as, it would normally finish with a GUID representing the chosen Azure subscription.
The service principals created by Azure Pipelines for brand spanking new service connections to an ACR all have the push function task (AcrPush). If we determine these, we will simply use them to offer them the AcrImageSigner function.
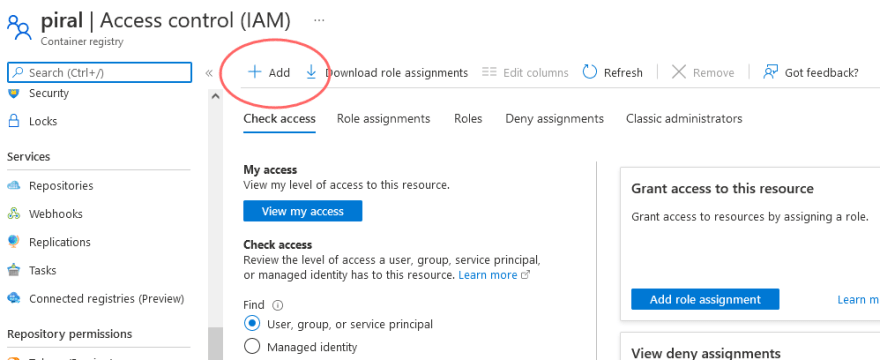
First, let’s click on on the accounts within the function assignments overview tab. The knowledge ought to look a bit like that:
Now, let’s add new roles by clicking on “Add”. Choose “Add Position Project”.
Lastly, we will assign new roles. Be certain to choose the AcrImageSigner function. Then add new members, choosing the beforehand chosen service principal(s).
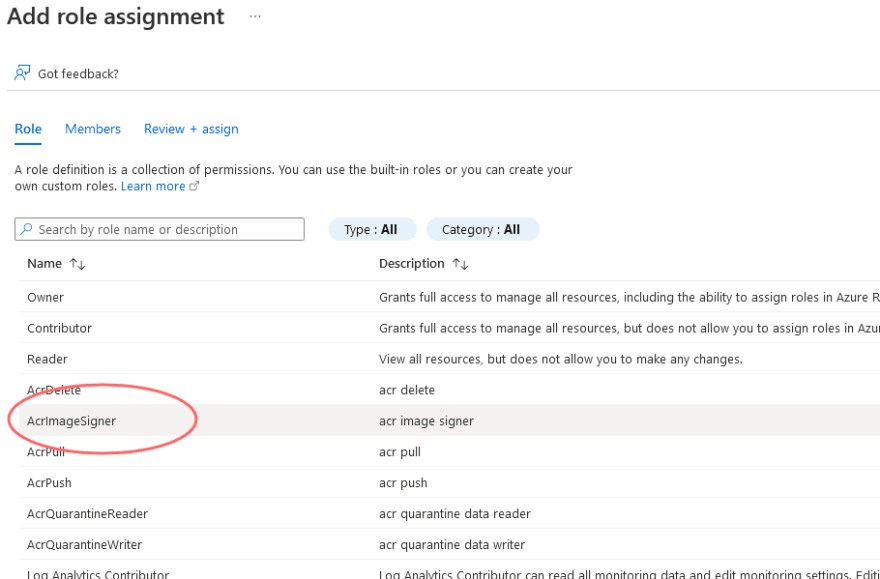
When every little thing is completed you must see a task task overview much like the one proven beneath. Necessary half is that the service principal(s) in query have each, the AcrPush and AcrImageSigner roles.

Additionally make certain to offer your personal account the AcrImageSigner function. This will probably be necessary to really initialize the ACR repository afterward.
Create Delegation Keys
Now it is time to truly create the keys. For this, you must have a nix surroundings (MacOS, Linux, WSL) and the OpenSSL toolchain put in.
First, let’s generate a brand new key:
openssl genrsa -out delegation.key 2048
Now we will truly pair the personal key with a public one – prepared for a signing request.
openssl req -new -sha256 -key delegation.key -out delegation.csr
It’s ample to self-sign the important thing. Let’s try this – maintaining the general public key lively for a yr.
openssl x509 -req -sha256 -days 365 -in delegation.csr -signkey delegation.key -out delegation.crt
Now we set the entry rights such that nobody else can learn or write the personal key. If we do not try this the Docker tooling will refuse to work with the important thing.
chmod 600 delegation.key
As soon as accomplished we will inform Docker to make use of the important thing as signing supply. We may give it a reputation to determine it (regionally) once more. I’ve chosen to only give it the corporate’s identify.
docker belief key load delegation.key --name smapiot
That is nice – the bottom line is now prepared and we will initialize the repository.
Initialize ACR Repository
Now that we arrange every little thing we will “initialize” the repository. That is the step to really train the ACR about our generated key. For safety causes this step is kind of necessary.
In any case, up so far anybody may come, considerably signal a picture and say “hey it is signed – so it is fantastic”. No, it isn’t. It needs to be a particular signature. And by initializing the repository we make certain to pin the repository to a particular signature.
We begin by logging into Docker utilizing the Azure CLI. This fashion, we’ll truly use Docker with a 3 hour legitimate entry token pinned to our account. Since we gave our account the AcrImageSigner function we will use it to initialize the repository.
az acr login --name piral.azurecr.io
The precise step is so as to add the signer utilizing the general public certificates and the important thing utilizing the docker CLI:
docker belief signer add --key delegation.crt smapiot piral.azurecr.io/piral-feed-service
Now, we will truly examine the delegation key for the given repository.
docker belief examine --pretty piral.azurecr.io/piral-feed-service
Which ought to give one thing much like the next output:
No signatures for piral.azurecr.io/piral-feed-service


Listing of signers and their keys for piral.azurecr.io/piral-feed-service

SIGNER    KEYS
smapiot   123...

Administrative keys for piral.azurecr.io/piral-feed-service

  Repository Key:       987...
  Root Key:     abc...
The necessary half is to notice down the repository key. We are going to want this for the pipeline.
Add Non-public Key to Pipeline Secrets and techniques
We have to retailer / use three values inside our pipeline:
- The personal key file. This needs to be uploaded / saved as a pipeline secret, e.g., in a library by way of the safe recordsdata characteristic.
- The used passphrase for the important thing. After we added the signer earlier one we needed to arrange a passphrase. Now, we have to present this passphrase.
- The repository key of the used key. We may additionally simply rename the file uploaded in (1) to the used key.
Pipeline Changes
Now to the grand finale… Within the azure-pipelines.yml we’ll must go from one thing like a buildAndPush command to a extra specific (and prolonged) variant.
As an example we began with one thing like the next:
- job: Docker@2
  inputs:
    command: buildAndPush
    dockerfile: ./Dockerfile
    repository: $(dockerImageName)
    containerRegistry: $(dockerRegistryConnection)
    tags: |
      newest
We now must decompose this into the totally different components (login, construct and push) and improve it with the DCT settings.
Importantly, we have to import the file we positioned within the safe recordsdata library. This file needs to be renamed to the ID we have came upon beforehand. It must also be configured accurately; such that nobody else may learn it.
Let’s have a look at the code shortly:
- job: Docker@2
  inputs:
    command: login
    containerRegistry: $(dockerRegistryConnection)

- job: DownloadSecureFile@1
  identify: contentTrust
  inputs:
    secureFile: 'docker-content-trust.key'

- script: |
    mkdir -p $(DOCKER_CONFIG)/belief/personal
    cp $(contentTrust.secureFilePath) $(DOCKER_CONFIG)/belief/personal
    echo "Copied $(contentTrust.secureFilePath) to $(DOCKER_CONFIG)/belief/personal"
    mv $(DOCKER_CONFIG)/belief/personal/docker-content-trust.key $(DOCKER_CONFIG)/belief/personal/$KEY_ID.key
    chmod 600 $(DOCKER_CONFIG)/belief/personal/$KEY_ID.key
    docker belief key load $(DOCKER_CONFIG)/belief/personal/$KEY_ID.key
  env:
    DOCKER_CONTENT_TRUST_REPOSITORY_PASSPHRASE: $(dockerContentTrustPassphrase)
    KEY_ID: 987...

- job: Docker@2
  inputs:
    command: construct
    dockerfile: ./Dockerfile
    containerRegistry: $(dockerRegistryConnection)
    repository: $(dockerImageName)
    tags: |
      newest
    arguments: '--disable-content-trust=false'

- job: Docker@2
  inputs:
    command: push
    containerRegistry: $(dockerRegistryConnection)
    repository: $(dockerImageName)
    tags: |
      newest
    arguments: '--disable-content-trust=false'
  env:
    DOCKER_CONTENT_TRUST_REPOSITORY_PASSPHRASE: $(dockerContentTrustPassphrase)
In there we’re additionally utilizing the beforehand set dockerContentTrustPassphrase. That is required in any respect place the place both we simply devour DCT signed pictures or the place we need to devour such pictures.
Conclusion
Organising DCT with the ACR shouldn’t be tough, however requires fairly some steps. Along with some – not very properly documented – conduct (e.g., identify of the file, file entry rights, …) the entire course of will be extra tedious than it truly must be.
The gained safety is certainly well worth the effort. Now, pictures have an extra layer of belief that’s simply verifiable by customers – a lot to the liking of huge enterprises and governments.
