
Through the years, haptic actuators have been included in electronics comparable to gaming controllers and cellular units so as to add a tactile factor to their consumer expertise utilizing movement and vibrations.
For instance, tactile experiences have been used on cellular units to enrich both audio or visible suggestions throughout actions comparable to an incoming name, alert, or message.
With the elevated improvement of third-party functions, numerous cellular working programs have made the API for his or her actuators brazenly obtainable. For instance, the UIFeedbackGenerator class is offered for iOS builders to create haptic suggestions in functions by way of the Apple Taptic Engine.
As a cellular software developer constructing with React Native, have you ever ever puzzled add haptic suggestions to enhance the expertise of your software?
This tutorial will cowl the topic of haptic suggestions, its advantages for functions, and implement haptic suggestions inside a React Native software. We are going to cowl:
Conditions
To comply with together with this text’s hands-on tutorial about including haptic suggestions to a React Native software, you will have to have the next;
- Node.js put in in your pc
- A cellular emulator in your pc, both for iOS or Android
- A primary understanding of React Native
Let’s get began.
What’s haptic suggestions?
The idea of haptics has to do with the sense of contact. From a technological context, it’s an umbrella time period that includes each haptic suggestions and haptic know-how.
Haptic know-how refers to units with the flexibility to stimulate the consumer’s sense of contact by making use of vibration or movement. With haptic know-how, haptic suggestions is created and felt by the tip consumer by their physique’s pure tactile system.
Advantages of including haptic suggestions to an software
Haptic suggestions has a direct affect on consumer expertise, amongst different areas. Builders use haptic suggestions to enrich interfaces proven from actions comparable to a profitable login or cart checkout, and this creates an immersive expertise for the tip consumer.
Exterior of cellular units, haptic suggestions has many advantages and use circumstances in numerous industries.
For instance, in vehicles, haptic suggestions is utilized in infotainment programs to scale back distractions whereas driving. Builders of digital actuality functions additionally apply haptics to recreate the strong really feel of digital objects by using ultrasonic audio system.
Let’s proceed to the hands-on part of this tutorial.
Including haptics help to a React Native software
Within the following sections, we are going to add haptics to an Expo-managed React Native software utilizing the expo-haptics package deal. We can even take into account create haptic suggestions utilizing the react-native-haptic-feedback package deal for functions with out Expo.
The React Native software that we are going to develop on this tutorial is for enjoying the legendary historic Egyptian sport of tic-tac-toe. Including help for haptics will improve the gaming expertise by informing the gamer when there’s a win, loss, or tie occasion, and even when a tile throughout the board is pressed.
Implementing haptics in an Expo-managed React Native software
Expo is an open supply platform for creating cross-platform React Native functions that run on cellular units and the online. To cut back improvement time, Expo supplies a number of packages that implement a number of machine APIs.
For haptics, Expo supplies the expo-haptics package deal to permit builders to make use of the iOS Taptic Engine and Android Vibrator system.
Word that the expo-haptics package deal doesn’t help React Native functions for the online. Moreover, on iOS, there are a number of circumstances the place the Taptic Engine might be unusable. Considered one of these circumstances is when the machine has Low Energy Mode enabled.
The expo-haptics package deal has three asynchronous strategies for producing haptic suggestions:
selectionAsync— for indicating a variety changeimpactAsync— for indicating a brand new factor throughout the consumer interface- Examples: dropdown factor, drag-and-drop factor
notificationAsync— for notifying the consumer in regards to the consequence of a process, occasion, or motion
The impactAsync and notificationAsync strategies settle for the ImpactFeedbackStyle and NotificationFeedbackType enums, respectively, to specify the depth of the suggestions to generate.
As we construct out the sport throughout the subsequent sections, we are going to use the selectionAsync()technique to generate haptic suggestions when a tile throughout the board is clicked. We can even use the notificationAsync() technique when an occasion occurs throughout the sport.
Getting ready the Expo software
The main focus of this text is on implementing haptic suggestions inside a React Native software. Due to this fact, whereas we are going to cowl the steps wanted to arrange the applying, we received’t dive into the code itself in an excessive amount of element till we attain our part on haptics.
Utilizing your pc terminal or command immediate, execute the npx command under to create an expo software named tic-tac-toe-haptics by way of the Expo CLI:
npx create-expo-app tic-tac-toe-haptics
After operating the command, it is best to see the next:
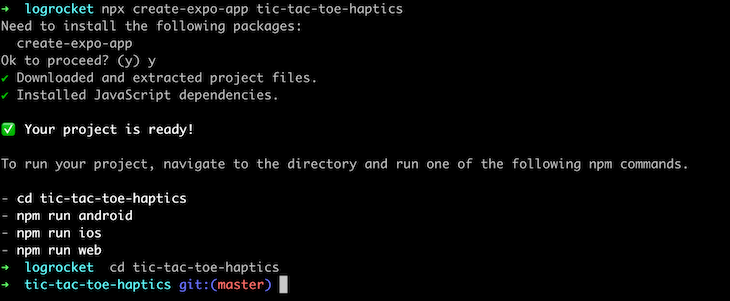
With the boilerplate software generated, the following step is to put in the dependencies wanted for navigating between a number of screens and utilizing the Haptics API.
Execute the 2 instructions under to maneuver into the tic-tac-toe-haptics listing and set up six further packages into the applying:
# change listing
cd tic-tac-toe-haptics

# set up dependencies
yarn add @react-navigation/native  @react-navigation/native-stack react-native-safe-area-context expo-haptics

npx expo set up react-native-screens react-native-safe-area-context
Constructing the applying interface
Utilizing your code editor, open the App.js file and exchange the boilerplate content material with the code block under. The code under comprises the navigation stack for a Dwelling and Sport display screen throughout the software:
import { NavigationContainer } from '@react-navigation/native';
import Dwelling from './src/screens/Dwelling';
import { createNativeStackNavigator } from '@react-navigation/native-stack';
import Sport from './src/screens/Sport';
import { SafeAreaProvider } from 'react-native-safe-area-context';

export default operate App() {
 const Stack = createNativeStackNavigator();

 return (
   <SafeAreaProvider>
     <NavigationContainer>
       <Stack.Navigator>
       <Stack.Display screen choices={{ headerShown: false }} identify="Dwelling" part={Dwelling} />
       <Stack.Display screen choices={{ headerShown: false }} identify="Sport" part={Sport} />
       </Stack.Navigator>
     </NavigationContainer>
   </SafeAreaProvider>
 );
}
The code block above makes use of two parts that don’t exist throughout the software. Let’s proceed to create them.
Create one other listing named src throughout the tic-tac-toe-haptics listing. The src listing will retailer new recordsdata and directories for the screens throughout the software.
Throughout the src listing, create a file named utils.js and add the code under into the file to retailer the additional parts, capabilities, and variables that might be used throughout the tic-tac-toe sport, together with the toast notifications displayed for ongoing, received, misplaced, and tied video games:
import { GameScreenStyles as kinds  } from './kinds'
import { View, Textual content, TouchableWithoutFeedback } from 'react-native'

const GAME_WINNING_COMBINATIONS = [
   [0, 1, 2],
   [3, 4, 5],
   [6, 7, 8],
   [0, 3, 6],
   [1, 4, 7],
   [2, 5, 8],
   [0, 4, 8],
   [2, 4, 6]
]

const guessNumber = () => Math.flooring(Math.random() * 9)

export const findUniqueRandomNumber = (exisitingArr) => {
   let rand = guessNumber();

   for (let i = 0; i < exisitingArr.size; i++) {
       if (exisitingArr[rand]) {
           rand = guessNumber()
       } else {
           return rand
       }
   }
}

export const getWinner = (existingArray) => {
   for (let i = 0; i <= 7; i++) {
       const winCombination = GAME_WINNING_COMBINATIONS[i];

       let a = existingArray[winCombination[0]];
       let b = existingArray[winCombination[1]];
       let c = existingArray[winCombination[2]];

       if (a === b && b === c) {
           return { winningPlayer: a, matchingTiles: [winCombination[0], winCombination[1], winCombination[2]] }
       }
   }
}

export const Toast = ({ eventType }) => (
   <View model={{ alignItems: 'middle' }} >
       <View model={[styles.toastContainer, { backgroundColor: eventType === "LOSS" ? "red" : "#5CB85C" }]} >
           {
               eventType === "ONGOING" &&
               <Textual content model={{ coloration: "white" }} > Match is ON! </Textual content>
           }
           {
               eventType === "WIN" &&
               <Textual content model={{ coloration: "white" }} > You've WON this spherical! </Textual content>
           }
           {
               eventType === "LOSS" &&
               <Textual content model={{ coloration: "white" }} > You've been DEFEATED!  </Textual content>
           }
           {
               eventType === "TIE" &&
               <Textual content model={{ coloration: "white" }} > It is a TIE </Textual content>
           }
       </View>
   </View>
)

export const GameTile = ({ merchandise, handlePress, matchedTile }) => (
   <TouchableWithoutFeedback
       onPress={() => handlePress()}
   >
       <View
           model={[styles.tile, { backgroundColor: matchedTile ? "#5CB85C" : "transparent" }]}
       >
           <Textual content model={[styles.text, { fontSize: 27 }]} > {merchandise}  </Textual content>
       </View>
   </TouchableWithoutFeedback>
)
Subsequent, create a kinds.js file and add the content material of the code block under to create the kinds utilized by parts throughout the software:
import { Dimensions, StyleSheet } from 'react-native'
const { top, width } = Dimensions.get("display screen")

export const GameScreenStyles = StyleSheet.create({
   toastContainer: {
       place: "absolute",
       width: 200,
       textAlign: 'middle',
       borderBottomLeftRadius: 10,
       borderBottomRightRadius: 10,
       top: 40,
       alignItems: 'middle',
       justifyContent: 'middle',
   },
   middle: {
       top: top - 150,
       alignItems: "middle",
       justifyContent: 'middle'
   },
   textual content: {
       textTransform: "uppercase",
       textAlign: "middle",
       fontSize: 18
   },
   button: {
       top: 45,
       backgroundColor: "#201238",
       width: width - 50,
       borderRadius: 5,
       justifyContent: "middle"
   },
   buttonText: {
       textTransform: "uppercase",
       textAlign: "middle",
       coloration: "#fff"
   },
   tileContainer: {
       top: 300,
       flexWrap: "wrap",

   },
   tile: {
       flex: 1,
       flexGrow: 1,
       flexBasis: 100,
       borderColor: "crimson",
       borderWidth: 1,
       justifyContent: 'middle',
       top: 80,
       width: 80
   }
})


export const HomeScreenStyles = StyleSheet.create({
   underline: {
       top: 5,
       width: 45,
       backgroundColor: "#D8D8D8"
   },
   middle: {
       alignItems: "middle",
   },
   row: {
       flexDirection: "row",
       justifyContent: "space-between",
       width: width / 2,
   },
   container: {
       top,
       flex: 1,
       justifyContent: 'space-between'
   },
   textual content: {
       textTransform: "uppercase",
       textAlign: "middle",
       fontSize: 18
   },
   button: {
       top: 45,
       backgroundColor: "#201238",
       width: width - 50,
       borderRadius: 5,
       justifyContent: "middle"
   },
   buttonText: {
       textTransform: "uppercase",
       textAlign: "middle",
       coloration: "#fff"
   },
})
Throughout the src listing, create a screens listing to retailer the recordsdata for the Dwelling and Sport screens.
Extra nice articles from LogRocket:
Throughout the screens listing, create a Dwelling.js file and add the content material of the code block under into the file. On the house display screen, a consumer is predicted to pick both X or O to make use of for his or her strikes throughout the tic-tac-toe board:
import React, { useState } from 'react'
import { View, Textual content, TouchableOpacity } from 'react-native'
import { SafeAreaView } from 'react-native-safe-area-context'
import { HomeScreenStyles as kinds } from '../kinds'
import * as Haptics from 'expo-haptics';

const gamePlayers = ["X", "O"]

const Dwelling = ({ navigation }) => {
   const [selectedPlayer, selectPlayer] = useState(null)

   return (
       <SafeAreaView model={{ flex: 1, backgroundColor: "#8DC7D4" }}>
           <View model={kinds.container}>
               <Textual content model={[styles.text, { marginTop: 30 }]} > Welcome </Textual content>
               <Textual content model={kinds.textual content} > Decide Your Participant </Textual content>

               <View model={[styles.center]} >
                   <View model={kinds.row}>
                       {
                           gamePlayers.map((participant, idx) => (
                               <TouchableOpacity key={idx} onPress={() => selectPlayer(participant)} >
                                   <Textual content model={[styles.text, { fontSize: 30 }]} > {participant} </Textual content>

                                   <View
                                       model={
                                           [styles.underline, { backgroundColor: selectedPlayer === player ? "green" : "#D8D8D8" }]
                                       }
                                   />
                               </TouchableOpacity>
                           ))
                       }
                   </View>
               </View>

               <View model={[styles.center, { marginBottom: 20 }]}>
                   <TouchableOpacity
                       onPress={() => {
                           if (selectedPlayer) {
                               navigation.navigate("Sport", { selectedPlayer })

                               return
                           }
                           Haptics.notificationAsync(Haptics.NotificationFeedbackType.Warning)
                       }}
                       model={[styles.button, { opacity: !selectedPlayer && 0.5 }]}
                   >
                       <Textual content model={kinds.buttonText}> Match me with my opponent </Textual content>
                   </TouchableOpacity>
               </View>
           </View>
       </SafeAreaView>
   )
}

export default Dwelling
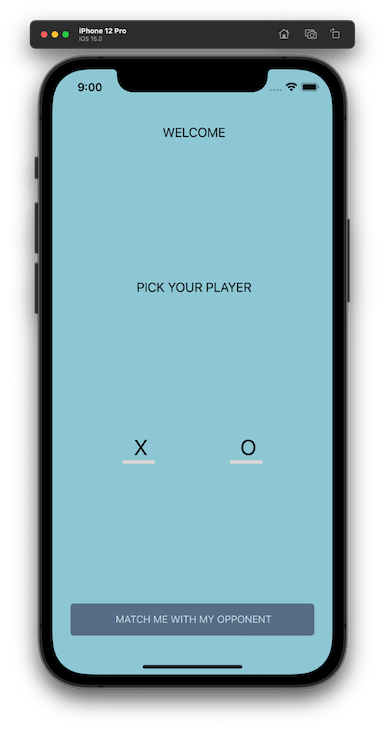
The picture under exhibits what the Dwelling display screen ought to seem like if you run the applying utilizing an emulator or your cellular machine immediately:
Subsequent, create a second file named Sport.js throughout the src/screens listing for the Sport display screen. Add the contents of the code block under into the Sport.js file to create the dad or mum part for the Sport display screen:
import React, { useState } from 'react'
import { View, Textual content, TouchableWithoutFeedback, Button } from 'react-native'
import { SafeAreaView } from 'react-native-safe-area-context'
import { GameScreenStyles as kinds  } from '../kinds'
import * as Haptics from 'expo-haptics';
import { getWinner, findUniqueRandomNumber, Toast, GameTile  } from '../utils'
const Sport = ({ route }) => {
   const participant = route?.params?.selectedPlayer

   const [gameTiles, setGameTile] = useState(Array(9).fill(null))
   const [gameStatus, setGameStatus] = useState('ONGOING')
   const [matchedTiles, setMatchedTiles] = useState([])
   const [isGameDisabled, disableGame] = useState(false)

   const handleTileClick = (place) => {
       Haptics.selectionAsync()

       if (!gameTiles[position] && !isGameDisabled) {
           let tilesCopy = [...gameTiles]

           if (!tilesCopy.contains(null)) {
               setGameStatus("TIE")
               disableGame(true)
               return
           }

           // consumer transfer
           tilesCopy[position] = participant

           // Simulating pc transfer
           setTimeout(() => {
            tilesCopy[findUniqueRandomNumber(tilesCopy)] = participant === "X" ? "O" : "X"
               const gameResult = getWinner(tilesCopy)

               if (gameResult?.winningPlayer) {
                   disableGame(true)
                   setMatchedTiles(gameResult?.matchingTiles)

                   if (gameResult?.winningPlayer === participant) {
                       setGameStatus("WIN")
                       Haptics.notificationAsync(Haptics.NotificationFeedbackType.Success)
                   } else {
                       setGameStatus("LOSS")
                       Haptics.notificationAsync(Haptics.NotificationFeedbackType.Error)
                   }
               }

               setGameTile(tilesCopy)
           }, 500)
       } else if (!gameTiles.contains(null)) {
           setGameStatus("TIE")
           disableGame(true)

           Haptics.notificationAsync(Haptics.NotificationFeedbackType.Warning)
       }
   }

   const resetGameState = () => {
       setGameTile(new Array(9).fill(null))
       disableGame(false)
       setMatchedTiles([])
       setGameStatus("ONGOING")

       Haptics.notificationAsync(
           Haptics.NotificationFeedbackType.Success
       )
   }

   return (
       <SafeAreaView model={{ flex: 1, backgroundColor: "#8DC7D4" }} >
           <View>
               <Toast eventType={gameStatus} />

               <View model={kinds.middle} >
                   <View model={[styles.tileContainer,]} >
                       {
                           gameTiles.map((merchandise, idx) =>
                               <GameTile
                                   key={idx}
                                   merchandise={merchandise}
                                   handlePress={() => {
                                       handleTileClick(idx)
                                   }}
                                   matchedTile={matchedTiles.contains(idx)}
                               />
                           )
                       }
                   </View>
               </View>

               <Button title="RESET GAME" onPress={(() => resetGameState())} />
           </View>
       </SafeAreaView>
   )
}

export default Sport
The Sport display screen above makes use of the worth of the gameStatus native state to regulate the weather displayed on the sport display screen and it’s modified based mostly on the end result of a match.
Whereas altering the gameStatus state, the Toast part from the src/utils.js file might be displayed with related textual content. The notificationAsync technique might be executed to generate haptic suggestions that enhances the toast. You possibly can see three variations of this within the code above:
- When the consumer wins:
Haptics.notificationAsync(Haptics.NotificationFeedbackType.Success) - For a tie:
Haptics.notificationAsync(Haptics.NotificationFeedbackType.Error) - When the consumer loses:
Haptics.notificationAsync(Haptics.NotificationFeedbackType.Warning)
Let’s see how every of those would look within the frontend.
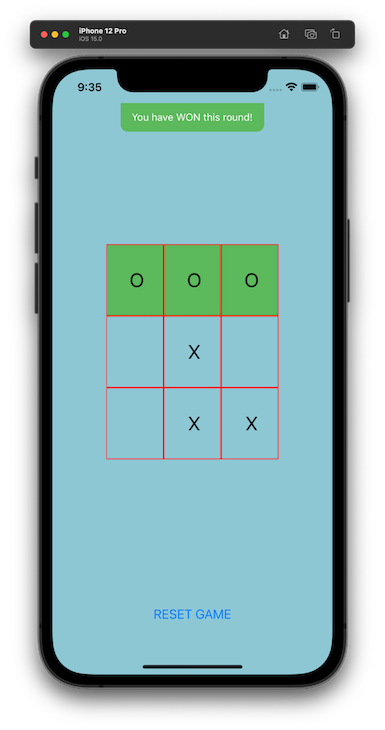
For a profitable consequence, the notificationAsync technique might be executed with a Success suggestions kind to enrich the displayed Toast in notifying the consumer that the sport has been received:
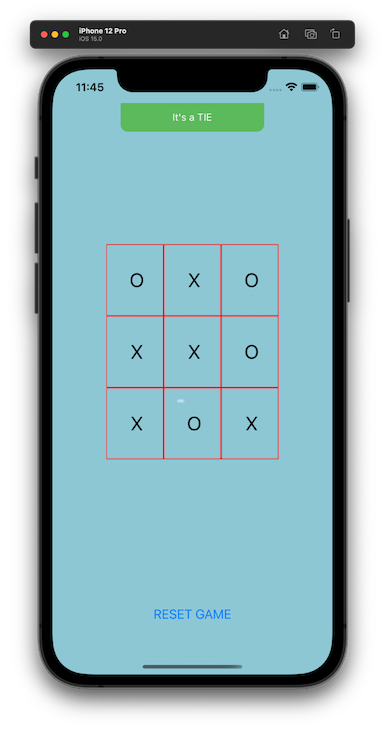
For a tie, the toast might be displayed and the notificationAsync technique can even be executed with an Error kind with gentle depth:
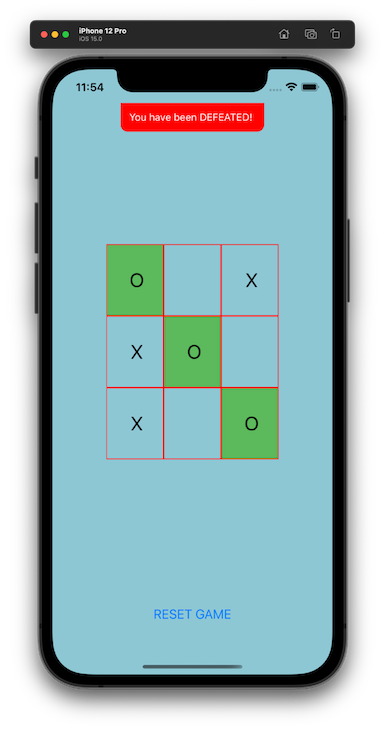
Within the occasion of the consumer dropping a match, the sport will show the toast with a crimson background and execute the notificationAsync technique with a Warning kind to inform the consumer of the loss:
Utilizing react-native-haptic-feedback to implement haptics with out Expo
For builders who’re constructing React Native functions with out utilizing Expo, the react-native-haptic-feedback package deal is a extra versatile group package deal for including haptics to your software.
In contrast to expo-haptics, you should hyperlink the react-native-haptic-feedback package deal both routinely utilizing the react-native hyperlink command or manually by modifying the related recordsdata.
When utilizing the react-native-haptic-feedback package deal, you could have entry to a set off() technique with a number of notification varieties. These are related to those who we utilized in our hands-on tutorial, so you’ll be able to implement them by following the steps outined above. You can too specify choices for iOS and Android platforms.
See the total record of what’s obtainable on Github.
Additional concerns for haptic suggestions in React Native
This tutorial centered on explaining haptic suggestions and use it inside React Native functions. When including haptic suggestions to a real-world software for use by a large viewers, there are different concerns to remember.
For instance, Apple’s documentation on haptic suggestions recommends making clear to the consumer why they’re experiencing haptic suggestions. It’s best to create haptic suggestions that enhances the present interface displayed as the results of an occasion.
Relying in your software design, you may also deem it match to play an audio tone when the haptic suggestions is launched to enhance the consumer expertise.
There must be an possibility for customers to allow or disable haptic suggestions inside your software. Primarily based on their current circumstances, a consumer may discover haptic suggestions annoying and wish to disable it.
For the tic-tac-toe sport inside this tutorial, there was no choice to disable the haptic suggestions. Nevertheless, you’ll be able to refactor the applying to have a toggle change the place customers toggle haptic suggestions on and off.
Though it’s attainable to switch haptic patterns, it is suggested that you simply follow the system’s haptic patterns. Customers are accustomed to the haptic patterns utilized by their units and they can subconsciously interpret what the haptic suggestions signifies based mostly on its sample.
I hope you discovered this tutorial helpful. You probably have any additional questions, let me know within the feedback.
LogRocket: Immediately recreate points in your React Native apps.

LogRocket is a React Native monitoring resolution that helps you reproduce points immediately, prioritize bugs, and perceive efficiency in your React Native apps.
LogRocket additionally helps you improve conversion charges and product utilization by displaying you precisely how customers are interacting along with your app. LogRocket’s product analytics options floor the explanation why customers do not full a specific move or do not undertake a brand new function.
Begin proactively monitoring your React Native apps — strive LogRocket totally free.
