On this collection, we’ve been making picture sliders with nothing however HTML and CSS. The concept is that we are able to use the identical markup however completely different CSS to get wildly completely different outcomes, irrespective of what number of photographs we toss in. We began with a round slider that rotates infinitely, kind of like a fidget spinner that holds photographs. Then we made one which flips by a stack of pictures.
This time round, we’re diving into the third dimension. It’s going to look robust at first, however plenty of the code we’re is precisely what we used within the first two articles on this collection, with some modifications. So, in case you’re simply now moving into the collection, I’d counsel trying out the others for context on the ideas we’re utilizing right here.
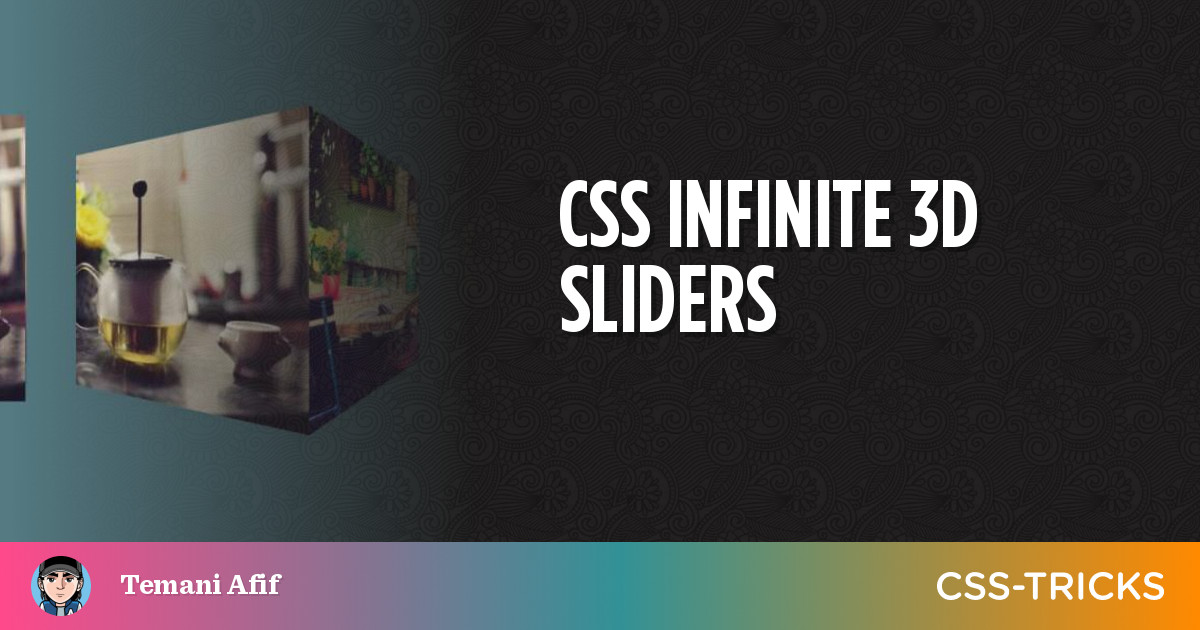
That is what we’re aiming for:
At first look, it appears like we have now a rotating dice with 4 photographs. However in actuality, we’re coping with six photographs in complete. Right here is the slider from a unique angle:
Now that we have now a superb visible for the way the pictures are organized, let’s dissect the code to see how we get there.
The essential setup
Similar HTML as the remainder of the sliders we’ve used for the opposite sliders:
<div class="gallery">
  <img src="" alt="">
  <img src="" alt="">
  <img src="" alt="">
  <img src="" alt="">
  <img src="" alt="">
</div>
And as soon as once more, we’re utilizing CSS Grid to put the pictures in a stack, one on prime of one other:
.gallery {
  show: grid;
}
.gallery > img {
  grid-area: 1 / 1;
  width: 160px;
  aspect-ratio: 1;
  object-fit: cowl;
}
The animation
The logic for this slider is similar to the round slider from the primary article. The truth is, in case you verify the video above once more, you may see that the pictures are positioned in a method that creates a polygon. After a full rotation, it returns to the primary picture.
We relied on the CSS transform-origin and animation-delay properties for that first slider. The identical animation is utilized to the entire picture components, which rotate across the identical level. Then, by utilizing completely different delays, we accurately place all the pictures round an enormous circle.
The implementation might be a bit completely different for our 3D slider. Utilizing transform-origin received’t work right here as a result of we’re working in 3D, so we are going to use rework as a substitute to accurately place all the pictures, then rotate the container.
We’re reaching for Sass once more so we are able to loop by the variety of photographs and apply our transforms:
@for $i from 1 to ($n + 1) {
  .gallery > img:nth-child(#{$i}) {
     rework:
       rotate(#{360*($i - 1) / $n}deg) /* 1 */
       translateY(50% / math.tan(180deg / $n)) /* 2 */
       rotateX(90deg); /* 3 */
  }
}
You is perhaps questioning why we’re leaping straight into Sass. We began with a set variety of photographs utilizing vanilla CSS within the different articles earlier than generalizing the code with Sass to account for any quantity (N) of photographs. Nicely, I feel you get the concept now and we are able to lower out all that discovery work to get to the true implementation.
The rework property is taking three values, which I’ve illustrated right here:

We first rotate all the pictures above one another. The angle of rotation will depend on the variety of photographs. For N photographs, we have now an increment equal to 360deg/N. Then we translate the entire photographs by the identical quantity in a method that makes their heart factors meet on the edges.

There’s some boring geometry that helps clarify how all this works, however the distance is the same as 50%/tan(180deg/N). We handled an analogous equation when making the round slider ( transform-origin: 50% 50%/sin(180deg/N) ).
Lastly, we rotate the pictures across the x-axis by 90deg to get the association we would like. Here’s a video that illustrates what the final rotation is doing:
Now all we have now to do is to rotate the entire container to create our infinite slider.
.gallery {
  transform-style: preserve-3d;
  --_t: perspective(280px) rotateX(-90deg);
  animation: r 12s cubic-bezier(.5, -0.2, .5, 1.2) infinite;
}
@keyframes r {
  0%, 3% {rework: var(--_t) rotate(0deg); }
  @for $i from 1 to $n {
    #{($i/$n)*100 - 2}%,
    #{($i/$n)*100 + 3}% {
      rework: var(--_t) rotate(#{($i / $n) * -360}deg);
    }
  }
  98%, 100% { rework: var(--_t) rotate(-360deg); }
}
That code is perhaps laborious to know, so let’s really step again a second and revisit the animation we made for the round slider. That is what we wrote in that first article:
.gallery {
  animation: m 12s cubic-bezier(.5, -0.2, .5, 1.2) infinite;
}
@keyframes m {
  0%, 3% { rework: rotate(0); }
  @for $i from 1 to $n {
    #{($i / $n) * 100 - 2}%,
    #{($i / $n) * 100 + 3}% {
      rework: rotate(#{($i / $n) * -360}deg);
    }
  }
  98%, 100% { rework: rotate(-360deg); }
}
The keyframes are virtually equivalent. Now we have the identical proportion values, the identical loop, and the identical rotation.
Why are each the identical? As a result of their logic is similar. In each instances, the pictures are organized round a round form and we have to rotate the entire thing to indicate every picture. That’s how I used to be in a position to copy the keyframes from the round slider and use that very same code for our 3D slider. The one distinction is that we have to rotate the container by -90deg alongside the x-axis to see the pictures since we have now already rotated them by 90deg on the identical axis. Then we add a contact of perspective to get the 3D impact.
That’s it! Our slider is completed. Right here is the total demo once more. All it’s important to do is so as to add as many photographs as you need and replace one variable to get it going.
Vertical 3D slider
Since we’re taking part in within the 3D house, why not make a vertical model of the earlier slider? The final one rotates alongside the z-axis, however we are able to additionally transfer alongside the x-axis if we would like.
If you happen to evaluate the code for each variations of this slider, you won’t instantly spot the distinction as a result of it’s just one character! I changed rotate() with rotateX() contained in the keyframes and the picture rework. That’s it!
It must be famous that rotate() is equal to rotateZ(), so by altering the axis from Z to X we rework the slider from the horizontal model into the vertical one.
Dice slider
We can not discuss 3D in CSS with out speaking about cubes. And sure, which means we’re going to make one other model of the slider.
The concept behind this model of the slider is to create an precise dice form with the pictures and rotate the total factor in across the completely different axis. Because it’s a dice, we’re coping with six faces. We’ll use six photographs, one for every face of the dice. So, no Sass however again to vanilla CSS.
That animation is slightly overwhelming, proper? The place do you even begin?
Now we have six faces, so we have to carry out no less than six rotations so that every picture will get a flip. Nicely, really, we’d like 5 rotations — the final one brings us again to the primary picture face. If you happen to go seize a Rubik’s Dice — or another cube-shaped object like cube — and rotate it along with your hand, you’ll have a good suggestion of what we’re doing.
.gallery {
  --s: 250px; /* the scale */

  transform-style: preserve-3d;
  --_p: perspective(calc(2.5*var(--s)));
  animation: r 9s infinite cubic-bezier(.5, -0.5, .5, 1.5);
}

@keyframes r {
  0%, 3%   { rework: var(--_p); }
  14%, 19% { rework: var(--_p) rotateX(90deg); }
  31%, 36% { rework: var(--_p) rotateX(90deg) rotateZ(90deg); }
  47%, 52% { rework: var(--_p) rotateX(90deg) rotateZ(90deg) rotateY(-90deg); }
  64%, 69% { rework: var(--_p) rotateX(90deg) rotateZ(90deg) rotateY(-90deg) rotateX(90deg); }
  81%, 86% { rework: var(--_p) rotateX(90deg) rotateZ(90deg) rotateY(-90deg) rotateX(90deg) rotateZ(90deg); }
  97%, 100%{ rework: var(--_p) rotateX(90deg) rotateZ(90deg) rotateY(-90deg) rotateX(90deg) rotateZ(90deg) rotateY(-90deg); }
}
The rework property begins with zero rotations and, on every state, we append a brand new rotation on a particular axis till we attain six rotations. Then we’re again to the primary picture.
Let’s not overlook the position of our photographs. Every one is utilized to a face of the dice utilizing rework:
.gallery img {
  grid-area: 1 / 1;
  width: var(--s);
  aspect-ratio: 1;
  object-fit: cowl;
  rework: var(--_t,) translateZ(calc(var(--s) / 2));
}
.gallery img:nth-child(2) { --_t: rotateX(-90deg); }
.gallery img:nth-child(3) { --_t: rotateY( 90deg) rotate(-90deg); }
.gallery img:nth-child(4) { --_t: rotateX(180deg) rotate( 90deg); }
.gallery img:nth-child(5) { --_t: rotateX( 90deg) rotate( 90deg); }
.gallery img:nth-child(6) { --_t: rotateY(-90deg); }
You’re most likely pondering there’s bizarre complicated logic behind the values I’m utilizing there, proper? Nicely, no. All I did was open DevTools and play with completely different rotation values for every picture till I acquired it proper. It could sound silly however, hey, it really works — particularly since we have now a set variety of photographs and we aren’t in search of one thing that helps N photographs.
The truth is, overlook the values I’m utilizing and attempt to do the position by yourself as an train. Begin with all the pictures stacked on prime of one another, open the DevTools, and go! You’ll most likely find yourself with completely different code and that’s completely high quality. There may be alternative ways to place the pictures.
What’s the trick with the comma contained in the
var()? Is it a typo?
It’s not a typo so don’t take away it! If you happen to do take away it, you’ll discover that it impacts the position of the primary picture. You’ll be able to see that in my code I outlined --_t for all the pictures besides the primary one as a result of I solely want a translation for it. That comma makes the variable fall again to a null worth. With out the comma, we received’t have a fallback and the entire worth might be invalid.
From the specification:
Notice: That’s,
var(--a,)is a sound perform, specifying that if the--acustomized property is invalid or lacking, thevar()` must be changed with nothing.
Random dice slider
A bit little bit of randomness is usually a good enhancement for this kind of animation. So, reasonably than rotate the dice in sequential order, we are able to roll the cube so to talk, and let the dice roll nonetheless it’s going to.
Cool proper? I don’t find out about you, however I like this model higher! It’s extra attention-grabbing and the transitions are satisfying to observe. And guess what? You’ll be able to play with the values to create your individual random dice slider!
The logic is precise not random in any respect — it simply seems that method. You outline a rework on every keyframe that means that you can present one face and… effectively, that’s actually it! You’ll be able to choose any order you need.
@keyframes r {
  0%, 3%   { rework: var(--_p) rotate3d( 0, 0, 0,  0deg); }
  14%,19%  { rework: var(--_p) rotate3d(-1, 1, 0,180deg); }
  31%,36%  { rework: var(--_p) rotate3d( 0,-1, 0, 90deg); }
  47%,52%  { rework: var(--_p) rotate3d( 1, 0, 0, 90deg); }
  64%,69%  { rework: var(--_p) rotate3d( 1, 0, 0,-90deg); }
  81%,86%  { rework: var(--_p) rotate3d( 0, 1, 0, 90deg); }
  97%,100% { rework: var(--_p) rotate3d( 0, 0, 0,  0deg); }
}
I’m utilizing rotate3d() this time however am nonetheless counting on DevTools to search out the values that really feel “proper” to me. Don’t attempt to discover a relationship between the keyframes as a result of there merely isn’t one. I’m defining separate transforms after which watching the “random” consequence. Be certain the primary picture is the primary and final frames, respectively, and present a unique picture on every of the opposite frames.
You aren’t obligated to make use of a rotate3d() rework as I did. You may as well chain completely different rotations like we did within the earlier instance. Mess around and see what you may provide you with! I might be ready so that you can share your model with me within the feedback part!
Wrapping up
I hope you loved this little collection. We constructed some enjoyable (and humorous) sliders whereas studying so much about every kind of CSS ideas alongside the way in which — from grid placement and stacking order, to animation delays and transforms. We even acquired to play with a splash of Sass to loop by an array of components.
And we did all of it with the very same HTML for every slider we made. How cool is that? CSS is dang highly effective and able to undertaking a lot with out the help of JavaScript.
