
Oftentimes as React Native builders, we’re tasked with creating authentication flows that require the person to enter a one-time password, or OTP.
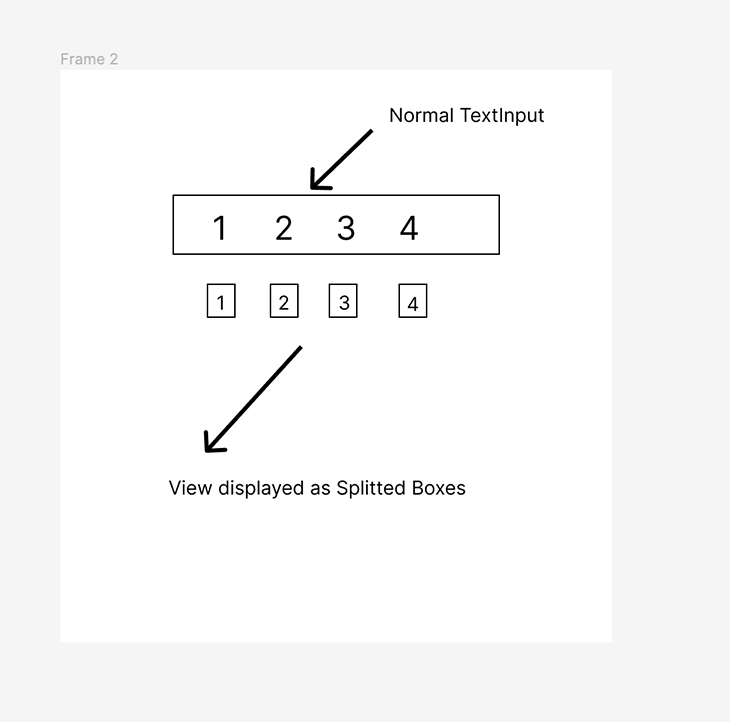
OTPs is usually a daunting job once we think about the dealing with of a TextInput that comes with creating this function. A traditional TextInput show takes the textual content entered by a person and outputs it, albeit hidden by asterisks, inside one field. However what if we need to cut up the show to create one field for every OTP digit? We will do precisely that!
On this article, we’ll discover ways to create cut up OTP enter fields in React Native with out utilizing exterior packages.
Establishing the surroundings
To arrange the event surroundings, we’ll use the Expo CLI. To create a brand new React Native undertaking in Expo, run the next command:
expo init splitOTP
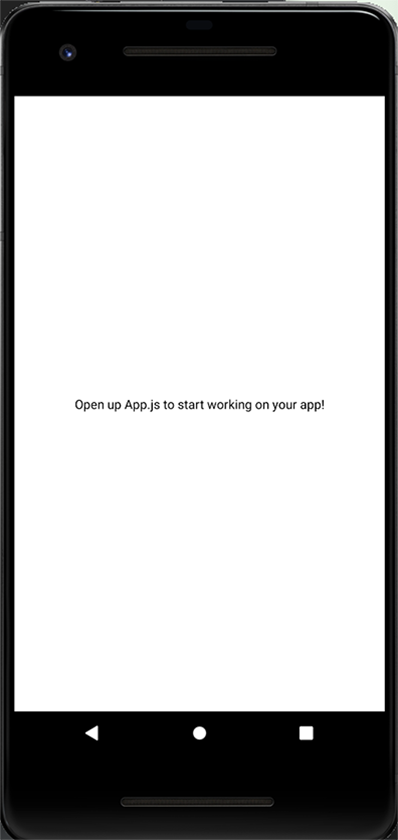
Choose the clean possibility, and this may bootstrap your undertaking for you. Subsequent, run expo begin to begin up the Metro server. You’ll be able to both open the app on an Android emulator or iOS simulator. The screenshots on this article shall be Android, nevertheless it ought to be practically equivalent on iOS.
Proper now, our emulator ought to be wanting like this:
We’ll use styled-components for app styling, which you’ll set up with:
>npm i begin
or…
yarn add styled-components
Implementing cut up OTP enter fields into an utility
The idea of implementing the cut up OTP function is to make TextInput our reference part or, in different phrases, our supply of fact. For every digit this textual content enter receives, we’ll render a styled View within the type of a field.
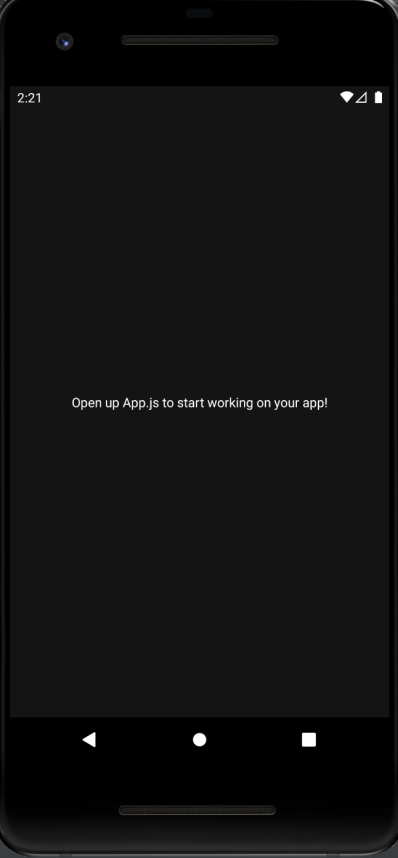
Afterward, the textual content enter shall be hidden and referred to as utilizing the useRef Hook as wanted. I modified the background-color of the container View to be darker so our implementation is extra seen.
The next code snippet reveals our entry file, App.js, the place we’ve modified the background shade:
export default perform App() {
 return (
   <View model={kinds.container}>
     <Textual content
       model={{
         shade: "white",
       }}
     >
       Open up App.js to begin working in your app!
     </Textual content>
     <StatusBar model="auto" />
   </View>
 );
}

const kinds = StyleSheet.create({
 container: {
   flex: 1,
   backgroundColor: "#141414",
   alignItems: "heart",
   justifyContent: "heart",
 },
});
Rendering the TextInput part
Shifting on, we’ll create the elements folder. Inside this folder, we can have one other folder referred to as OTP that can home the OTPInput.js and Kinds.js information.
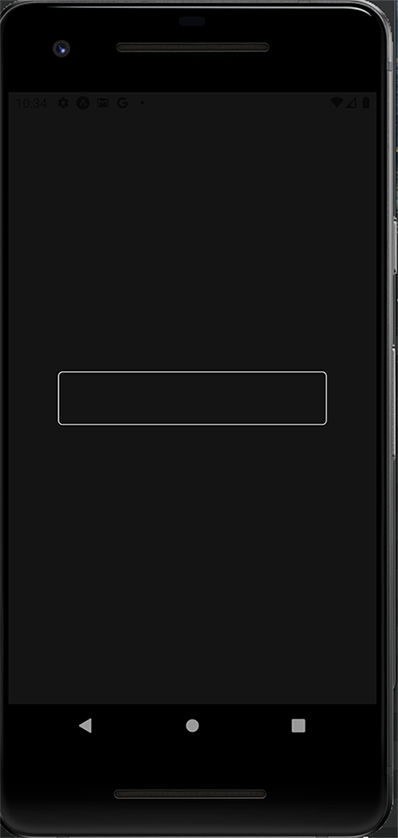
Contained in the OTPInput.js file, we’ll have two elements created with the styled part: TextInputHidden, the textual content enter we shall be hiding later; and OTPInputContainer, housing the textual content enter itself.
Beneath is our Kinds.js file:
import styled from "styled-components/native";

export const OTPInputContainer = styled.View`
 justify-content: heart;
 align-items: heart;
`;

export const TextInputHidden = styled.TextInput`
 width: 300px;
 border-color: #e5e5e5;
 border-width: 1px;
 border-radius: 5px;
 padding: 15px;
`;
And right here is the code in our OTPInput.js file:
import React from "react";
import { OTPInputContainer, TextInputHidden } from "./kinds";

const OTPInput = () => {
 return (
   <OTPInputContainer>
     <TextInputHidden />
   </OTPInputContainer>
 );
};

export default OTPInput;
Now, we’ll use the OTPInput part in App.js so we will render the entire implementation in our emulator/simulator:
import { StatusBar } from "expo-status-bar";
import { StyleSheet, Textual content, View } from "react-native";
import OTPInput from "./elements/OTP/OTPInput";

export default perform App() {
 return (
   <View model={kinds.container}>
     <OTPInput />
     <StatusBar model="auto" />
   </View>
 );
}

const kinds = StyleSheet.create({
 container: {
   flex: 1,
   backgroundColor: "#141414",
   alignItems: "heart",
   justifyContent: "heart",
 },
});
We’ll initialize some states in App.js and move them down as props to the OTPInput.js file.
The primary state shall be code, an empty string that can retailer the worth entered within the enter subject.
The second state shall be isPinReady, a Boolean that shall be false by default and true when the person enters the required variety of anticipated digits.
Now, we are going to declare the utmost size of our anticipated numbers as 4 (this may be declared based mostly in your use case).
We’ll move these states as a prop to the OTPInput part. Subsequent, we’ll destructure all of the values we move as props into the OTPInput.js part in App.js. The destructured values shall be handed to TextInputHidden.
Subsequent, we’ll set the worth of the TextInput part to the code state and set the onChangeText to setCode. The onChangeText will replace the code state (set as an empty string earlier) because the person enters the values.
Since we’re solely anticipating numbers to be entered into the enter subject, we set keyboardType to number-pad and the maxLength as the utmost quantity that may be entered. In our case, once more, it’s 4.
To deal with the onBlur occasion when the enter is out of focus, we’ll use the useRef Hook and handleOnBlur perform. We’ll create a reference variable with useRef and set the preliminary worth to null. For the handleOnBlur perform, we make a declaration for later use.
Now, in our App.js file, we are going to set all of the states and move it as props to the OTPInput part as proven beneath:
import { useState } from "react";
import { StatusBar } from "expo-status-bar";
import { StyleSheet, Textual content, View } from "react-native";
import OTPInput from "./elements/OTP/OTPInput";

export default perform App() {
 const [otpCode, setOTPCode] = useState("");
 const [isPinReady, setIsPinReady] = useState(false);
 const maximumCodeLength = 4;
 return (
   <View model={kinds.container}>
     <OTPInput
       code={otpCode}
       setCode={setOTPCode}
       maximumLength={maximumCodeLength}
       setIsPinReady={setIsPinReady}
     />
     <StatusBar model="auto" />
   </View>
 );
}

const kinds = StyleSheet.create({
 container: {
   flex: 1,
   backgroundColor: "#141414",
   alignItems: "heart",
   justifyContent: "heart",
 },
});
Inside OTPInput.js, we are going to obtain the props we handed to the OTPInput part and destructure them to be used:
import React, { useRef } from "react";
import { OTPInputContainer, TextInputHidden } from "./kinds";

const OTPInput = ({ code, setCode, maximumLength, setIsPinReady }) => {
 const inputRef = useRef();

 const handleOnBlur = () => {};
 return (
   <OTPInputContainer>
     <TextInputHidden
       worth={code}
       onChangeText={setCode}
       maxLength={maximumLength}
       ref={inputRef}
       onBlur={handleOnBlur}
     />
   </OTPInputContainer>
 );
};

export default OTPInput;
Creating cut up enter containers elements
Now, we are going to create some elements for the cut up enter containers themselves. First, we’ll create a Pressable part referred to as SplitOTPBoxesContainer and provides it some styling. Then, we’ll make a View part referred to as SplitBoxes to render our cut up containers and the textual content part (SplitBoxText) to show the textual content.
You’ll be able to see the code in our Kinds.js file beneath:
export const SplitOTPBoxesContainer = styled.Pressable`
 width: 80%;
 flex-direction: row;
 justify-content: space-evenly;
`;
export const SplitBoxes = styled.View`
 border-color: #e5e5e5;
 border-width: 2px;
 border-radius: 5px;
 padding: 12px;
 min-width: 50px;
`;

export const SplitBoxText = styled.Textual content`
 font-size: 20px;
 text-align: heart;
 shade: #e5e5e5;
`;
Shifting again to OTPInput.js, we’ll put the SplitOTPBoxesContainer above the TextInputHidden part.
Contained in the SplitOTPBoxesContainer, we’ll map by way of the digits of the TextInputHidden part and render a field for every of them. We’ll create an array with a most size of 4 utilizing the Array.fill() methodology and initialize the enter subject indices with 0.
const boxArray = new Array(maximumLength).fill(0);
After we log the boxArray to the console, we get this because of this:
Array [
   0,
   0,
   0,
   0,
 ]
Now, we are going to create a perform to deal with the mapping for every worth within the array and render a field for every worth. It is going to obtain the worth and index from the Array.map methodology.
We first create a variable emptyInput, an empty string that can render when an enter field is empty. Every digit shall be extracted from the code enter string utilizing the index, and, if it’s empty, will return the emptyInput variable we declared earlier.
The View part for SplitBoxes will then be returned with the SplitBoxText. The worth for the SplitBoxText would be the digit, and the index shall be handed as the important thing to the SplitBoxes.
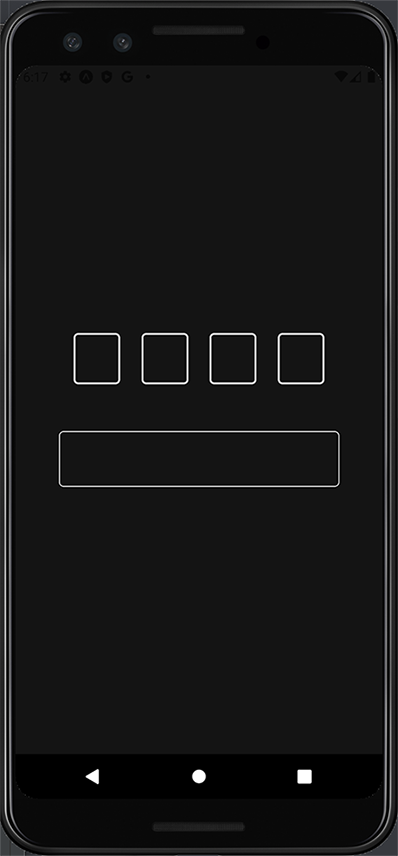
Within the SplitOTPBoxesContainer, we’ll map by way of the boxArray and move within the boxDigit perform to render the cut up containers. It will render the containers in reference to the variety of digits within the boxArray, which shall be 4.
We are going to implement this in our OTPInput.js file:
const OTPInput = ({ code, setCode, maximumLength, setIsPinReady }) => {
 const boxArray = new Array(maximumLength).fill(0);
 const inputRef = useRef();

 const boxDigit = (_, index) => {
   const emptyInput = "";
   const digit = code[index] || emptyInput;
   return (
     <SplitBoxes key={index}>
       <SplitBoxText>{digit}</SplitBoxText>
     </SplitBoxes>
   );
 };

 const handleOnBlur = () => {};
 return (
   <OTPInputContainer>
     <SplitOTPBoxesContainer>{boxArray.map(boxDigit)}</SplitOTPBoxesContainer>
     <TextInputHidden
       worth={code}
       onChangeText={setCode}
       maxLength={maximumLength}
       ref={inputRef}
       onBlur={handleOnBlur}
     />
   </OTPInputContainer>
 );
};
Now we will verify the cut up containers in our emulator/simulator and enter some values!
Highlighting the present OTP digit
After we press every field, we have to spotlight the present enter field with its background shade and set off the keyboard. Keep in mind that now we have SplitOTPBoxesContainer, a pressable part. We’ll move the onPress prop to it with the perform handleOnPress.
To realize this, we’ll declare a Boolean state to verify whether or not we’re in focus. It’ll be false by default for the enter containers.
Within the handleOnPress perform, we set the main focus state we created to true and use the inputRef to set off it to be in focus. Within the handleOnBlur perform, we are going to set the main focus state again to false.
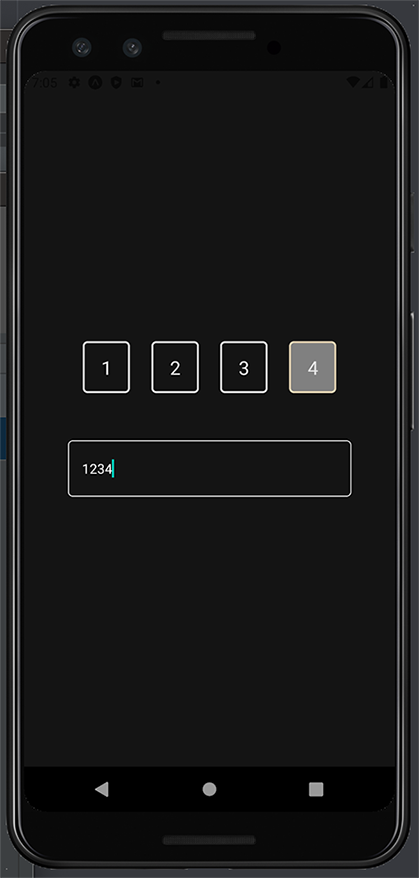
At this level, we should always have the ability to press on the TextInput to enter the PIN digits and see them within the cut up containers and the TextInput:
 const [isInputBoxFocused, setIsInputBoxFocused] = useState(false);

 const handleOnPress = () => {
   setIsInputBoxFocused(true);
   inputRef.present.focus();
 };

 const handleOnBlur = () => {
   setIsInputBoxFocused(false);
 };
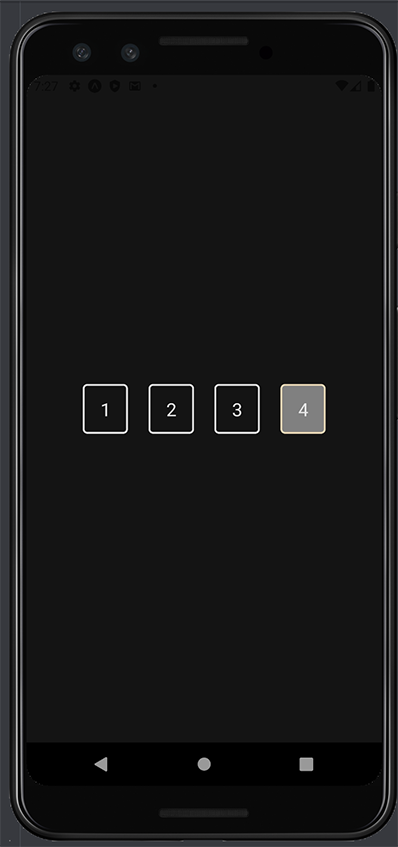
To finish the present field spotlight, we’ll create a brand new styled part in our Kinds.js file referred to as SplitBoxesFocused that’ll be based mostly on the SplitBoxes, modifying the background and border-color:
export const SplitBoxesFocused = styled(SplitBoxes)`
 border-color: #ecdbba;
 background-color: gray;
`;
Within the boxDigit perform, we’ll set up a couple of variables:
isCurrentValue: verify if the mapping’s present worth is the present digit or field to be targeted onisLastValue: verify for the final digitisCodeComplete: verify and shall betrueif the size of the code is identical as the utmost size we specified earlierisValueFocused: verify if the worth is targeted. This shall betrueif it’s the present or final worth, and if the code is full.
Now, we need to toggle between the SplitBoxes and SplitBoxesFocused. We are going to create a brand new variable referred to as StyledSplitBoxes. If each the textual content enter and worth are targeted, we are going to return the SplitBoxesFocused; in any other case, we are going to return SplitBoxes.
Subsequent, we are going to change the StyledSplitBoxes with the SplitBoxes. We will have our targeted enter field rendered with the desired background shade.
const boxDigit = (_, index) => {
   const emptyInput = "";
   const digit = code[index] || emptyInput;

   const isCurrentValue = index === code.size;
   const isLastValue = index === maximumLength - 1;
   const isCodeComplete = code.size === maximumLength;

   const isValueFocused = isCurrentValue || (isLastValue && isCodeComplete);

   const StyledSplitBoxes =
     isInputBoxFocused && isValueFocused ? SplitBoxesFocused : SplitBoxes;
   return (
     <StyledSplitBoxes key={index}>
       <SplitBoxText>{digit}</SplitBoxText>
     </StyledSplitBoxes>
   );
Including dynamism in our cut up enter fields
What if we need to add dynamism to our app to make it look even higher?
To realize this, we will use the useEffect Hook and replace the worth of setIsPinReady to true every time all of the required digits have been crammed.
 useEffect(() => {
   // replace pin prepared standing
   setIsPinReady(code.size === maximumLength);
   // clear up perform
   return () => {
     setIsPinReady(false);
   };
 }, [code]);
code was added as a dependency, so useEffect will solely run when the code worth adjustments. Then, we’ll replace the TextInputHidden styled part to cover it completely, however with out shedding any of its management:
export const TextInputHidden = styled.TextInput`
 place: absolute;
 opacity: 0;
`;
Hiding keyboard on urgent exterior the cut up containers
If the keyboard is pulled up and a person presses anyplace on the display screen exterior the containers, the keyboard ought to be dismissed. We will use Pressable and Keyboard from React Native.
The View part wrapping the textual content enter shall be changed by the Pressable part, and the onPress perform shall be connected to name the keyboard.dismiss perform as proven beneath:
import { StyleSheet, Textual content, View, Pressable, Keyboard } from "react-native";
import OTPInput from "./elements/OTP/OTPInput";

export default perform App() {
 const [otpCode, setOTPCode] = useState("");
 const [isPinReady, setIsPinReady] = useState(false);
 const maximumCodeLength = 4;
 return (
   <Pressable model={kinds.container} onPress={Keyboard.dismiss}>
     <OTPInput
       code={otpCode}
       setCode={setOTPCode}
       maximumLength={maximumCodeLength}
       setIsPinReady={setIsPinReady}
     />
     <StatusBar model="auto" />
   </Pressable>
 );
}
Syncing the submit button to the OTP enter state
Let’s say now we have a submit button within the design that must be carried out alongside this function.
We will first create the button utilizing the TouchableOpaity and Textual content part and render it in Kinds.js:
export const ButtonContainer = styled.TouchableOpacity`
 background-color: #d8e9a8;
 padding: 20px;
 justify-content: heart;
 align-items: heart;
 width: 200px;
 margin-top: 30px;
`;

export const ButtonText = styled.Textual content`
 shade: black;
 font-size: 20px;
`;
Then, in our App.js file, we’ll use the 2 elements we simply created:
export default perform App() {
 const [otpCode, setOTPCode] = useState("");
 const [isPinReady, setIsPinReady] = useState(false);
 const maximumCodeLength = 4;
 return (
   <Pressable model={kinds.container} onPress={Keyboard.dismiss}>
     <OTPInput
       code={otpCode}
       setCode={setOTPCode}
       maximumLength={maximumCodeLength}
       setIsPinReady={setIsPinReady}
     />

     <ButtonContainer>
       <ButtonText>Login</ButtonText>
     </ButtonContainer>
     <StatusBar model="auto" />
   </Pressable>
 );
}
Utilizing the isPinReady state, we will toggle this button to be lively or inactive, relying on whether or not all of the digits have been entered.
<
ButtonContainer
       disabled={!isPinReady}
       model={{
         backgroundColor: !isPinReady ? "gray" : "#000000",
       }}
     >
       <ButtonText
         model={{
           shade: !isPinReady ? "black" : "#EEEEEE",
         }}
       >
         Login
       </ButtonText>
     </ButtonContainer>
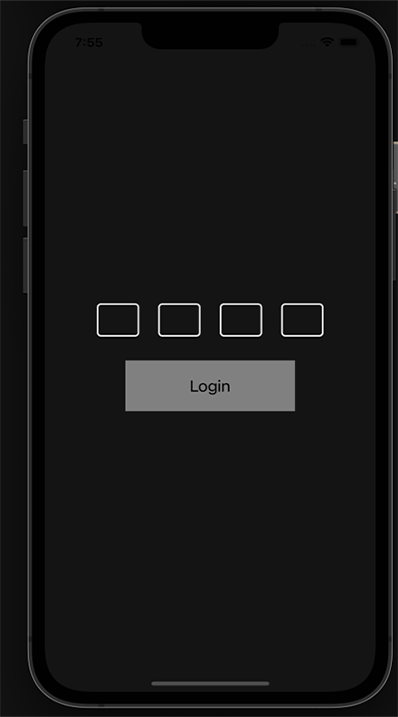
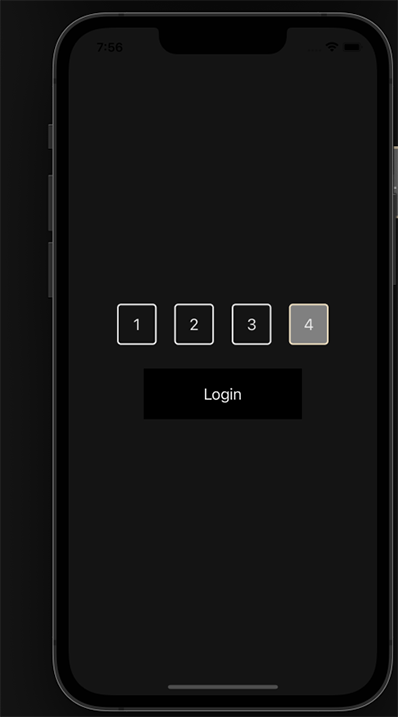
And there now we have it!
Conclusion
We have now efficiently created a cut up OTP enter subject in React Native! It may be adjusted to the variety of digits a person must enter by modifying the utmost size quantity.
You will discover the hyperlink to the GitHub repository right here.
LogRocket: Immediately recreate points in your React Native apps.

LogRocket is a React Native monitoring resolution that helps you reproduce points immediately, prioritize bugs, and perceive efficiency in your React Native apps.
LogRocket additionally helps you enhance conversion charges and product utilization by exhibiting you precisely how customers are interacting along with your app. LogRocket’s product analytics options floor the explanation why customers do not full a specific circulation or do not undertake a brand new function.
Begin proactively monitoring your React Native apps — strive LogRocket without spending a dime.
