
With a typewriter impact, phrases are displayed one letter at a time as an alternative of suddenly, making the textual content seem as if it’s being written in actual time. Yow will discover an instance of a code block typewriter impact on Codepen’s touchdown web page that makes use of syntax highlighting, a kind of particular shade formatting, to simply show written textual content within the type of code.
On this article, we’ll learn to construct an identical code block typewriter impact from scratch with React. We’ll additionally reveal an alternate method that makes use of a pre-existing typewriter bundle. To comply with together with this tutorial, you’ll want primary information of React. We’ll cowl the next:
Yow will discover the complete supply code for this tutorial at this GitHub repo. Let’s get began!
Putting in dependencies
In the event you don’t have React put in already, navigate in your system to your challenge listing, open a command-line window, and run the next bash scripts in it:
npx create-react-app typewriter
The command above creates a React challenge folder known as typewriter with all the mandatory dependencies for constructing our utility. To simply model our utility, we’ll use Tailwind CSS. You’ll be able to set up Tailwind CSS by working the next instructions in your CLI:
npm set up -D tailwindcss postcss autoprefixer
npx tailwindcss init -p
As soon as the set up is full, modify the tailwind.config.js file to permit assist for jsx components, as proven under:
/** @kind {import('tailwindcss').Config} */
module.exports = {
  content material: [
    "./src/**/*.{js,jsx,ts,tsx}",
  ],
  theme: {
    prolong: {},
  },
  plugins: [],
}
Lastly, add the next Tailwind CSS directives to the highest stage of index.css:
@tailwind base;
@tailwind parts;
@tailwind utilities;
Constructing a typewriter impact
Our typewriter impact will encompass two fundamental components, a container the place we’ll preserve the textual content that we wish to animate and a a blinking cursor to imitate a typewriter.
Typewriter show space
First, in our App.js file, we’ll construct the show window for the typewriter impact:
import "./App.css";
import {React, useState, useEffect} from "react";

operate App() {
  const [text1, setText1] = useState("const sayHello = () = {");
  const [text2, setText2] = useState("Console.log('good day')");
  const [text3, setText3] = useState("//This prints out Good day World");
  return (
    <div className=" flex h-screen justify-center items-center">
      <div className=" h-1/2 w-1/2 bg-black rounded-md flex items-center pl-6">
        {/* kind author show */}
        <span>
          <div className=" text-white text-2xl blinking-cursor">{text1}</div>
          <div className=" text-white text-2xl blinking-cursor">{text2}</div>
          <div className=" text-white text-2xl blinking-cursor">{text3}</div>
          <div className=" text-white text-2xl blinking-cursor">{`}`}</div>
        </span>
      </div>
    </div>
  );
}

export default App;
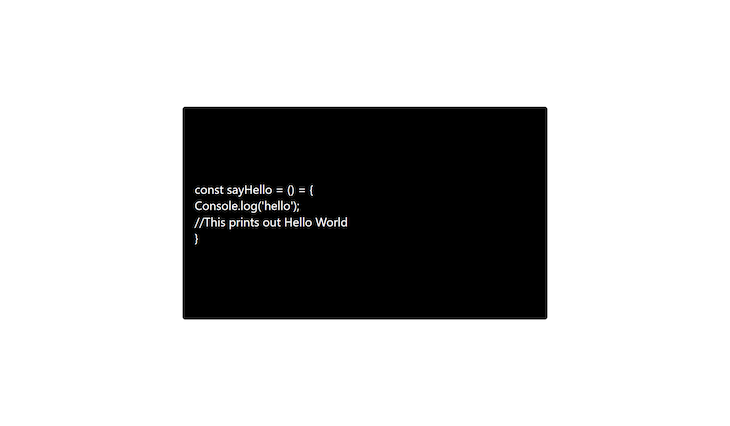
The code above creates a container the place we’ll preserve the textual content that we wish to animate with our typewriter impact. If we run the code above with the npm begin command, we’ll get a “Good day, World!”consequence much like the picture under:
Including a blinking cursor
Subsequent, we’ll construct and append a blinking cursor to the ending of the textual content. Add the code under to index.css:
.bg-code{
  background-color: rgb(40, 42, 54);
}

.blinking-cursor::after ";
  animation: blink 1s step-end infinite;

@keyframes blink {
  from,
  to {
    opacity: 1;
  }
  50% {
    opacity: 0;
  }
}
The CSS kinds above add a | to the top of every textual content, inflicting a blinking impact that mimics a cursor.
Add the typewriter impact to textual content
To create our typewriter impact, we’ll use the React useEffect Hook. To take action, add the next modifications to your code:
const first_text = "const sayHello = () = {";
  const second_text = "console.log('good day')";
  const third_text = "//This prints out Good day World";

  const [text1, setText1] = useState("");
  const [text2, setText2] = useState("");
  const [text3, setText3] = useState("");

  useEffect(() => {
    const timeout = setTimeout(() => {
      setText1(first_text.slice(0, text1.size + 1));
    }, 100);
    return () => clearTimeout(timeout);
  }, [text1]);

  useEffect(() => {
    const timeout = setTimeout(() => {
      setText2(second_text.slice(0, text2.size + 1));
    }, 250);

    return () => clearTimeout(timeout);
  }, [text2]);

  useEffect(() => {
    const timeout = setTimeout(() => {
      setText3(third_text.slice(0, text3.size + 1));
    }, 300);

    return () => clearTimeout(timeout);
  }, [text3]);
Within the code above, we used a setTimeout operate and a slice operator. The setTimeout operate executes the code block after the required interval. We use the splice operator to divide the complete string into characters and return the textual content one character at a time.
For the callback, we use the states. Each time we enter a brand new character, the state will get up to date, and the setTimeout operate is executed. Consequently, the setTimeout runs till the complete textual content is totally typed.
Deleting and retyping textual content
To loop the typewriter impact, we’ll add two states, isdeleting and istyping, for when the consumer desires to delete textual content and after they end typing, respectively:
Extra nice articles from LogRocket:
const textState = ["istyping", "isdeleting"];
const [typing, setTyping] = useState(textState[0]);

operate sleep(ms) {
    return new Promise((resolve) => setTimeout(resolve, ms));
}
Now that we’ve created states for typing and deleting the textual content, let’s use the sleep operate to create a delay between switching from the 2 states. Due to this fact, when the consumer is totally completed typing the textual content, we’ll implement a pause. Let’s go forward and modify our code to make use of these states, as proven under:
useEffect(() => {
    const timeout = setTimeout(() => {
      if (typing === "istyping" && text1 !== first_text) {
        setText1(first_text.slice(0, text1.size + 1));
      }
      else if (text1 === first_text && typing === "istyping"){
        sleep(2000).then(()=>{
        setTyping(textState[1])
        })
      }
      else if ( (text1 === first_text && typing==="isdeleting") || typing === "isdeleting" ) {
        setText1(first_text.slice(0, text1.size - 1));
        if(text1.size<=2){
            setTyping(textState[0])
        }
      }
    }, 100);
  return () => clearTimeout(timeout);
}, [text1, typing1]);
Within the code above, we examine that typing is the same as istyping and that the textual content will not be equal to the total string. If this returns true, we’ll run the typing impact. When the textual content is much like the total string, we use the sleep operate to modify to the isdeleting state after two seconds.
Lastly, we use the final situation to delete the textual content one character at a time till solely a single letter stays. At this level, the typing state is ready again to istyping, and the complete course of begins once more. We’ll do the identical for text2 and text3 additionally.
Highlighting code syntax
To focus on our textual content to seem like a code block, we’ll set up the React Syntax Highlighter by way of the CLI:
npm i react-syntax-highlighter
When this bundle is put in, we will import it in App.js and use it as follows:
import SyntaxHighlighter from 'react-syntax-highlighter';
import { docco } from 'react-syntax-highlighter/dist/esm/kinds/hljs';
//...
<span>
  <div className=" text-2xl">
    <SyntaxHighlighter className="blinking-cursor" language="javascript" model={dracula}>
      {text1}
    </SyntaxHighlighter>
  </div>
  <div className=" text-2xl">
    <SyntaxHighlighter className="blinking-cursor" language="javascript" model={dracula}>
      {text2}
    </SyntaxHighlighter>
  </div>
  <div className=" text-2xl">
    <SyntaxHighlighter className="blinking-cursor" language="javascript" model={dracula}>
      {text3}
    </SyntaxHighlighter>
  </div>
  <div className=" text-2xl">
    <SyntaxHighlighter className="blinking-cursor" language="javascript" model={dracula}>
      {`}`}
    </SyntaxHighlighter>
  </div>
</span>
Now that we’ve carried out our Syntax Higlighter element, we will wrap up our typewriter impact.
Utilizing a pre-built typewriting library
As a substitute for coding and customizing our personal typewriter impact, we will use a pre-built library to avoid wasting time.
An instance of a library that handles the typewriter impact is react-typewriter-effect. We will set up this bundle by way of the CLI with the next command:
npm i react-typewriter-effect
As soon as set up is full, we will use it in our utility as follows to get a typewriter impact:
import TypeWriterEffect from 'react-typewriter-effect';
//...

<TypeWriterEffect
  textStyle={{ fontFamily: 'Pink Hat Show' }}
  startDelay={100}
  cursorColor="black"
  textual content="Textual content for typewriting impact right here"
  typeSpeed={100}
  eraseSpeed={100}
/>
The code above will produce a typewriter impact for the required textual content string.
Conclusion
On this article, we’ve realized how you can simply create a typewriter impact utilizing React. Implementing this characteristic in your web site or utility can enhance your UI by including visible curiosity and directing your consumer’s consideration the place you need it to go. You’ll be able to add on to the typewriter impact we’ve constructed from scratch to implement extra of your individual customizations, or you need to use a library that implements this characteristic for you, like react-typewriter-effect.
I hope you’ve loved this text, and be sure you depart a remark when you’ve got any questions. Joyful coding!
Full visibility into manufacturing React apps
Debugging React purposes could be tough, particularly when customers expertise points which are laborious to breed. In the event you’re excited about monitoring and monitoring Redux state, robotically surfacing JavaScript errors, and monitoring gradual community requests and element load time, strive LogRocket. 

LogRocket is sort of a DVR for internet and cell apps, recording actually all the pieces that occurs in your React app. As a substitute of guessing why issues occur, you may mixture and report on what state your utility was in when a problem occurred. LogRocket additionally displays your app’s efficiency, reporting with metrics like shopper CPU load, shopper reminiscence utilization, and extra.
The LogRocket Redux middleware bundle provides an additional layer of visibility into your consumer classes. LogRocket logs all actions and state out of your Redux shops.
Modernize the way you debug your React apps — begin monitoring at no cost.
