
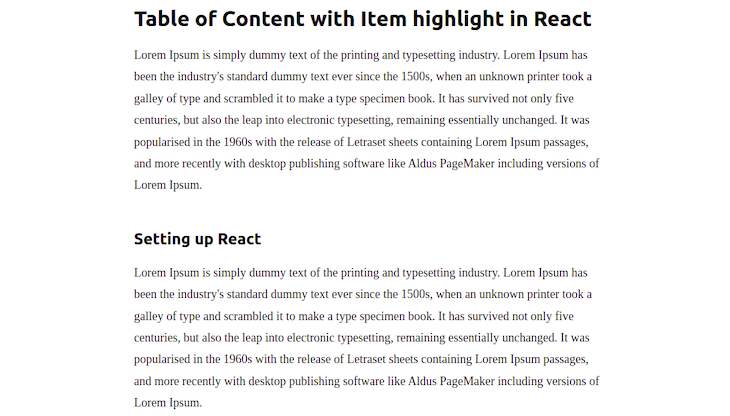
A desk of contents supplies web site viewers with a abstract of the web page’s content material, permitting them to shortly navigate to sections of the web page by clicking on the specified heading. Sometimes, tables of contents are carried out in documentation and blogs.
On this tutorial, we’ll learn to create a sticky desk of contents that may dynamically checklist the out there headings on a web page, highlighting the energetic headings. As we scroll by way of our article, when a heading turns into seen on the display, will probably be highlighted within the TOC, as seen within the gif under:

To comply with together with this tutorial, try to be accustomed to React and React Hooks. You must also have Node.js put in in your system. The total code for this tutorial is on the market on GitHub. Let’s get began!
Organising React
For this tutorial, I’ve created a starter repo by which I’ve included the code we’ll use to create our desk of contents. First, we’ll must clone the repo. To take action, run the next command within the terminal:
$ git clone -b starter https://github.com/Tammibriggs/table-of-content.git

$ cd table-of-content

$ npm set up
Once we begin the app with the $ npm begin command, we must always see the next web page:
Create a TOC part
Let’s begin by creating our TOC part, which will likely be sticky and can reside on the appropriate aspect of our display.
Extra nice articles from LogRocket:
Within the app we cloned earlier, create a TableOfContent.js file and a tableOfContent.css file within the src listing. Add the next traces of code to the TableOfContent.js file:
// src/TableOfContent.js
import './tableOfContent.css'

operate TableOfContent() {
  return (
    <nav>
      <ul>
        <li>
          <a href="#">A heading</a>
        </li>
      </ul>
    </nav>
  )
}
export default TableOfContent
Within the code above, discover that we’re wrapping the textual content in an anchor tag <a></a>. In our TOC, we’ll add performance in order that after we click on on a heading, it can take us to the corresponding part on our web page.
We are able to achieve this simply with an anchor tag by passing the ID of the part we wish to navigate to within the href attribute. Subsequently, all of the sections on our web page should comprise an ID, which I’ve already included within the Content material.js file.
Subsequent, add the next traces of code within the tableOfContent.css file:
// src/tableOfContent.css
nav {
  width: 220px;
  min-width: 220px;
  padding: 16px;
  align-self: flex-start;
  place: -webkit-sticky;
  place: sticky;
  high: 48px;
  max-height: calc(100vh - 70px);
  overflow: auto;
  margin-top: 150px;
}

nav ul li {
  margin-bottom: 15px;
}
Now, to show this part, head over to the App.js file and add the next import:
import TableOfContent from './TableOfContent';
Subsequent, modify the App part to appear to be the next:
// src/App.js
operate App() {
  return (
    <div className="wrapper">
      <Content material />
      <TableOfContent />
    </div>
  );
}
With the code above, we’ll see a sticky part on the appropriate aspect of our app.
Discover the headings on the web page
To seek out all of the headings on our web page, we will use the querySelectorAll doc technique, which returns a NodeList representing a listing of components that match the desired group of selectors.
The instance under exhibits how we’ll use the querySelectorAll technique:
const headings = doc.querySelectorAll(h2, h3, h4)
Now we have specified h2, h3, and h4 because the selectors, that are the potential headings utilized in an article. We aren’t together with h1 as a result of it’s primarily used for the title of a web page, and we wish our TOC to comprise solely the subsections of our web page.
Now to seek out the headings, add the next import within the TableOfContent.js file:
import { useEffect, useState } from 'react';
Subsequent, within the part, add the next traces of code earlier than the return assertion:
// src/TableOfContent.js
const [headings, setHeadings] = useState([])

useEffect(() => {
  const components = Array.from(doc.querySelectorAll("h2, h3, h4"))
    .map((elem) => ({
      textual content: elem.innerText,
    }))
  setHeadings(components)
}, [])
The code above will discover all the desired heading components on our web page after which retailer the textual content content material within the state.
Within the code above, we’re utilizing the Array.from technique to create an array from the NodeList returned by querySelectorAll. We achieve this as a result of some features, like map, which we used above, usually are not carried out on NodeList. To simply work with the heading components discovered, we convert them to an array.
Now, to show the headings within the TOC, modify the return assertion of the part to appear to be the next code:
// src/TableOfContent.js
return (
<nav>
<ul>
{headings.map(heading => (
<li key={heading.textual content}>
<a href="#">{heading.textual content}</a>
</li>
))}
</ul>
</nav>
)
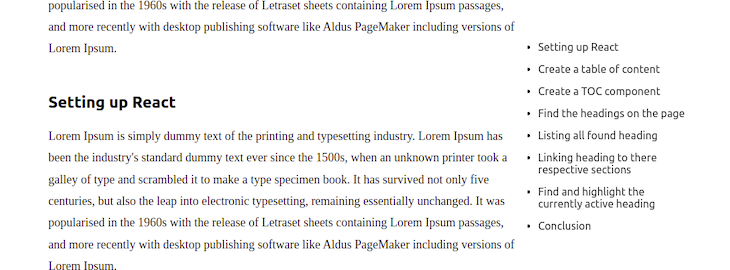
Now, after we open the app in our browser, we’ll see the next:
Hyperlink and itemizing heading in hierarchy
Proper now, after we click on on a heading within the TOC, it doesn’t take us to the right part. You’ll discover that they’re all in the identical line with no indication of which is a major heading or subheading. Let’s repair this.
Within the TableOfContent part, modify the useEffect Hook to appear to be the next code:
// src/TableOfContent.js
useEffect(() => {
  const components = Array.from(doc.querySelectorAll("h2, h3, h4"))
    .map((elem) => ({
      id: elem.id,
      textual content: elem.innerText,
      stage: Quantity(elem.nodeName.charAt(1))
    }))
  setHeadings(components)
}, [])
Together with the textual content from the headings we discovered, we’re additionally including an ID and a stage property to the state. We’ll go the ID to the anchor tag of the TOC textual content in order that after we click on on it, we’ll be taken to the corresponding part of the web page. Then, we’ll use the stage property to create a hierarchy within the TOC.
Modify the ul component within the return assertion of the TableOfContent part to appear to be the next:
// src/TableOfContent.js
<ul>
  {headings.map(heading => (
    <li
      key={heading.id}
      className={getClassName(heading.stage)}
      >
      <a
        href={`#${heading.id}`}
        onClick={(e) => {
          e.preventDefault()
          doc.querySelector(`#${heading.id}`).scrollIntoView({
            conduct: "easy"
          })}}
        >
        {heading.textual content}
      </a>
    </li>
  ))}
</ul>
Within the code above, together with including the ID to the href attribute of the anchor tag <a></a>, we additionally added an onClick occasion, which, when fired, calls scrollIntoView to make the browser easily scroll to the corresponding part.
Within the li component, we name getClassName(heading.stage) within the className attribute. We’ll use this characteristic, which we’ll create shortly, to set totally different class names primarily based on the worth of the stage property. Subsequently, we can provide subheadings within the TOC totally different styling from the primary headings.
Subsequent, to create the getClassName operate, add the next code outdoors the TableOfContent part:
// src/TableOfContent.js
const getClassName = (stage) => {
  change (stage) {
    case 2:
      return 'head2'
    case 3:
      return 'head3'
    case 4:
      return 'head4'
    default:
      return null
  }
}
Now, add the next traces of code within the in tableOfContent.css file:
// src/tableOfContent.css
.head3{
  margin-left: 10px;
  list-style-type: circle;
}
.head4{
  margin-left: 20px;
  list-style-type: sq.;
}
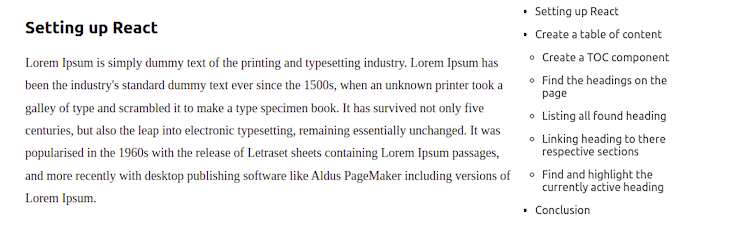
With the code above, after we click on on a heading or subheading in our TOC, we’ll be taken to the corresponding part. Now, there’s a hierarchy of the headings in our TOC:
Discover and spotlight the at present energetic heading
When a heading is seen on our web page, we wish to spotlight the corresponding textual content within the TOC.
To detect the visibility of the headings, we’ll use the Intersection Observer API, which supplies a strategy to monitor a goal component, executing a operate when the component reaches the pre-defined place.
Observing energetic headings with the Intersection Observer API
Utilizing the Intersection Observer API, we’ll create a customized Hook that may return the ID of the energetic header. Then, we’ll use the ID that’s returned to focus on the corresponding textual content in our TOC.
To take action, within the src listing, create a hook.js file and add the next traces of code:
// src/hooks.js
import { useEffect, useState, useRef } from 'react';

export operate useHeadsObserver() {
  const observer = useRef()
  const [activeId, setActiveId] = useState('')

  useEffect(() => {
    const handleObsever = (entries) => {}

    observer.present = new IntersectionObserver(handleObsever, {
      rootMargin: "-20% 0% -35% 0px"}
    )

    return () => observer.present?.disconnect()
  }, [])

  return {activeId}
}
Within the code above, we created a brand new occasion of the Intersection Observer. We handed the handleObsever callback and an choices object the place we’ve specified the circumstances below which the observer’s callback is executed.
In object utilizing the rootMargin property, we’re shrinking the highest of the foundation component by 20 p.c, which is at present our complete web page, and the underside by 35 p.c. Subsequently, when a header is on the high 20 p.c and backside 35 p.c of our web page, it won’t be counted as seen.
Let’s specify the headings we wish to observe by passing them to the observe technique of the Intersection Observer. We’ll additionally modify the handleObsever callback operate to set the ID of the intersected header within the state.
To take action, modify the useEffect Hook to appear to be the code under:
// src/hooks.js
useEffect(() => {
  const handleObsever = (entries) => {
    entries.forEach((entry) => {
      if (entry?.isIntersecting) {
        setActiveId(entry.goal.id)
      }
    })
  }

  observer.present = new IntersectionObserver(handleObsever, {
    rootMargin: "-20% 0% -35% 0px"}
  )

  const components = doc.querySelectorAll("h2, h3", "h4")
  components.forEach((elem) => observer.present.observe(elem))
  return () => observer.present?.disconnect()
}, [])
Within the TableOfContent.js file, import the created Hook with the next code:
// src/TableOfContent.js
import { useHeadsObserver } from './hooks'
Now, name the Hook after the headings state within the TableOfContent part:
// src/TableOfContent.js
const {activeId} = useHeadsObserver()
With the code above, when a heading component intersects, will probably be out there with activeId.
Highlighting the energetic heading
To focus on the energetic headings in our TOC, modify the anchor tag <a></a> of the li component within the returned assertion of the TableOfContent part by including the next model attribute:
model={{
  fontWeight: activeId === heading.id ? "daring" : "regular"
}}
Now, our anchor tag will appear to be the next:
// src/TableOfContent.js
<a
  href={`#${heading.id}`}
  onClick={(e) => {
    e.preventDefault()
    doc.querySelector(`#${heading.id}`).scrollIntoView({
      conduct: "easy"
    })}}
    model={{
      fontWeight: activeId === heading.id ? "daring" : "regular"
    }}
  >
  {heading.textual content}
</a>
Now, when a header is energetic, it can change into daring. With this, we’re performed creating our desk of contents with header highlighting.
Drawbacks of highlighting TOC objects
There are some concerns to remember when including merchandise highlighting to a TOC. For one, there isn’t a normal means of including this characteristic to a TOC. Subsequently, throughout totally different websites, the implementation is totally different, which means our web site’s customers should find out how our TOC works.
As well as, since each desk of contents has a unique quantity of spacing between every heading primarily based on the textual content below it, our implementation of the highlighting characteristic may not be correct for all headings.
Conclusion
Including a desk of contents to your weblog or article creates a greater expertise for web site guests. On this tutorial, we realized tips on how to create a desk of contents with merchandise highlighting to point every energetic header, serving to your customers navigate by way of your web site and bettering your general UX.
Full visibility into manufacturing React apps
Debugging React functions might be tough, particularly when customers expertise points which are arduous to breed. In the event you’re concerned about monitoring and monitoring Redux state, robotically surfacing JavaScript errors, and monitoring sluggish community requests and part load time, attempt LogRocket. 

LogRocket is sort of a DVR for net and cellular apps, recording actually all the things that occurs in your React app. As a substitute of guessing why issues occur, you’ll be able to mixture and report on what state your utility was in when a difficulty occurred. LogRocket additionally screens your app’s efficiency, reporting with metrics like shopper CPU load, shopper reminiscence utilization, and extra.
The LogRocket Redux middleware bundle provides an additional layer of visibility into your consumer classes. LogRocket logs all actions and state out of your Redux shops.
Modernize the way you debug your React apps — begin monitoring at no cost.
