On this article, we’ll take a look at work with Vuetify coloration themes. We are going to cowl add Vuetify to a Vue.js utility, create customized themes, and dynamically change between them.
Soar forward:
Why use Vuetify themes for Vue.js apps?
Vuetify is among the most generally used CSS libraries and presently the preferred materials design part library for Vue.js. As of the writing of this text, this Vue part framework has over 36k stars on GitHub.
Together with its intensive part and icon library, Vuetify offers a plethora of different options. One in all these options is the flexibility to dynamically change app coloration themes with minimal effort. This makes Vuetify a superb selection for builders designing responsive, versatile, and extensible apps.
Including Vuetify to a Vue.js app
Let’s get began by creating a brand new Vue utility and configuring Vuetify. We’ll discover two other ways to take action under: the beneficial strategy utilizing Vite, and an alternate choice utilizing Vue CLI.
Creating the mission with Vite (beneficial)
The simplest option to get began with creating a brand new Vue and Vuetify mission is by way of the command under. This command makes use of Vite to scaffold a brand new Vue 3 utility, in addition to to put in the newest model of Vuetify on the app:
npx create-vuetify my-app
# OR
yarn create vuetify my-app
Operating this command will immediate you with a couple of questions, resembling whether or not you need to add TypeScript assist to your app, your most well-liked bundle supervisor, and so forth.
Make the suitable picks in line with your preferences. As soon as performed, now you can run your utility with the next command:
npm run dev
# OR
yarn dev
Creating the mission with Vue CLI
An alternative choice is to make use of the standard Vue CLI tooling. Nevertheless, this isn’t beneficial as a result of Vue CLI is presently in upkeep mode.
To start, be certain that Vue CLI is put in globally. Then, run the next command to create a brand new utility:
vue create my-app
Much like the Vite command, operating this command will immediate you to make some picks in line with your preferences. After, you possibly can add Vuetify with this command:
vue add vuetify
Whenever you run this command, additionally, you will be prompted to pick out a most well-liked model of Vuetify to put in. You possibly can then run your utility with the next command:
npm run serve
# OR
yarn serve
Utilizing both of the 2 strategies talked about above will generate the required scaffold in your utility — particularly, a brand new plugin/vuetify.js file within the /src folder. This file comprises the code for initializing Vuetify with Vue, in addition to any future theme configuration we might be doing.
For much more choices, the official set up web page contains directions on configure Vuetify manually in addition to by way of CDN.
Vuetify theme configuration
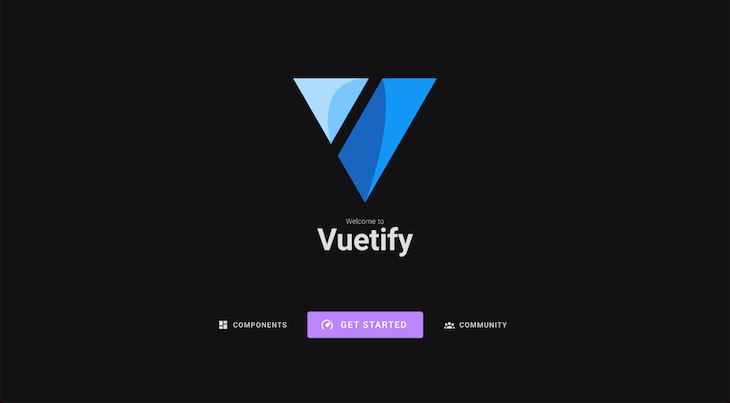
Vuetify comes with two themes pre-installed — a light-weight theme and a darkish theme. By default, while you run your utility, it will likely be rendered within the gentle theme. Nevertheless, you possibly can change this setting by modifying the defaultTheme choice within the Vuetify plugin configuration file.
For instance, to set a default darkish theme, we will modify the defaultTheme choice like so:
// src/plugins/vuetify.js

import "@mdi/font/css/materialdesignicons.css";
import "vuetify/types";

import { createVuetify } from "vuetify";

export default createVuetify({
  theme: {
    defaultTheme: "darkish",
  },
});
Our utility ought to now be rendered with the darkish theme, as proven under:
Creating customized themes
In Vuetify, it’s also attainable to create customized themes which are based mostly on both the default gentle or darkish themes. We are able to do that by passing an object containing our new theme choices — resembling if it’s extending the sunshine or darkish theme, in addition to coloration preferences — throughout Vuetify’s initialization.
For instance, suppose you need to create a customized theme that’s based mostly on the darkish theme, however with a couple of adjustments to the colours used. You may do that by defining the customized theme as follows:
// src/plugins/vuetify.js

import "@mdi/font/css/materialdesignicons.css";
import "vuetify/types";

import { createVuetify } from "vuetify";
// Customized theme properties
const customDarkTheme = {
  darkish: true,
  colours: {
    background: "#15202b",
    floor: "#15202b",
    main: "#3f51b5",
    secondary: "#03dac6",
    error: "#f44336",
    data: "#2196F3",
    success: "#4caf50",
    warning: "#fb8c00",
  },
};

export default createVuetify({
  theme: {
    defaultTheme: "customDarkTheme",
    themes: {
      customDarkTheme,
    },
  },
});
To confirm these adjustments, let’s open the default src/App.vue file and paste the code under into it:
<template>
  <v-container class="fill-height">
    <v-responsive class="d-flex align-center text-center fill-height">
      <div class="text-body-2 font-weight-light mb-n1">Welcome to</div>

      <h1 class="text-h2 font-weight-bold">Vuetify</h1>

      <div class="py-5" />

      <v-row class="d-flex align-center justify-center">
        <v-col cols="auto"> <v-btn coloration="main"> Major </v-btn> </v-col>
        <v-col cols="auto">
          <v-btn coloration="secondary"> Secondary </v-btn>
        </v-col>
        <v-col cols="auto"> <v-btn coloration="error"> Error </v-btn> </v-col>
      </v-row>

      <v-row class="d-flex align-center justify-center">
        <v-col cols="auto">
          <v-btn coloration="data"> Data </v-btn>
        </v-col>
        <v-col cols="auto">
          <v-btn coloration="success"> Success </v-btn>
        </v-col>
        <v-col cols="auto">
          <v-btn coloration="warning"> Warning </v-btn>
        </v-col>
      </v-row>
    </v-responsive>
  </v-container>
</template>
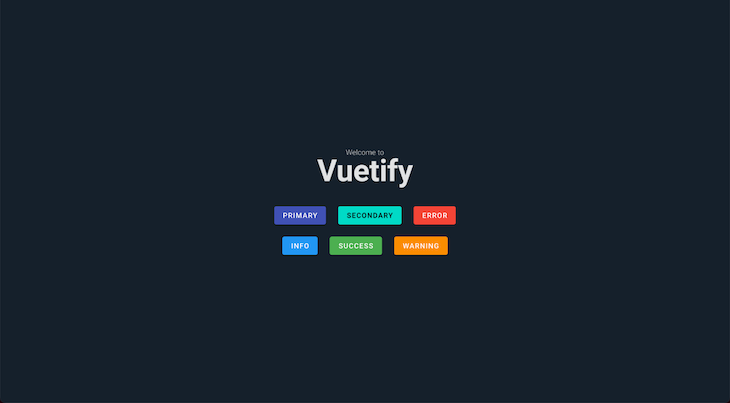
To exhibit how our Vuetify theme colours will look, the default part within the code above has been modified to show buttons of various variants. If we run our utility now, we must always get the next outcomes:
Dynamically switching between themes with Vuetify
Vuetify features a useTheme technique that enables us to simply get and set the worth of our app’s present theme. Utilizing this technique, we will entry the present theme worth at theme.world.present.worth.darkish. It will return a boolean (true or false) worth indicating whether or not the present theme is darkish or gentle.
Moreover, to vary the present app theme, we will merely modify theme.world.title.worth, setting its worth to gentle, darkish, or a customized theme title we’ve created.
For instance, we will use the next code to create a dynamic gentle/darkish mode switcher based mostly on this precept:
<!-- src/App.vue -->
<template>
  <v-container class="fill-height">
    <v-responsive class="d-flex align-center text-center fill-height">
      <div class="text-body-2 font-weight-light mb-n1">Welcome to</div>

      <h1 class="text-h2 font-weight-bold">Vuetify</h1>

      <div class="py-4" />
      <v-row class="d-flex align-center justify-center">
        <v-col cols="auto">
          <v-switch
            inset
            coloration="data"
            v-model="darkMode"
            @change="toggleTheme()"
            :label="`It is ${darkMode ? 'Darkish' : 'Gentle'}!`"
          ></v-switch>
        </v-col>
      </v-row>
    </v-responsive>
  </v-container>
</template>

<script setup>
import { ref } from "vue";
import { useTheme } from "vuetify";

const theme = useTheme();
const darkMode = ref(false);

const toggleTheme = () => {
  theme.world.title.worth = darkMode.worth ? "darkish" : "gentle";
  // Non-compulsory: Get worth of present theme
  console.log(`Present theme is darkish? ${theme.world.present.worth.darkish}`);
};
</script>
The code above imports Vuetify’s useTheme hook and makes use of it to get the present theme object. We additionally created a reactive darkMode state and certain it to a change part. The darkMode variable is ready to false, indicating that the theme is gentle by default.
Following that, we outlined a toggleTheme perform to toggle between gentle and darkish themes. Whenever you toggle the change, the perform updates the darkMode variable and makes use of it to set the present theme title.
After we run our utility within the browser, we must always see the next output:
It’s additionally price noting that the defaultTheme choice within the Vuetify plugin file was set to gentle to exhibit this instance.
Dynamically switching between customized themes
We are able to additionally use the beforehand described idea to modify between customized themes. Assume we’ve got a few customized themes outlined in our plugin file, as proven under:
// src/plugins/vuetify.js

import "@mdi/font/css/materialdesignicons.css";
import "vuetify/types";

import { createVuetify } from "vuetify";

const customDarkTheme = {
  darkish: true,
  colours: {
    background: "#15202b",
    floor: "#15202b",
    main: "#3f51b5",
    secondary: "#03dac6",
    error: "#ff5722",
  },
};

const customLightTheme = {
  darkish: false,
  colours: {
    background: "#eee",
    floor: "#15202b",
    main: "#3f51b5",
    secondary: "#00ccff",
    error: "#ffcc00",
  },
};

export default createVuetify({
  theme: {
    defaultTheme: "gentle",
    themes: {
      customDarkTheme,
      customLightTheme,
    },
  },
});
We are able to change between them as expressed within the code under:
<!-- src/App.vue -->
<template>
  <v-container class="fill-height">
    <v-responsive class="d-flex align-center text-center fill-height">
      <div class="text-body-2 font-weight-light mb-n1">Welcome to</div>

      <h1 class="text-h2 font-weight-bold">Vuetify</h1>

      <div class="py-5" />

      <v-row class="d-flex align-center justify-center">
        <v-col cols="auto"> <v-btn coloration="main"> Major </v-btn> </v-col>
        <v-col cols="auto">
          <v-btn coloration="secondary"> Secondary </v-btn>
        </v-col>
        <v-col cols="auto"> <v-btn coloration="error"> Error </v-btn> </v-col>
      </v-row>

      <div class="py-5" />

      <v-row class="d-flex align-center justify-center">
        <v-col cols="4">
          <v-select
            label="Choose Theme"
            v-model="selectedTheme"
            :objects="myThemes"
            @replace:modelValue="setTheme()"
          ></v-select>
        </v-col>
      </v-row>
    </v-responsive>
  </v-container>
</template>

<script setup>
import { ref } from "vue";
import { useTheme } from "vuetify";

const theme = useTheme();
const myThemes = ["light", "dark", "customLightTheme", "customDarkTheme"];
const selectedTheme = ref(myThemes[0]);

const setTheme = () => {
  theme.world.title.worth = selectedTheme.worth;
  console.log(selectedTheme.worth);
};
</script>
Within the code above, we outlined an array that comprises Vuetify’s default gentle and darkish themes, in addition to our personal customDarkTheme and customLightTheme.
We then used this array to populate a choose part, permitting the person to pick out from numerous theme choices. When a person chooses a distinct theme from the choose part, our utility updates to make use of that theme.
Whenever you run your utility at this level, it’s best to see one thing like this:
Switching between Vuetify themes in your markup
Vuetify offers extra strategies so that you can simply apply most well-liked themes immediately in your markup.
One technique is to make use of the theme prop, which is supported by all Vuetify elements and means that you can simply set a most well-liked theme for various sections of your utility. Right here’s an instance of how this may very well be utilized in a card part:
<v-card width="400" theme="darkish">
  <v-card-item>
    <v-card-title>Card title</v-card-title>
  </v-card-item>

  <v-card-text> Lorem ipsum dolor sit amet. </v-card-text>
</v-card>
Within the instance above, whatever the theme you specify within the Vuetify configuration, the cardboard part and its kids might be rendered at the hours of darkness theme. In fact, the worth specified within the theme prop is also a customized theme title that you simply had beforehand created.
One other technique to immediately apply themes in your markup is through the use of the <v-theme-provider> part. This part is usually helpful for making use of completely different themes to bigger sections of your utility, eliminating the necessity to set the theme prop on every particular person part:
<v-theme-provider theme="customLightTheme">
  <v-container>
    <v-row>
      . . .
    </v-row>
  </v-container>
</v-theme-provider>
Within the previous instance, we used the <v-theme-provider> part to use the customLightTheme to a big part of our utility.
Conclusion
All through this text, we’ve lined create customized themes in Vuetify, in addition to dynamically change between these themes. All of the examples used on this article have additionally been created as separate elements and uploaded to Github in your comfort.
Expertise your Vue apps precisely how a person does
Debugging Vue.js functions may be tough, particularly when there are dozens, if not lots of of mutations throughout a person session. For those who’re all in favour of monitoring and monitoring Vue mutations for all your customers in manufacturing, attempt LogRocket. 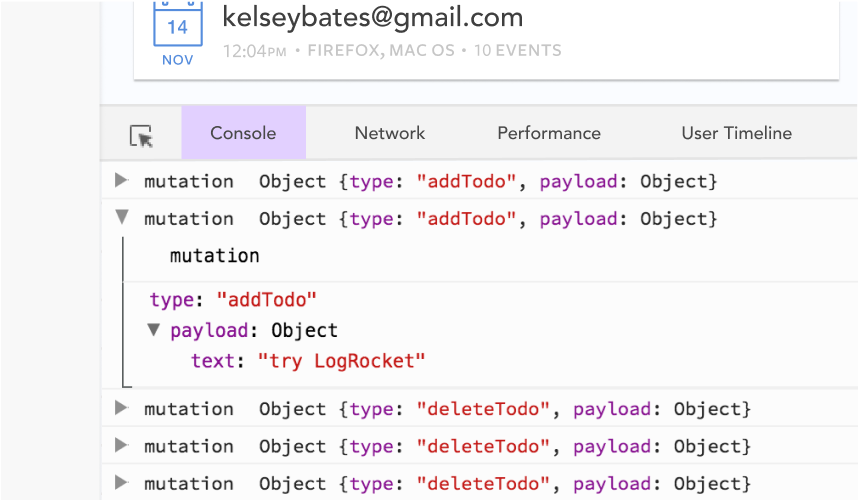 https://logrocket.com/signup/
LogRocket is sort of a DVR for net and cell apps, recording actually all the things that occurs in your Vue apps together with community requests, JavaScript errors, efficiency issues, and far more. As a substitute of guessing why issues occur, you possibly can combination and report on what state your utility was in when a difficulty occurred.
The LogRocket Vuex plugin logs Vuex mutations to the LogRocket console, providing you with context round what led to an error, and what state the applying was in when a difficulty occurred.
Modernize the way you debug your Vue apps – Begin monitoring without spending a dime.
