
Introduction
We are going to construct an admin panel that helps CRUD operations, has built-in authentication, and a mutation mode function utilizing industry-standard greatest instruments.
Trade-standard instruments and practices could be exhausting to achieve and time-consuming to keep up by yourself. Frameworks can prevent time by doing these jobs for you. So, we’ll use highly effective frameworks together with Materials UI, Strapi, and refine to construct a high-quality admin panel.
UI design is usually a advanced and time-consuming course of, however a software like Materials UI may help simplify the method and velocity up the event cycle. On this tutorial, we’ll use Materials UI’s advantages and deal with knowledge fetching and mutations. We’ll additionally combine the Strapi knowledge supplier that Refine has built-in help.
We’ll stroll by way of the method of itemizing, creating and deleting posts in a refine utility and make use of refine’s parts and hooks to construct out our performance.
Steps we’ll cowl contains:
Prerequisities
Earlier than we dive into the meat of the article, let’s first check out the instruments paperwork we’ll be utilizing.
Your node model should be mininum v16.14.0
What are the advantages of utilizing refine?
refine is a headless React inside software framework that helps you develop shortly whereas creating each B2B and B2C purposes. It speeds you up whereas permitting full customization, making it a great selection for speedy growth with professional options.
- It’s Open Supply underneath the MIT license.
- It’s simple to make use of and be taught. There are various examples that can assist you get began, in addition to documentation.
- Is a framework that doesn’t require you to make use of any UI libraries or frameworks.
- Helps Ant Design and Materials UI natively for fast and straightforward options. Because of the headless method, you’ll be able to simply combine your personal UI answer.
- Backend agnostic, so you’ll be able to hook up with any backend you need.
- Customizable, which implies you’ll be able to change it to suit your wants.
- Among the essential options are knowledge fetching and state administration, routings, authentication, authorization, internationalization, real-time, mutation modes with optimistic and pessimistic and undoable modes
Bootstrapping the refine app
We’ll use superplate CLI wizard to create and customise refine utility.
Run the next command
npx superplate-cli -p refine-react material-ui-example
Choose the next choices to finish CLI wizard:
? Do you need to use a UI Framework?:
❯ Materials UI

? Would you like an prolonged theme?:
❯ No

? Do you need to add darkish mode help?:
❯ No

? Router Supplier:
❯ React Router v6

? Knowledge Supplier:
❯ Strapi v4

? Would you like a personalized structure?
❯ No

? i18n - Internationalization:
❯ No
CLI ought to be create a mission and set up the chosen dependencies.
Implementing Strapi v4 knowledge supplier
Knowledge suppliers are refine hooks making it attainable to eat totally different API’s and knowledge companies conveniently.
The required Strapi knowledge supplier setups are added routinely by the CLI wizard.
To eat refine’s Pretend Strapi API, we’ll want to alter the API URL within the mission folder.
// src/constants.ts
export const API_URL = "https://api.strapi-v4.refine.dev";
Discuss with refine docs for extra detailed details about refine Strapi V4 help→
Discuss with refine’s knowledge supplier documentation for detailed info→
Discuss with official Strapi v4 documentation→
CRUD operations
We’re going to implement CRUD operations options like itemizing, creating, and modifying information.
Itemizing information
We have to create PostList web page to point out knowledge on the UI.
First, we’ll want an interface to work with the information from the API endpoint.
We’ll create a brand new folder named interfaces underneath /src for those who do not have already got one. Then create a index.d.ts file with the next code:
// src/interfaces/index.d.ts
export interface ICategory {
    id: quantity;
    title: string;
}

export interface IPost  "draft"
Now, we’ll create a brand new folder named pages/posts underneath /src. Underneath that folder, create a record.tsx file with the next code:
// src/pages/posts/record.tsx
import React from "react";
import {
    useDataGrid,
    DataGrid,
    GridColumns,
    DateField,
    Record,
} from "@pankod/refine-mui";

import { IPost } from "interfaces";

export const PostList: React.FC = () => {
    const { dataGridProps } = useDataGrid<IPost>();

    const columns = React.useMemo<GridColumns<IPost>>(
        () => [
            { field: "title", headerName: "Title", flex: 1, minWidth: 350 },
            {
                field: "createdAt",
                headerName: "CreatedAt",
                minWidth: 220,
                renderCell: function render({row}) {
                    return (
                        <DateField format="LLL" value={row.createdAt} />
                    );
                },
            }
        ],
        [],
    );

    return (
        <Record>
            <DataGrid {...dataGridProps} columns={columns} autoHeight />
        </Record>
    );
};
We import and use Materials UI parts from refine’s @pankod/refine-mui to point out knowledge.
<DataGrid/> is a local Materials UI element. It renders information row by row as a desk. <DataGrid/> expects a columns prop as a required.
refine hook useDataGrid fetches knowledge from API and wraps them with varied helper hooks required for the <DataGrid/> element. Knowledge interplay capabilities like sorting, filtering, and pagination will likely be immediately obtainable on the <DataGrid/> with this single line of code.
Discuss with refine’s useDataGrid hook docs to extra info→
columns array are used for mapping and formatting every discipline proven on the <DataGrid/> discipline prop maps the sector to an identical key from the API response. renderCell prop is used to decide on the suitable Discipline element for the given knowledge kind.
Data: “The useDataGrid hook works in appropriate with each the <DataGrid> and the <DataGridPro> element.”
Notice you will have src/App.tsx file to search out your pages and posts. Within the /pages folder, put this index.tsx file in it which permits all the pieces within the posts folder for use elsewhere.
// src/pages/posts/index.tsx
export * from "./record";
Discuss with offical refine’s Materials UI tutorial for detailed explanations and examples→
Including sources and join pages to refine app
Now we’re prepared to begin connecting to our API by including a useful resource to our utility.
We’ll add /posts/ endpoint from our instance API as a useful resource.
We’ll add the highlighted code to our App.tsx to connect with the endpoint and Record web page.
// App.tsx
import { Refine } from "@pankod/refine-core";
import {
    notificationProvider,
    RefineSnackbarProvider,
    CssBaseline,
    GlobalStyles,
    Format,
    ThemeProvider,
    LightTheme,
    ReadyPage,
    ErrorComponent,
} from "@pankod/refine-mui";
import routerProvider from "@pankod/refine-react-router-v6";
import { DataProvider } from "@pankod/refine-strapi-v4";

import { authProvider, axiosInstance } from "./authProvider";
import { API_URL } from "./constants";
// ====>
import { PostList } from "./pages/posts";
// <====

perform App() {
    return (
        <ThemeProvider theme={LightTheme}>
            <CssBaseline />
            <GlobalStyles types={{ html: { WebkitFontSmoothing: "auto" } }} />
            <RefineSnackbarProvider>
                <Refine
                    notificationProvider={notificationProvider}
                    Format={Format}
                    ReadyPage={ReadyPage}
                    catchAll={<ErrorComponent />}
                    routerProvider={routerProvider}
                    authProvider={authProvider}
                    dataProvider={DataProvider(API_URL + `/api`, axiosInstance)}
                    // ====>
                    sources={[
                        {
                            name: "posts",
                            list: PostList,
                        },
                    ]}
                    // <====
                />
            </RefineSnackbarProvider>
        </ThemeProvider>
    );
}

export default App;
Data: sources is a property of <Refine/> representing API Endpoints. The identify property of each single useful resource ought to match one of many endpoints in your API!
After setup is full, navigate to the mission folder and begin your mission with:
npm run dev
The applying ought to redirect now to an URL outlined by the identify property.
It’s going to ask you to login to the app. Attempt with these credentials:
Username: demo@refine.dev
Password: demodemo
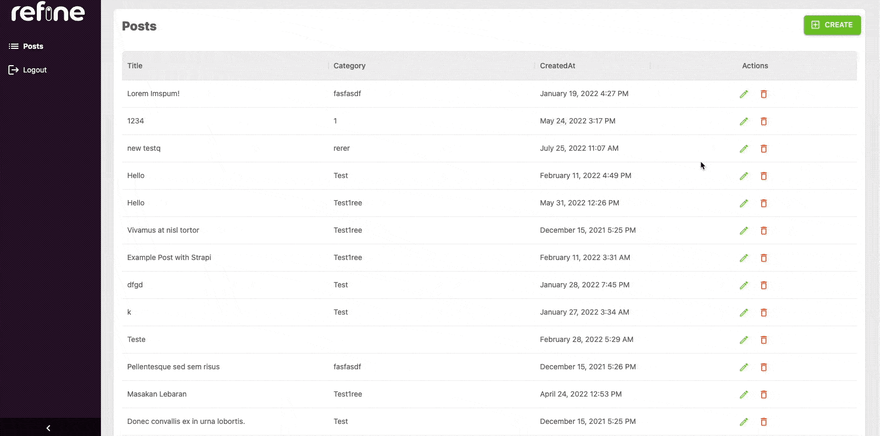
Test that the URL is routed to /posts and posts are displayed accurately in a desk construction and even the pagination works out-of-the field.
Dealing with relational knowledge
Relations will not be populated when fetching entries. We’ll use metaData possibility to make use of relational inhabitants for Strapi v4 API.
The information from /posts endpoint that had a class id discipline. To get class titles routinely from /classes endpoint for every report and present on our desk, we have to use populate function of Strapi v4.
We’ll set populate parameter to outline which fields will likely be populated.
// src/pages/publish/record.tsx
  const { dataGridProps } = useDataGrid<IPost>({
        // ====>
        metaData: {
            populate: ["category"],
        },
        // <====
    });
To point out class discipline in desk, we have to add new column to the PostList element.
// src/pages/publish/record.tsx
  const columns = React.useMemo<GridColumns<IPost>>(
        () => [
           ...
           // ====>
            {
                field: "category.title",
                headerName: "Category",
                minWidth: 250,
                flex: 1,
                renderCell: function render({ row }) {
                    return row.category?.title;
                },
            },
           // <====
           ...
        ],
        [],
    );
Tip: We use advantages of Strapi V4 relational inhabitants function by utilizing populate parameter. It handles to getting relational knowledge routinely.
Discuss with refine Strapi v4 documentation for extra info

Making a report
The Materials UI supplies already styled, however nonetheless very customizable inputs that encapsulate including labels and error dealing with with helper texts. Nevertheless, we’d like a third-party library to deal with types when utilizing Materials UI. React Hook Kind is among the greatest choices for this job!
The React Hook Kind library has been built-in with refine (@pankod/refine-react-hook-form) . This implies now you can use Materials UI on your types and handle them utilizing @pankod/refine-react-hook-form.
First, we’ll create PostCreate web page to create new information.
// src/pages/posts/create
import {
    Field,
    TextField,
    Autocomplete,
    useAutocomplete,
    Create,
} from "@pankod/refine-mui";
import { useForm, Controller } from "@pankod/refine-react-hook-form";

import { ICategory } from "interfaces";

export const PostCreate: React.FC = () => {
    const {
        refineCore: { formLoading },
        saveButtonProps,
        register,
        management,
        formState: { errors },
    } = useForm();

    const { autocompleteProps } = useAutocomplete<ICategory>({
        useful resource: "classes",
    });

    return (
        <Create isLoading={formLoading} saveButtonProps={saveButtonProps}>
            <Field
                element="kind"
                sx={{ show: "flex", flexDirection: "column" }}
                autoComplete="off"
            >
                <TextField
                    {...register("title", { required: "Title is required" })}
                    error={!!errors?.title}
                    helperText={errors.title?.message}
                    margin="regular"
                    required
                    fullWidth
                    id="title"
                    label="Title"
                    identify="title"
                    autoFocus
                />
                <Controller
                    management={management}
                    identify="class"
                    guidelines={{ required: "Class is required" }}
                    render={({ discipline }) => (
                        <Autocomplete
                            {...autocompleteProps}
                            {...discipline}
                            onChange={(_, worth) => {
                                discipline.onChange(worth);
                            }}
                            getOptionLabel={(merchandise) => {
                                return merchandise.title ? merchandise.title : "";
                            }}
                            isOptionEqualToValue= possibility.id === worth.id

                            renderInput={(params) => (
                                <TextField
                                    {...params}
                                    label="Class"
                                    margin="regular"
                                    variant="outlined"
                                    error={!!errors.class}
                                    helperText={errors.class?.message}
                                    required
                                />
                            )}
                        />
                    )}
                />
            </Field>
        </Create>
    );
};
Add element export to index.tsx.
// src/pages/posts/index.tsx
export * from "./create";
After creating the <PostCreate> element, add it to useful resource with create prop:
// App.tsx
...

import {
    PostList,
 // ====>
    PostCreate,
 // <====
} from "pages/posts";

...

const App: React.FC = () => {
    return (
        <ThemeProvider theme={LightTheme}>
            <CssBaseline />
            <GlobalStyles types={{ html: { WebkitFontSmoothing: "auto" } }} />
            <RefineSnackbarProvider>
                <Refine
                    authProvider={authProvider}
                    routerProvider={routerProvider}
                    dataProvider={dataProvider(API_URL)}
                    notificationProvider={notificationProvider}
                    ReadyPage={ReadyPage}
                    Format={Format}
                    catchAll={<ErrorComponent />}
                    sources={[
                        {
                            name: "posts",
                            list: PostList,
                            // highlight-next-line
                            create: PostCreate,
                        },
                    ]}
                />
            </RefineSnackbarProvider>
        </ThemeProvider>
    );
};
Attempt it on the browser and see for those who can create new posts from scratch.

Modifying a report
We’ll begin by creating a brand new <PostEdit> web page accountable for modifying a existed single report:
// src/pages/posts/edit.tsx
import { Controller, useForm } from "@pankod/refine-react-hook-form";
import {
    Edit,
    Field,
    TextField,
    Autocomplete,
    useAutocomplete,
} from "@pankod/refine-mui";

import { ICategory } from "interfaces";

export const PostEdit: React.FC = () => {
    const {
        refineCore: { formLoading },
        saveButtonProps,
        register,
        management,
        formState: { errors },
    } = useForm({ refineCoreProps: { metaData: { populate: ["category"] } } });

    const { autocompleteProps } = useAutocomplete<ICategory>({
        useful resource: "classes",
        defaultValue: queryResult?.knowledge?.knowledge.class.id,
        queryOptions: { enabled: !!queryResult?.knowledge?.knowledge.class.id },
    });

    return (
        <Edit isLoading={formLoading} saveButtonProps={saveButtonProps}>
            <Field
                element="kind"
                sx={{ show: "flex", flexDirection: "column" }}
                autoComplete="off"
            >
                <TextField
                    {...register("title", { required: "Title is required" })}
                    error={!!errors?.title}
                    helperText={errors.title?.message}
                    margin="regular"
                    required
                    fullWidth
                    id="title"
                    label="Title"
                    identify="title"
                    defaultValue={" "}
                    autoFocus
                />
                <Controller
                    management={management}
                    identify="class"
                    guidelines={{ required: "Class is required" }}
                    defaultValue=""
                    render={({ discipline }) => (
                        <Autocomplete
                            {...autocompleteProps}
                            {...discipline}
                            onChange={(_, worth) => {
                                discipline.onChange(worth);
                            }}
                            getOptionLabel={(merchandise) => {
                                return merchandise.title
                                    ? merchandise.title
                                    : autocompleteProps?.choices?.discover(
                                          (p) =>
                                              p.id.toString() ===
                                              merchandise.toString(),
                                      )?.title ?? "";
                            }}
                            isOptionEqualToValue=
                            renderInput={(params) => (
                                <TextField
                                    {...params}
                                    label="Class"
                                    margin="regular"
                                    variant="outlined"
                                    error={!!errors.class}
                                    helperText={errors.class?.message}
                                    required
                                />
                            )}
                        />
                    )}
                />
            </Field>
        </Edit>
    );
};
Add element export to index.tsx.
// src/pages/posts/index.tsx
export * from "./edit";
We’re going to add an edit button to the every row within the record by defining Actions column in PostList web page.
// src/pages/posts/record.tsx
import React from "react";
import {
    useDataGrid,
    DataGrid,
    GridColumns,
    DateField,
    Record,
    // ====>
    Stack,
    EditButton,
    // <====
} from "@pankod/refine-mui";

import { IPost } from "interfaces";

export const PostList: React.FC = () => {
    const { dataGridProps } = useDataGrid<IPost>({
        metaData: {
            populate: ["category"],
        },
    });

    const columns = React.useMemo<GridColumns<IPost>>(
        () => [
            { field: "title", headerName: "Title", flex: 1, minWidth: 350 },
            {
                field: "category.title",
                headerName: "Category",
                minWidth: 250,
                flex: 1,
                renderCell: function render({ row }) {
                    return row.category?.title;
                },
            },

            {
                field: "createdAt",
                headerName: "CreatedAt",
                minWidth: 220,
                renderCell: function render({ row }) {
                    return <DateField format="LLL" value={row.createdAt} />;
                },
            },
             // ====>
            {
                headerName: "Actions",
                headerAlign: "center",
                field: "actions",
                minWidth: 180,
                align: "center",
                flex: 1,
                sortable: false,
                renderCell: function render({ row }) {
                    return (
                        <Stack direction="row" spacing={1}>
                            <EditButton
                                size="small"
                                hideText
                                recordItemId={row.id}
                            />
                        </Stack>
                    );
                },
            },
           // <====
        ],
        [],
    );

    return (
        <Record>
            <DataGrid {...dataGridProps} columns={columns} autoHeight />
        </Record>
    );
};
After creating the <PostEdit> element, add it to useful resource with edit prop:
// App.tsx
...

import {
    PostList,
    PostCreate,
 // ====>
    PostEdit
 // <====
} from "pages/posts";

...

const App: React.FC = () => {
    return (
        <ThemeProvider theme={LightTheme}>
            <CssBaseline />
            <GlobalStyles types={{ html: { WebkitFontSmoothing: "auto" } }} />
            <RefineSnackbarProvider>
                <Refine
                    authProvider={authProvider}
                    routerProvider={routerProvider}
                    dataProvider={dataProvider(API_URL)}
                    notificationProvider={notificationProvider}
                    ReadyPage={ReadyPage}
                    Format={Format}
                    catchAll={<ErrorComponent />}
                    sources={[
                        {
                            name: "posts",
                            list: PostList,
                            create: PostCreate,
                            // ====>
                            edit: PostEdit
                            // <====
                        },
                    ]}
                />
            </RefineSnackbarProvider>
        </ThemeProvider>
    );
};
You’ll be able to strive utilizing edit buttons which is able to set off the edit types for every report, permitting you to replace the report knowledge.
Deleting a report
Deleting a report could be achieved in two methods.
The primary approach is including a delete button on every row since refine would not routinely add one, so now we have to replace our <PostList> element so as to add a <DeleteButton> for every report.
We’re going to add new cell to the Actions column to point out delete button on every row.
// src/pages/record.tsx
import React from "react";
import {
    useDataGrid,
    DataGrid,
    GridColumns,
    EditButton,
    DateField,
    Record,
    Stack,
 // ====>
    DeleteButton,
 // <====
} from "@pankod/refine-mui";

import { IPost } from "interfaces";

export const PostList: React.FC = () => {
    const { dataGridProps } = useDataGrid<IPost>({
        metaData: {
            populate: ["category"],
        },
    });


    const columns = React.useMemo<GridColumns<IPost>>(
      ...

            {
                headerName: "Actions",
                headerAlign: "middle",
                discipline: "actions",
                minWidth: 180,
                align: "middle",
                flex: 1,
                sortable: false,
                renderCell: perform render({ row }) {
                    return (
                        <Stack route="row" spacing={1}>
                            <EditButton
                                measurement="small"
                                hideText
                                recordItemId={row.id}
                            />
                             // ====>
                            <DeleteButton
                                measurement="small"
                                hideText
                                recordItemId={row.id}
                            />
                             // <====

                        </Stack>
                    );
                },
            },
        ],
        [],
    );

    return (
        <Record>
            <DataGrid {...dataGridProps} columns={columns} autoHeight />
        </Record>
    );
};
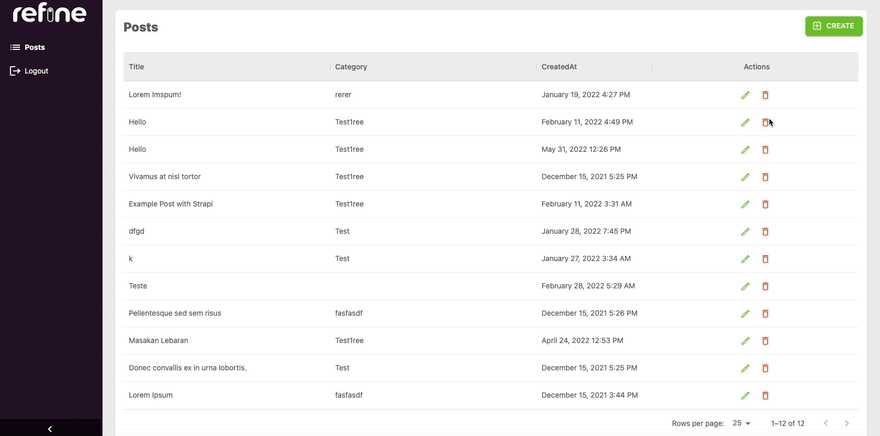
Now we’re capable of delete report by clicking delete button and affirmation.
The second approach is displaying delete button in <PostEdit> web page. To point out delete button in edit web page, canDelete prop must be handed to useful resource object.
// App.tsx
...

perform App() {
    return (
        <ThemeProvider theme={LightTheme}>
            <CssBaseline />
            <GlobalStyles types={{ html: { WebkitFontSmoothing: "auto" } }} />
            <RefineSnackbarProvider>
                <Refine
                    notificationProvider={notificationProvider}
                    Format={Format}
                    ReadyPage={ReadyPage}
                    catchAll={<ErrorComponent />}
                    routerProvider={routerProvider}
                    authProvider={authProvider}
                    dataProvider={DataProvider(API_URL + `/api`, axiosInstance)}
                    sources={[
                        {
                            name: "posts",
                            list: PostList,
                            create: PostCreate,
                            edit: PostEdit,
                             // ====>
                            canDelete: true,
                             // <====
                        },
                    ]}
                />
            </RefineSnackbarProvider>
        </ThemeProvider>
    );
}

export default App;
The <DeleteButton> ought to be seem in an edit kind.
Implementing mutation mode
We’ll like to point out how mutation modes making your app really feel extra aware of the person. Refine affords three modes for mutations known as pessimistic, optimistic, and undoable. This modes determines when the unintended effects are executed.
If we briefly describe:
pessimistic: UI updates are delayed till the mutation is confirmed by the server.
optimistic: UI updates are instantly up to date earlier than confirmed by server.
undoable: UI updates are instantly up to date, however you’ll be able to undo the mutation.
We’ll implement undoable mutation mode. The mutation is utilized regionally, redirection and UI updates are executed instantly as if the mutation is profitable. Waits for a customizable quantity of timeout interval earlier than mutation is utilized.
Throughout the timeout, mutation could be cancelled from the notification with an undo button and UI will revert again accordingly.
Discuss with Refine mutation mode docs for extra detailed info→
To activate mutation mode, we’ll set mutationMode property to the <Refine/> element.
// App.tsx
...
perform App() {
    return (
        <ThemeProvider theme={LightTheme}>
            <CssBaseline />
            <GlobalStyles types={{ html: { WebkitFontSmoothing: "auto" } }} />
            <RefineSnackbarProvider>
                <Refine
                    notificationProvider={notificationProvider}
                    Format={Format}
                    ReadyPage={ReadyPage}
                    catchAll={<ErrorComponent />}
                    routerProvider={routerProvider}
                    authProvider={authProvider}
                    dataProvider={DataProvider(API_URL + `/api`, axiosInstance)}
                    sources={[
                        {
                            name: "posts",
                            list: PostList,
                            create: PostCreate,
                            edit: PostEdit,
                            canDelete: true,
                        },
                    ]}
                     // ====>
                    mutationMode="undoable"
                     // <====
                />
            </RefineSnackbarProvider>
        </ThemeProvider>
    );
}

export default App;
Tip:The default timeout interval is setted to 5000ms. You’ll be able to change it by setting undoableTimeout property to the <Refine> element.
Sharing the present web page with filters
Think about we have to share the present web page with filtering and sorting parameters to our colleagues. The correct strategy to do is, sharing the URL that has embody all wanted parameters like:
/posts?present=1&pageSize=8&type[]=createdAt&order[]=desc
Refine affords syncWithLocation property that enable us to modifying question parameters manually and share present web page, objects depend per web page, type and filter parameters simply to others.
// App.tsx
...
perform App() {
    return (
        <ThemeProvider theme={LightTheme}>
            <CssBaseline />
            <GlobalStyles types={{ html: { WebkitFontSmoothing: "auto" } }} />
            <RefineSnackbarProvider>
                <Refine
                    ...
                    mutationMode="undoable"
                    // ====>
                    syncWithLocation
                    // <====
                />
            </RefineSnackbarProvider>
        </ThemeProvider>
    );
}

export default App;
Now, we are able to get present info from URL as a question parameters. We are able to both use this hyperlink to share to others or outline filter, pagination, and sorting parameters manually by altering URL parameters.
Conclusion
On this article, we’ll present you how one can construct a CRUD admin panel utilizing refine and Materials UI. This method will help you shortly create an admin interface on your utility with minimal coding. We’ll begin by establishing our mission with the required dependencies. Then, we’ll create our CRUD parts utilizing Materials UI. Lastly, we’ll wire all the pieces up and add some further options from refine like mutation mode.
We coated:
- The way to bootstrap refine app
- Connecting Strapi v4 knowledge supplier to refine app.
- Creating pages for CRUD operations
- Implementing a few of refine options like mutation mode and site sync.
refine is an open supply software that quickly and flexibly develops for CRUD admin panels or internet apps. It’s simple to get began with and would not require quite a lot of code. It has good documentation that coated examples, pointers, and tutorials utilizing greatest practices. refine is continually being up to date with new options and enhancements.
Discuss with official refine web page for extra info→
Stay StackBlitz Instance
Username: demo@refine.dev
Password: demodemo
