
To us people, dialog is second-nature; it comes naturally to us, however the identical can’t be stated for bots. Even a easy query like, “How was your day?”, may very well be rephrased a number of methods (for instance, “How’s it going?”, “How are you?”), none of which a bot can ordinarily perceive.
We will interpret the intent behind the query, however quite a bit goes into constructing the logic to facilitate a wiser dialog with a bot, and for many builders, coding it from scratch isn’t possible.
Effectively, happily, there’s one thing known as NLU (natural-language understanding), which allows higher human-computer dialog – in different phrases, a sensible chatbot that makes use of machine studying and different applied sciences in an effort to higher perceive human interactions.
An NLU algorithm doesn’t simply acknowledge textual content, but in addition interprets the intent behind it. Therefore, it’s a perfect algorithm for chatbots. Learn extra about NLU right here.
And that is the place the aim of this text is available in. We’re going to construct our chatbot utilizing Google’s NLU platform, DialogFlow. Learn on to be taught extra about DialogFlow, and how one can combine it right into a React utility with this observe alongside tutorial.
Getting began with DialogFlow
In easy phrases, DialogFlow is an end-to-end instrument powered by NLU to design and combine chatbots into our interfaces. It interprets pure language into machine-readable knowledge utilizing machine studying (ML) fashions skilled by the language we offer. How does it work? Let’s be taught whereas we construct our chatbot.
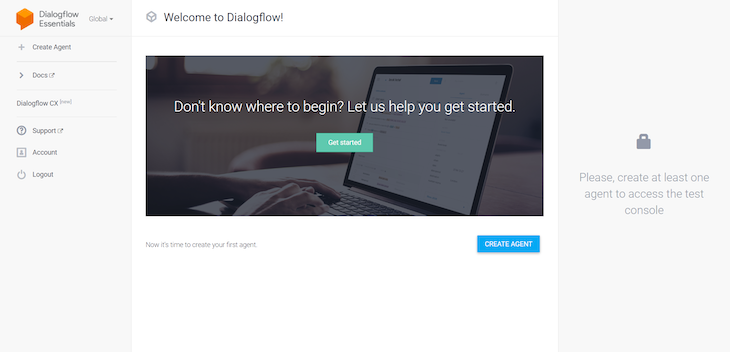
Open the DialogFlow console and log in along with your Google account. Upon profitable login, we see the next interface:
The very first thing that will catch your consideration is the Create Agent choice.
What’s an agent?
Nothing fancy! The chatbot itself is an agent. Accumulating the person’s question, appearing on it, and eventually sending a response is all dealt with by our agent.
Let’s create our chatbot; how a few bot for a espresso store, for our instance? No prizes for guessing my espresso store inspiration.
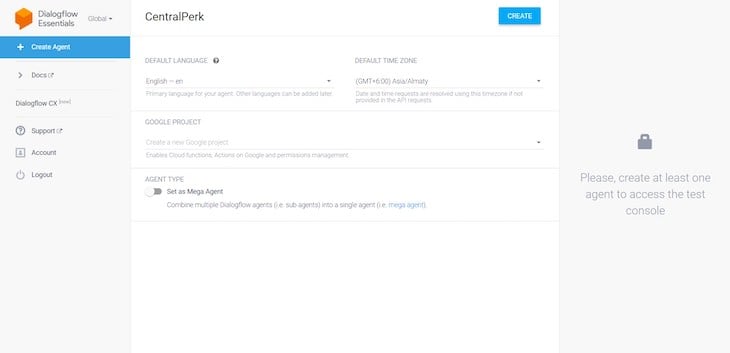
That is how the console ought to look now:
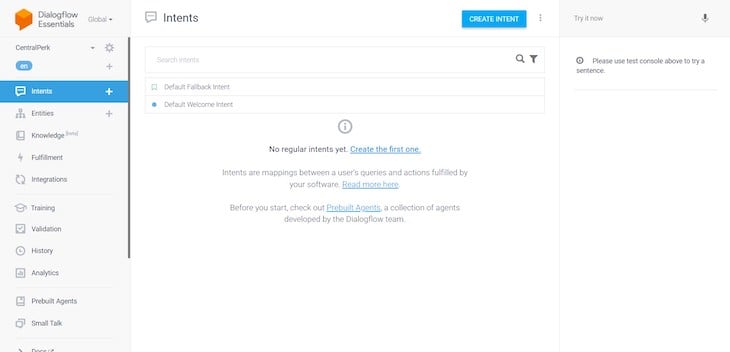
Now, extra jargon has appeared on the display screen – Intents.
What are intents?
The console says that, “Intents are mappings between a person’s queries and actions fulfilled by your software program”. So, what does this imply?
Let me clarify: within the case of our bot, we count on to obtain queries like, “I would love a cappuccino” and, “When does the store open?”, and so on. We will categorize these queries into person intentions reminiscent of “Take Order”, “Timings”, and so on. To deal with them, we outline these classes as intents in our agent.
Extra nice articles from LogRocket:
We additionally see that our agent comes with two default intents; Default Welcome Intent and Default Fallback Intent. Let’s discover them in a bit extra element:
Fairly a little bit of jargon in right here; let’s undergo them one after the other:
Contexts
In a human dialog, to grasp phrases, we often want some context. Likewise, with the bot, an intent must know the context of the question. To make this attainable, we join a number of intents by way of contexts. We are going to be taught extra about this later on this article.
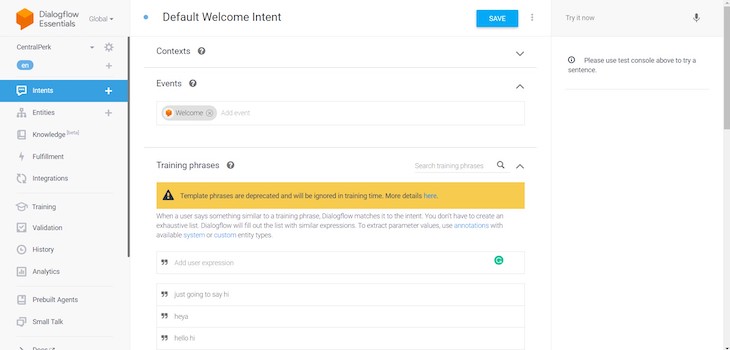
Coaching phrases
These are instance phrases to coach and assist our agent match queries with the best intent. Extra phrases and variations will enhance the accuracy of intent matching.
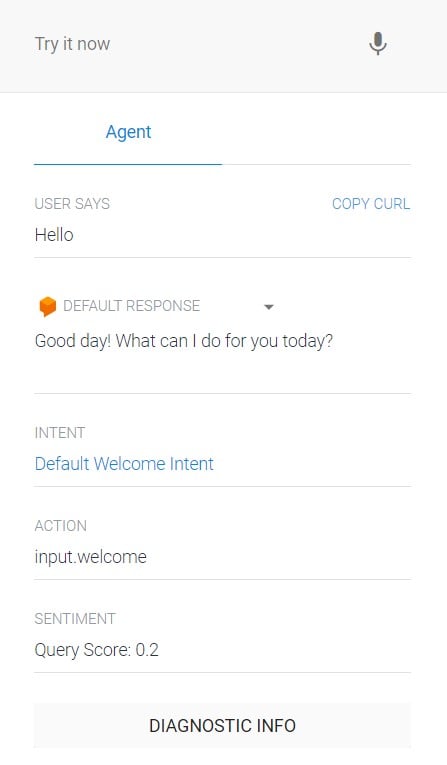
By seeing the default listing of phrases, it’s clear that this intent is used to greet our customers.
Occasions
We simply discovered the agent appears for coaching phrases to set off intents. Nonetheless, intents will also be triggered by occasions. There are two varieties of occasions:
- Platform occasions: These are offered by the platform itself and happen when platform-specific occasions happen (e.g., a Welcome occasion)
- Customized occasions: These are outlined by us (e.g., the response from an API name made by us)
Actions and parameters
As soon as the question is matched with the best intent, subsequent comes motion on it. To behave, typically we have to extract some knowledge from the question. To extract, we outline parameters with entity varieties. Take this for instance: “Is the espresso store open right now?”; the parameter to extract right here is right now, which is crucial information wanted to carry out some logic and reply accordingly. We are going to be taught extra about this later on this tutorial.
Responses
Response to the person. Right here, we see static phrases, however they are often dynamic, too, if we make use of parameters or achievement.
Achievement
After we allow achievement, the agent provides a dynamic response by making an API name outlined by us (e.g., if a person desires to ebook a desk, we are able to verify the database and reply primarily based on availability). Once more, extra on this a bit later.
Let’s do this default intent first earlier than going any additional. On the best aspect, now we have a Dialogflow Simulator to check our agent. We are saying one thing just like the coaching phrases, and the agent responds from the listing of responses:
And, if we are saying one thing utterly totally different, the agent triggers a Default Fallback Intent:
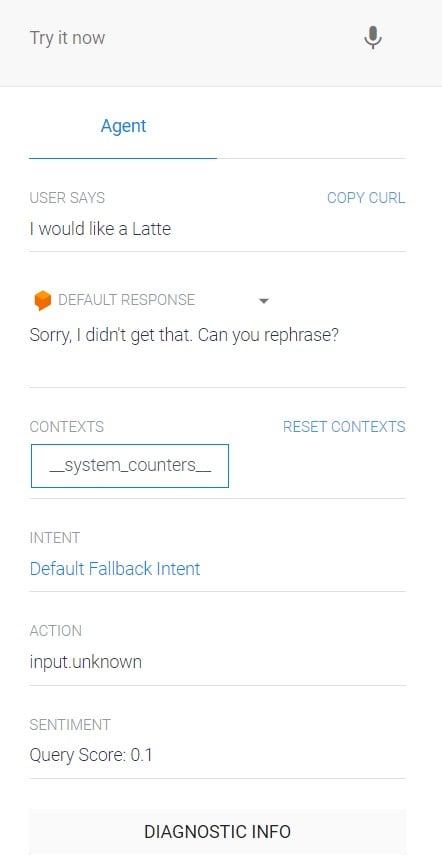
So, if the agent fails to search out the best intent, it triggers the fallback intent. Fairly clean, proper? However, let’s attempt to keep away from it and add intents to hold out the entire dialog.
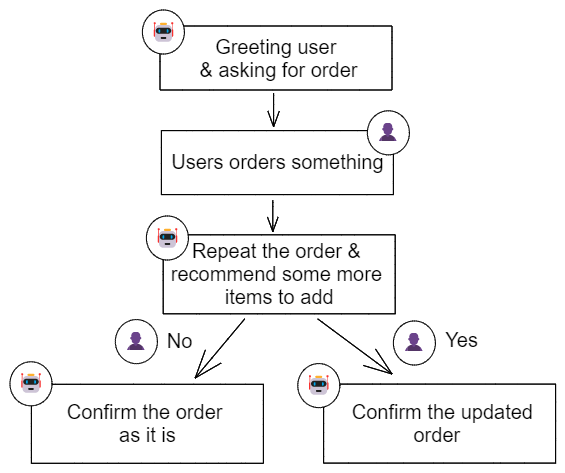
Including common intents
Let’s attempt to create this dialog proven within the diagram beneath:
Modify the response of Default Welcome Intent to greet and ask for the order. One thing like this; “Greetings! What would you wish to order?”.
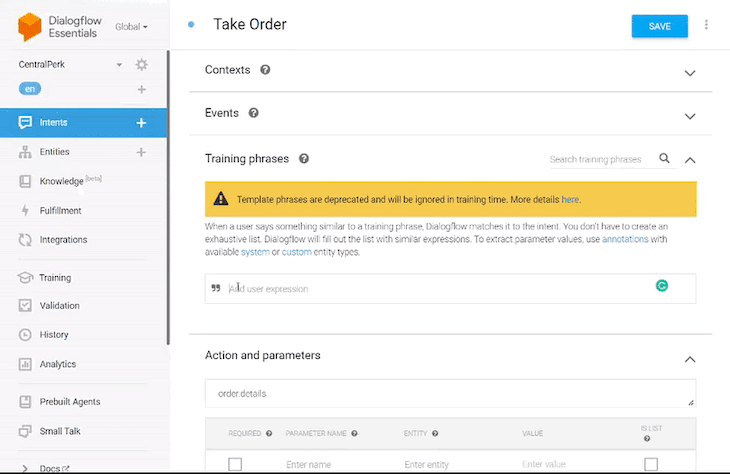
Create an intent to take the order, and identify the intent to one thing easy that is smart, like Take Order.
Now, we add coaching phrases. The person would possibly say, “I want to have 2 lattes”. Including this to the listing of coaching phrases is sufficient to get it matched with this intent. However, we additionally want the qualifying info; ‘2’ and ‘lattes’.
To extract them, we’ll add a few parameters inside the phrase – amount (@sys.quantity entity sort) and merchandise (@sys.any entity sort):
Add extra variations to make it higher. Right here’s some I added:

As soon as the parameter-rich phrases are added, this desk is mechanically stuffed. We will mark them as required/elective and set a default worth if wanted. As well as, we have to outline a query as a immediate, to pressure the person to enter the required parameter, if not entered the primary time.
So, which means that if we get the primary phrase from the listing, “I want to order”, and the merchandise (required) is lacking, the immediate will get triggered to ask for it. If we get the second phrase from the listing; “I want to order a mocha”, and amount (elective) isn’t there, then, as a substitute of prompting the person to enter the amount, we’ll simply set the default worth as 1 and use that.
We will return a dynamic response to utilize parameters to repeat the order and ask if they want an add-on:

To do that, create an intent to deal with the person’s response to the add-on query.
The response will likely be both Sure or No. That is the perfect situation to introduce follow-up intents. Because the identify suggests, these are used to follow-up with the dialog within the mum or dad intent.
DialogFlow offers many predefined follow-up intents for frequent replies like “Sure”, “No” or “Cancel”. Additionally, If it’s essential deal with customized replies, you may create your individual customized follow-ups. We’re going to make use of the predefined ones for this tutorial, nevertheless it’s as much as you in case you want to put your individual spin on it.
From the intent listing, hover the mouse over the TakeOrder intent and click on Add follow-up intent. Choose Sure and the follow-up intent is created named Take Order – sure.
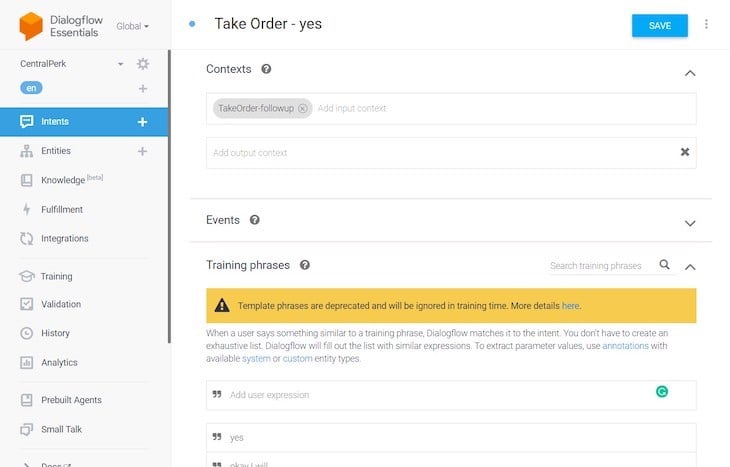
You will have observed there’s an enter context added (TakeOrder-followup). For follow-ups to work, they should be linked to the mum or dad intent, and that’s the place the context turns out to be useful.
After we create a follow-up intent, an output context is mechanically added to the mum or dad intent and an enter context of the identical identify is added to the follow-up intent.
We don’t want to fret concerning the coaching phrases, as they’re already in place. Now, add a dynamic response for this intent. As contexts are in place, we are able to use the parameters from the mum or dad intent, like this:

Equally, create a predefined follow-up intent to deal with No in response. This one will likely be named Take Order – no. Simply add a dynamic response right here, as properly:

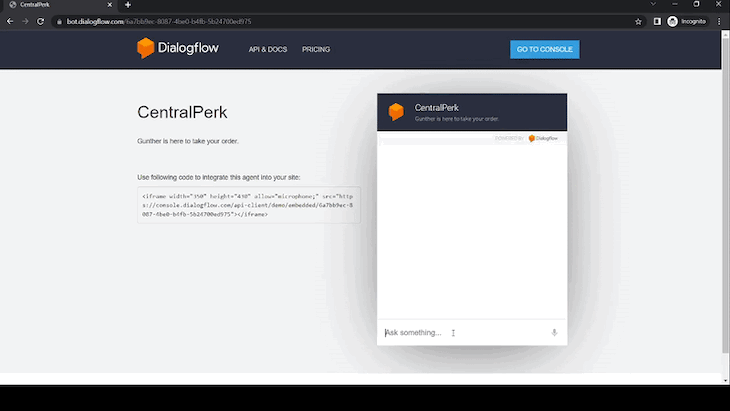
The agent is able to perform the dialog. We will all the time check it within the simulator, however let’s attempt one thing totally different. Click on Integrations within the sidebar and allow Internet Demo. Open the URL offered there and begin the dialog:
The agent is working tremendous as anticipated, however wouldn’t it’s good to indicate the entire billing quantity of the order? We will fetch the costs from a server and return the calculated quantity to the person.
Connecting with a NodeJS server
Whereas discussing intents, we got here throughout Achievement, which helps to return dynamic responses by making API calls outlined by us. That’s what we want right here to work together with our server.
Discover Achievement within the sidebar and open it. DialogFlow offers two methods to make use of achievement:
- An in-line editor powered by Google Cloud Features. However, to allow this, we have to add a sound billing account as this integration has fees, if used past a sure restrict
I’m going to construct a webhook service and make it public. Earlier than continuing, ensure that the service meets the necessities talked about right here.
Constructing our server
Create a node app in a brand new listing and set up the required dependencies:
mkdir centralperk-server
cd centralperk-server
npm init -y
npm i categorical dialogflow-fulfillment
Begin with a fundamental server in index.js:
const categorical = require("categorical");
const app = categorical();

app.get("https://weblog.logrocket.com/", (req, res) => {
  res.ship("Hello from server!");
});

app.pay attention(8080, () => {
  console.log("server operating...");
});
This merely runs the server at port 8080. Now, let’s write some code to deal with webhook requests from DialogFlow:
const categorical = require("categorical");
const app = categorical();

const { WebhookClient } = require("dialogflow-fulfillment");
const getPrice = require("./helpers");

app.get("https://weblog.logrocket.com/", (req, res) => {
  res.ship("Hello from server!");
});

app.put up("https://weblog.logrocket.com/", categorical.json(), (req, res) => {
  const agent = new WebhookClient({ request: req, response: res });

  operate handleIntent(agent) {
    const intent = agent.intent;
    const merchandise = agent.contexts[0].parameters.merchandise;
    const amount = agent.contexts[0].parameters.amount;
    const billingAmount = getPrice(intent, merchandise, amount);

    const response =
      intent === "Take Order - sure"
        ? `Nice! Your ${amount} ${merchandise} and cookies will likely be prepared very quickly. Please pay ${billingAmount}$.`
        : `Okay! Your ${amount} ${merchandise} will likely be prepared very quickly. Please pay ${billingAmount}$.`;

    agent.add(response);
  }

  const intentMap = new Map();
  intentMap.set("Take Order - sure", handleIntent);
  intentMap.set("Take Order - no", handleIntent);
  agent.handleRequest(intentMap);
});

app.pay attention(8080, () => {
  console.log("server operating...");
});
Helpers to calculate value:
const priceList = {
  mocha: 5,
  latte: 7,
  cookies: 2,
};

module.exports = operate (intent, merchandise, amount) {
  const whole =
    intent === "Take Order - sure"
      ? priceList[`${item}`] * amount + priceList["cookies"]
      : priceList[`${item}`] * amount;

  return whole;
};
Let’s stroll by the above implementation.
The imported WebhookClient will deal with the communication with DialogFlow’s webhook achievement API. When a fulfillment-enabled intent is matched, an HTTPS POST webhook request is distributed to our server. This request is dealt with by agent.handleRequest(intentMap). It takes in a map of handlers and every handler is a operate callback. The one outlined right here extracts all of the wanted info from the handed occasion, calculates the billing quantity, after which lastly returns the dynamic response.
Making the server public
Utilizing ngrok is the quickest and best solution to put the server on the Web. Comply with the steps right here for fast setup and set up. As soon as executed with the steps, run the next command:
ngrok http 8080
And the secured public URL is prepared very quickly:
ngrok (Ctrl+C to stop) Go to http://localhost:4040/ to examine, replay, and modify your requests Session Standing on-line Account Piyush (Plan: Free) Model 3.0.6 Area India (in) Latency 55ms Internet Interface http://127.0.0.1:4040 Forwarding https://2c73-182-64-199-236.in.ngrok.io -> http://localhost:8080 Connections ttl opn rt1 rt5 p50 p90 5 0 0.00 0.01 2.37 5.21
(Be aware: Keep in mind to maintain the native server up and operating)
Enabling the webhook
Go forward and allow the webhook within the Achievement window and enter the secured public URL. As well as, keep in mind that webhook calls should be enabled for each follow-up intents.
All appears good. Let’s check it now:

Our chatbot is all arrange!
Integrating the DialogFlow chatbot right into a React App
There are various methods to combine the chatbot right into a React app:
- Construct the chat widget in React from scratch. Deal with the state of incoming and outgoing messages utilizing a library like Redux and modify the Node server to deal with calls from the React app in addition to sending them to DialogFlow. This does sound fascinating, however is quite a bit to cowl and is outdoors the scope of this specific article
- Utilizing Kommunicate to relatively extra effortlessly combine the DialogFlow chatbot into React app
On this weblog tutorial, we’re going with the Kommunicate choice.
DialogFlow ES: Kommunicate integration
Comply with these steps:
Go for Free Trial and enroll along with your Google account.
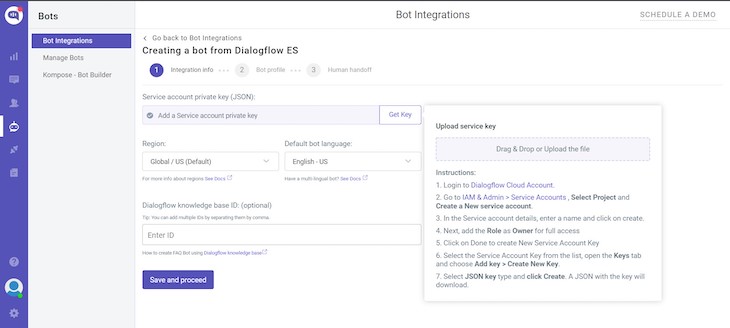
Click on Bot Integrations and choose DialogFlow ES.
Get the JSON key from the DialogFlow cloud account utilizing the directions talked about within the following picture:
Subsequent, we get to decide on a custom-made avatar:
![]()
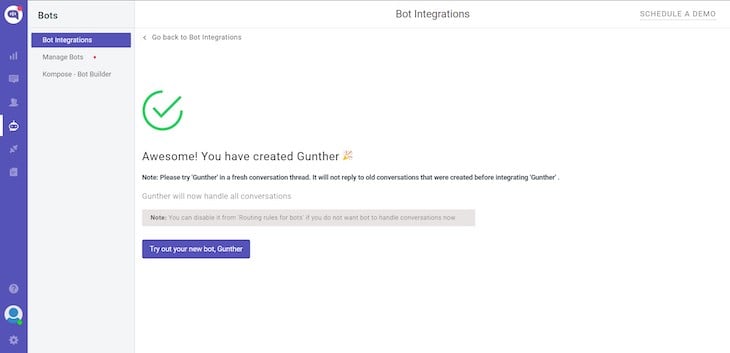
And that’s all we have to do for DialogFlow ES and Kommunicate integration!
Combine the Kommunicate chat widget right into a React App
Create a chatbot part and paste the next code in useEffect():
(operate (d, m) {
      var kommunicateSettings = {
        appId: "<YOUR APP_ID>",
        popupWidget: true,
        automaticChatOpenOnNavigation: true,
      };
      var s = doc.createElement("script");
      s.sort = "textual content/javascript";
      s.async = true;
      s.src = "https://widget.kommunicate.io/v2/kommunicate.app";
      var h = doc.getElementsByTagName("head")[0];
      h.appendChild(s);
      window.kommunicate = m;
      m._globals = kommunicateSettings;
    })(doc, window.kommunicate || {});
import React, { useEffect } from "react";

operate Chatbot() {
  useEffect(() => {
    (operate (d, m) {
      var kommunicateSettings = {
        appId: "<YOUR APP_ID>",
        popupWidget: true,
        automaticChatOpenOnNavigation: true,
      };
      var s = doc.createElement("script");
      s.sort = "textual content/javascript";
      s.async = true;
      s.src = "https://widget.kommunicate.io/v2/kommunicate.app";
      var h = doc.getElementsByTagName("head")[0];
      h.appendChild(s);
      window.kommunicate = m;
      m._globals = kommunicateSettings;
    })(doc, window.kommunicate || {});
  }, []);
  return <div></div>;
}

export default Chatbot;
Keep in mind to switch the placeholder along with your appId. Lastly, import it within the App part:
import "./App.css";
import Chatbot from "./Chatbot";

operate App() {
  return (
    <div className="App">
      <Chatbot />
    </div>
  );
}

export default App;
Run the app regionally to check the mixing:
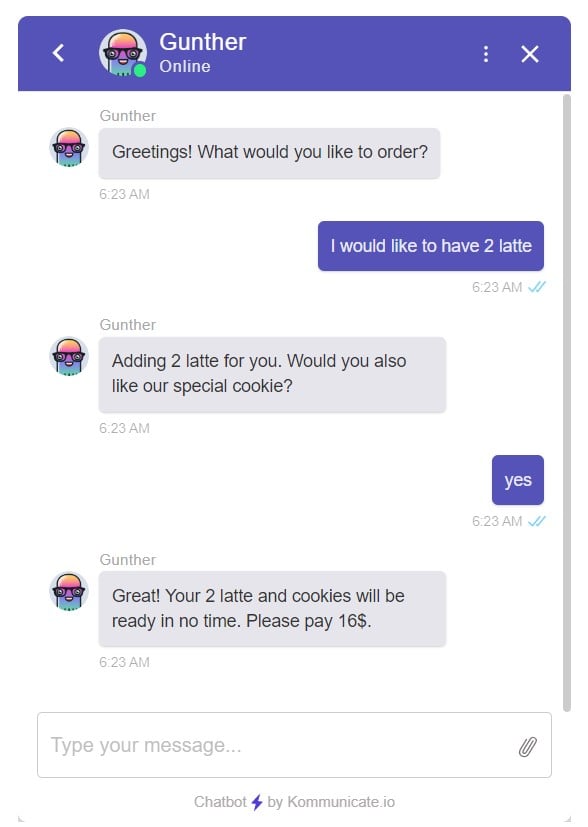
And identical to that, now we have added our chatbot into our React app. Go to this dashboard so as to add extra customizations to issues like colour, icons, and notification sounds, and so on.
Conclusion
That’s all for this weblog! We discovered a number of features of chatbot improvement; from constructing it with DialogFlow, connecting with the NodeJS server, to lastly Integrating it into React app. I hope it made sense to you and also you have been capable of observe together with this tutorial with ease.
In case you have any questions, you may depart them within the feedback and I’ll be pleased to reply them. Be happy to succeed in out to me on LinkedIn or Twitter.
Full visibility into manufacturing React apps
Debugging React purposes might be troublesome, particularly when customers expertise points which might be exhausting to breed. When you’re focused on monitoring and monitoring Redux state, mechanically surfacing JavaScript errors, and monitoring gradual community requests and part load time, attempt LogRocket. 

LogRocket is sort of a DVR for net and cellular apps, recording actually every part that occurs in your React app. As a substitute of guessing why issues occur, you may combination and report on what state your utility was in when a difficulty occurred. LogRocket additionally screens your app’s efficiency, reporting with metrics like shopper CPU load, shopper reminiscence utilization, and extra.
The LogRocket Redux middleware bundle provides an additional layer of visibility into your person periods. LogRocket logs all actions and state out of your Redux shops.
Modernize the way you debug your React apps — begin monitoring without cost.
