
Svelte is likely one of the hottest frameworks constructed on JavaScript. Though it was launched again in 2016, it’s nonetheless thought of to be a comparatively new framework (in comparison with React, Vue.js, and others) within the frontend area.
Regardless of arriving later to the celebration, Svelte’s pleasant syntaxes and nice efficiency have made it unattainable to ignore. However, even with its glorious fame, the Svelte ecosystem finds itself struggling to maintain up with modern instruments and can want extra time to match the toolbox dimension of its counterparts.
Happily, the Svelte group works exhausting to maintain the framework related by regularly introducing new, helpful instruments, with the hope of bridging the hole between different frameworks. One instance is Svelvet, a just lately launched part library that enables for the straightforward creation of attractive, customizable circulate diagrams in Svelte.
On this article, we’ll introduce Svelvet’s core ideas and reveal the best way to construct circulate diagrams in Svelte utilizing Svelvet.
Bounce forward:
Conditions
To comply with together with this tutorial, you’ll have to have a foundational data of Svelte and its ideas.
What’s Svelvet?
Svelvet is a light-weight part library for rendering interactive node-based circulate diagrams in Svelte. The library makes use of a graph-based editor for reworking, analyzing, and visualizing knowledge. It additionally makes use of D3.js zoom and choice elements to ship a easy zooming and panning habits on the graph.
Based on the creators of Svelvet, the library was constructed to fulfill the calls for for a diagramming instrument just like React circulate, a node-based graph renderer for React, in Svelte. In consequence, Svelvet has comparable functionalities and options to React Stream, corresponding to:
- Ease of use
- Ease of customization
- Interactivity
- Quick rendering
Now that we have now a primary understanding of Svelvet, let’s see how we will add it to our initiatives and begin rendering flowchart diagrams.
Getting began
You’ll be able to set up Svelvet in your initiatives through npm or Yarn utilizing one of many following instructions:
Extra nice articles from LogRocket:
npm set up svelvet
yarn add svelvet
In the event you don’t have a venture arrange already, you possibly can bootstrap a Svelte venture, like so:
npx degit sveltejs/template
Then, set up dependencies:
npm set up
Subsequent, you possibly can combine Svelvet into your Svelte venture by importing a Svelvet part contained in the script part of any part in your venture folder:
import Svelvet from 'svelvet';
The Svelvet part accepts a number of props, however the nodes and edges properties are the precise constructing blocks of the part. The part’s nodes and edges render graphs in keeping with their assigned values.
Right here’s a primary utilization of the Svelvet part:
<script>
import Svelvet from 'svelvet';
const initialNodes = [
{
id: 1,
position: { x: 350, y: 50 },
data: { label: 'input Node' },
width: 175,
height: 40,
bgColor: 'white'
},
{
id: 2,
position: { x: 350, y: 150 },
data: { label: 'Default Node' },
width: 175,
height: 40,
bgColor: 'white'
}
];
const initialEdges = [
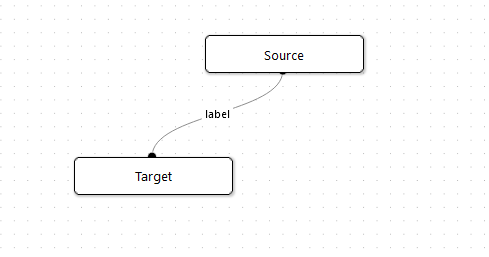
{ id: 'e1-2', source: 1, target: 2, type: 'default', label: 'label'},
];
</script>
<Svelvet nodes={initialNodes} edges={initialEdges} background />
As you possibly can see, the initialNodes and initialEdges array of objects are being handed to the nodes and edges props, respectively. Svelvet will render the graphs in keeping with the values of the article properties in every array.
The code above will render the beneath graph to the browser:
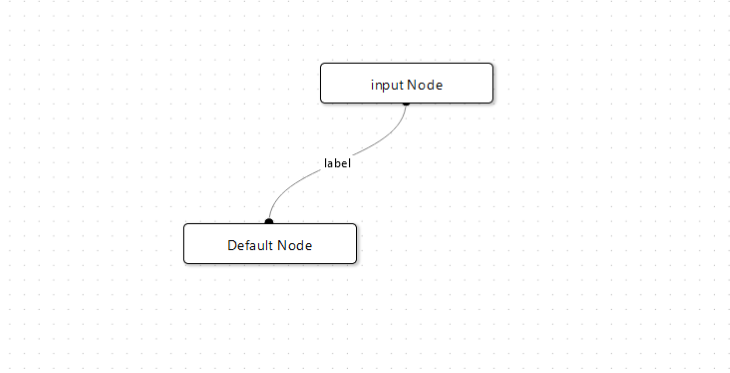
This instance ought to provide you with an concept of how the nodes and edges props work. Subsequent, we’ll have a look at how the article properties outline and join the nodes and edges props.
Nodes
The nodes prop is used to render box-shaped components, known as nodes, to the graph. Every node might include some textual content or data describing what the node represents.
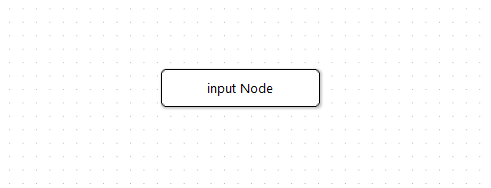
The nodes prop takes an array of objects, and the properties of the objects are used to outline the width, top, place, and background colour (bgColor) of every node. Every object represents a node, so if there are 5 objects current in a specific nodes array, the part will render 5 nodes to the graph.
Right here’s a typical node object:
{
    id: 1,
    place: { x: 350, y: 50 },
    knowledge: { label: 'enter Node' },
    width: 175,
    top: 40,
    bgColor: 'white'
}
Now, let’s check out every object’s properties to raised perceive what they’re used for.
id
The id property is used to assign IDs to every node. The property takes an integer which acts as an identifier for the node. The integers are used to reference every node when defining an edge property.
knowledge
The knowledge property is used to label nodes, it takes an object with a 'label' property that accepts a string worth of texts or data to be displayed on the node.
place
The place property is used to place a node on the graph; it takes an object with x and y properties. These properties settle for integer values which might be used to align the node on the x and y axes.
bgColor
The bgColor property does what its title implies; it’s used to alter the background colours of nodes.
width and top
The width and top properties are used to manage the scale of a node; they settle for integer values.
Edges
The edges prop is used to assemble the strains between nodes on the graph. These strains are referred to as edges, they usually act as a connector between two nodes.
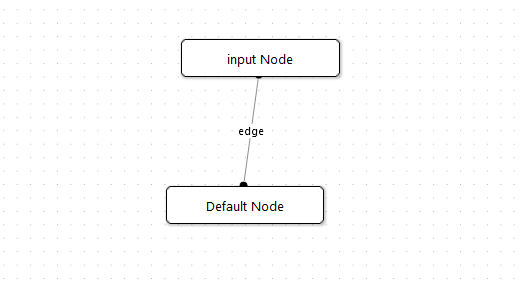
The edges prop takes an array of objects, and the properties of the objects are used to reference and join nodes.
const initialEdges = [
    {
      id: 'e1-2',
      source: 1,
      target: 2,
      type: 'straight',
      label: 'edge'
    },
];

...
 <Svelvet ... edges={initialEdges} .../>
Let’s check out the article properties to raised perceive how they work.
id
The id property additionally serves as an identifier for edges, however in contrast to the previous, it accepts string values as a substitute of integers. The worth describes the nodes being linked by the article. For instance, an edge object with an id worth of 'e1-2' will join the node with an id of 1 to a different node whose id is 2.
//edge for connecting node 1 and a couple of
{ id: 'e1-2', ...}
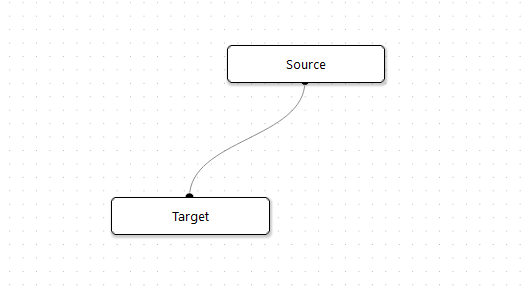
supply
The supply property is used to set the origin of an edge. The property takes an integer that references the id worth of a node and marks it because the supply of the sting.
//referencing the node with an id of 1
{
  ...,
  supply: 1,
  ...
}
When the goal node is ready, the part will begin drawing the sting line from the supply node.
goal
The goal property is used to set the vacation spot of an edge from the supply. The property additionally takes an integer that references the id worth of a node that’s completely different from the supply.
For instance, if the supply property is referencing a node whose id is 1, the goal property will reference one other node whose id is both 2 or 3.
//node 1 focusing on node 2
{
  ...,
  supply: 1,
  goal: 2,
  ...
}
label
The label property works equally to the node knowledge property; it’s used so as to add textual content or data to edges. The label is positioned on the intersection between two connecting nodes.
{
  ...,
  label: 'label'
}
animate
The animate property is used to animate edges. It takes a Boolean worth which animates the sting when set to true and retains it static when set to false.
{
  ... ,
  animate: true
}
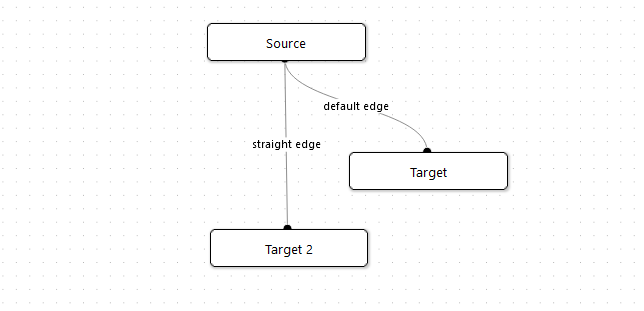
kind
The kind property is used to set the looks of an edge, it takes a default or straight string worth. The default edge kind is a Bezier curve, whereas the straight edge kind is a straight line.
{
  ... ,
  kind: ‘default’
}
//or
{
  ... ,
  kind: ‘straight’
}
arrow
The arrow property is used to configure the tip level of an edge line; it transforms the sting into an arrowhead pointing towards the goal node. The arrow property accepts a Boolean worth of both true or false.
{
  ... ,
  arrow: true
}
![]()
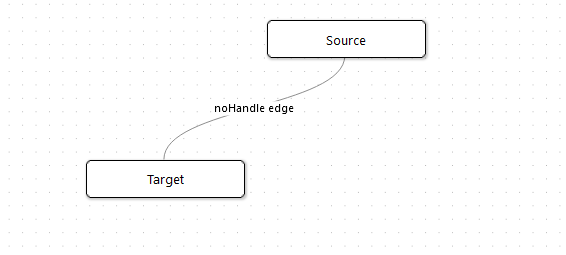
noHandle
This noHandle property is just like the arrow property; it’s used to take away the deal with of an edge line in the direction of the goal node. The property accepts a Boolean worth of both true or false.
{
  ... ,
  noHandle: true
}
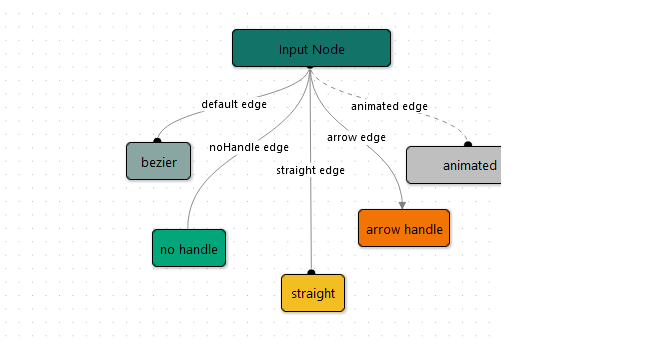
Constructing a flowchart with Svelvet
We’ve reviewed Svelvet’s core ideas; this data is ample that can assist you kickstart your journey of diagramming in Svelvet.
To complete issues up, let’s construct a flowchart from scratch.
As a primary step, create a brand new part in your Svelte venture or use the App.svelte primary part as a substitute. Subsequent, import the Svelte part contained in the script part, create two arrays of objects, and tweak the properties to your choice.
For this instance, we’ll use the next:
<script>
Import Svelvet from ‘svelvet’

//nodes array
const nodeArr = [
   {
     id: 1,
     position: { x: 300, y: 20 },
     data: { label: "Input Node" },
     width: 175,
     height: 40,
     bgColor: "#127369"
   },
   {
     id: 2,
     position: { x: 80, y: 150 },
     data: { label: "bezier" },
     width: 70,
     height: 40,
     bgColor: "#8AA6A3"
   },
   {
     id: 3,
     position: { x: 282, y: 190 },
     data: { label: "straight" },
     width: 70,
     height: 40,
     bgColor: "#F2BE22"
   },
   {
     id: 4,
     position: { x: 494, y: 150 },
     data: { label: "animated" },
     width: 140,
     height: 40,
     bgColor: "#BFBFBF"
   },
   {
     id: 5,
     position: { x: 120, y: 225 },
     data: { label: "no handle" },
     width: 80,
     height: 40,
     bgColor: "#03A678"
   },
   {
     id: 6,
     position: { x: 390, y: 225 },
     data: { label: "arrow handle" },
     width: 100,
     height: 40,
     bgColor: "#F27405"
   }
 ];

 //edges array
 const edgeArr = [
   {
     id: "e1-2",
     source: 1,
     target: 2,
     type: "bezier",
     label: "default edge"
   },
   {
     id: "e1-3",
     source: 1,
     target: 3,
     type: "straight",
     label: "straight edge"
   },
   {
     id: "e1-4",
     source: 1,
     target: 4,
     type: "bezier",
     animate: true,
     label: "animated edge"
   },
   {
     id: "e1-5",
     source: 1,
     target: 5,
     type: "bezier",
     noHandle: true,
     label: "noHandle edge"
   },
   {
     id: "e1-6",
     source: 1,
     target: 6,
     type: "bezier",
     arrow: true,
     label: "arrow edge"
   }
 ];
</script>
Subsequent, add the Svelvet part to the template part of the part and move the nodeArr array to the nodes prop and the edgesArr array to the edges prop, like so:
<Svelvet nodes={nodeArr} edges={edgeArr} />
Now, save the code and begin the event server by working the next command:
npm run dev
You’ll discover that it’s exhausting to understand the boundaries of the Svelvet renderer, and nodes will typically overlap past the boundaries. That is as a result of renderer’s default white background.
To repair this problem and make the renderer much less imprecise, you possibly can add a background prop to the part, like so:
<Svelvet nodes={nodeArr} edges={edgeArr} background />
The background prop will add a dotted background to the renderer, it will make it a lot simpler to understand the dimensions of the renderer.
We are able to additionally improve the dimensions of the renderer by including width and top props to the part:
<Svelvet nodes={nodeArr} edges={edgeArr} background width={900} top={800} />
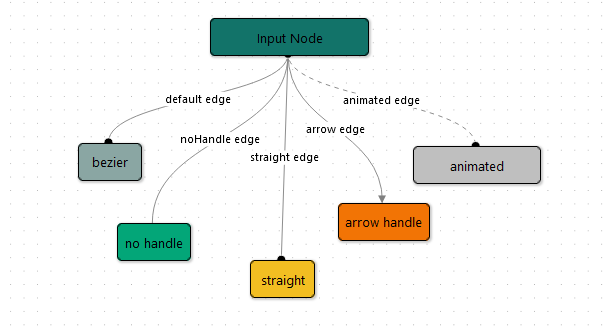
That’s it; we’ve created a circulate diagram very quickly!
Svelvet is interactive out of the field. You, and people viewing your circulate diagram, can choose and transfer nodes round within the graph, in addition to zoom and pan.
basic-usage (forked)
basic-usage (forked) by david4473 utilizing svelte, svelvet
Conclusion
On this article, we investigated Svelvet’s core ideas, studied the node and edge object properties, and demonstrated the best way to use Svelvet to arrange a primary circulate diagram.
Svelvet continues to be in its infancy, and lacks among the options provided by its counterpart, React circulate. The Svelvet workforce has promised to make the library extra in depth by integrating further customization, testing, and error dealing with options sooner or later.
Regardless, the library’s base performance is constructed out and is prepared for manufacturing; you need to use it in your initiatives. Even with out further performance, Svelvet is an intuitive resolution for constructing stunning circulate diagrams in Svelte.
To be taught extra about Svelvet, seek advice from the documentation or the GitHub repo.
LogRocket: Full visibility into your net and cellular apps

LogRocket is a frontend utility monitoring resolution that allows you to replay issues as in the event that they occurred in your individual browser. As an alternative of guessing why errors occur, or asking customers for screenshots and log dumps, LogRocket enables you to replay the session to rapidly perceive what went improper. It really works completely with any app, no matter framework, and has plugins to log further context from Redux, Vuex, and @ngrx/retailer.
Along with logging Redux actions and state, LogRocket data console logs, JavaScript errors, stacktraces, community requests/responses with headers + our bodies, browser metadata, and customized logs. It additionally devices the DOM to file the HTML and CSS on the web page, recreating pixel-perfect movies of even essentially the most advanced single-page net and cellular apps.
